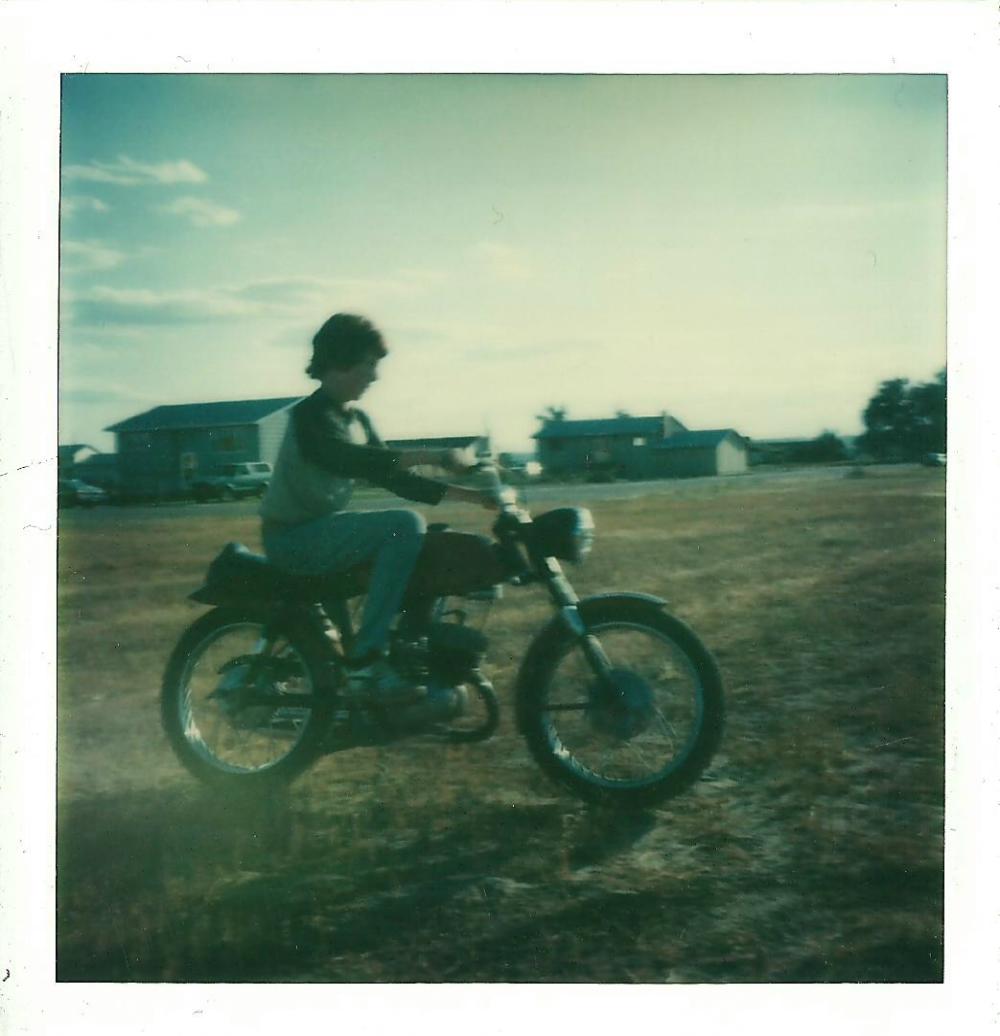
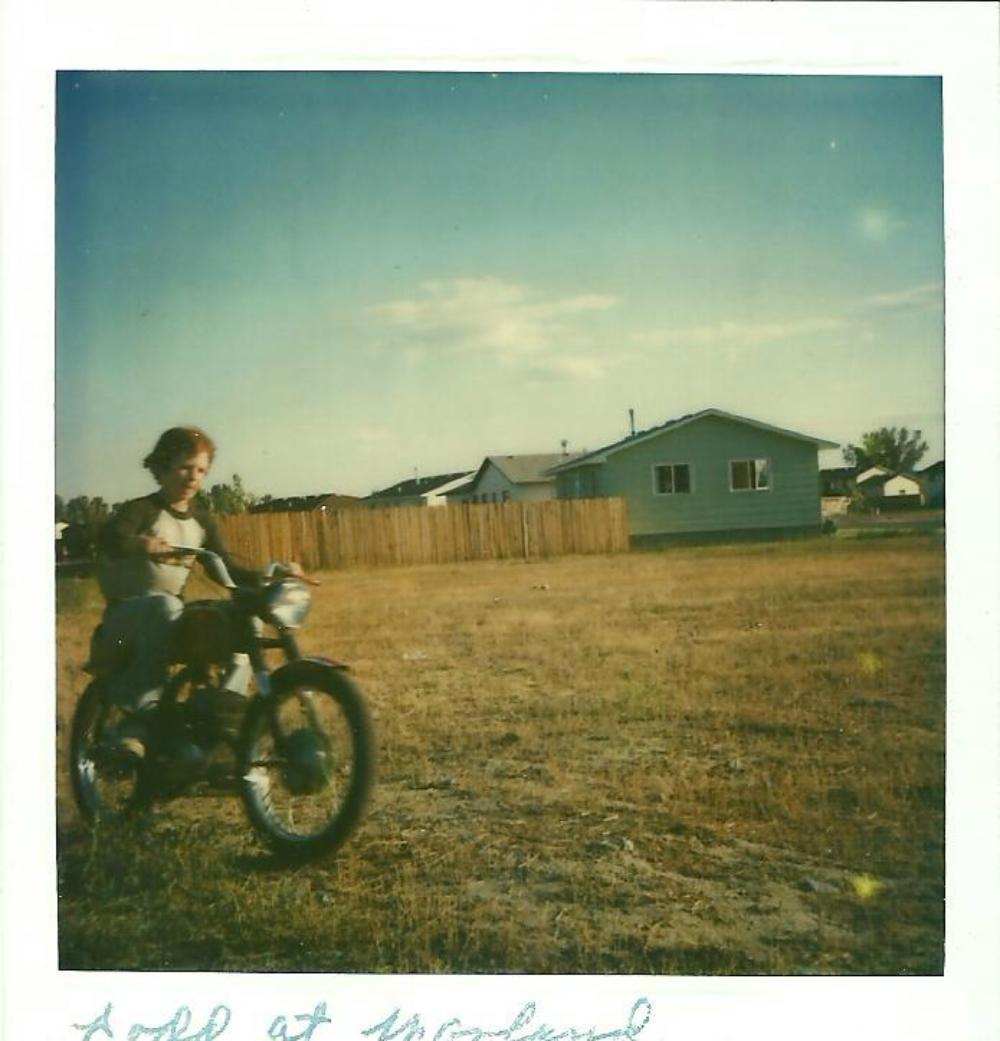
Me at age 15
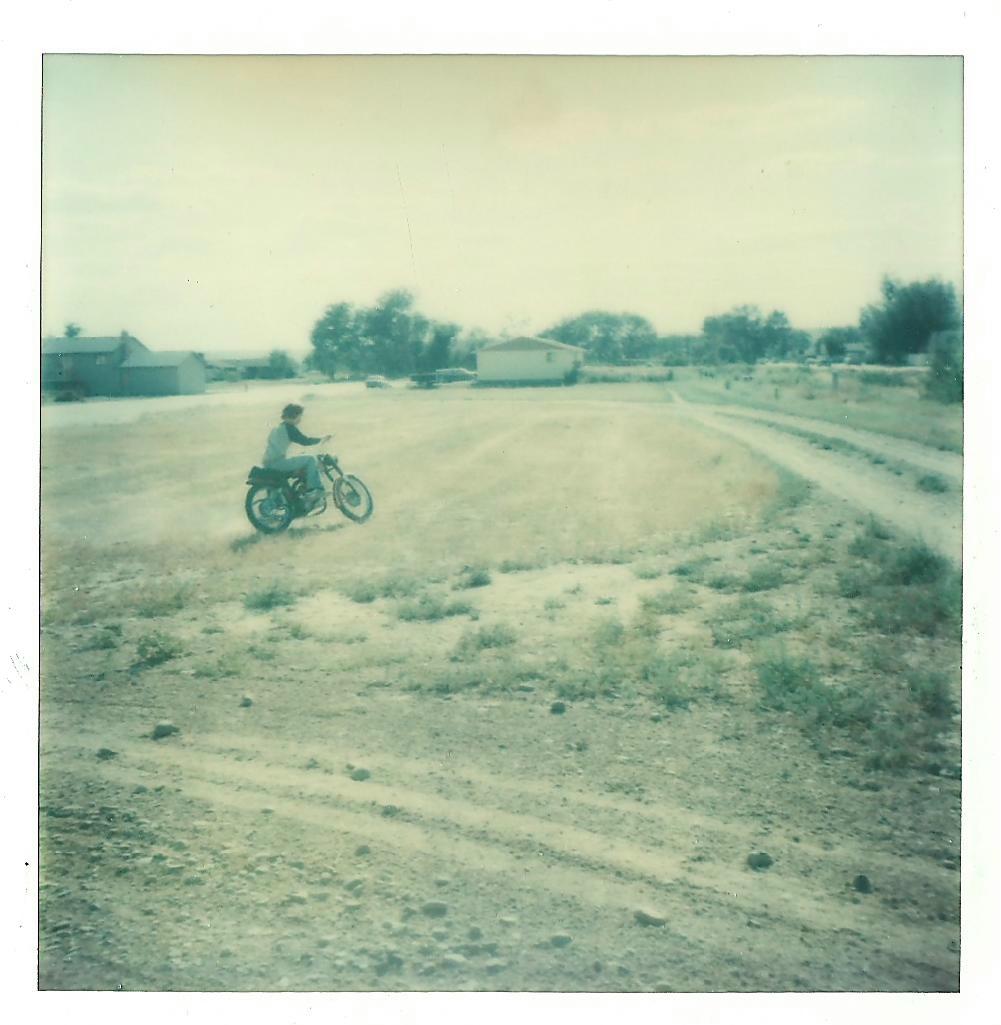
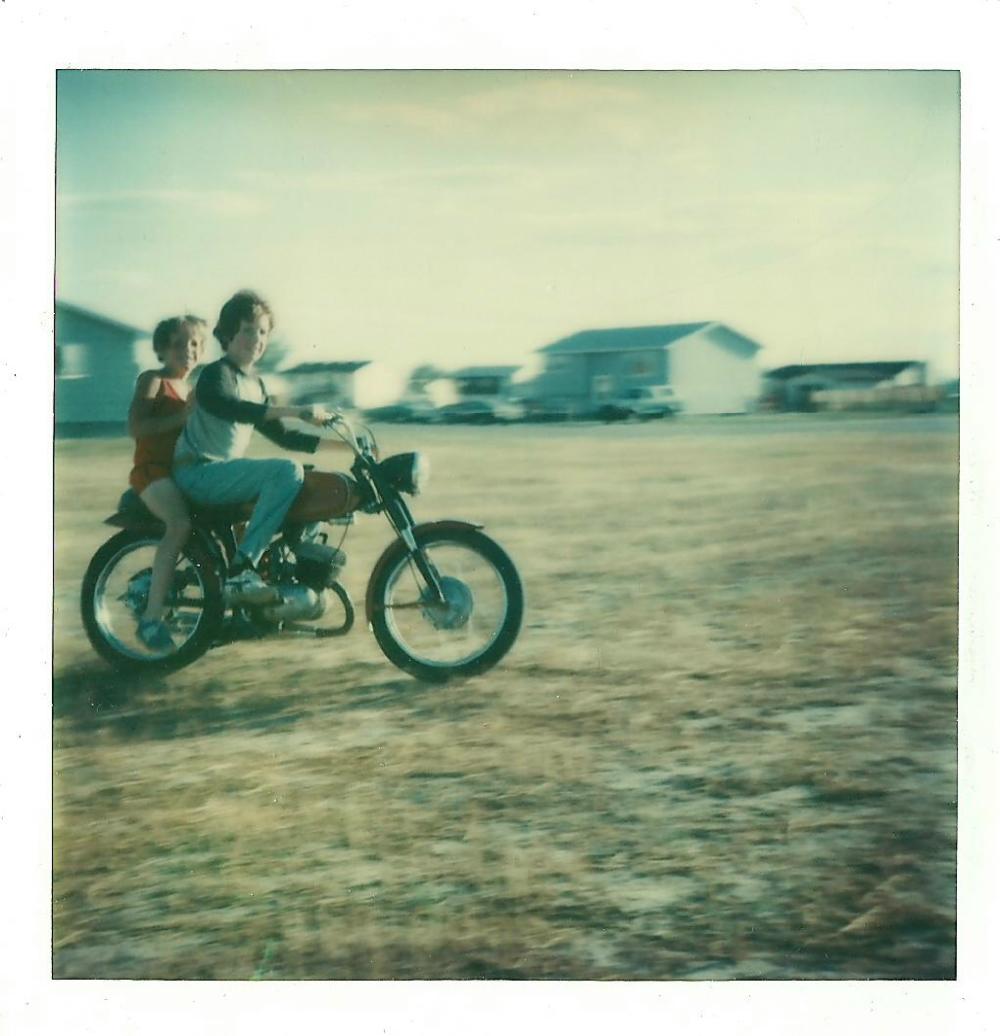
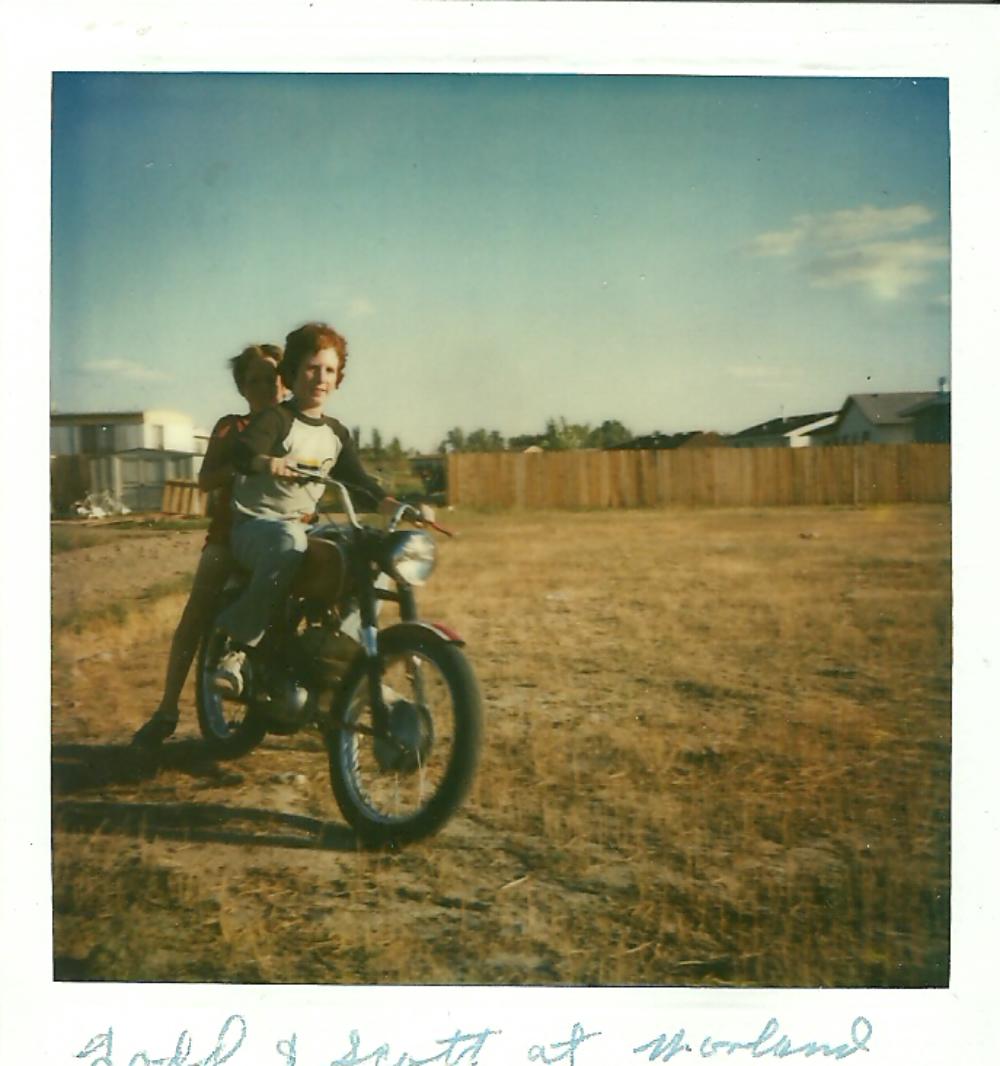
Giving my brother a ride
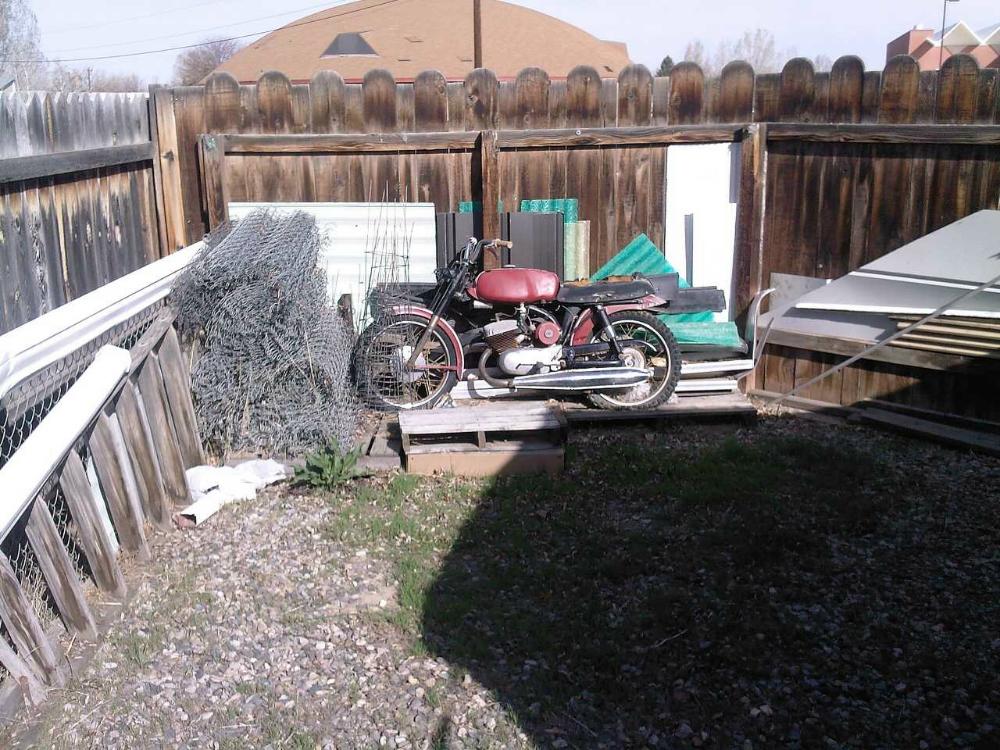
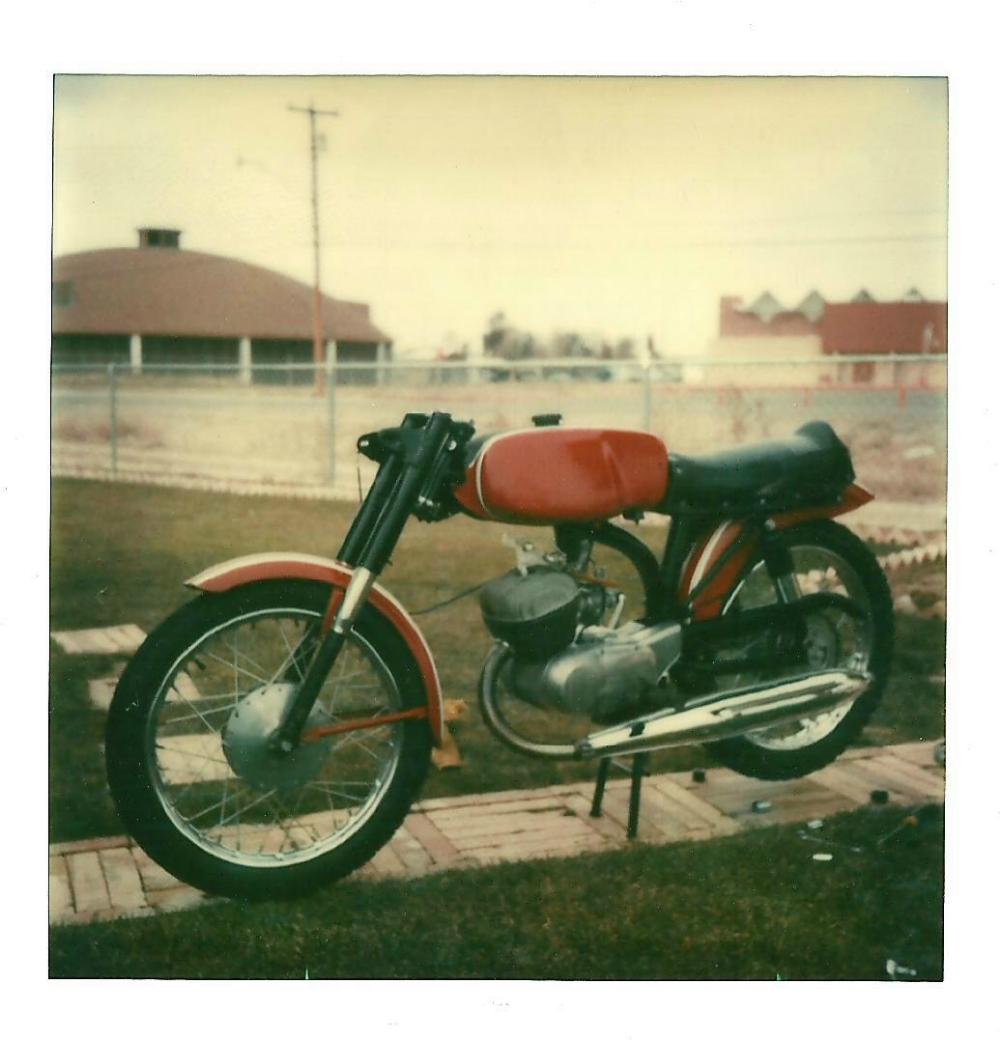
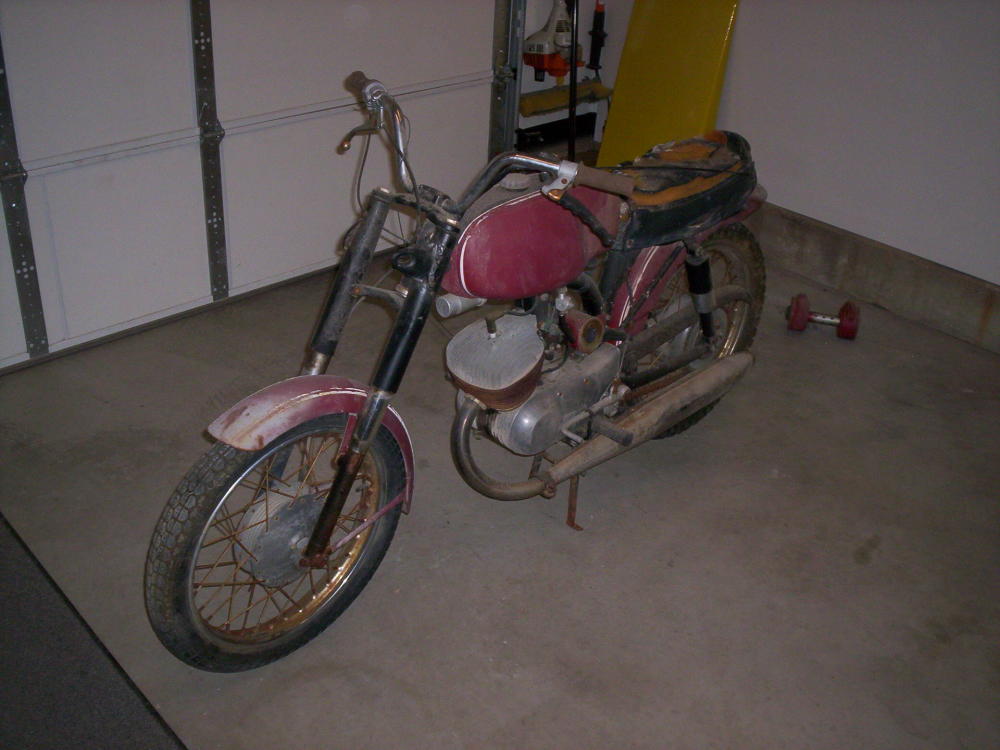
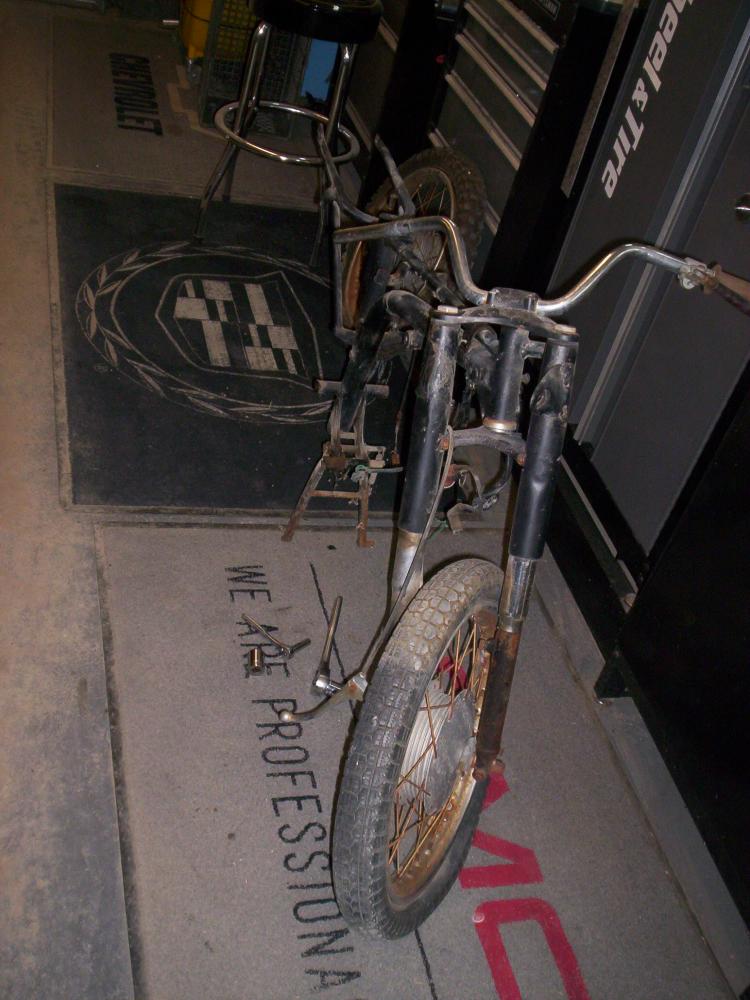
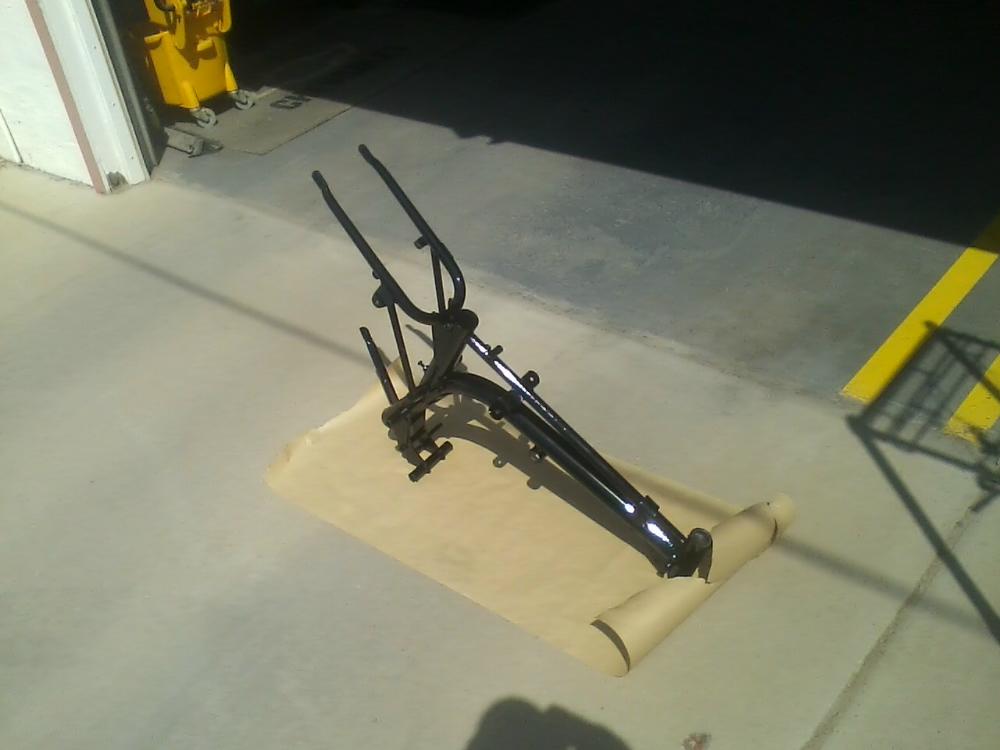
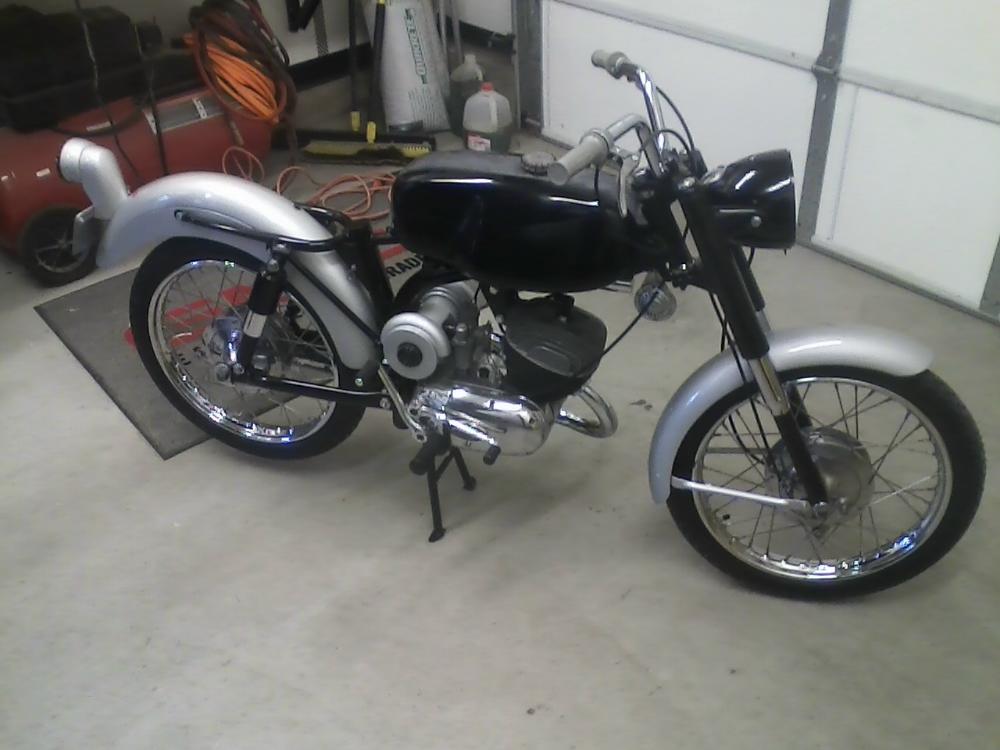
Getting it ready to move to my house after my father passed (RIP Richard Joseph Bury - July 10 2017)
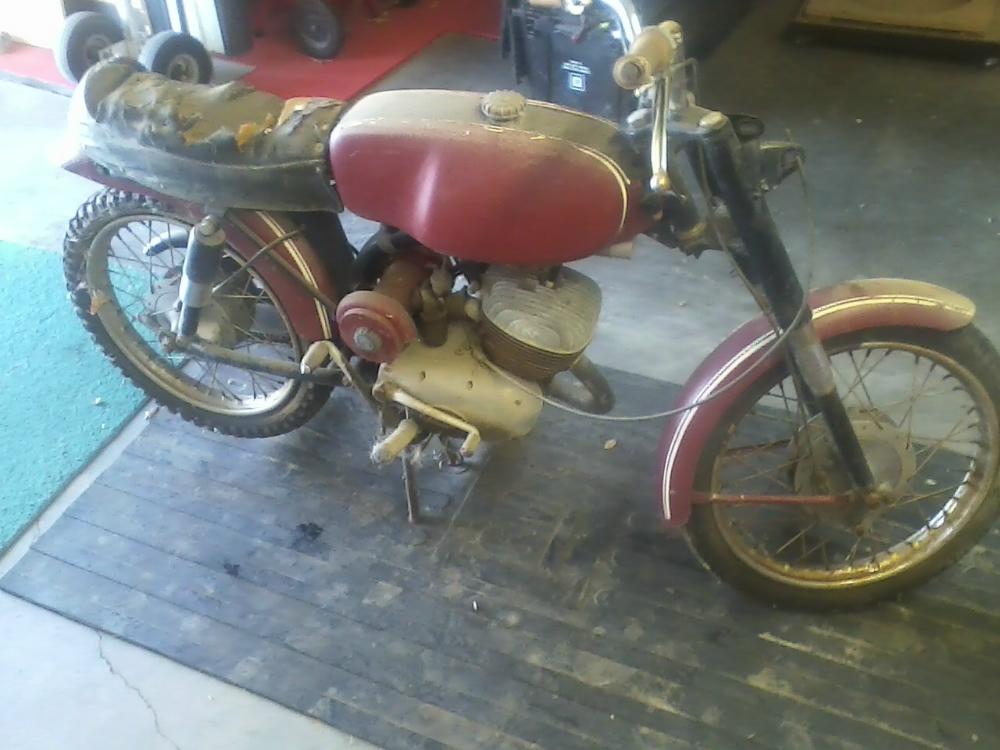
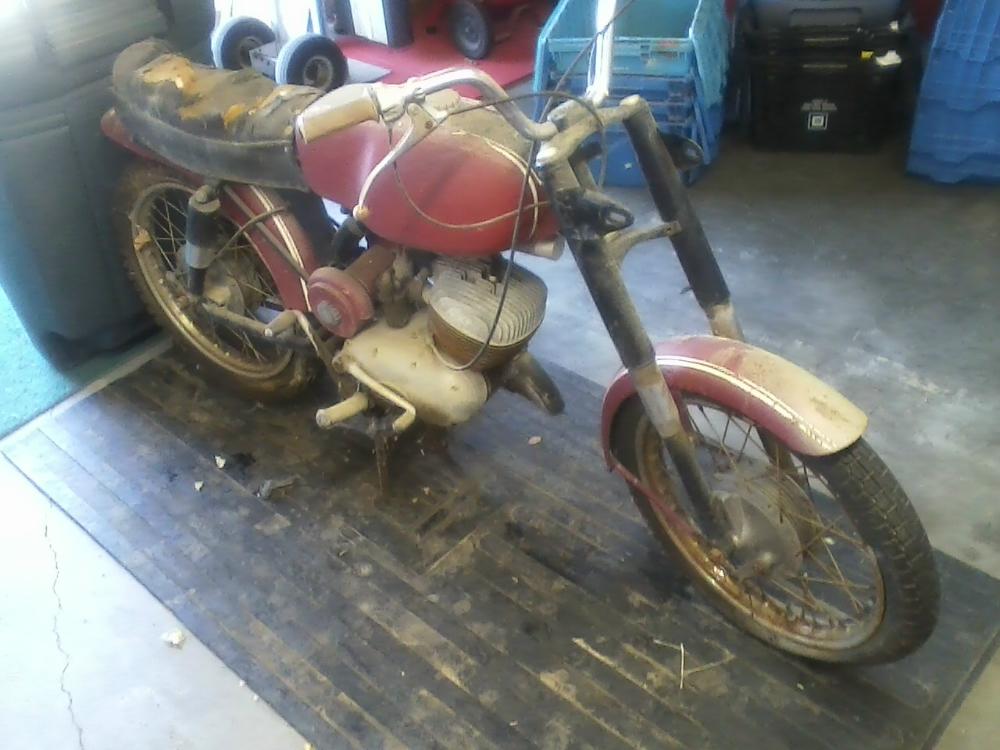

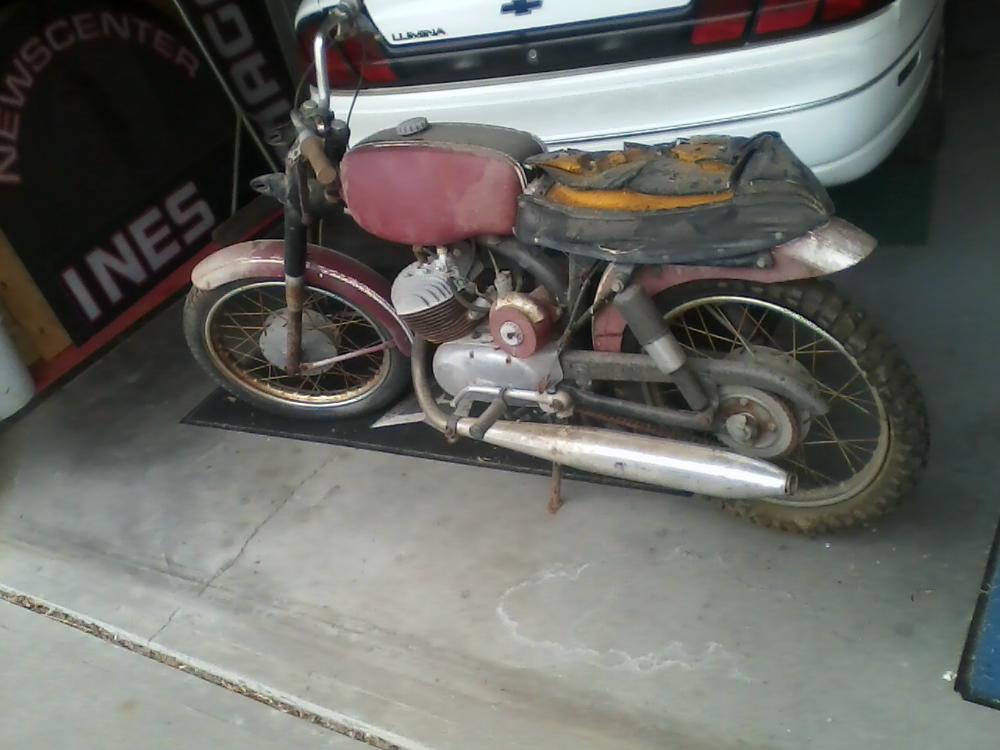
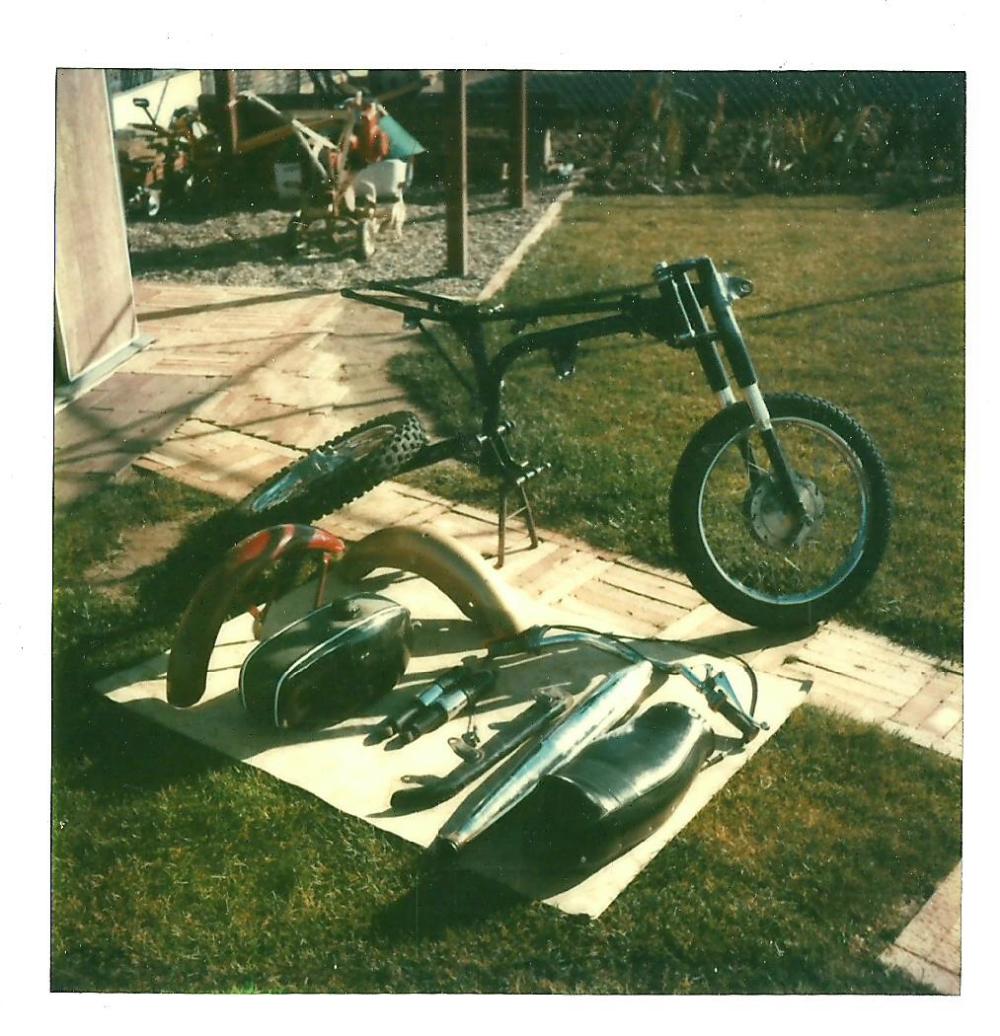
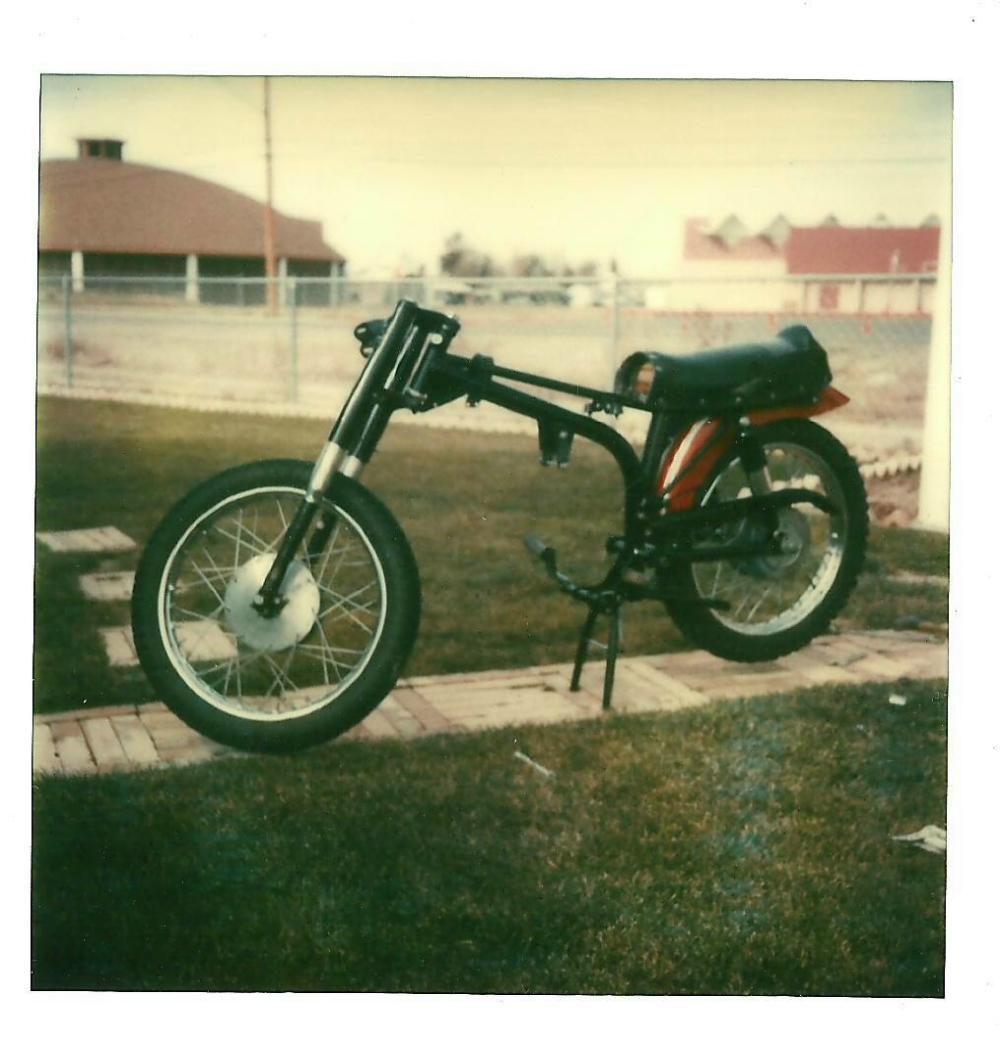
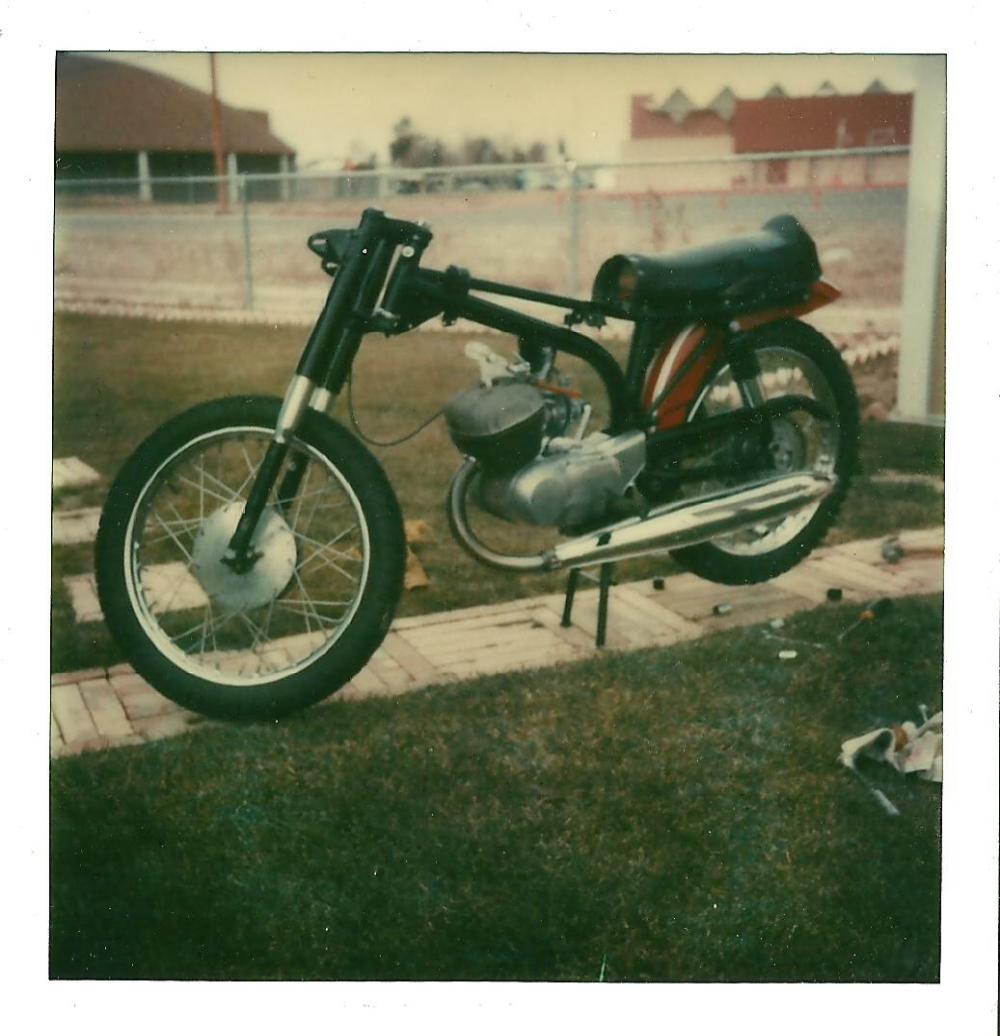
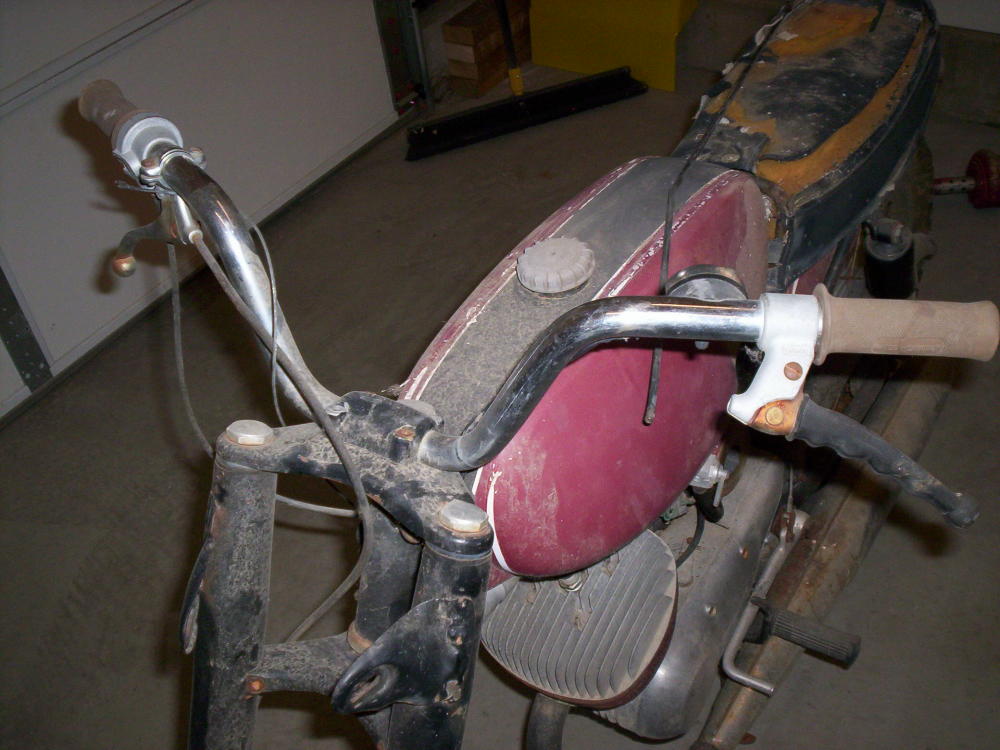
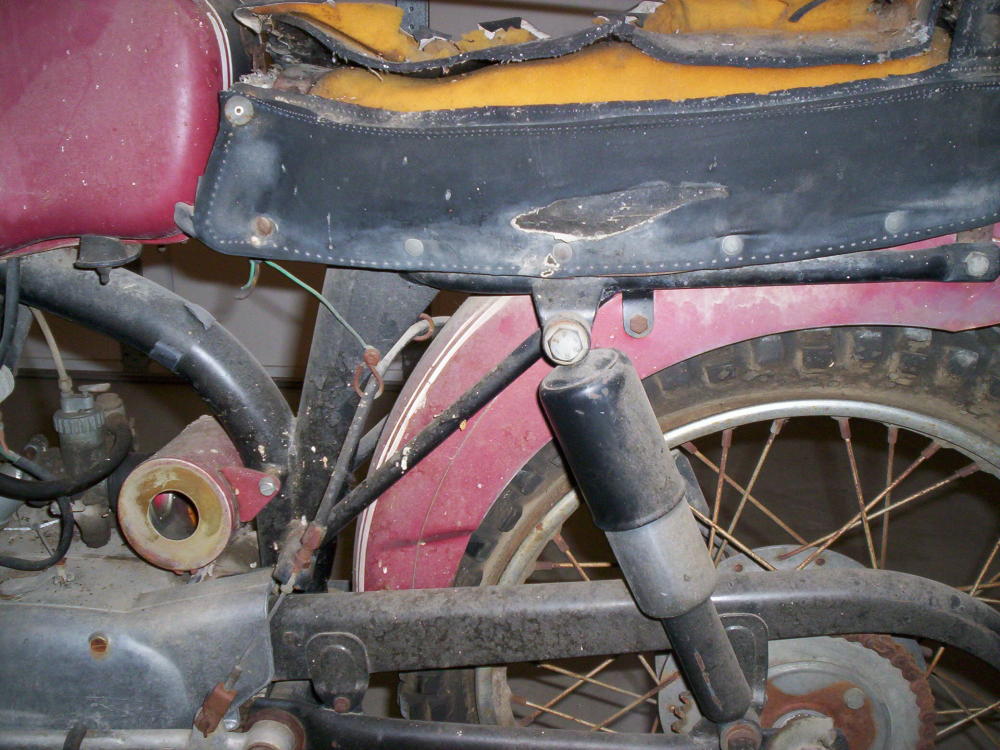
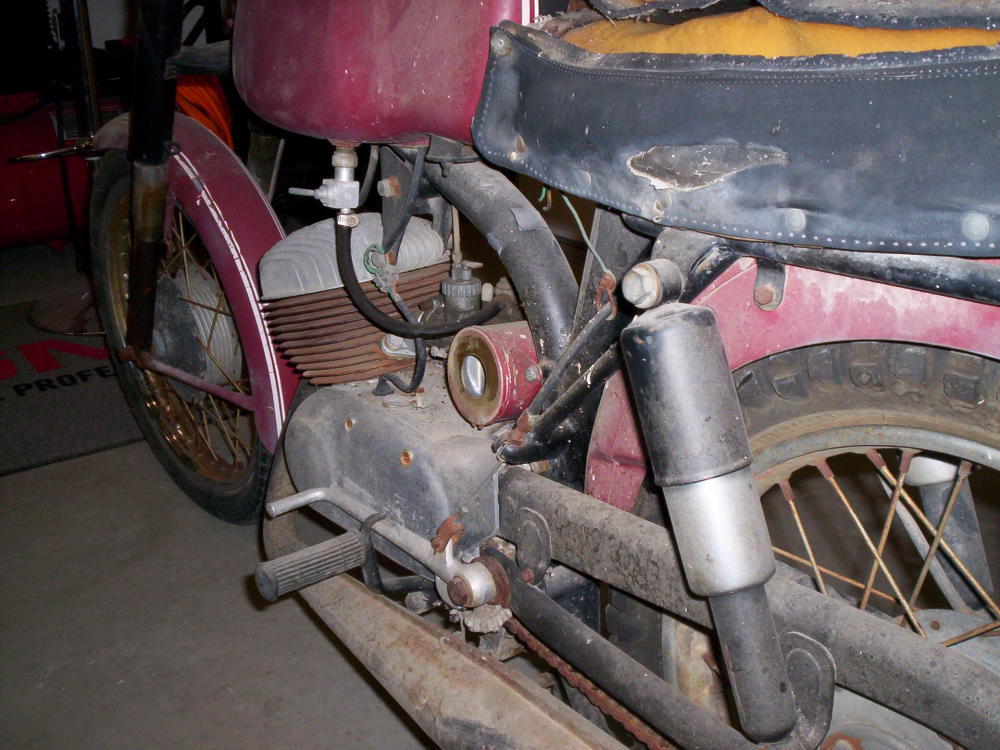
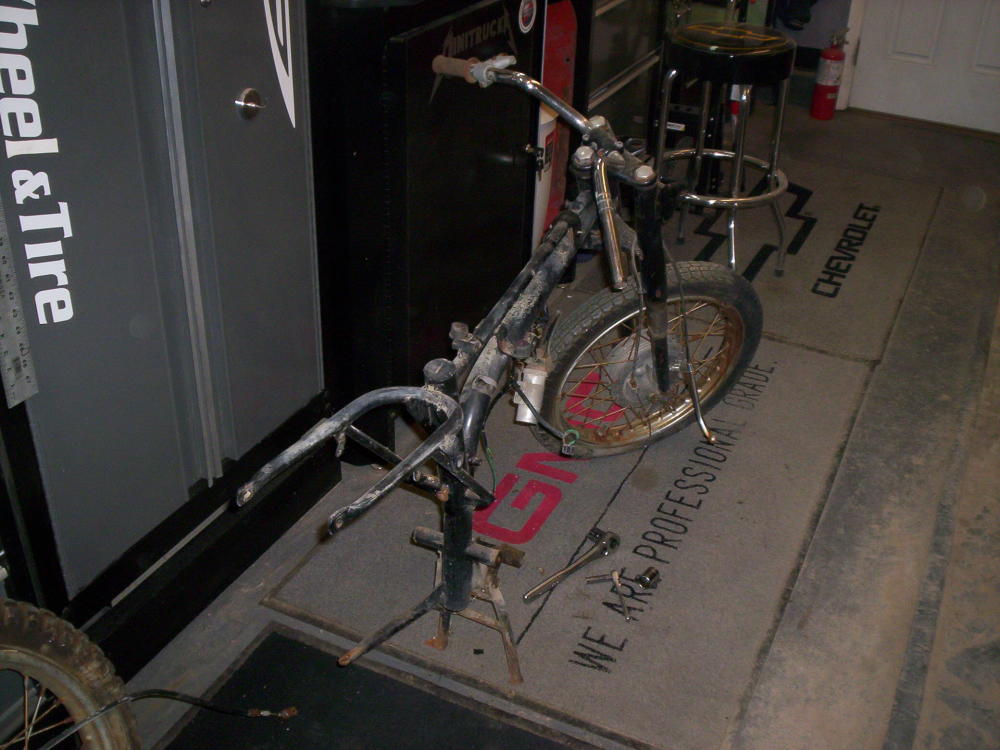
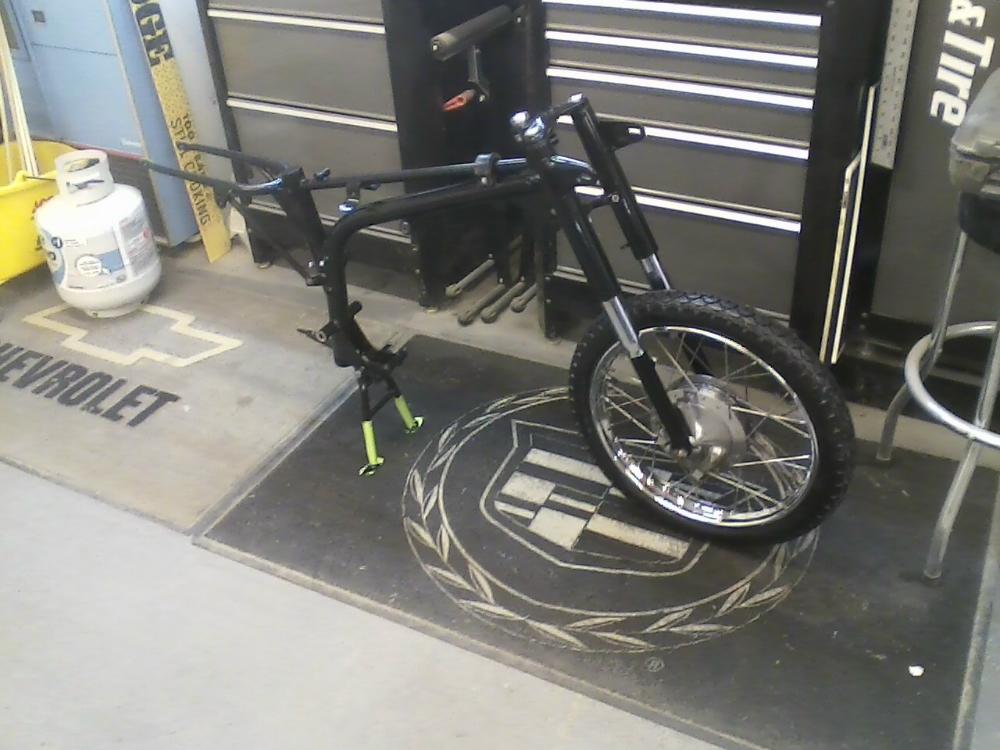
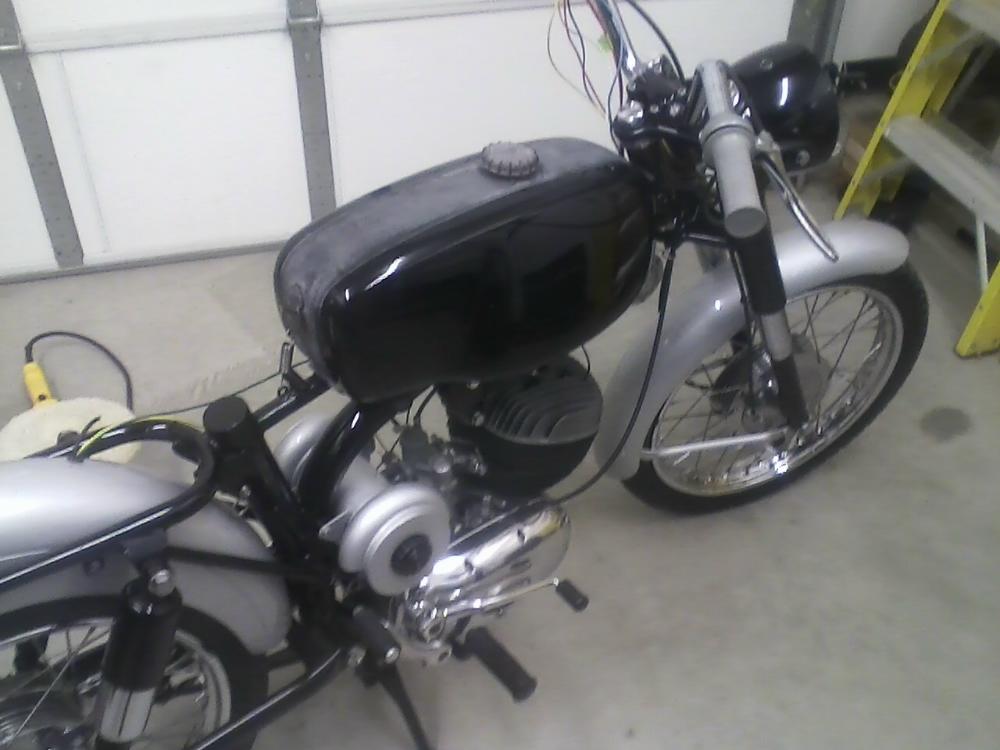
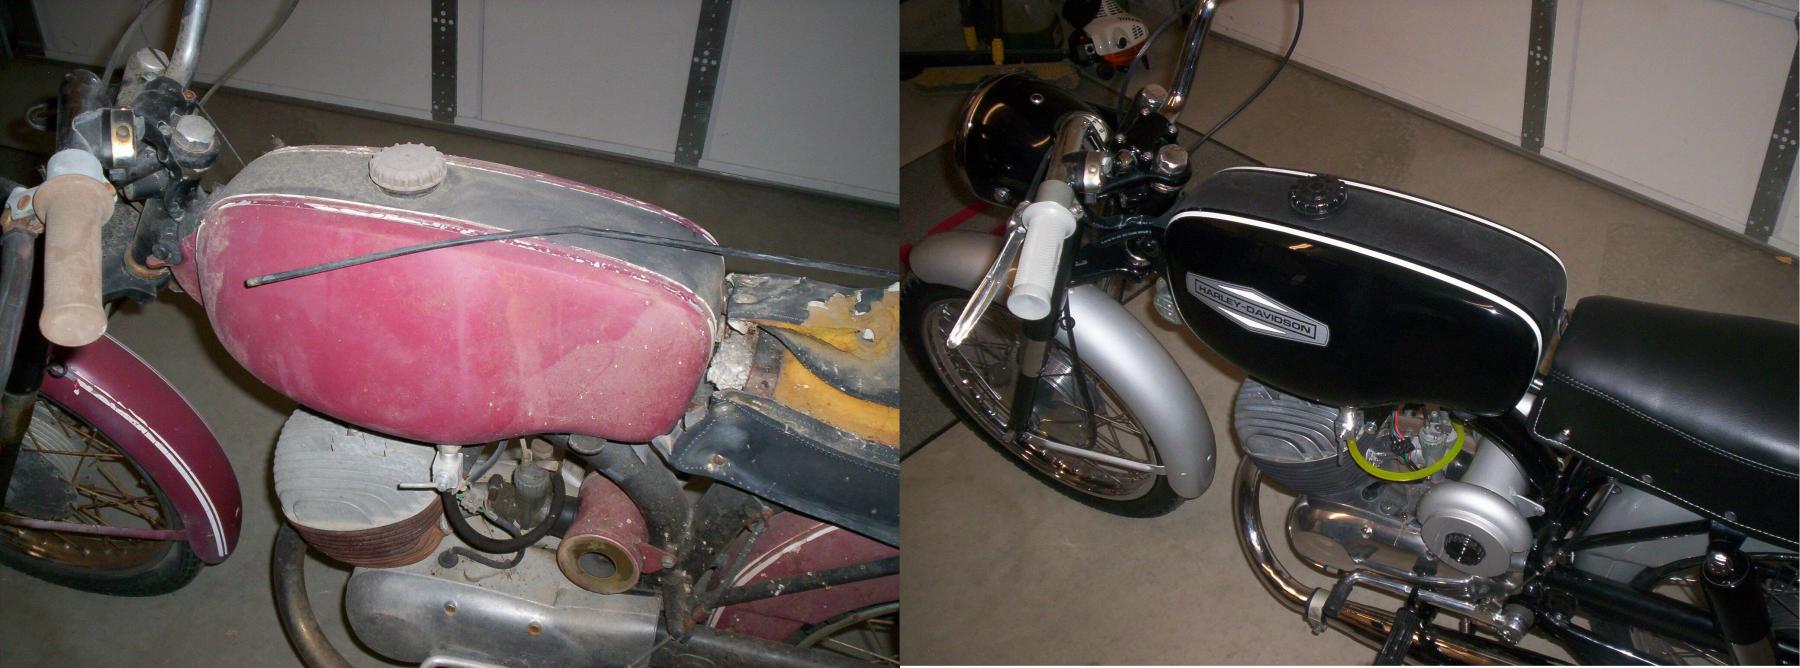
In my garage 2019, getting ready for restore. Missing head light, tail light, horn, brake light switch, rear fender bobbed because it was ripped, wrong brake levers and muffler clamp.
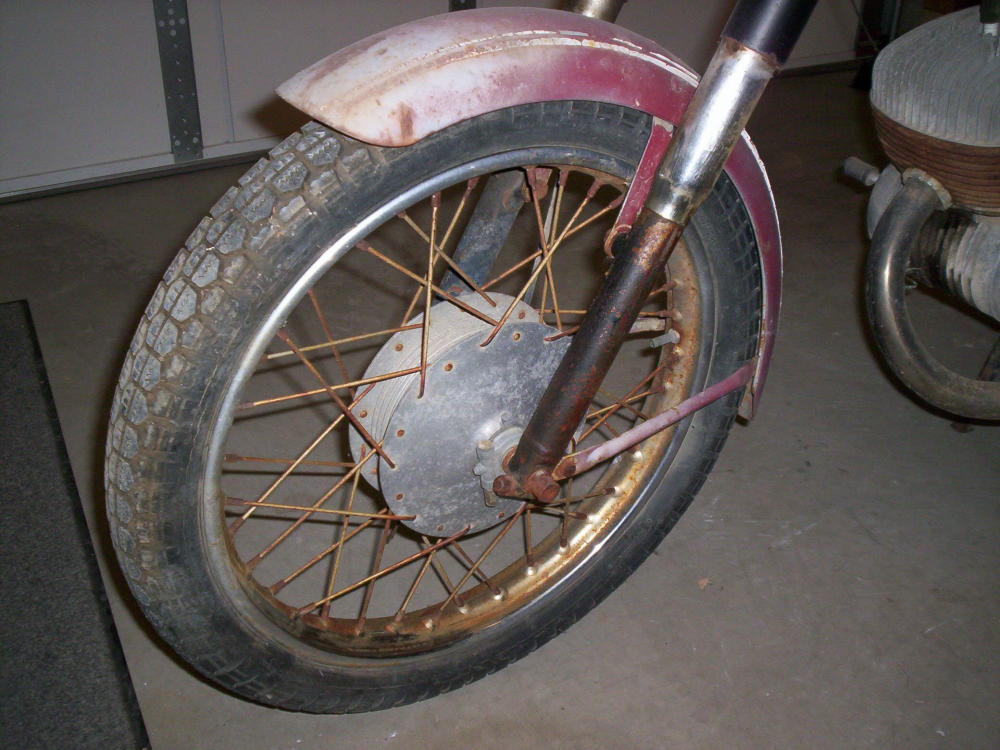
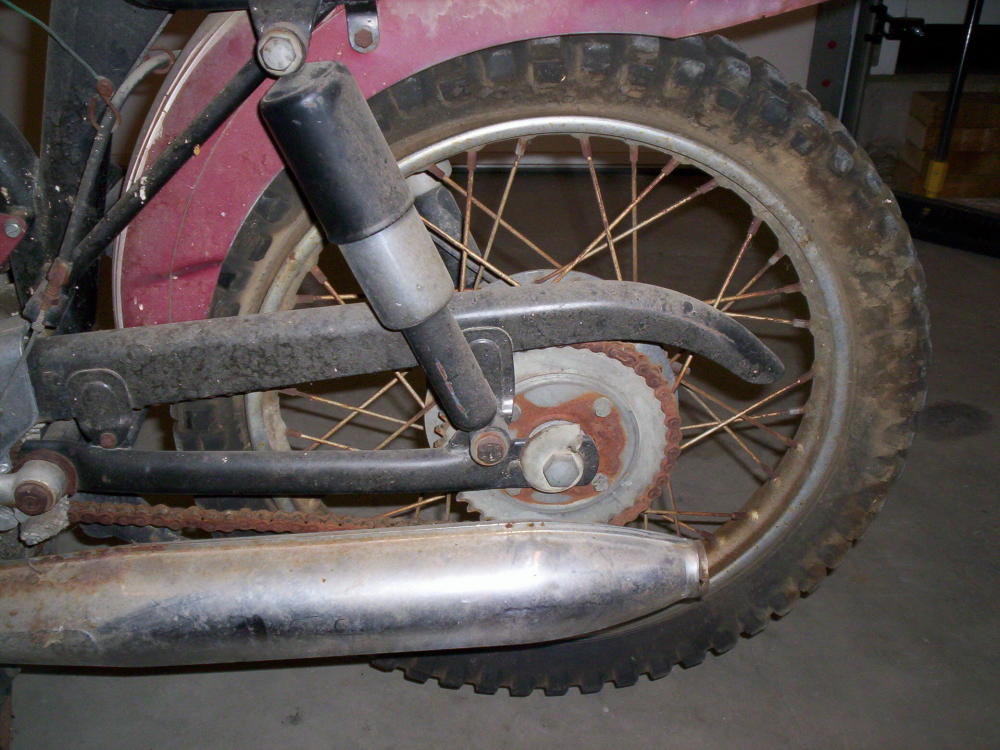
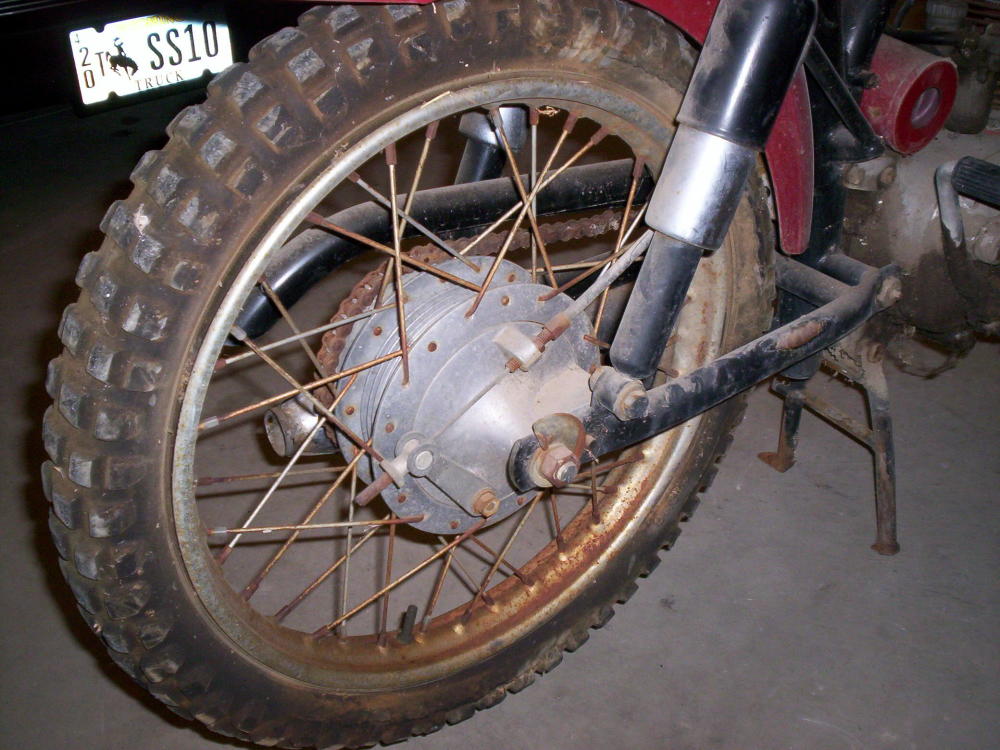
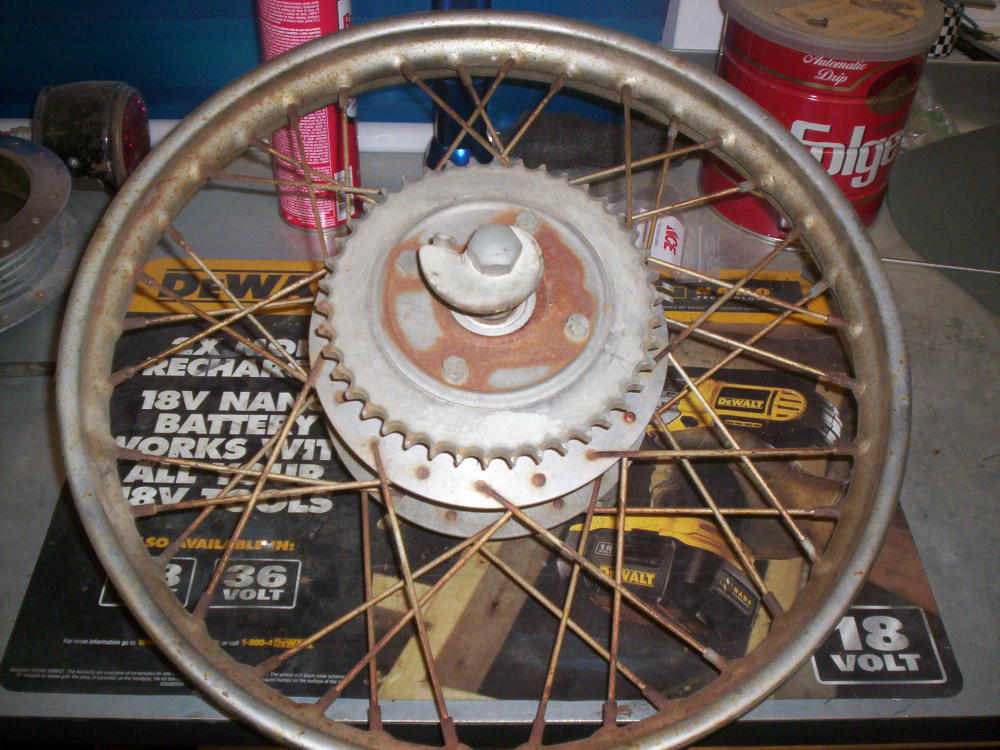
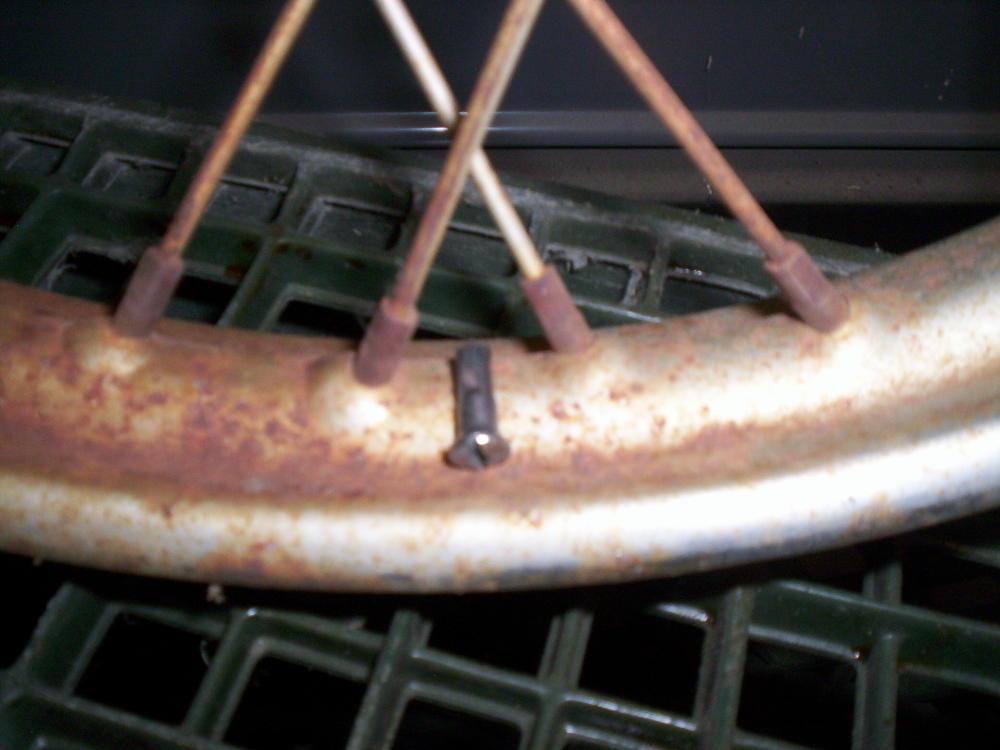
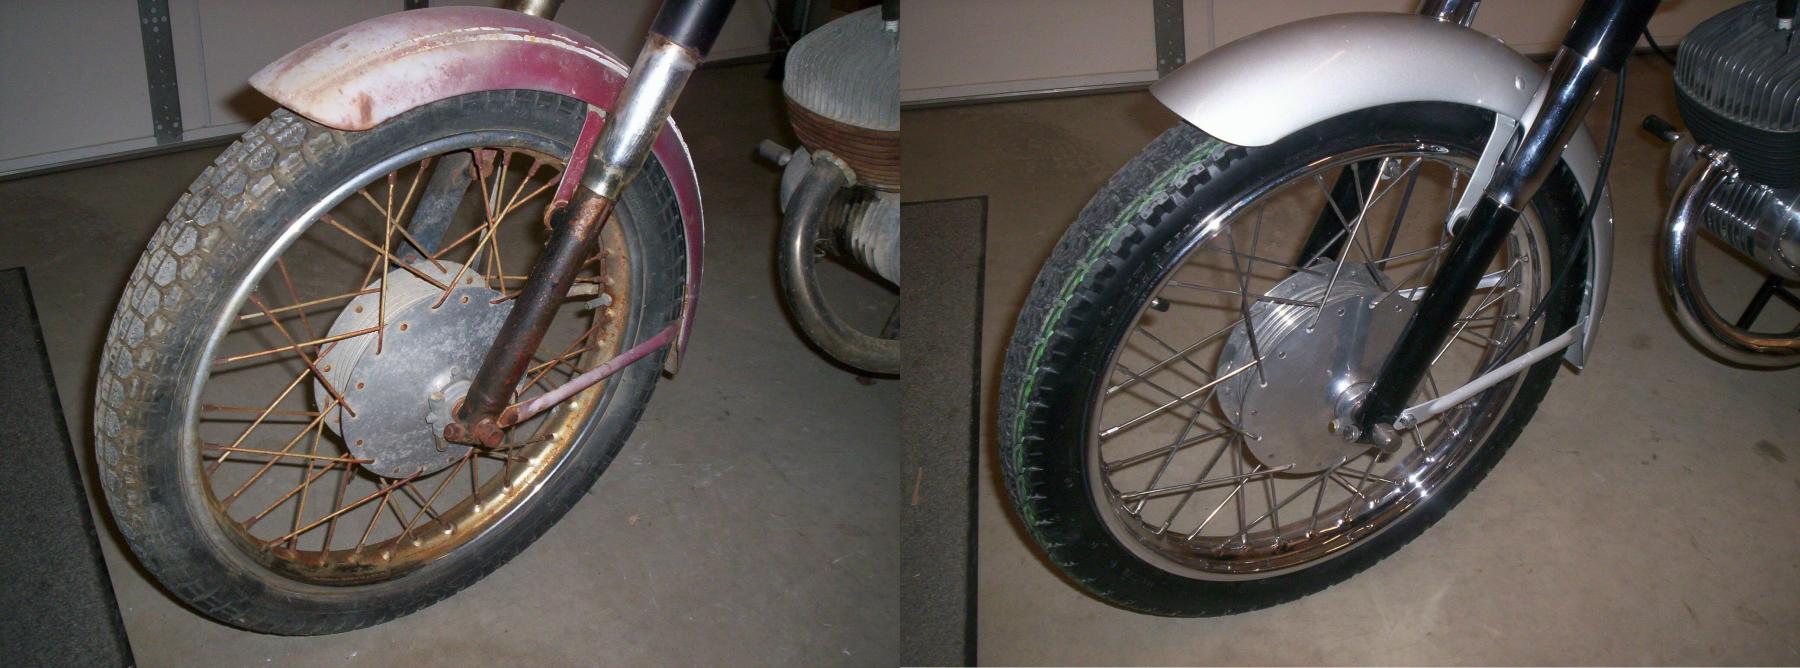
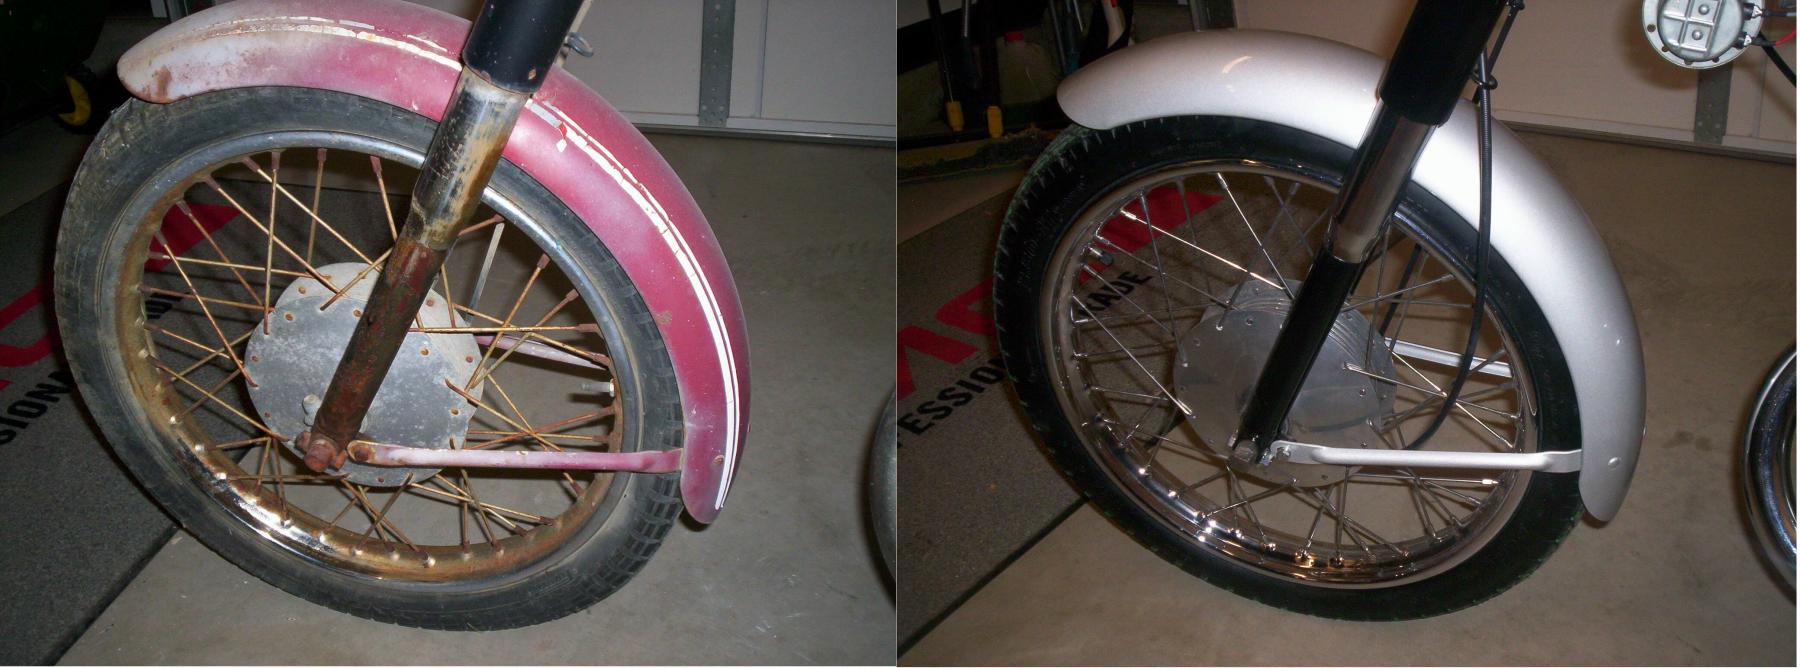
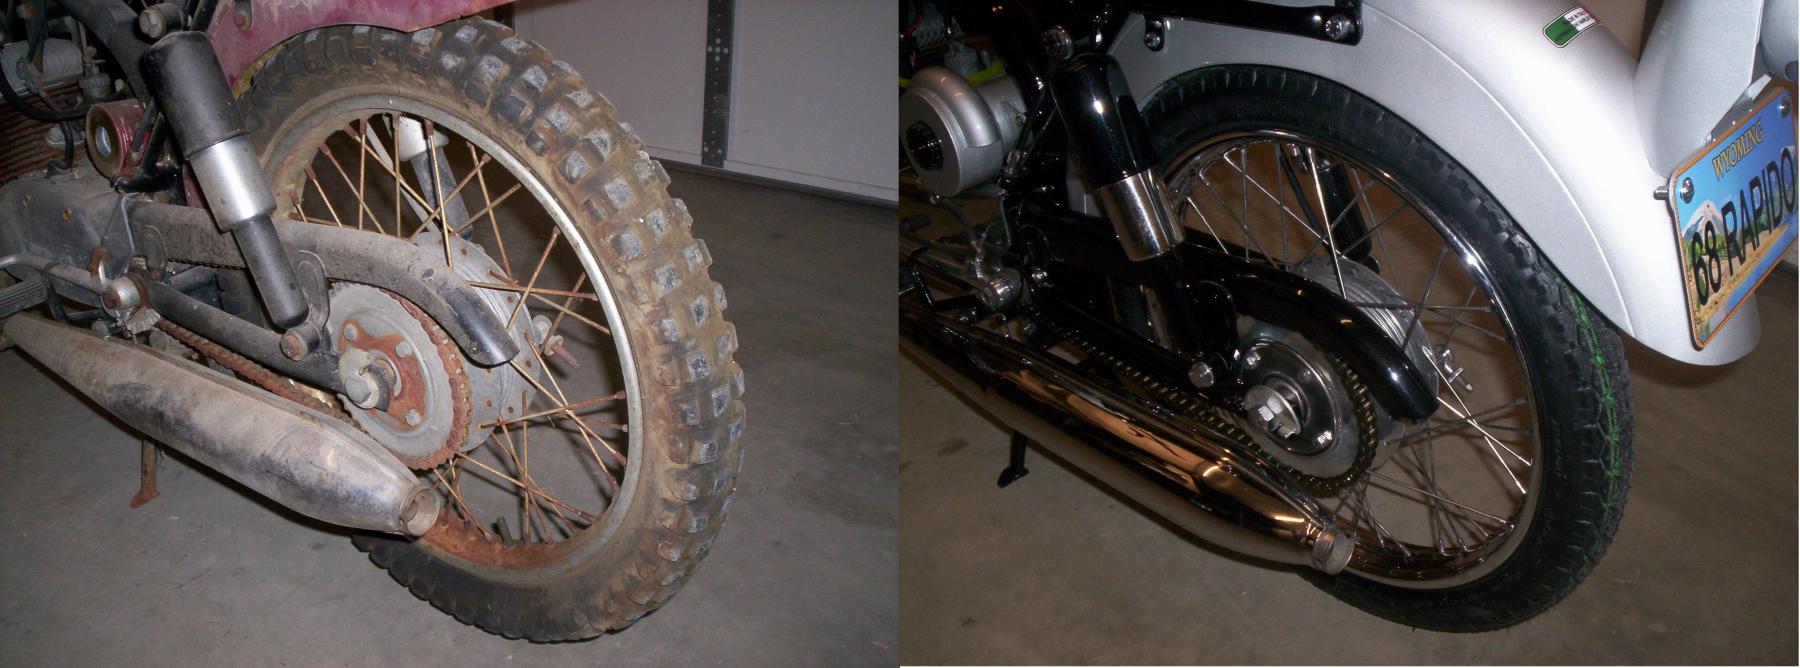
Very rusty wheels
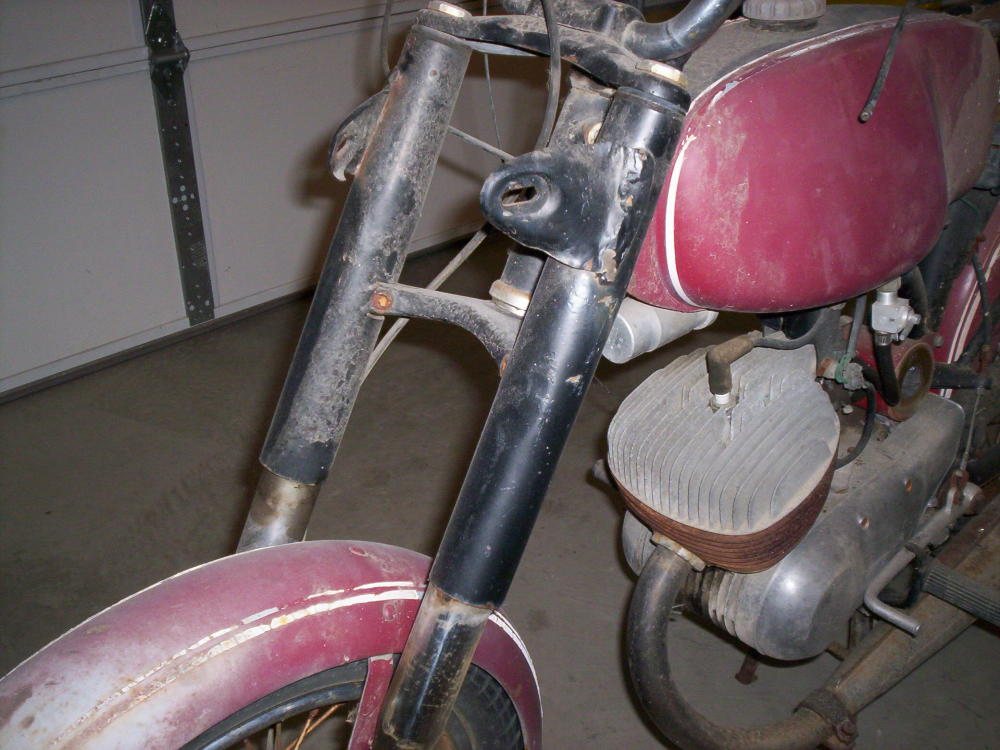
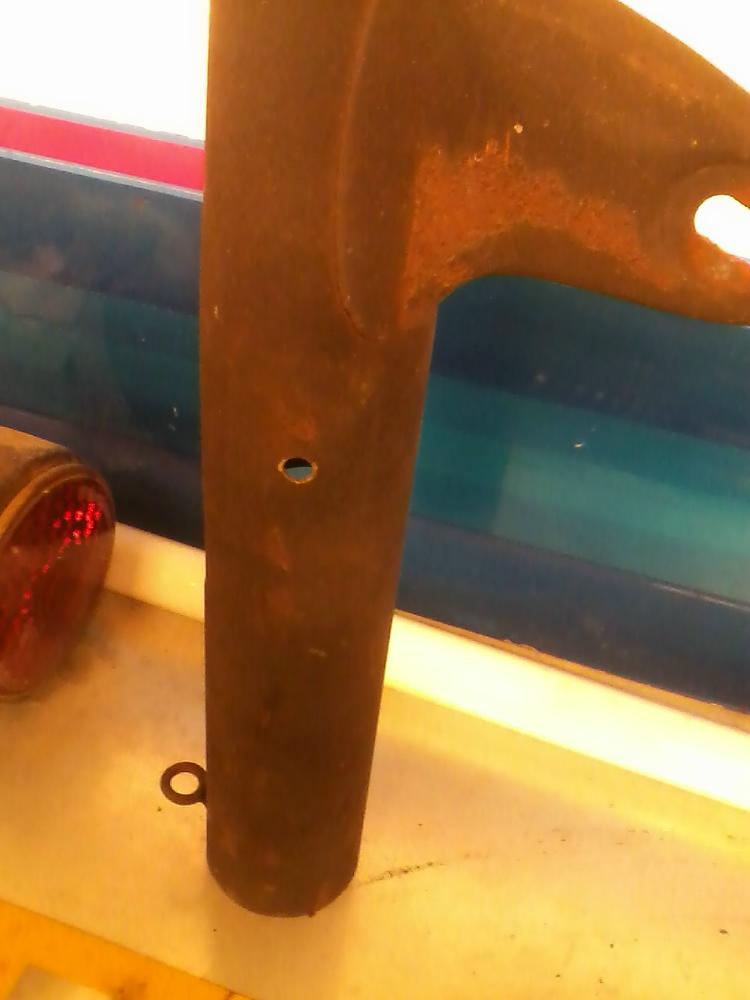
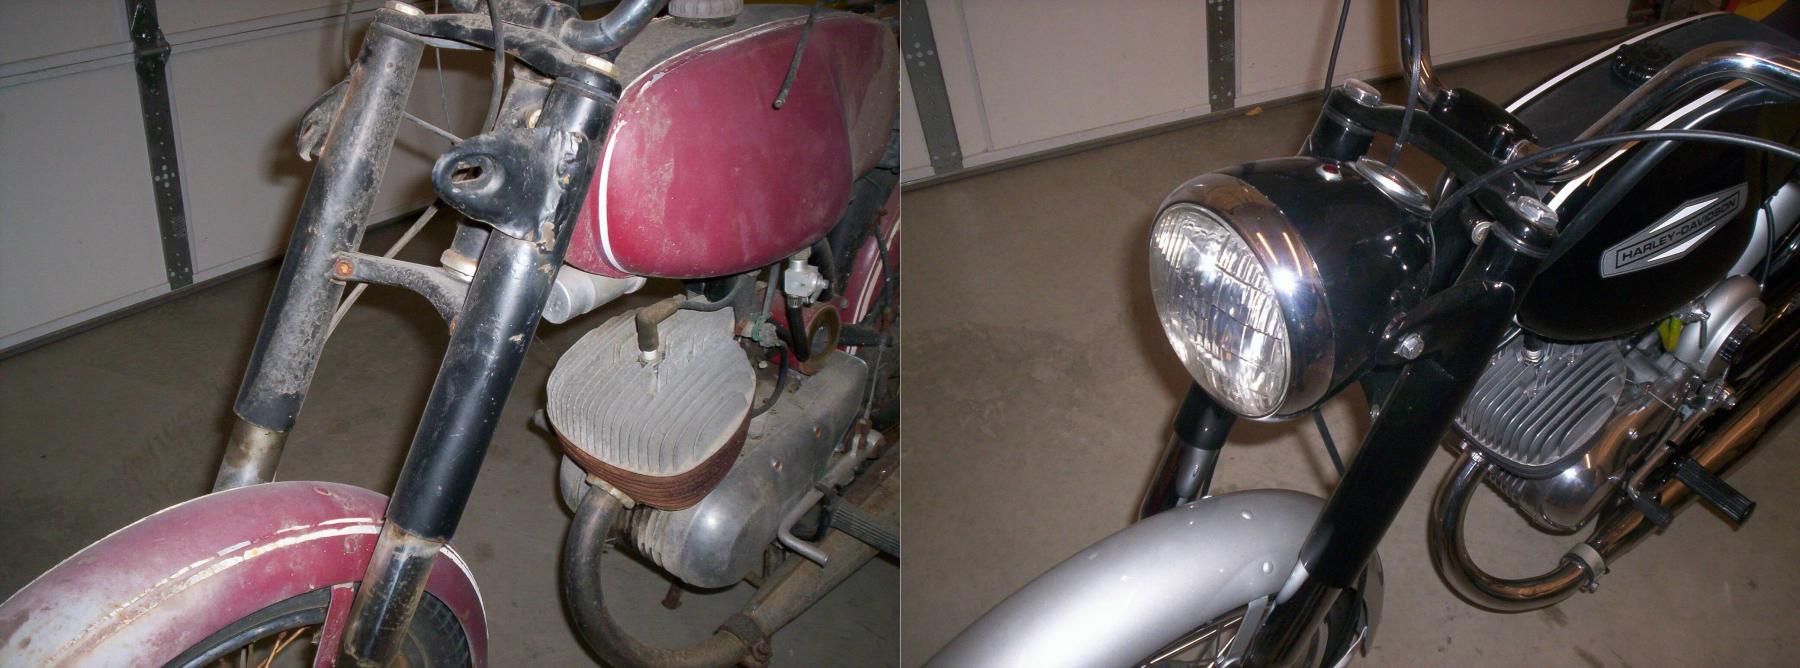
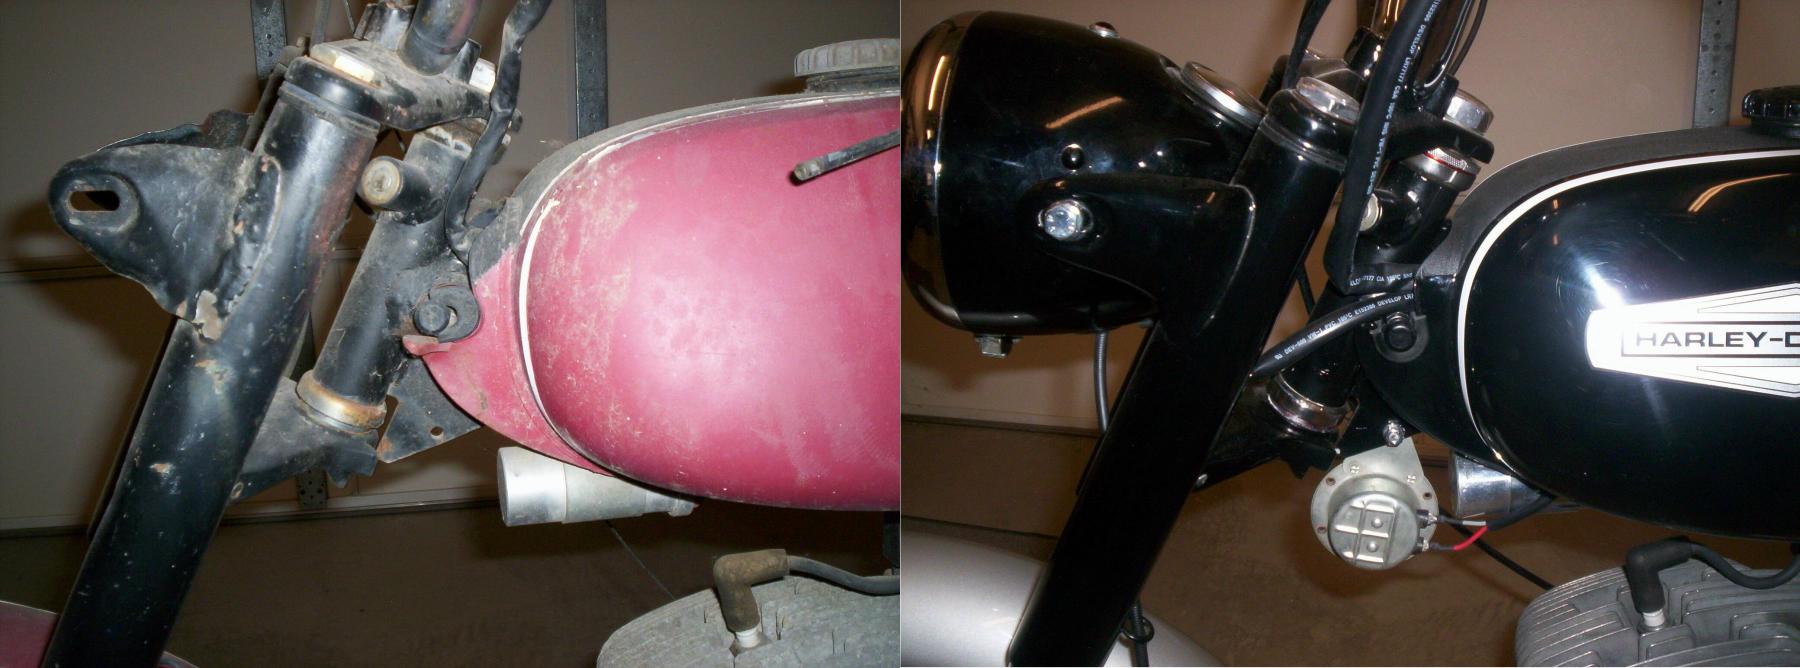
Looks like my grandfather had brazed back on the head light mounts, no idea if the headlight was there when I got it from him or not.
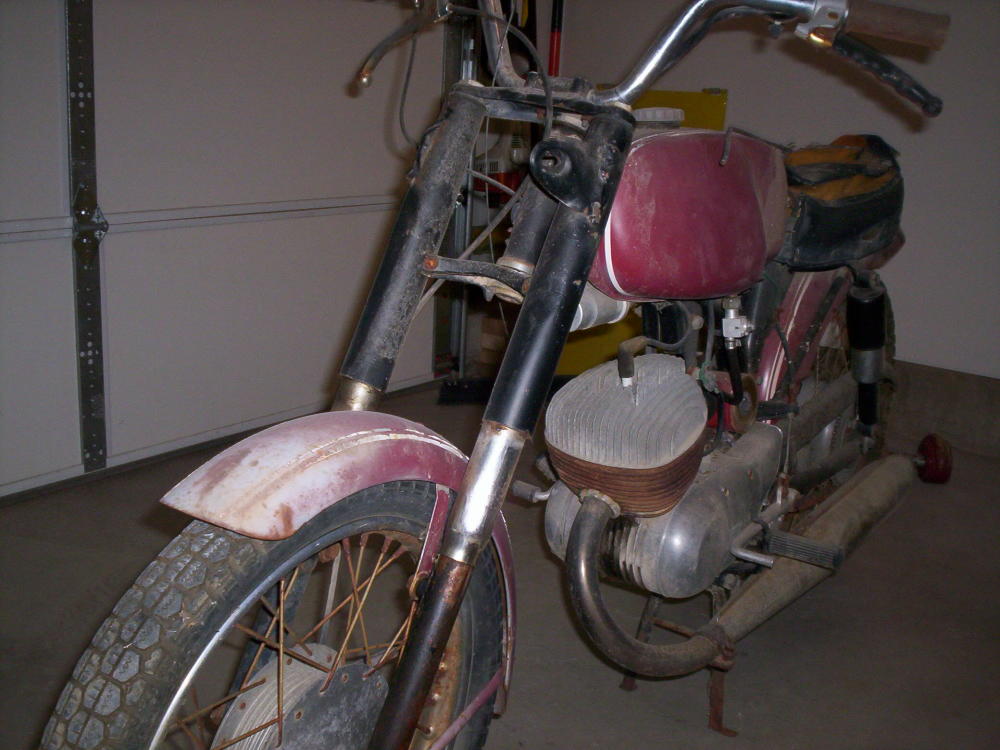
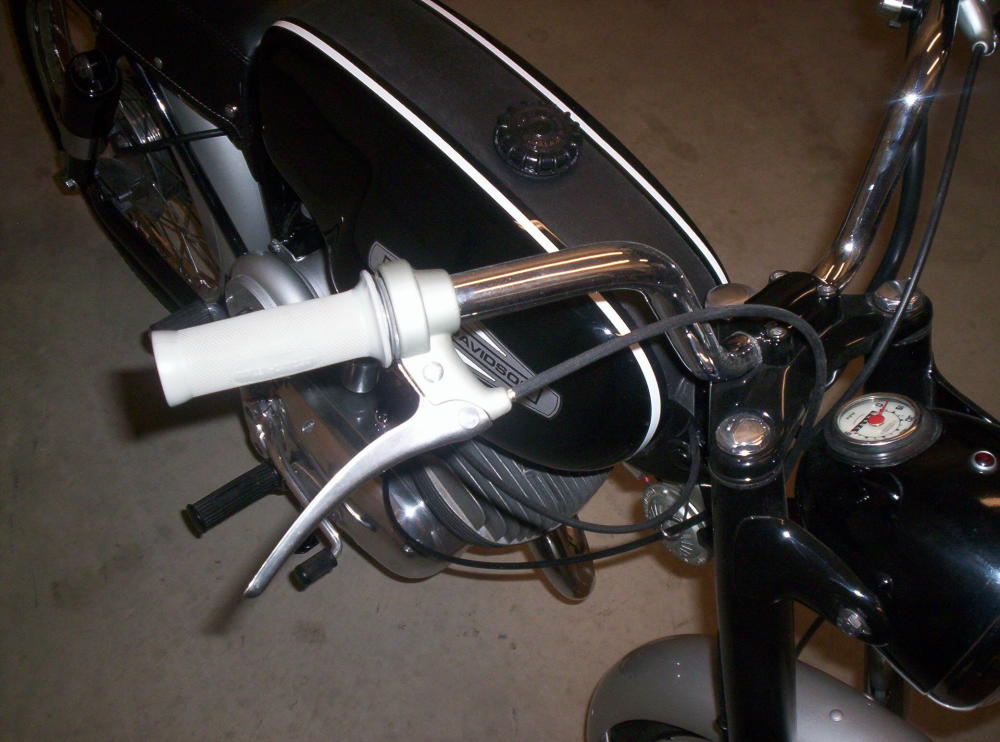
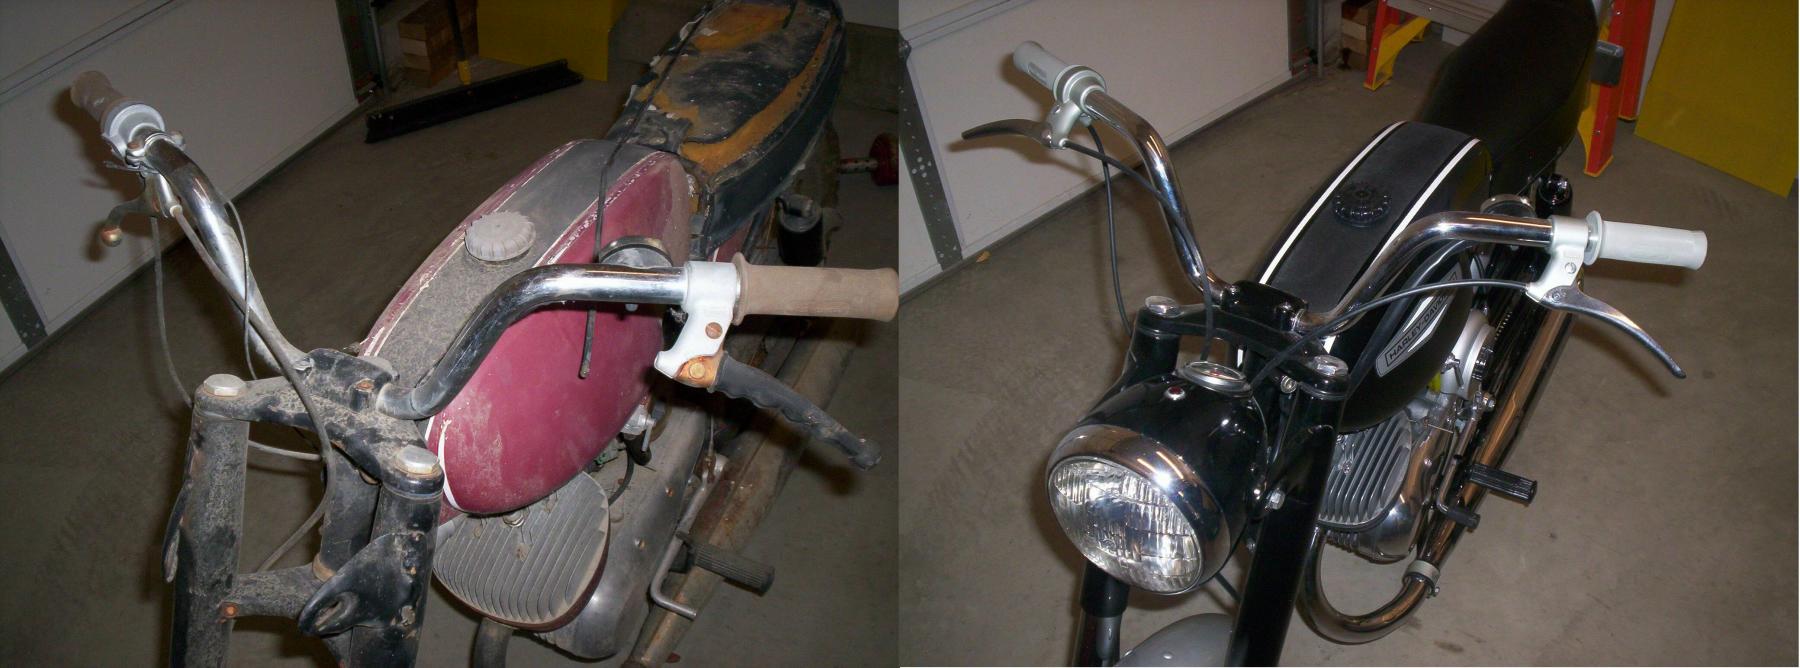
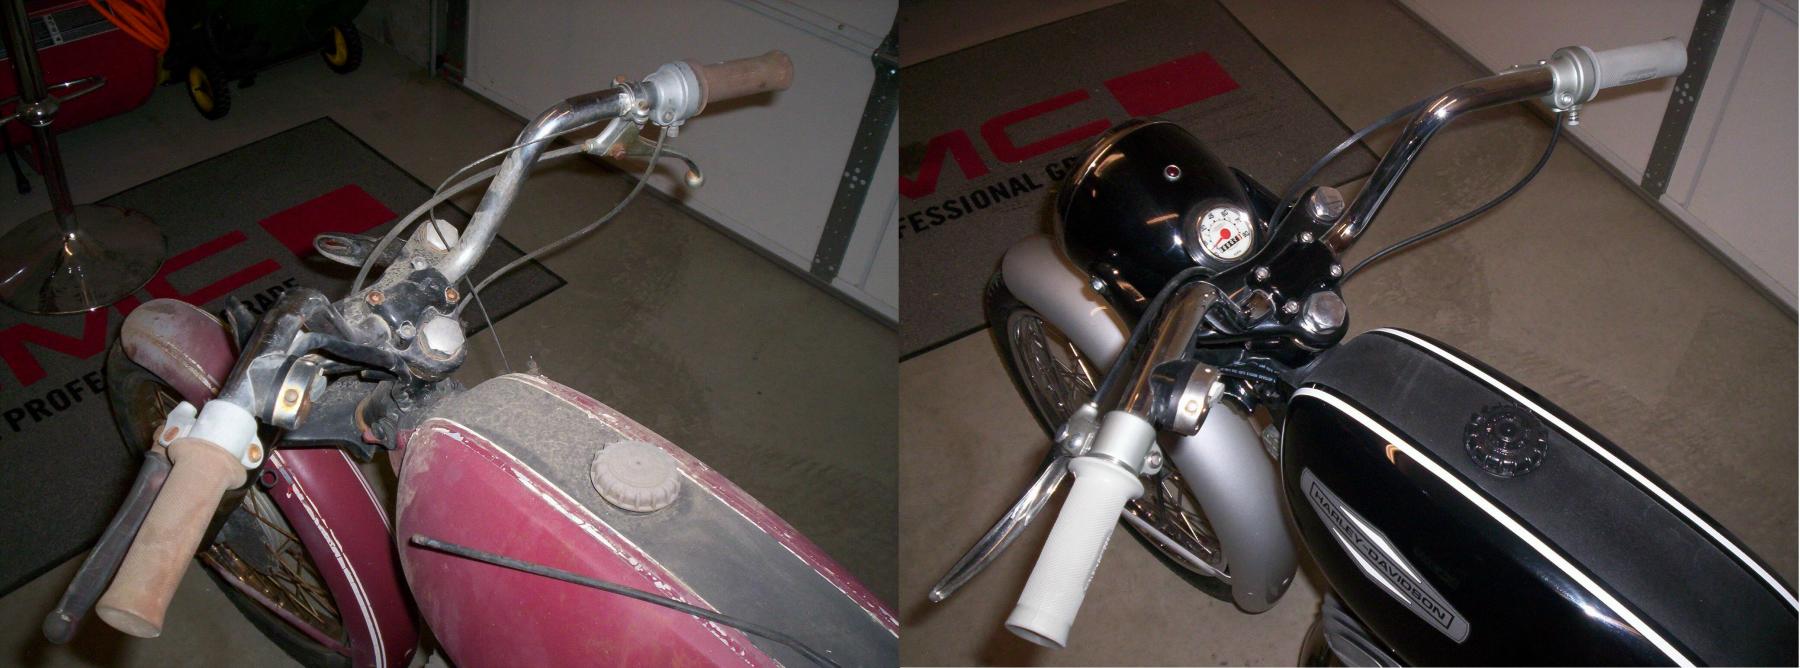
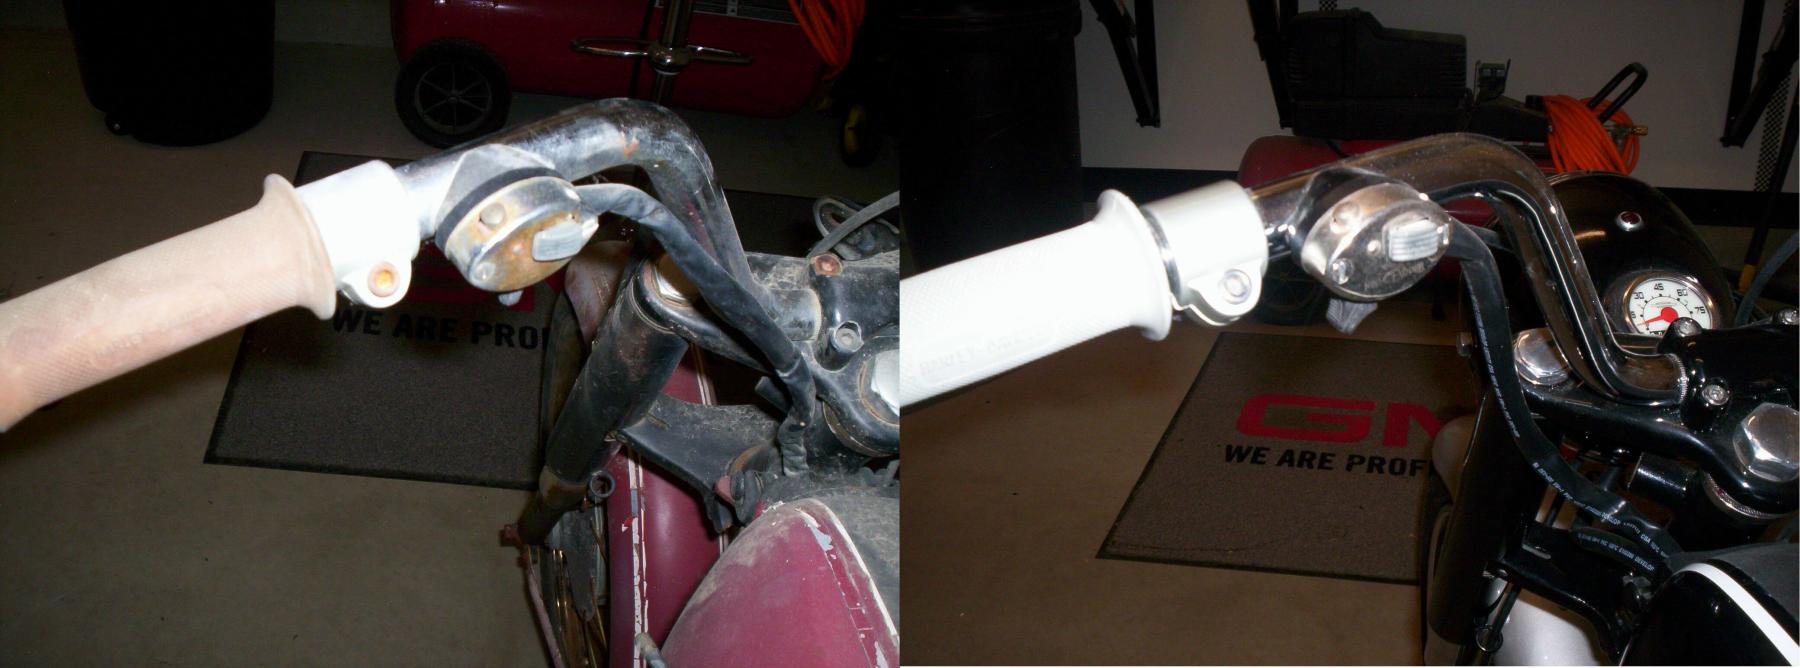
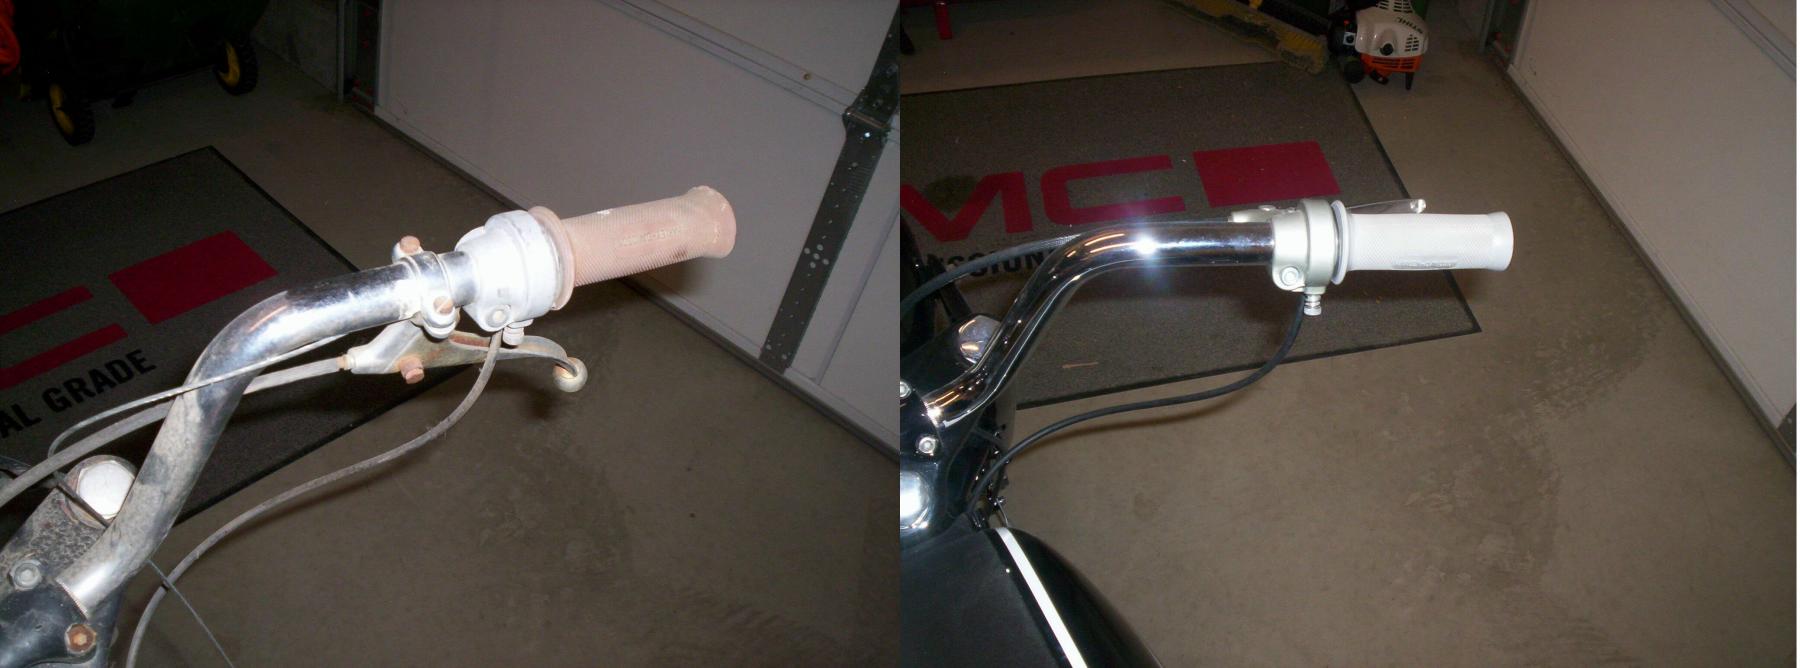
Wrong brake levers and sun baked hand grips.
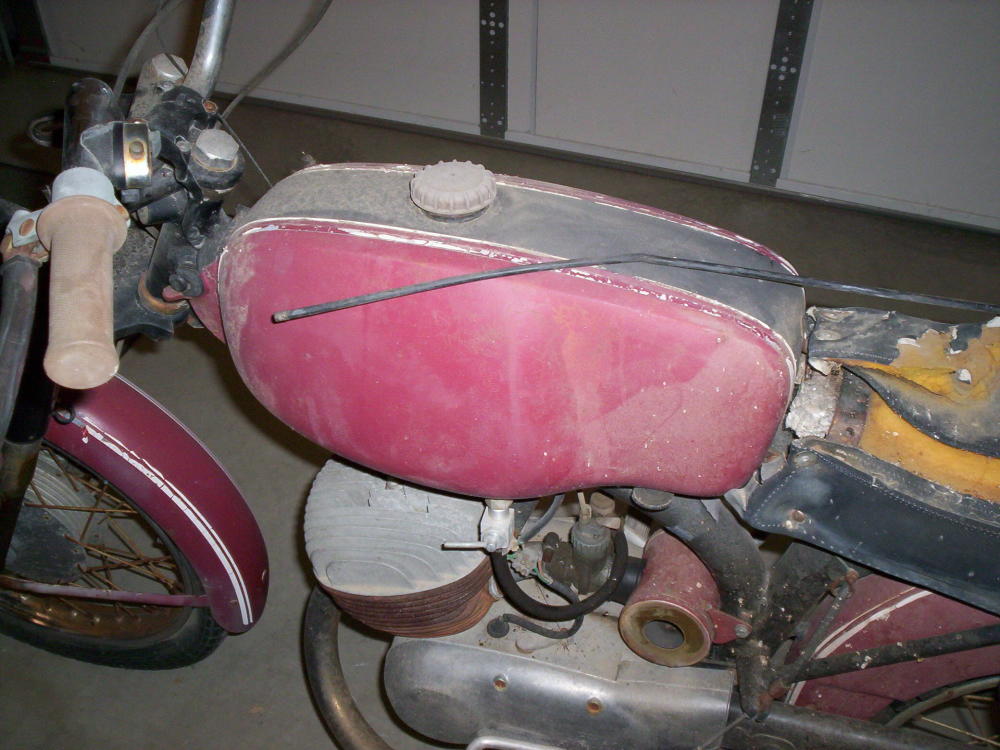
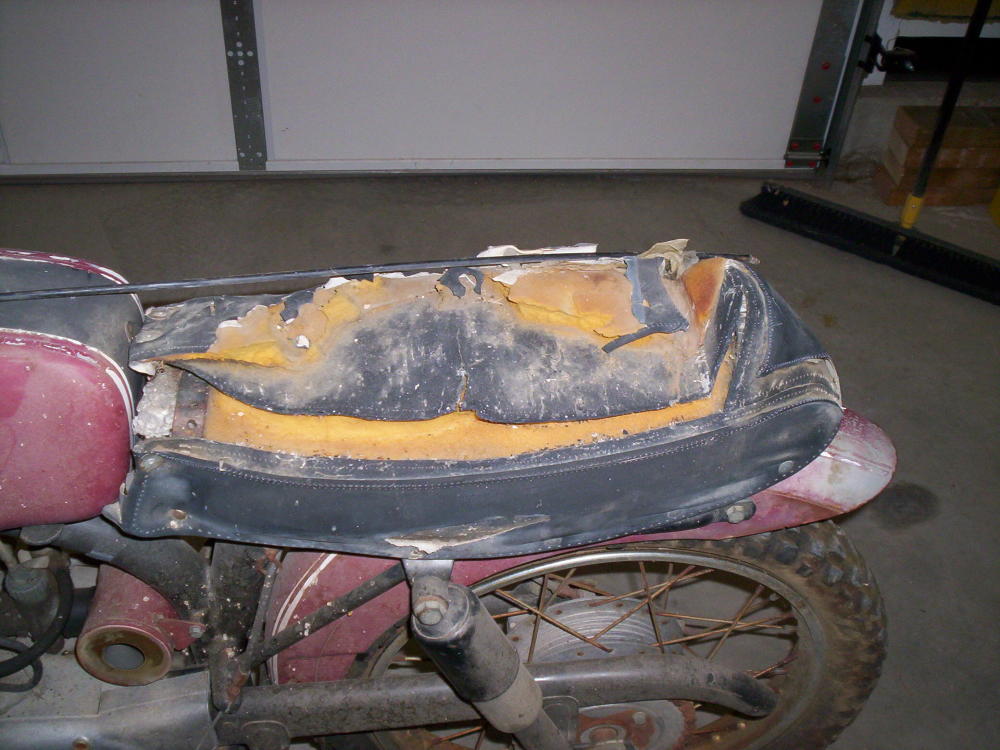
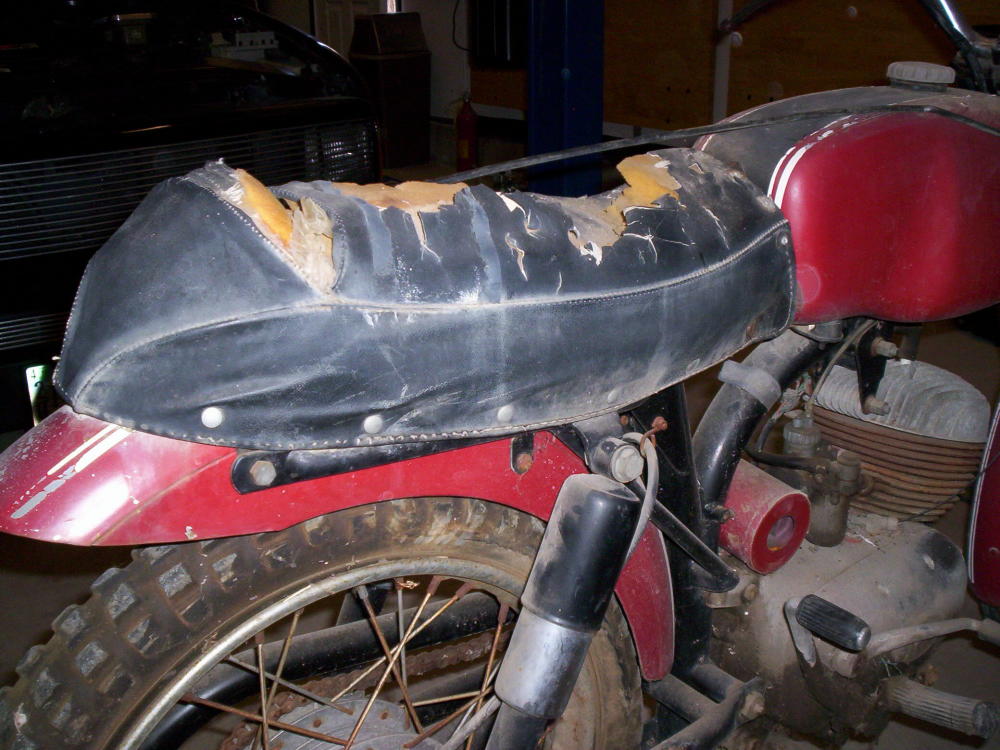
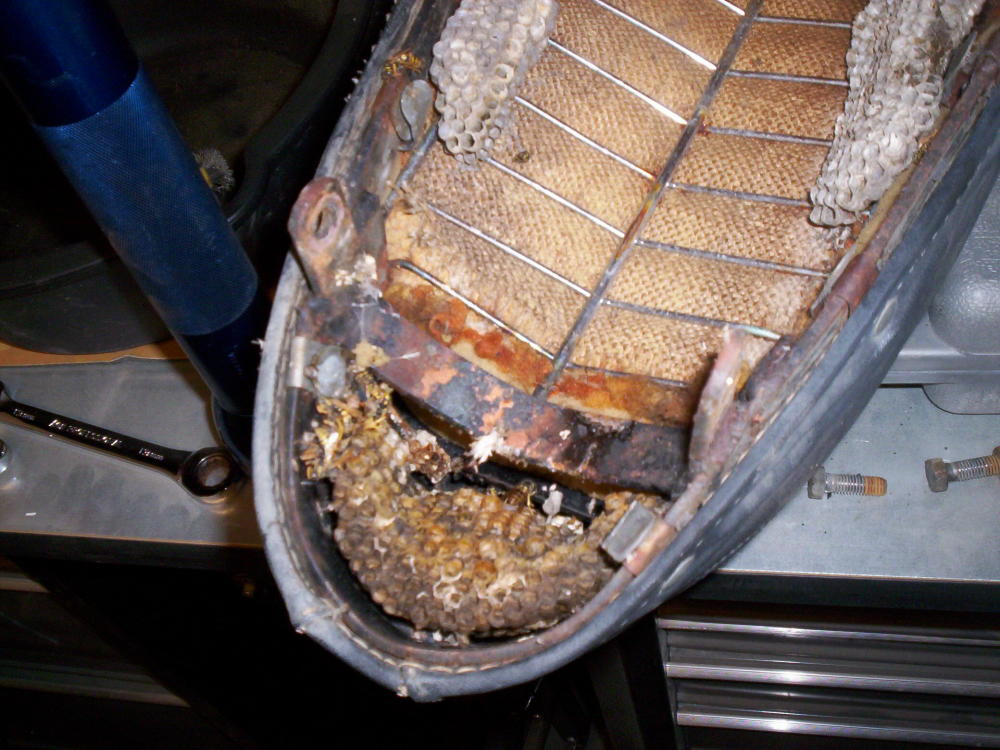
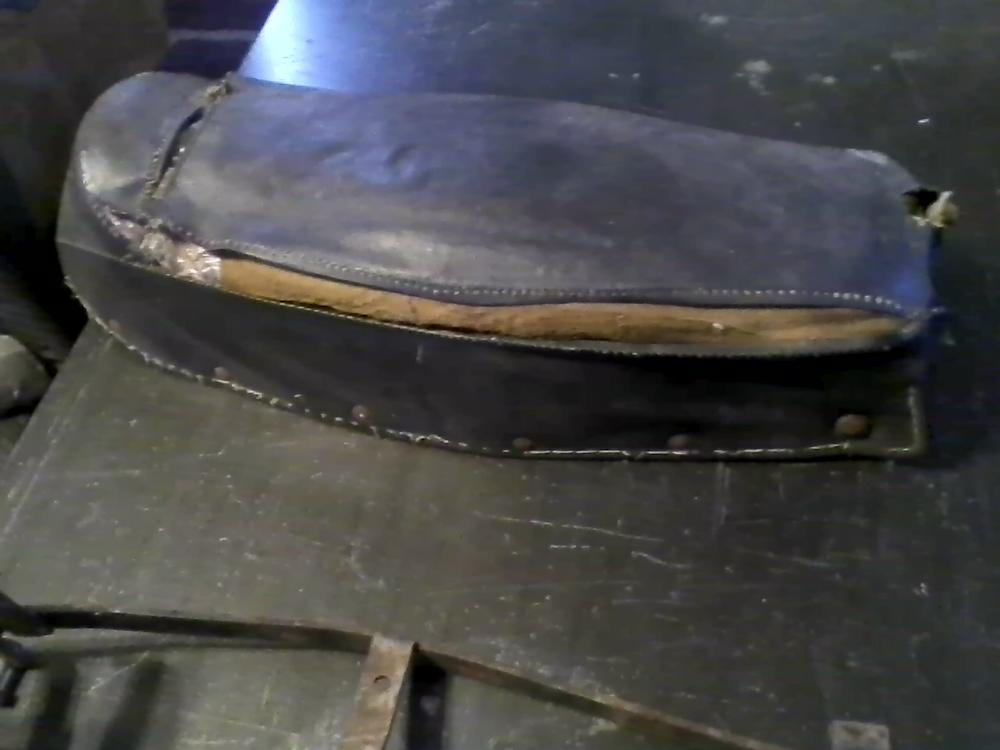
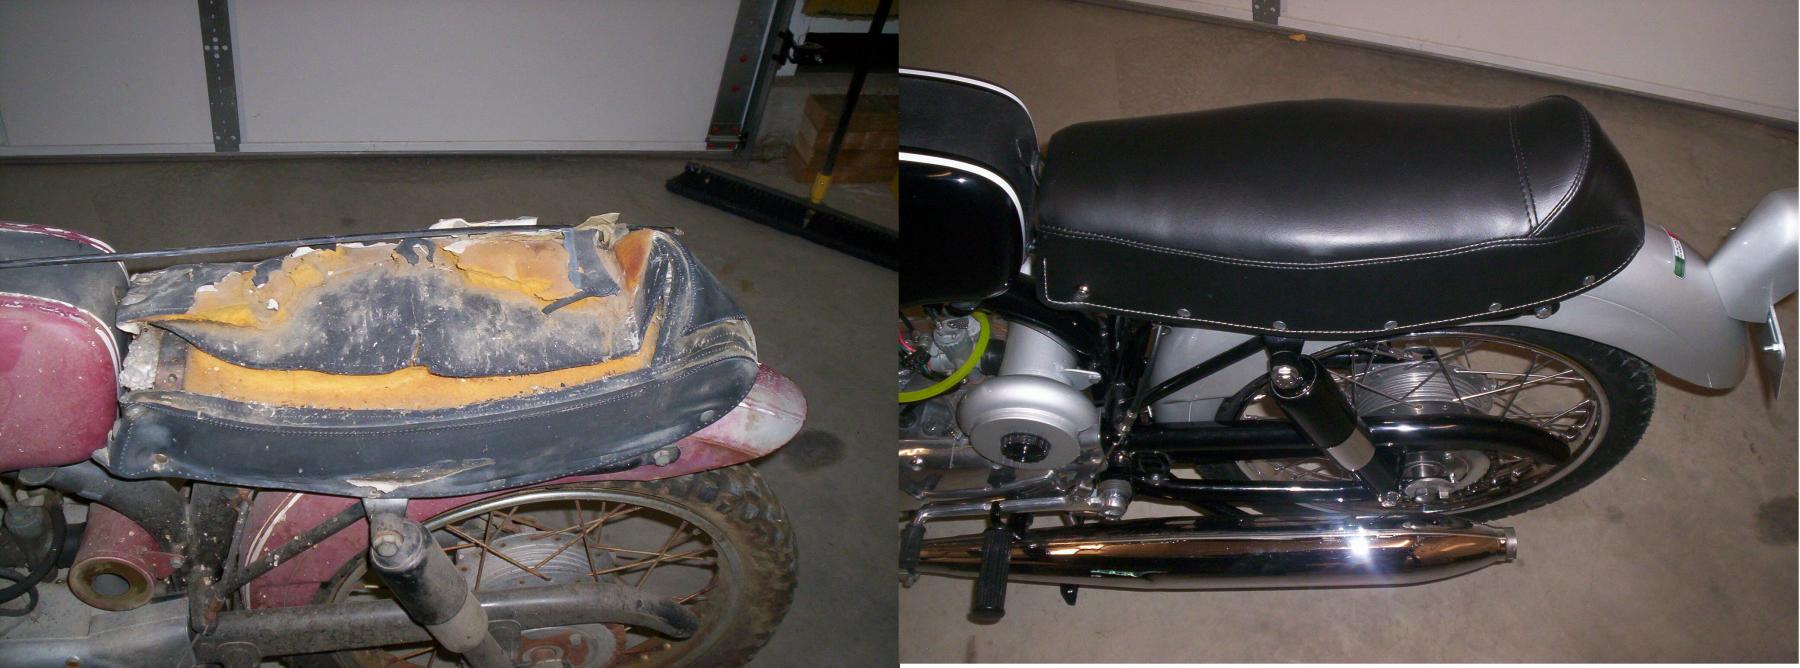
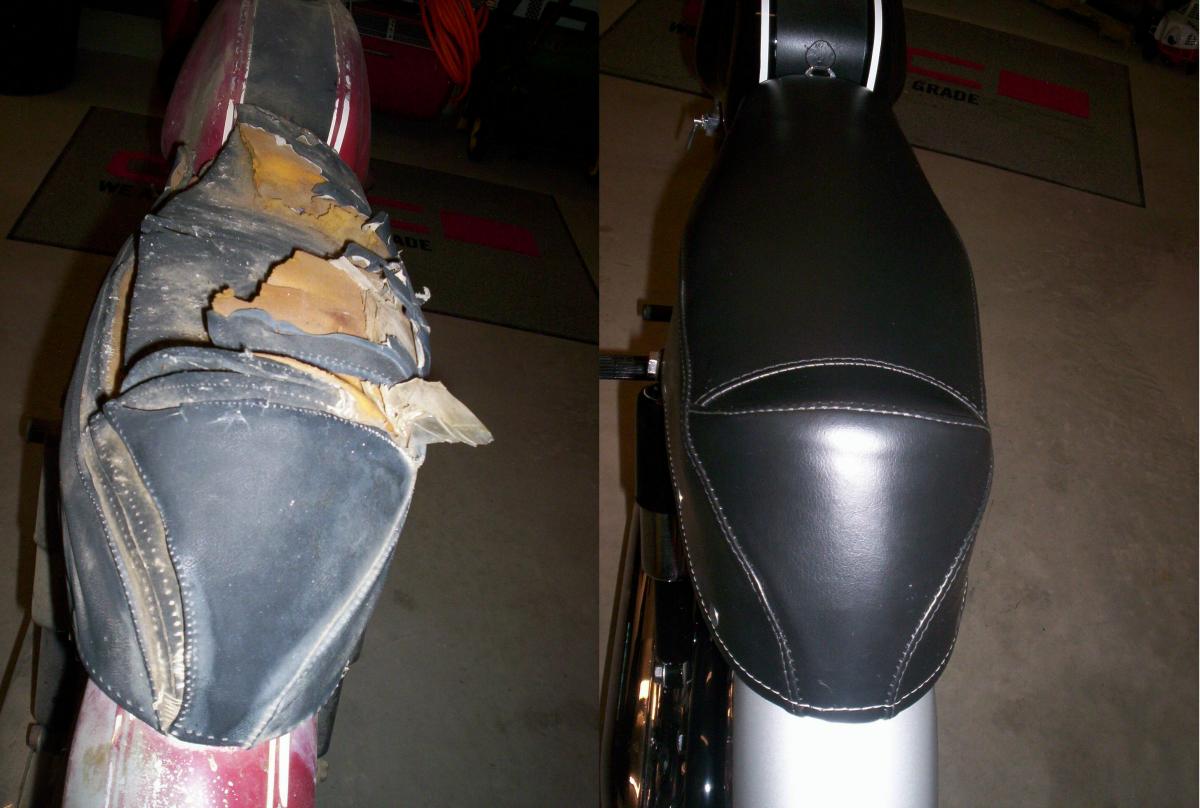
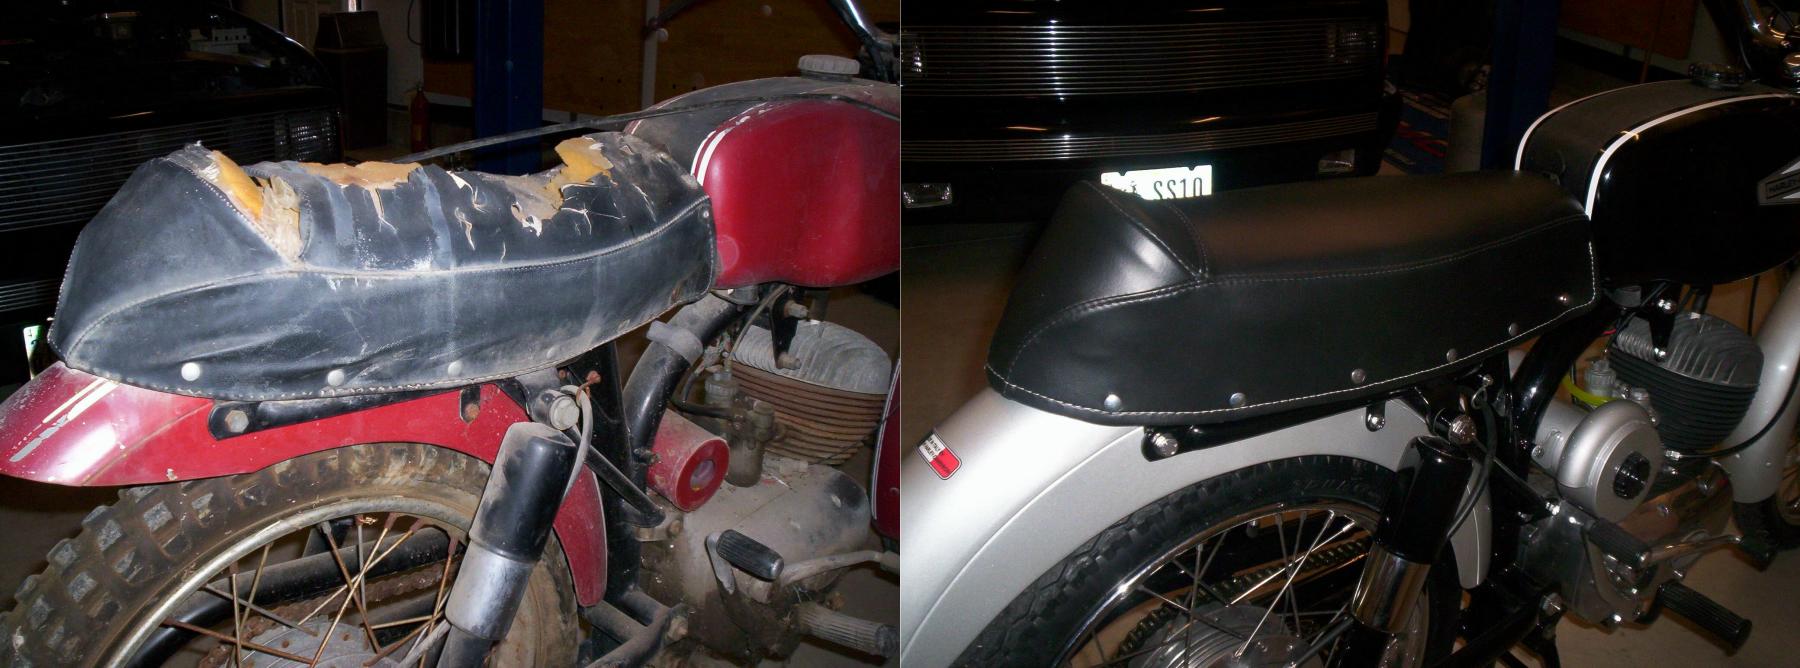
Seat is somewhat there.
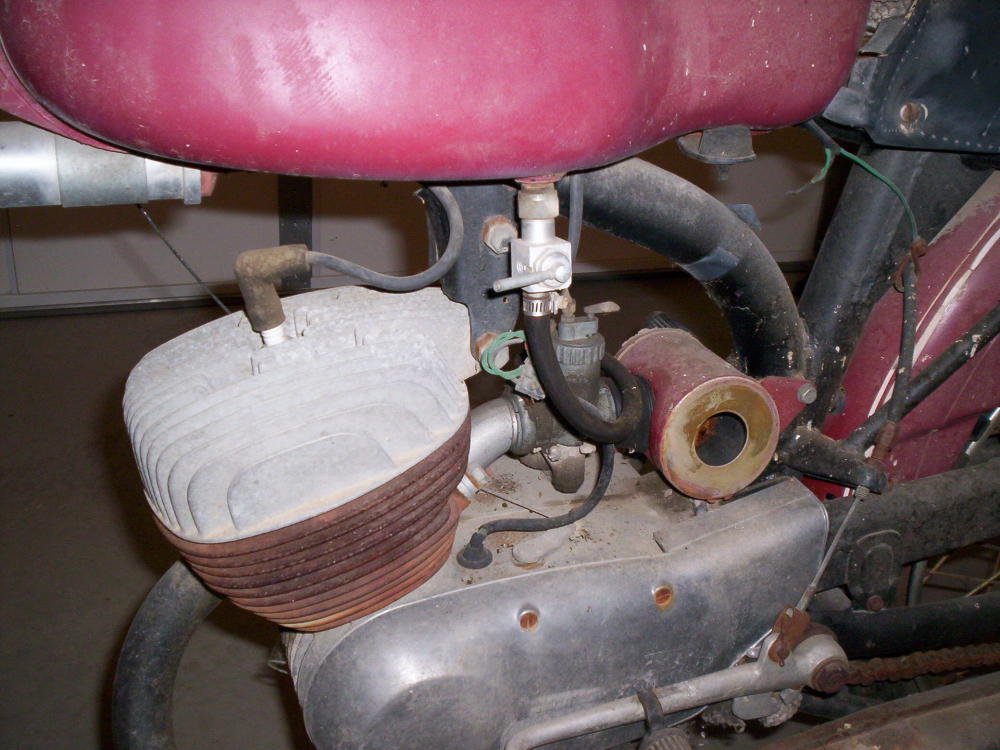
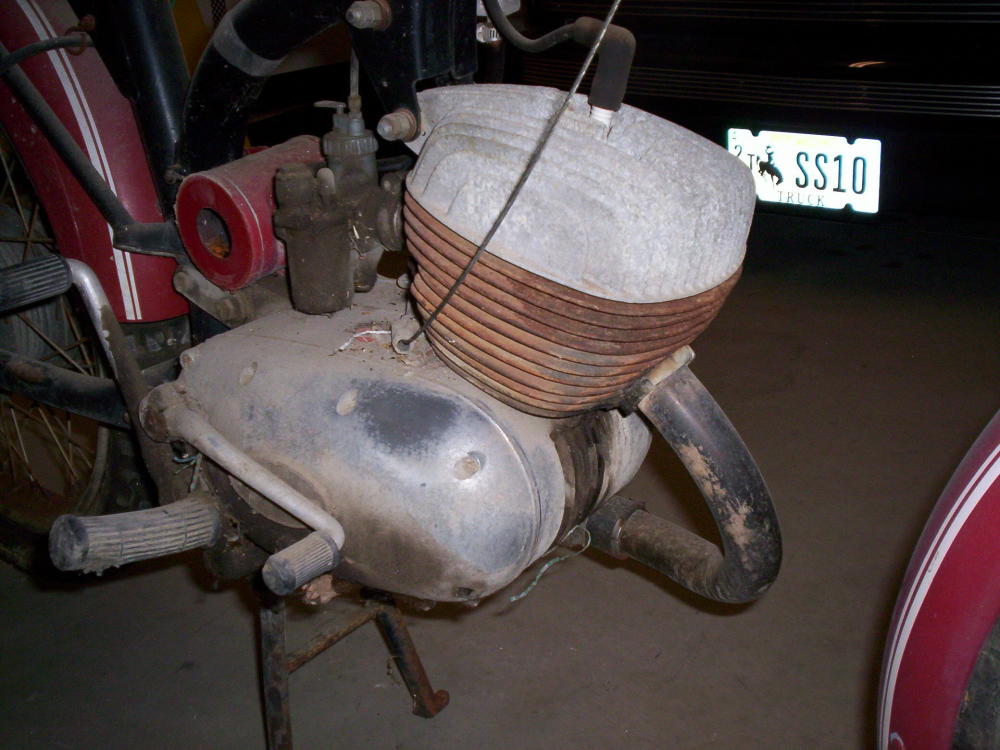
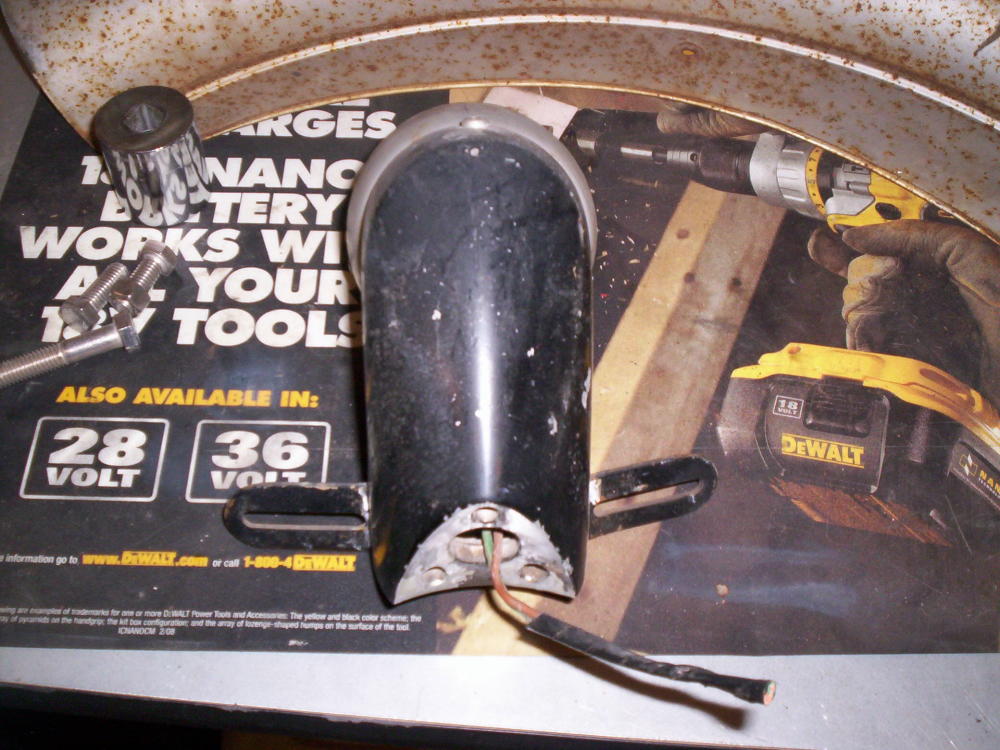
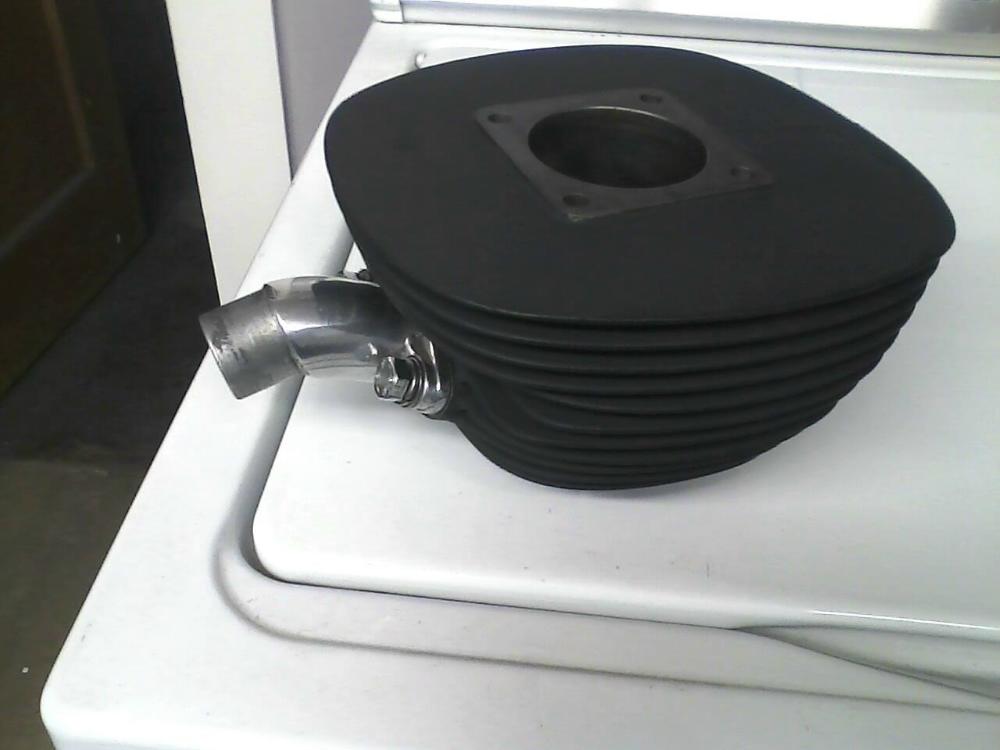
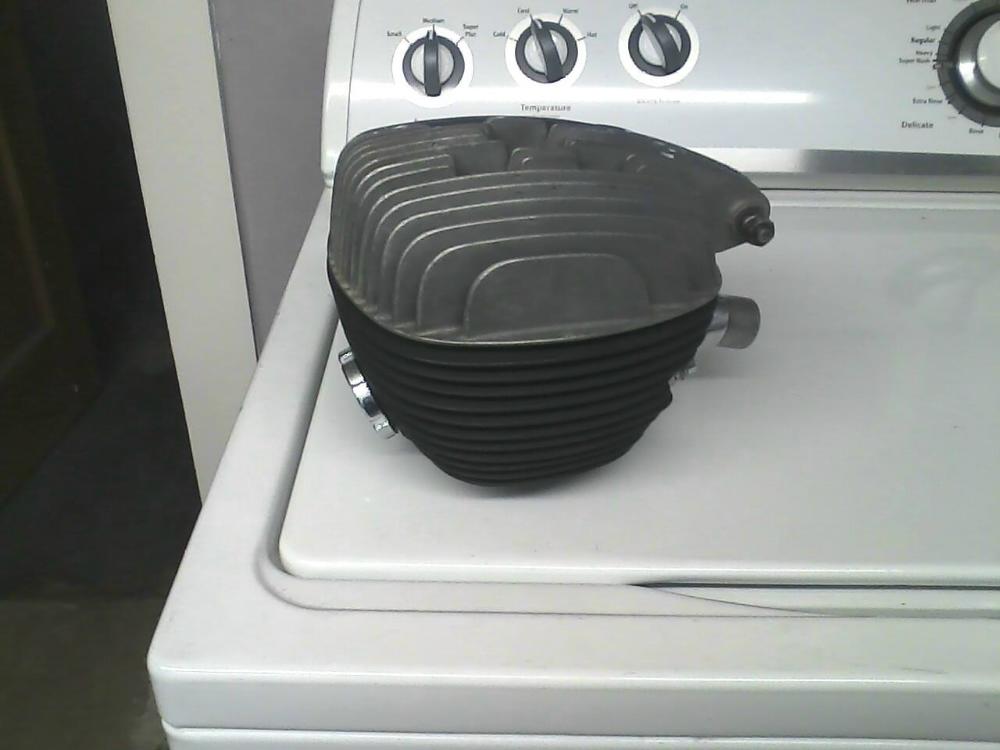
Crunchy fuel line and rear brake light wires just hanging. (Wish I would have took pics before I removed the air cleaners)
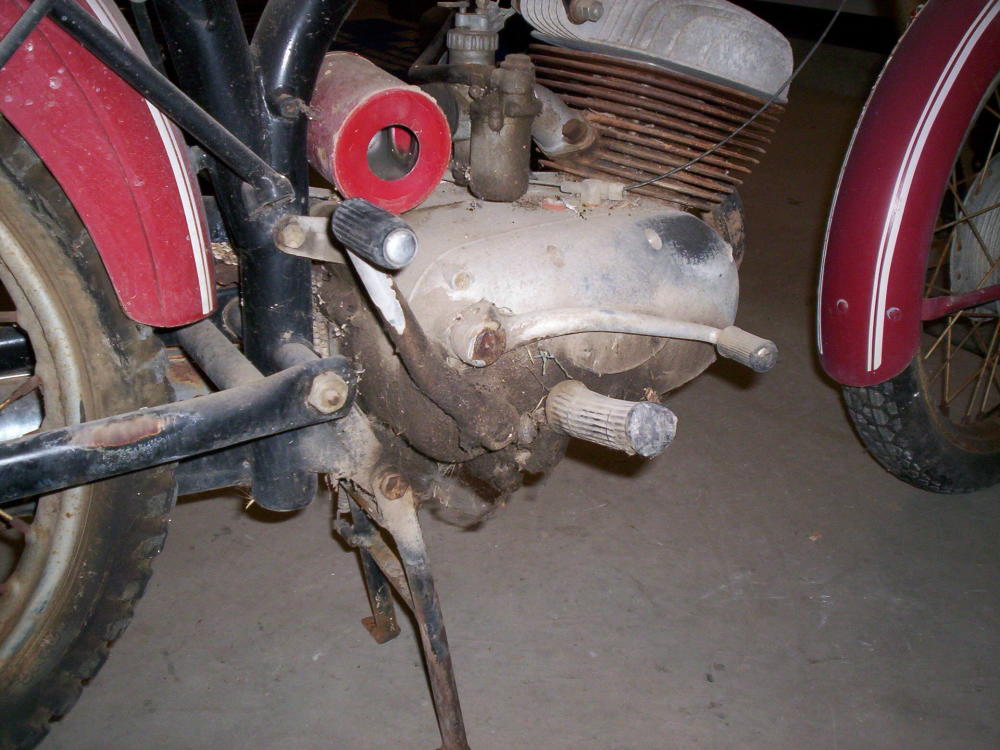
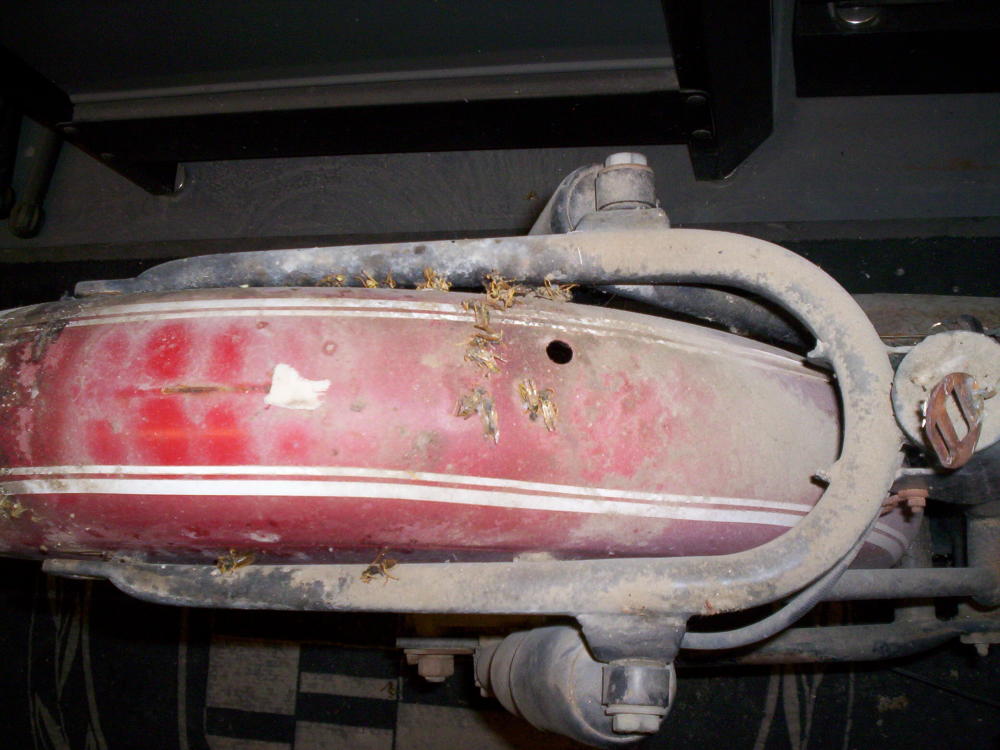
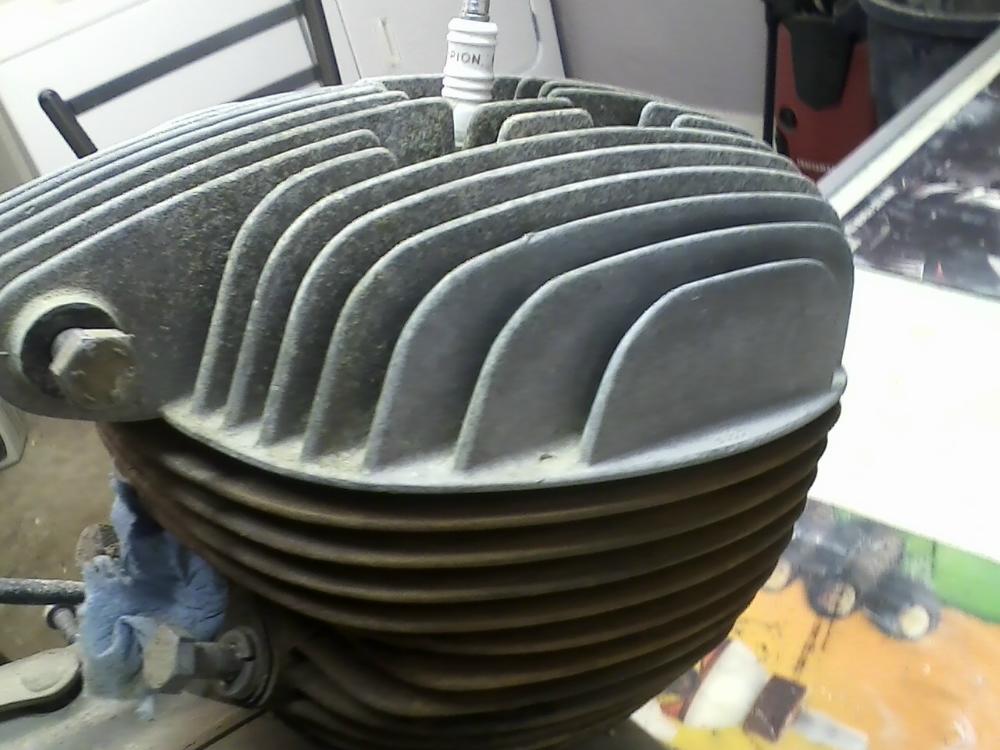
35 years of sludge
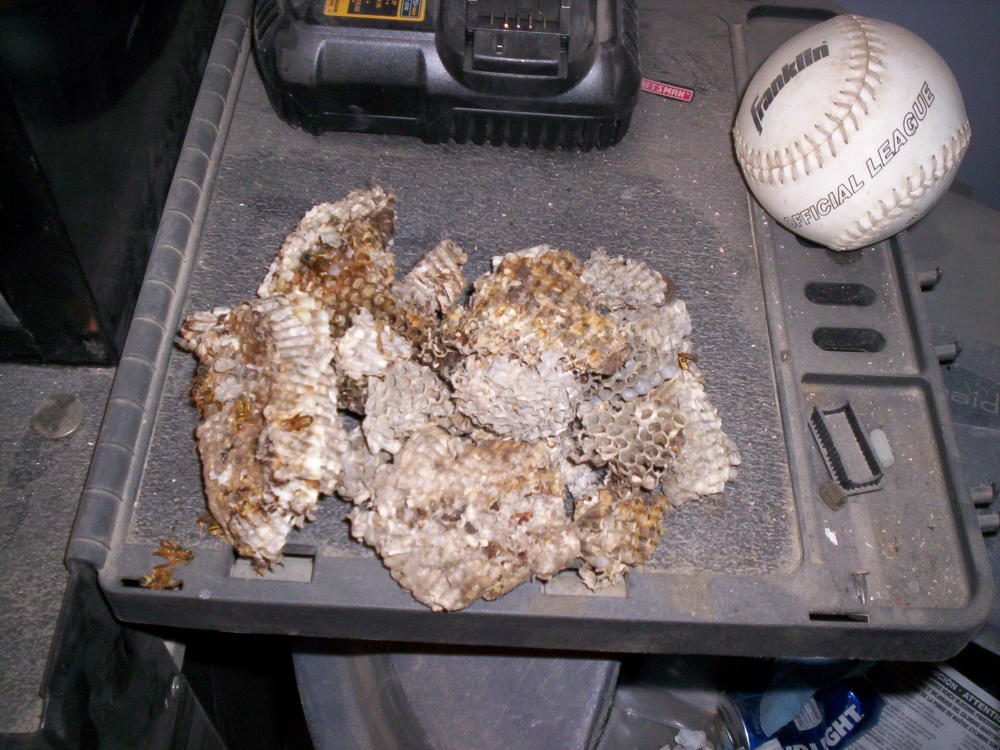
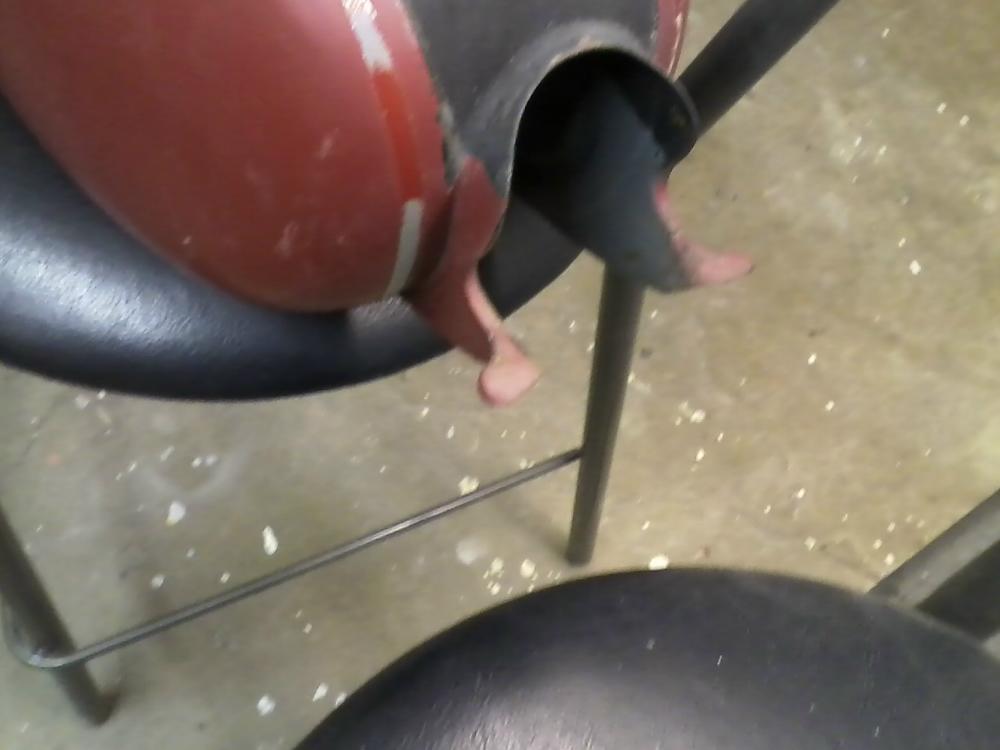
Wasps had lots of time to build nests everywhere.
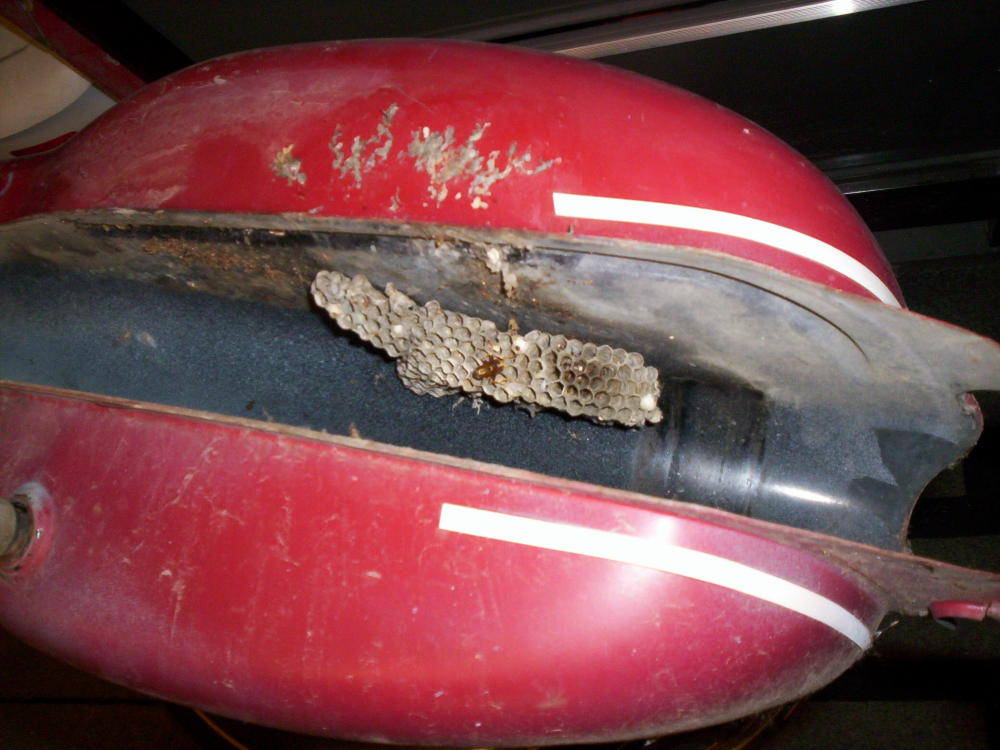
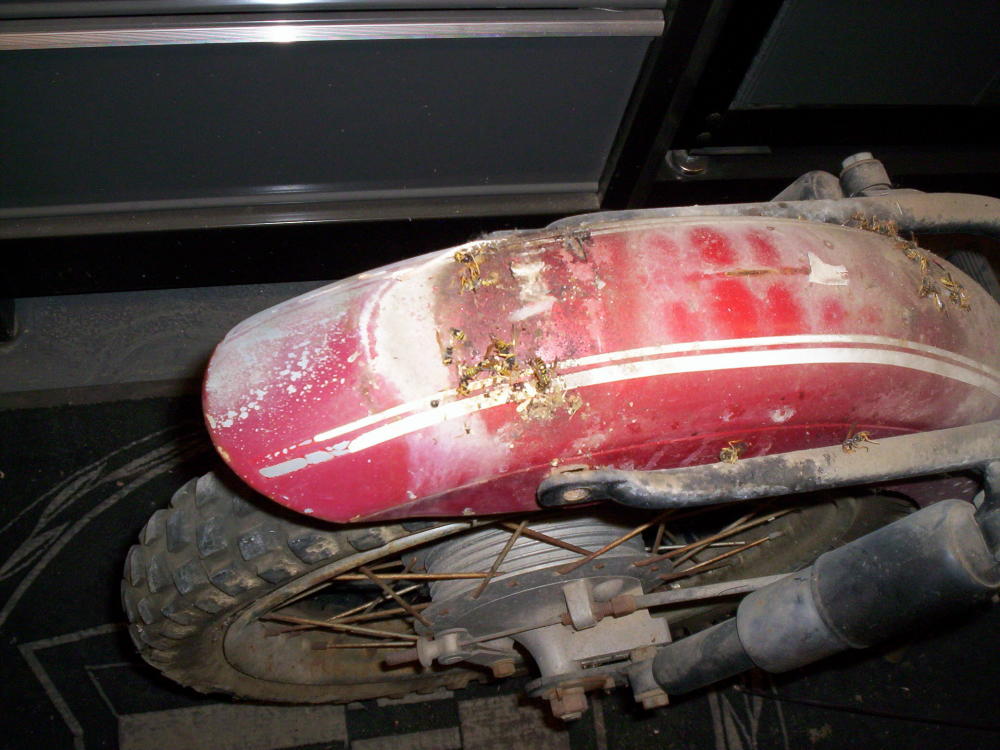
This was most of them but not all.
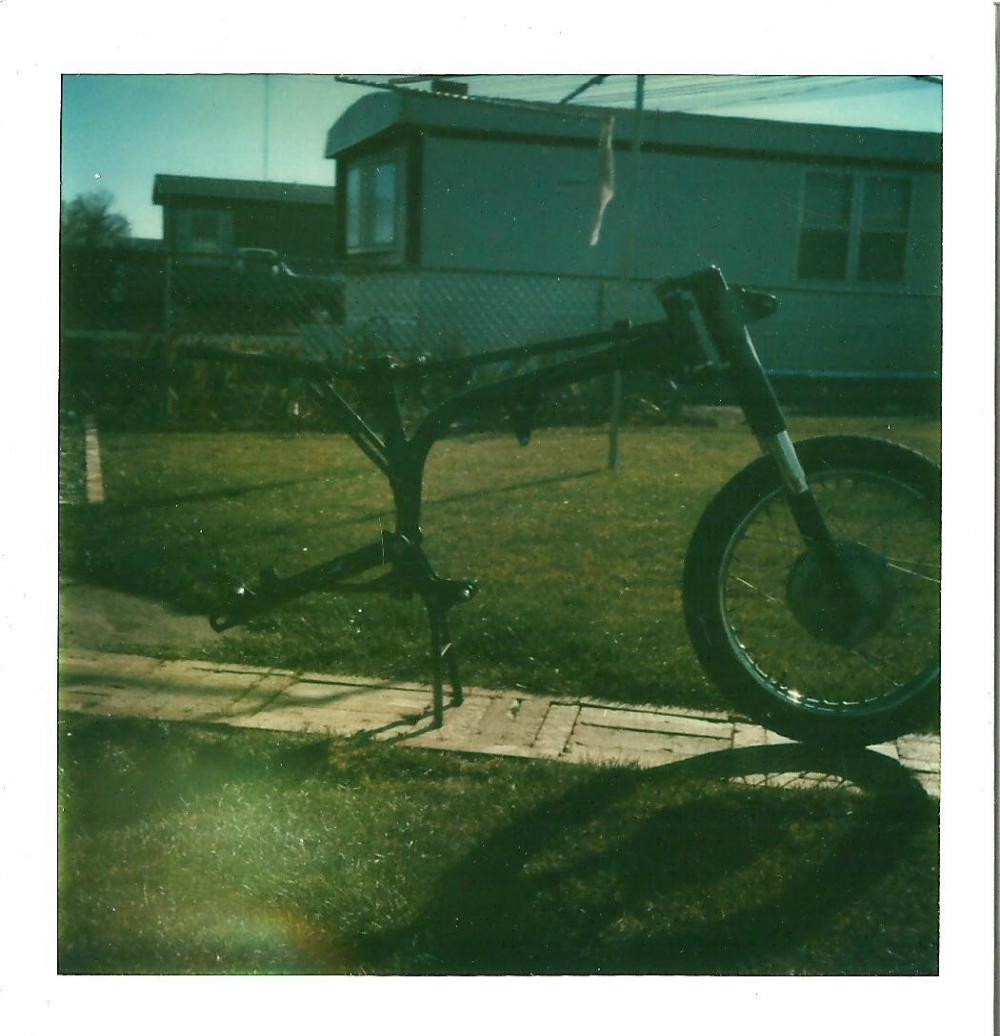
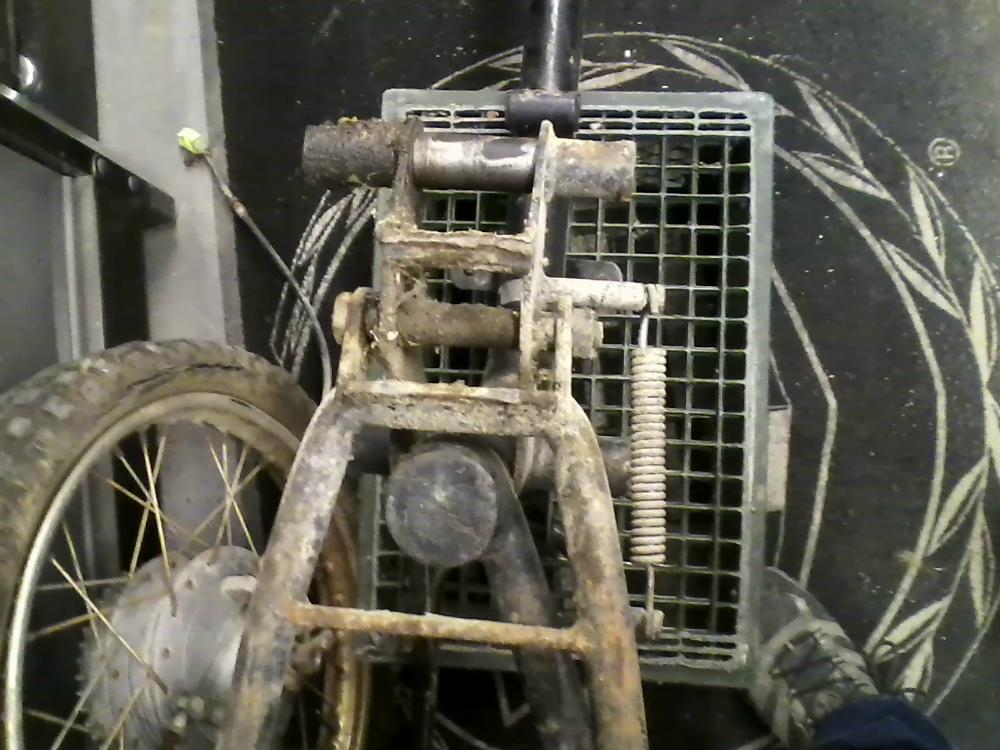
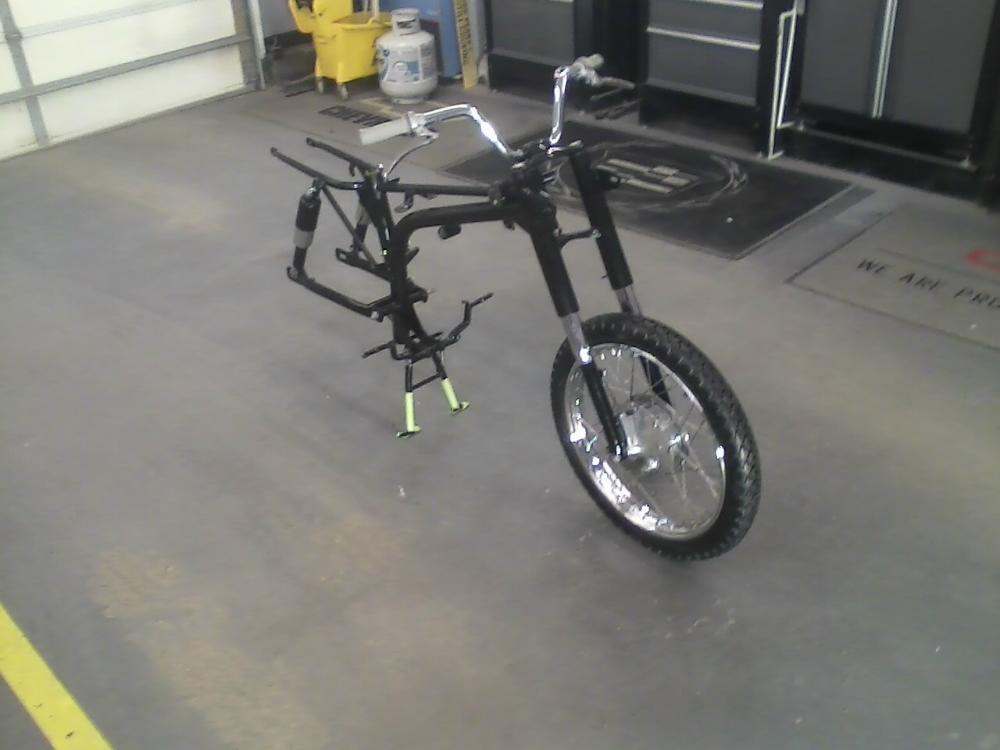
Tear down has started

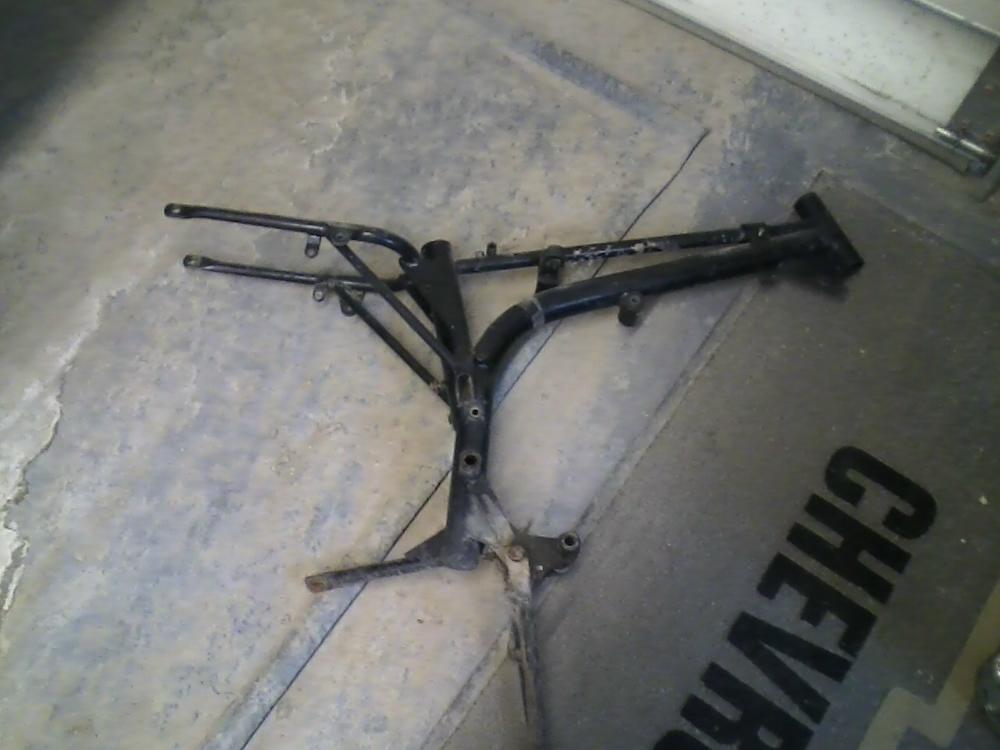
As far as it can go.
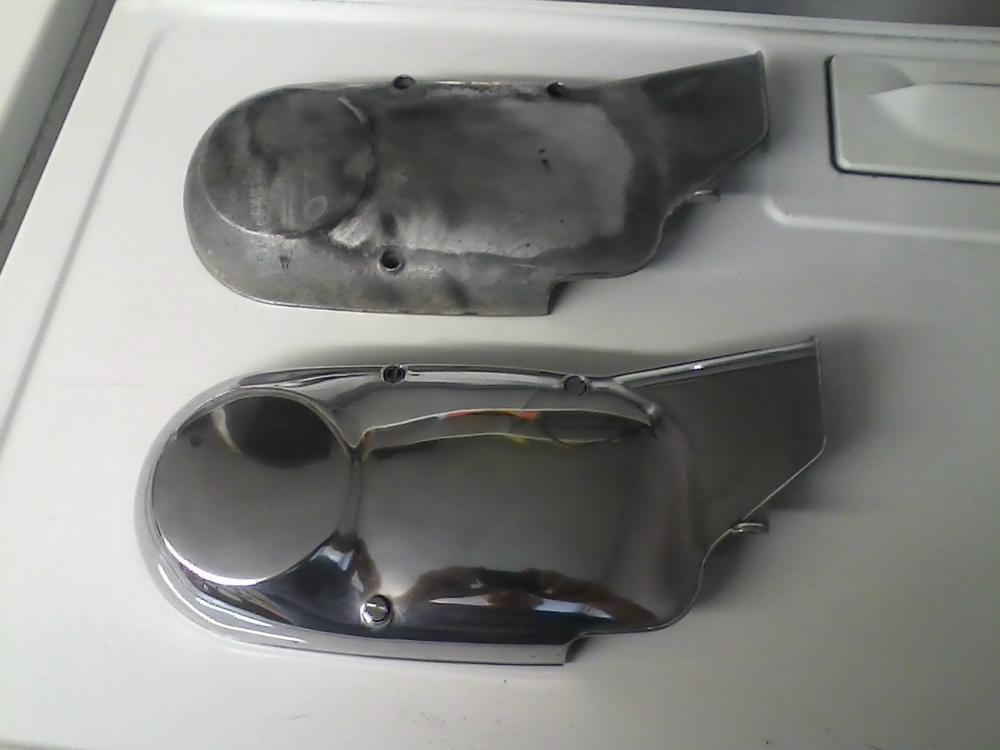
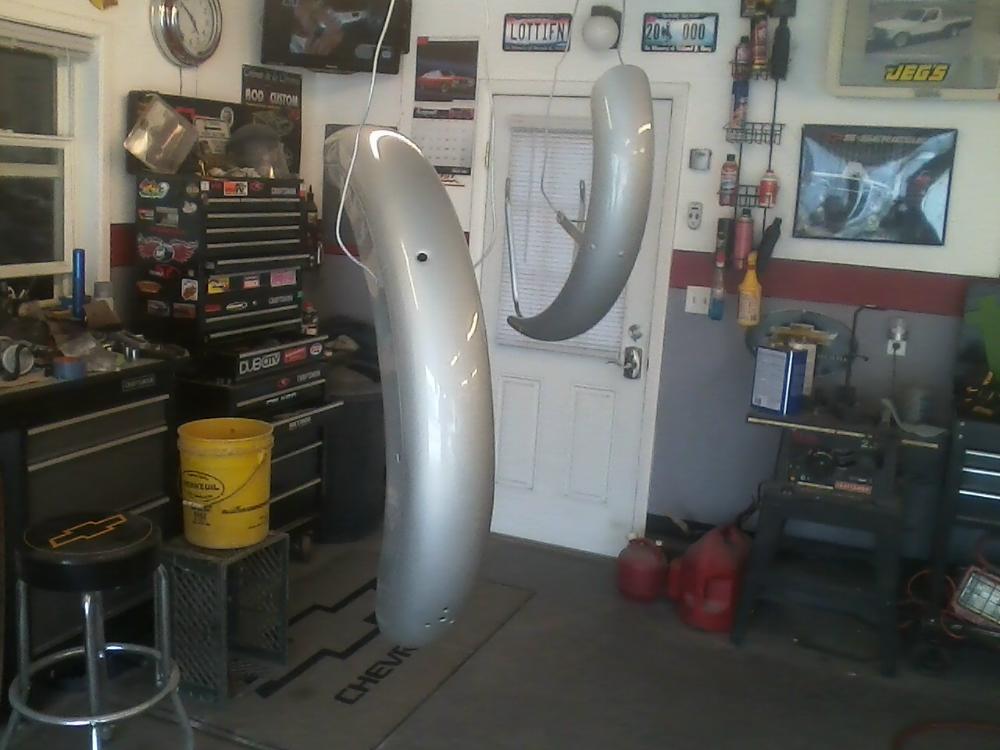
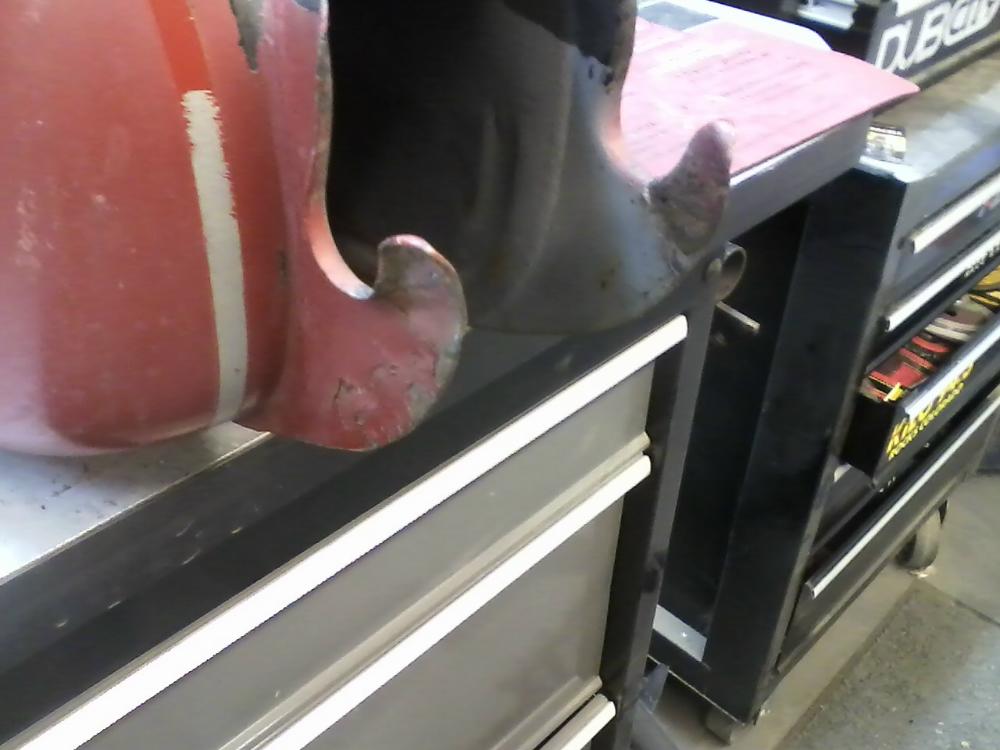
Another set of fork covers as mine were to damaged to fix.
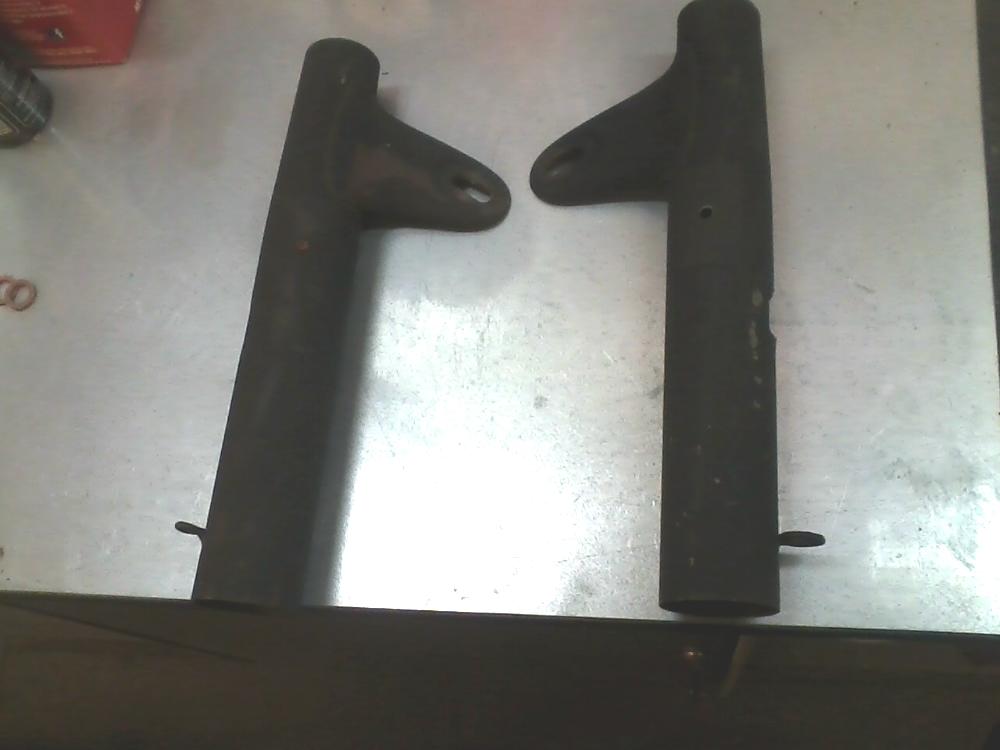
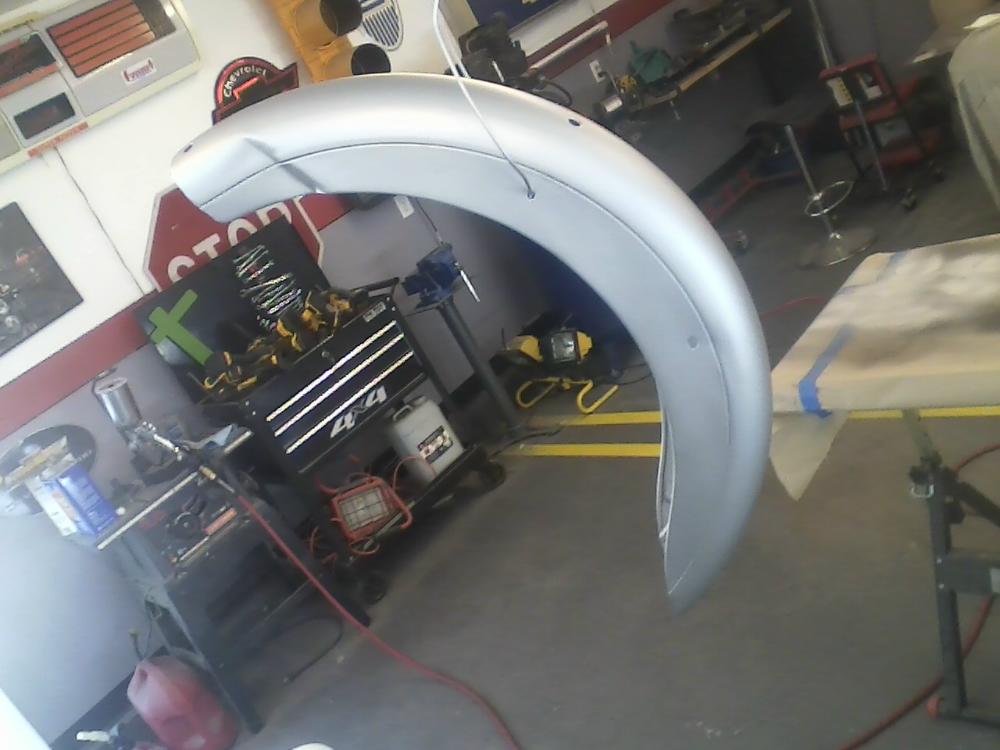
These are from a 69 which had side reflectors whtch the 68 does not have.
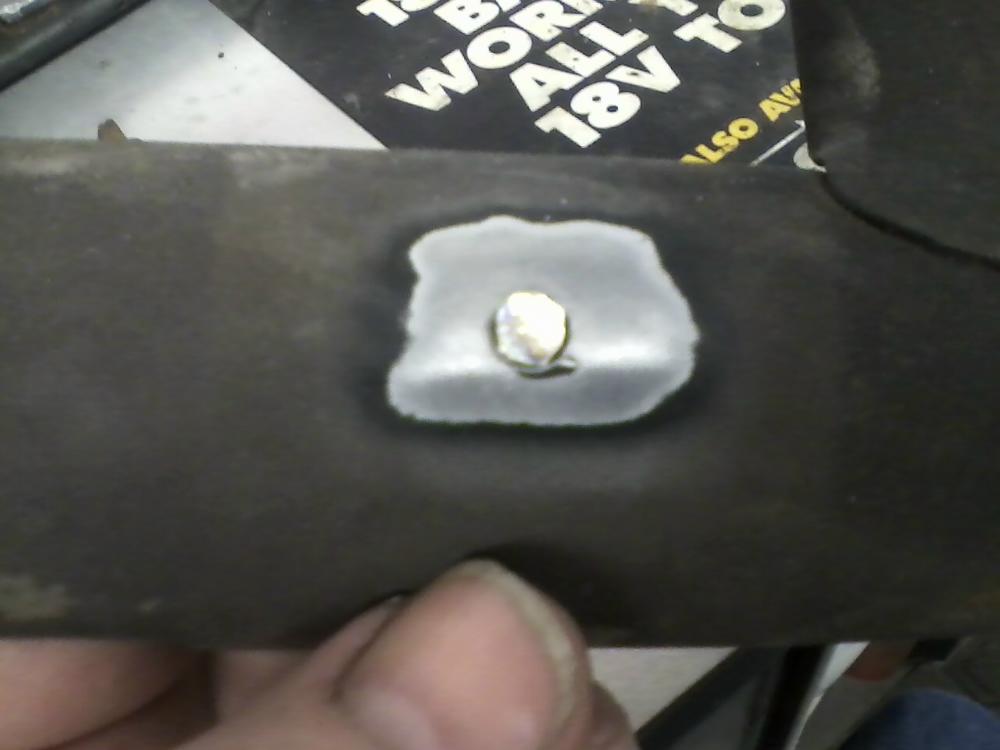
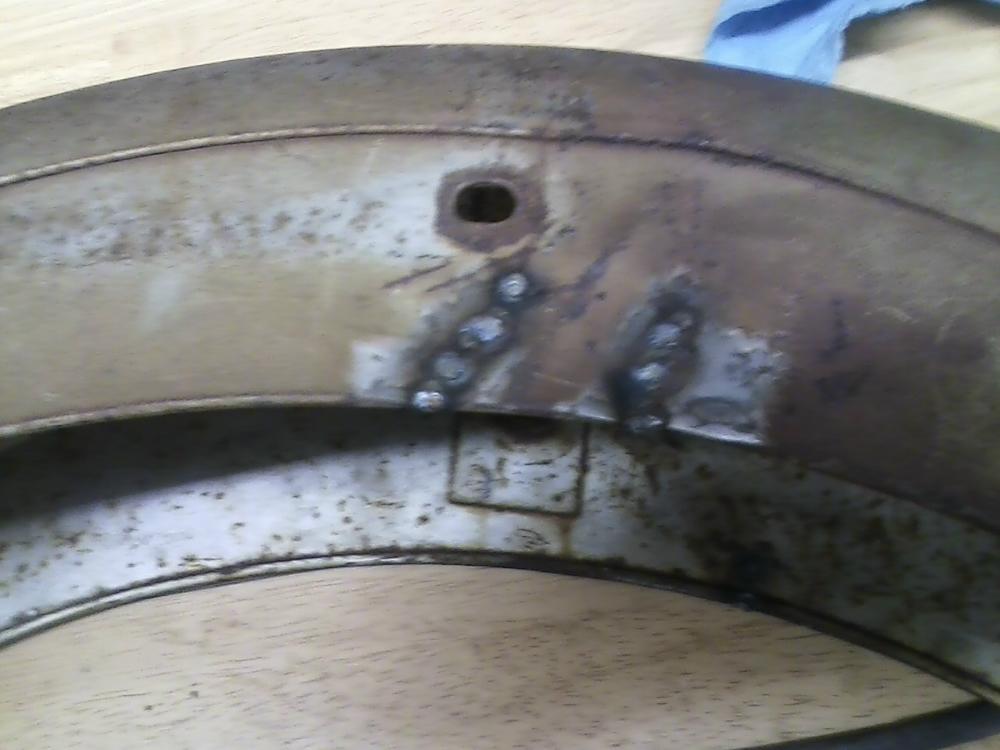
Made plugs and welded up the holes.
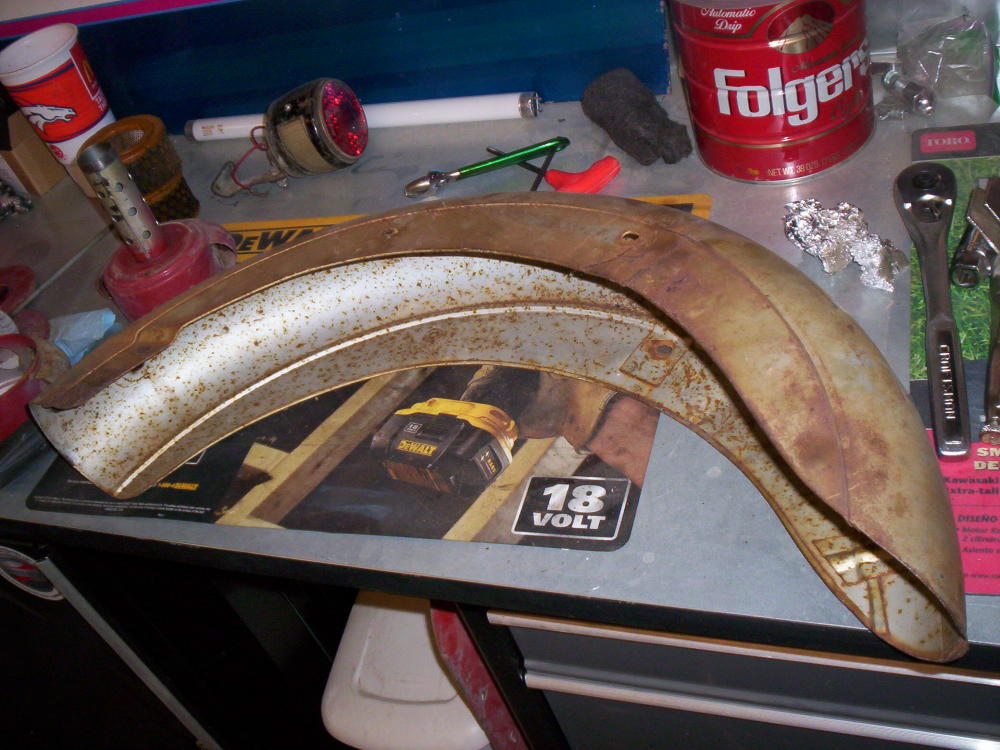
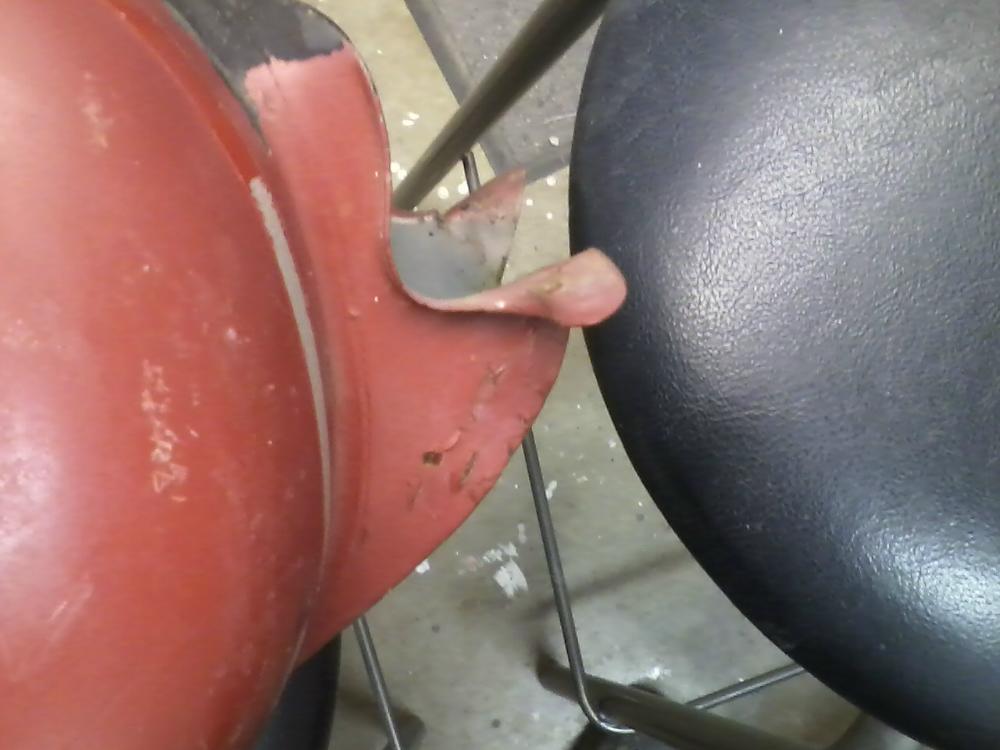
Another fender I got off ebay as mide had been bobbed due to damage, this one wasn't as good of shape as I thought it was and very rusty.
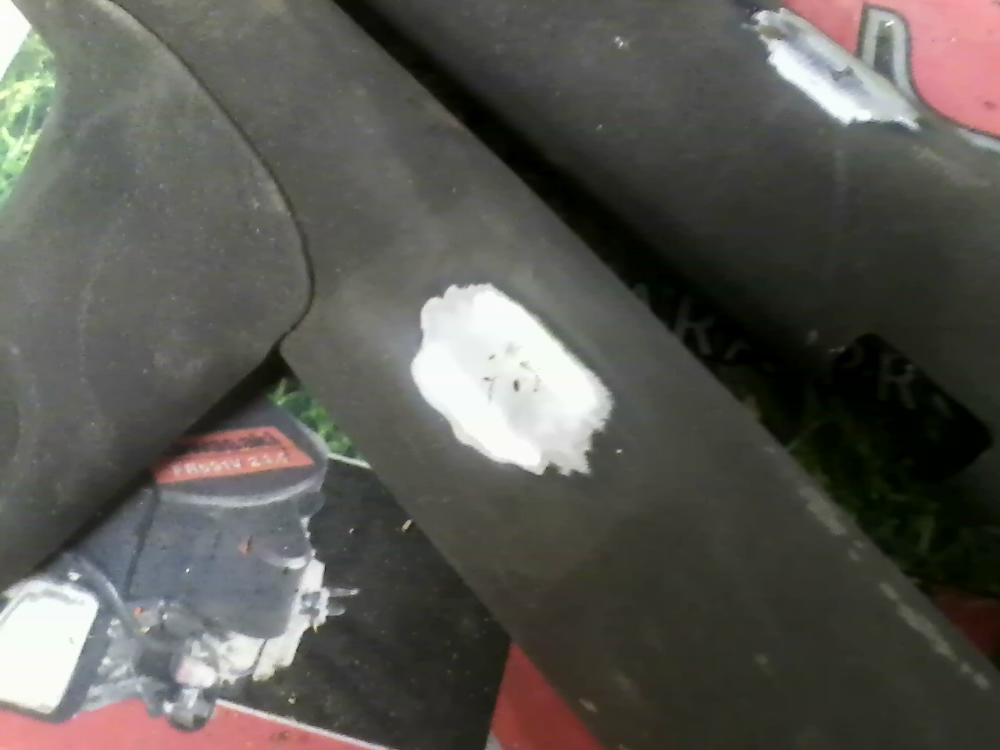
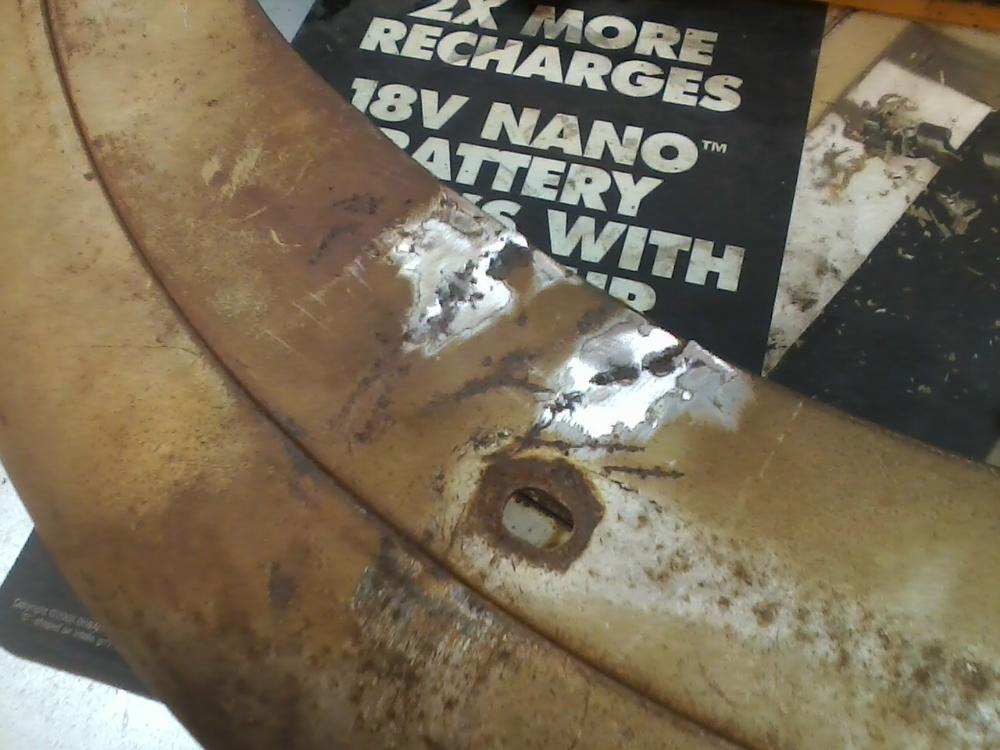
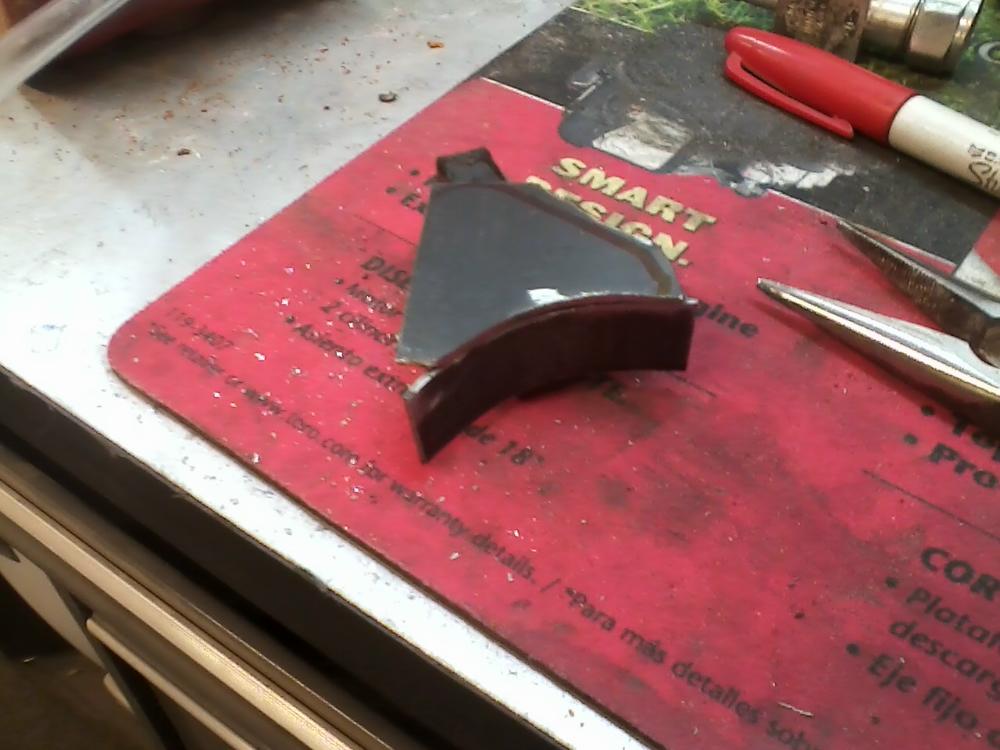
Tack welded the rips in this fender, Must have been a common thing with this design.
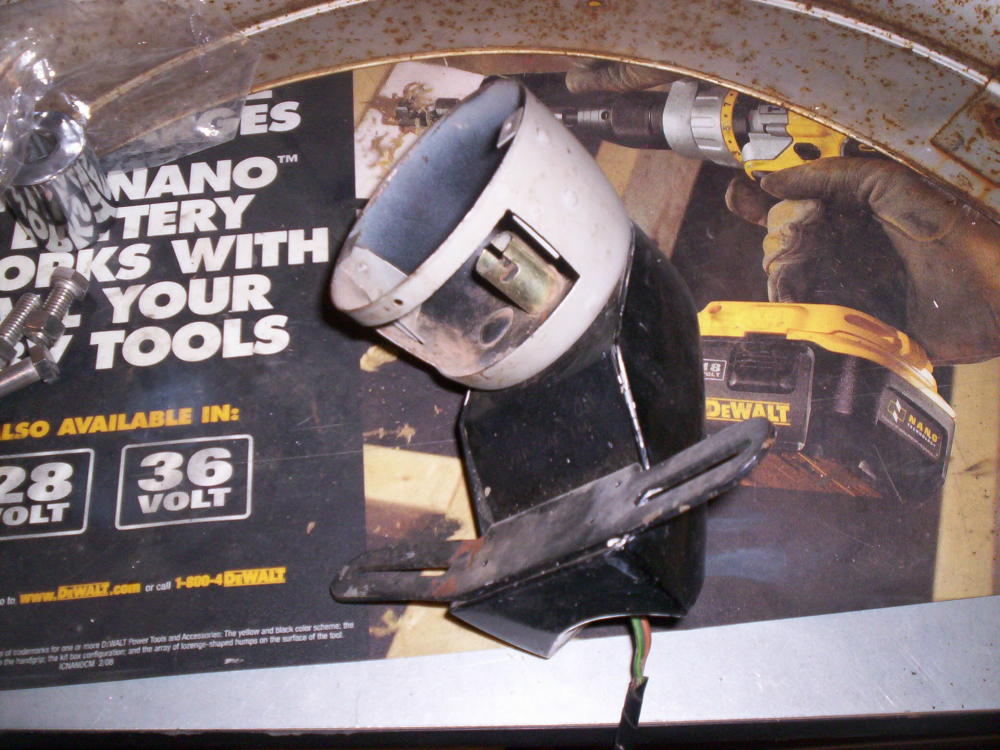
Tail light and housing I picked up on Ebay, tail light is wrong for my bike, the search continues.
Foot pegs, the right side one is pretty bent, wonder how many times my uncle and aunts dumped this bike.

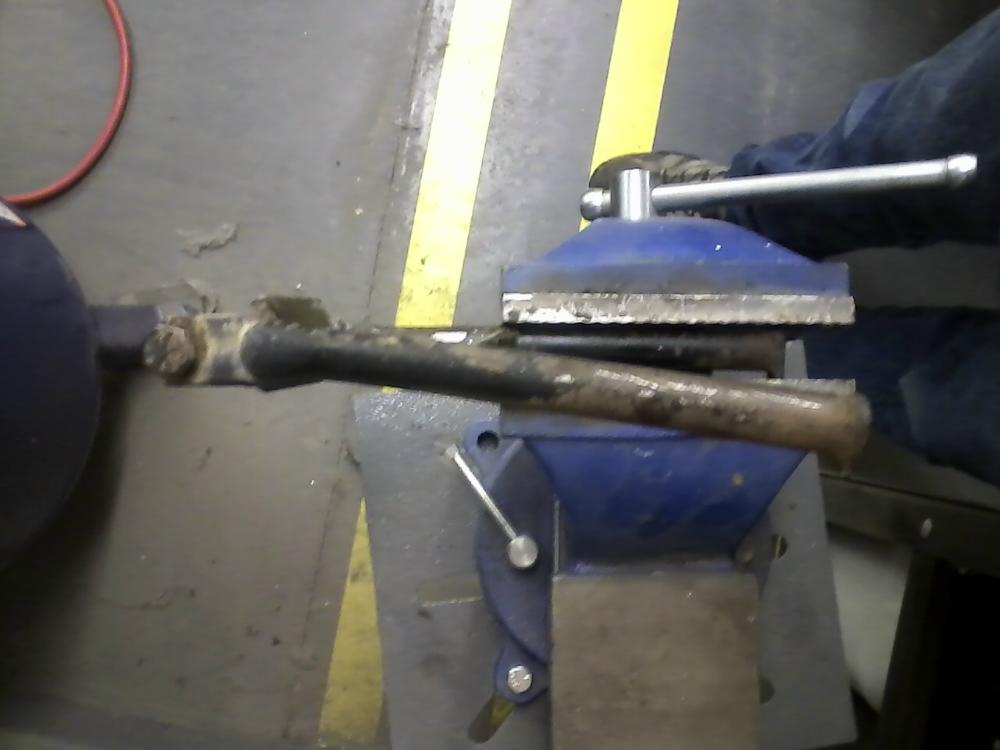
Kick stand was also bent, got it straighted out.
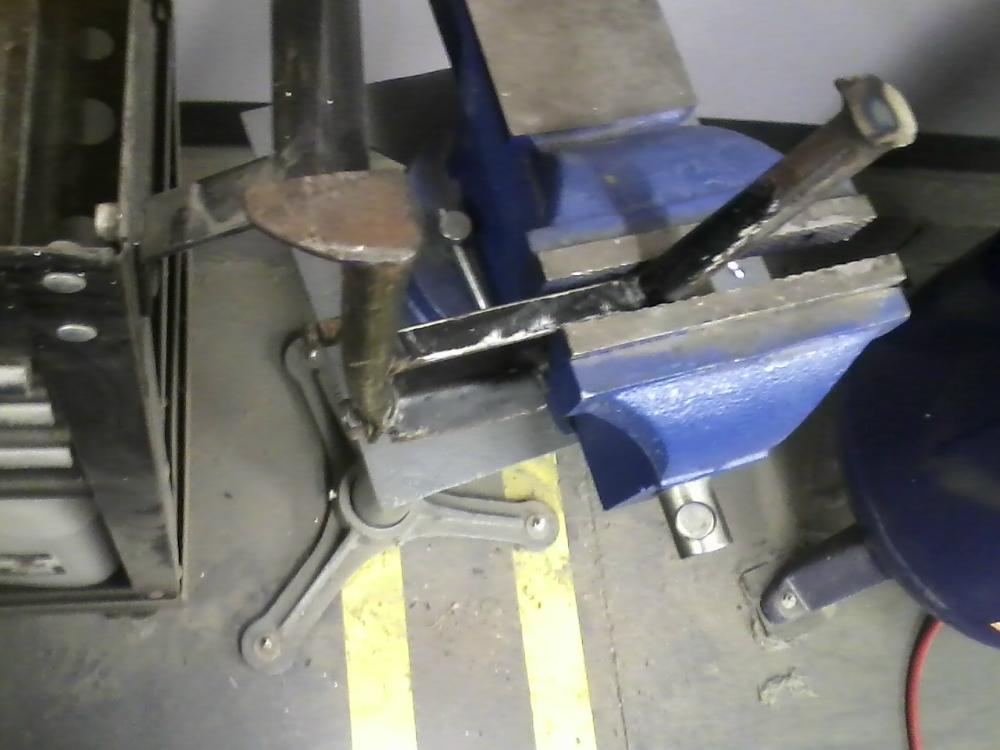
The feet on the kick stand were almost worn off, cut one off in this pic.
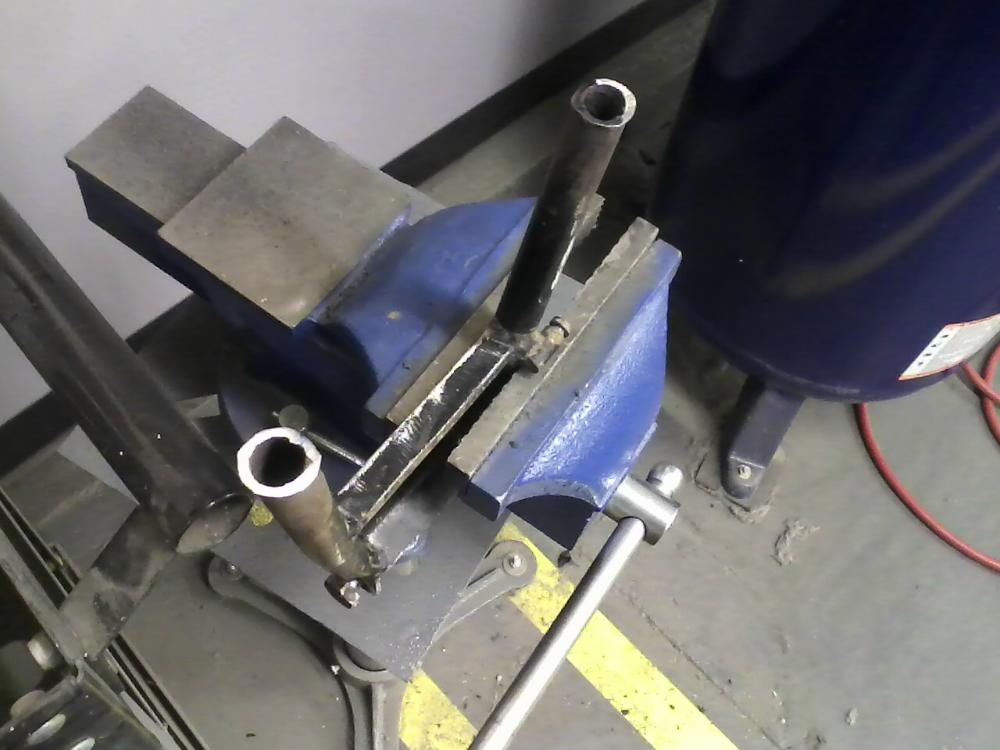
Both feet cut off.
Made feet with flat stock and welded them on.
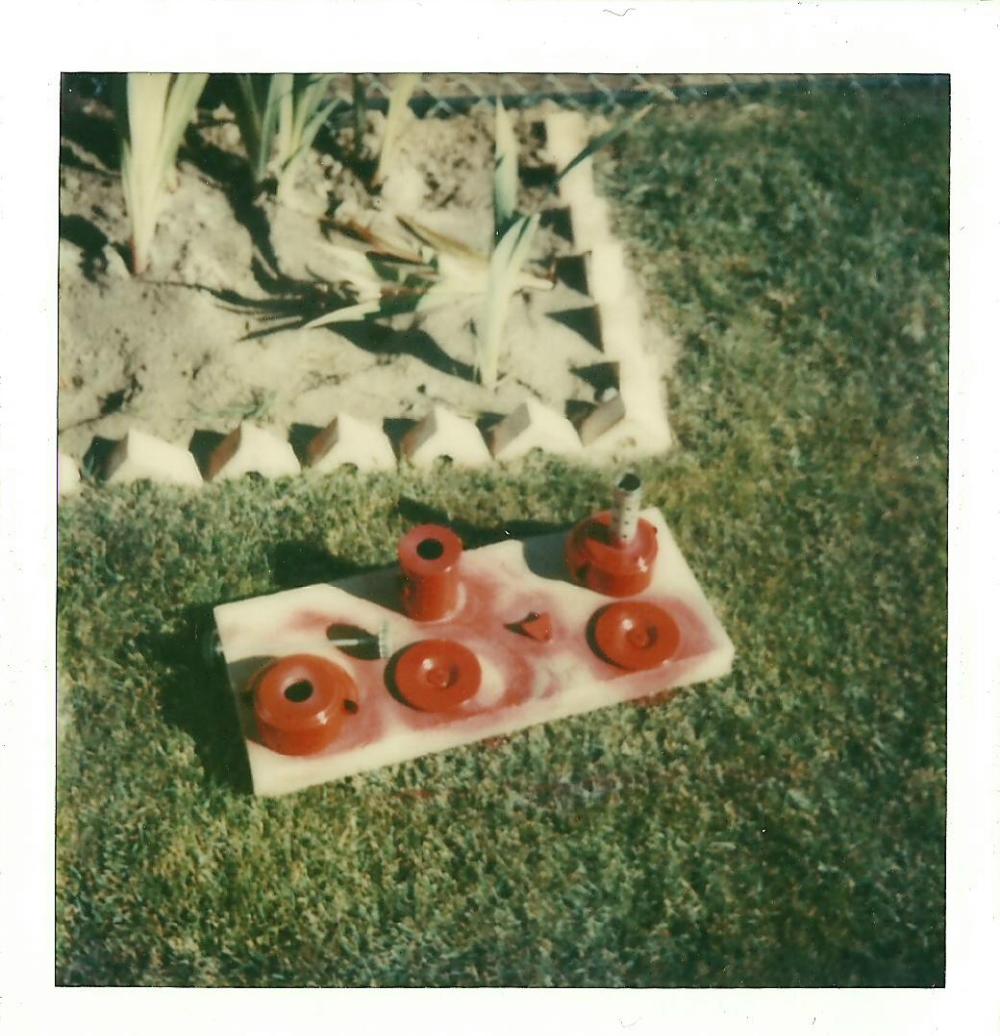
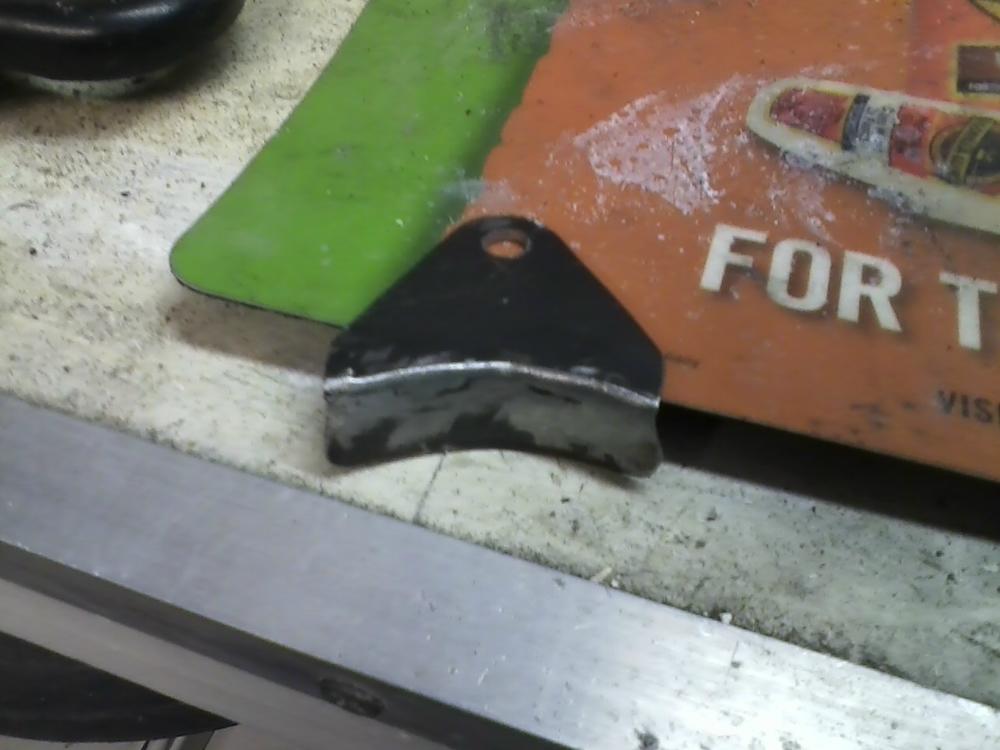
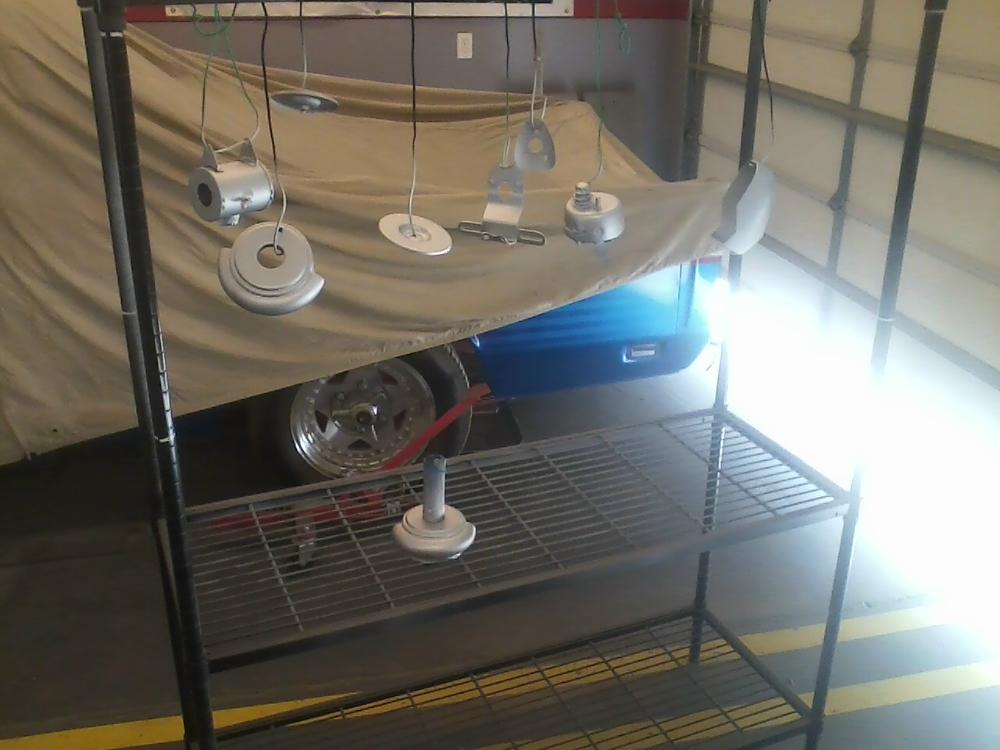
One of the air cleaner brackets was missing so I have to make that also.
Matching the curve to the housing.
Mocking the bracket, the original was one piece bent, but I had no way to do that so I welded 2 pieces together.
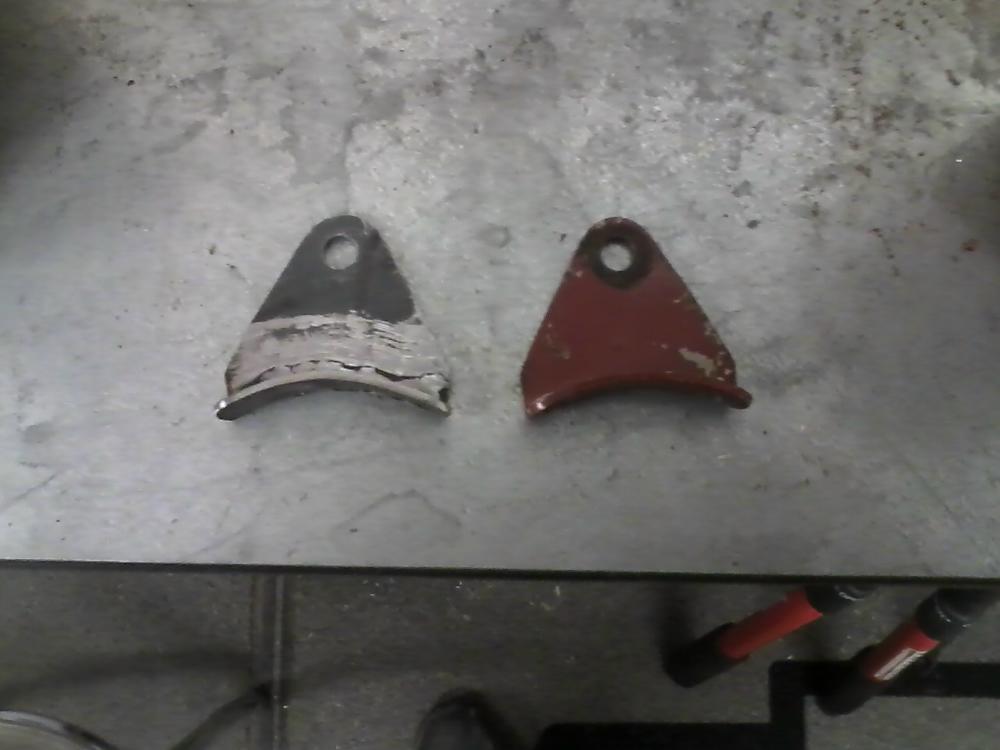
Welded and ground.
A little more grinding and it will be identical.
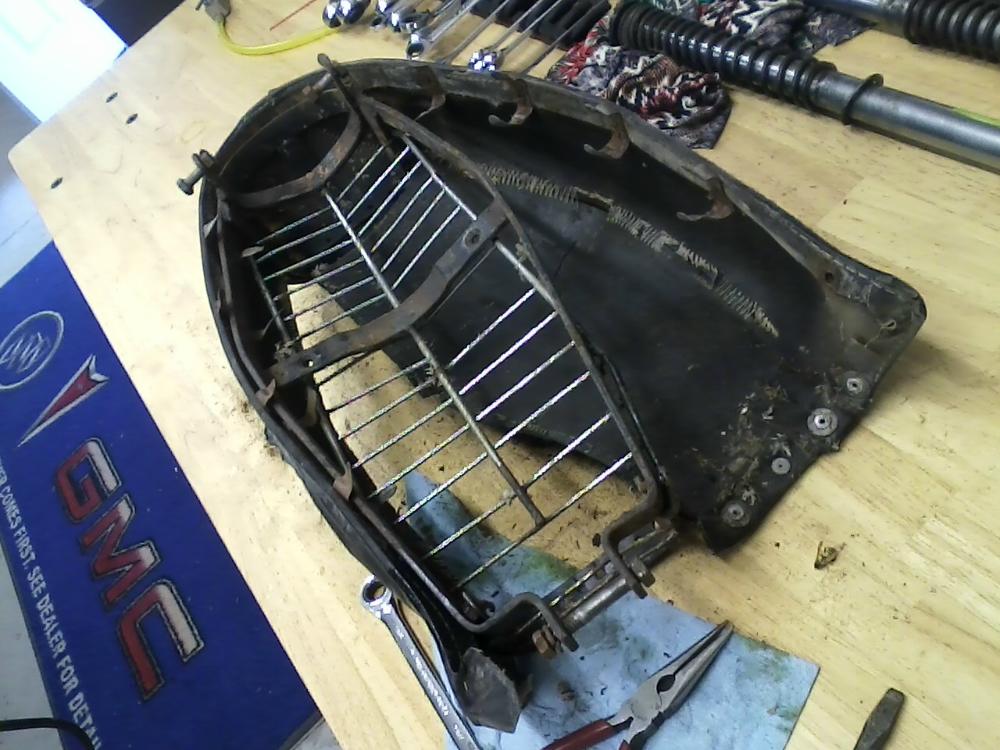
Not sure what happened to the seat but my grandfather repaired it with a wire shelf, thick padding and house carpet.
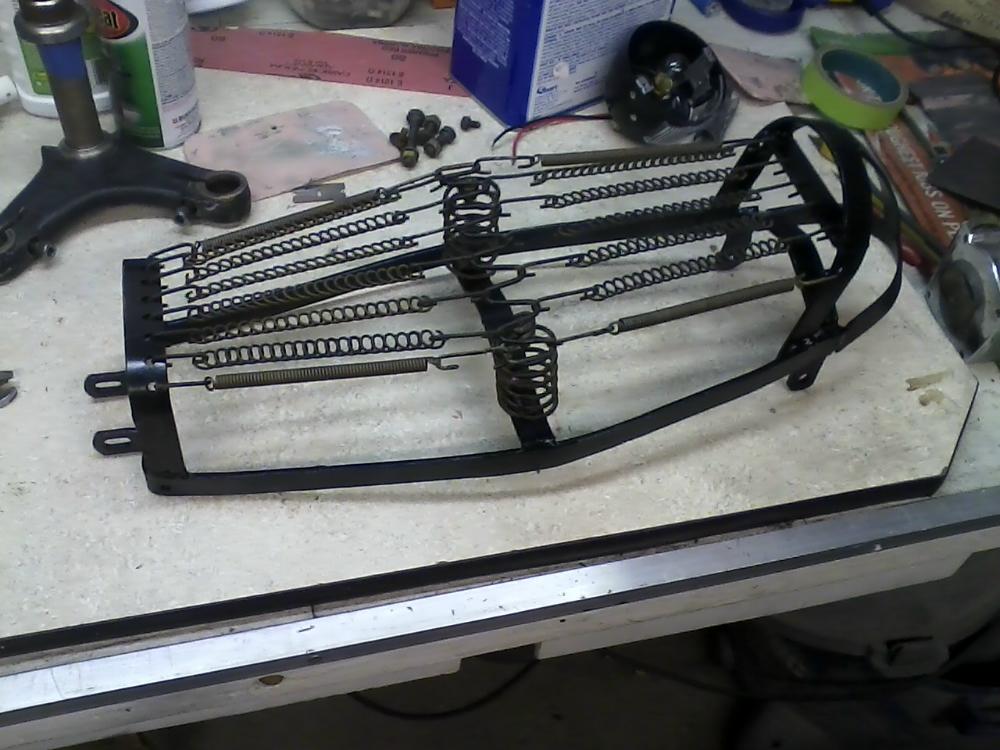
Another seat from Ebay of course. Needed the springs and the cover to use as a pattern for a new cover.
Have to transfer the springs to my seat frame as the one I bought is for a different model (note the rear mounts on mine and the other has a center bolt instead)
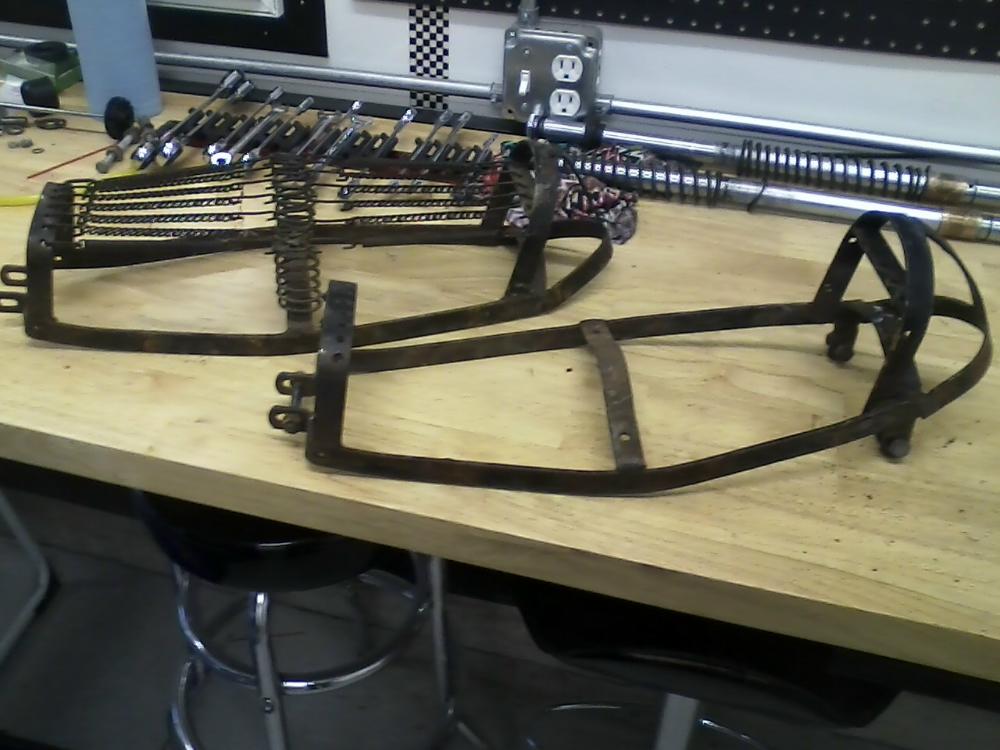
Swapped and had to straighten the frame, notice the center is touching the bench in the above picture.
Original chrome polished out pretty good.

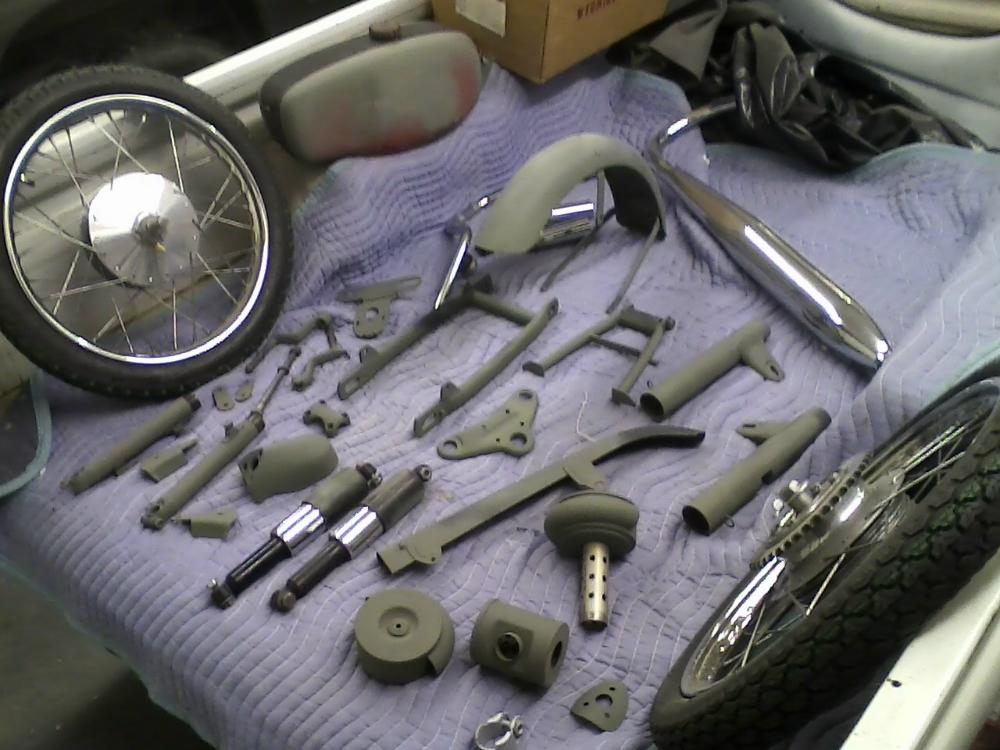
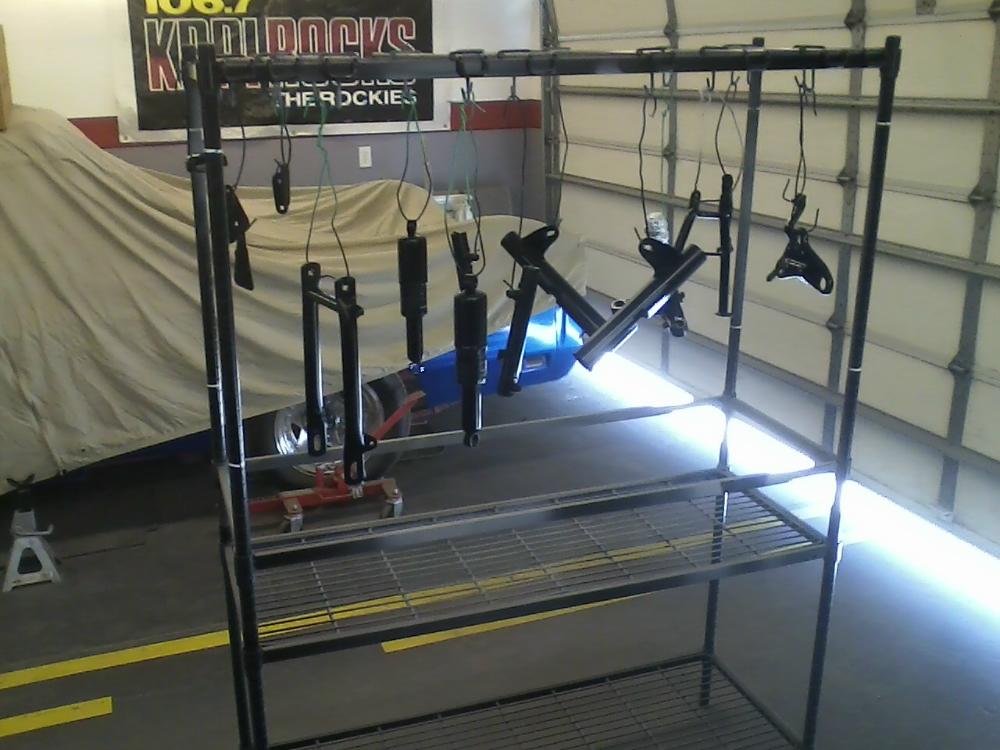
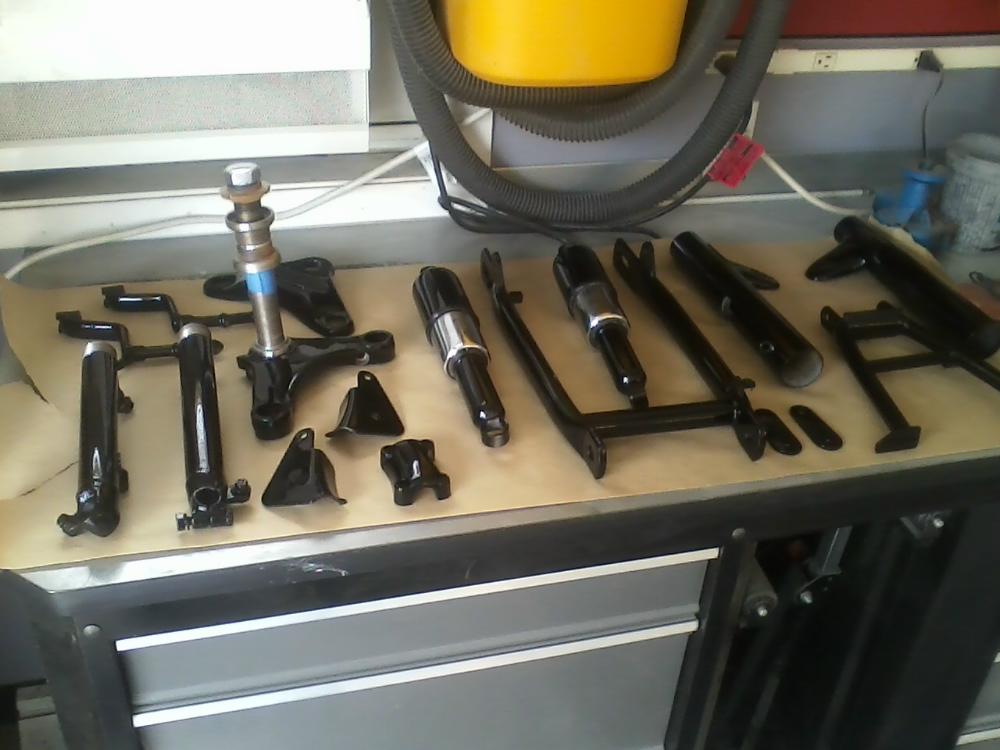
Rims, shock covers, handle bar and muffler ready to be sent off to the chrome shop.

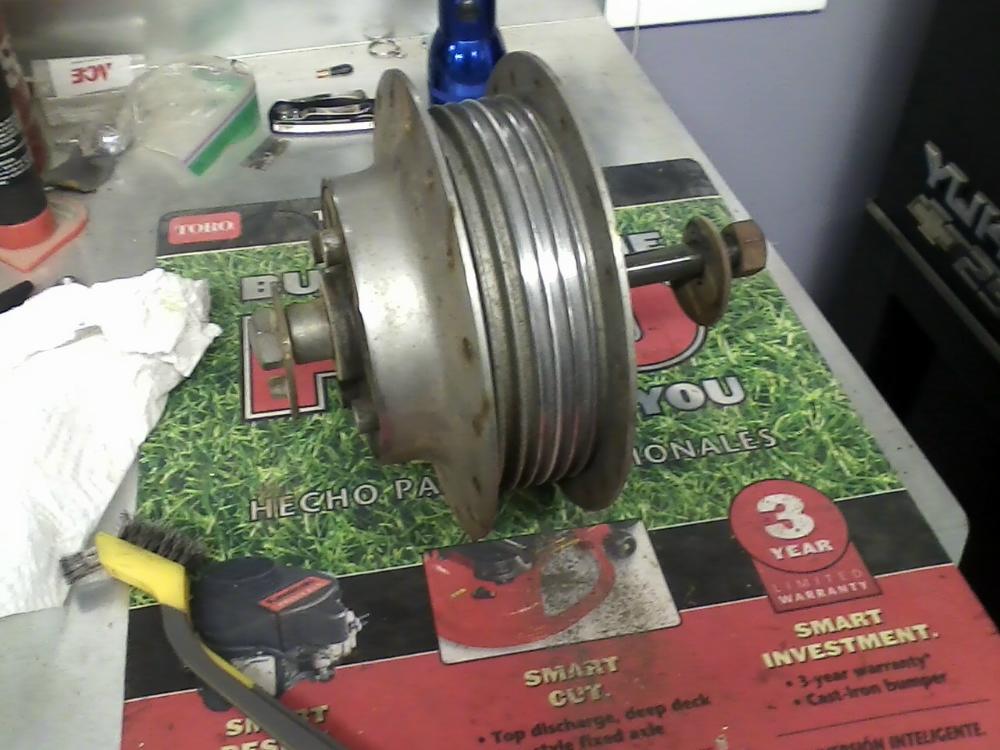
Rusty wheels, to far gone to polish, had to rechrome the hoops.
Spoke nipple soaked in rust remover and polished, could not find enough new ones so had to save these.
Hard to beileve these are from the same bike. Soaked and polished 72 nipples and spokes 3 times each. (so rusty, it kept coming out)

Before and after spokes.
Partial polish of front wheel hub.
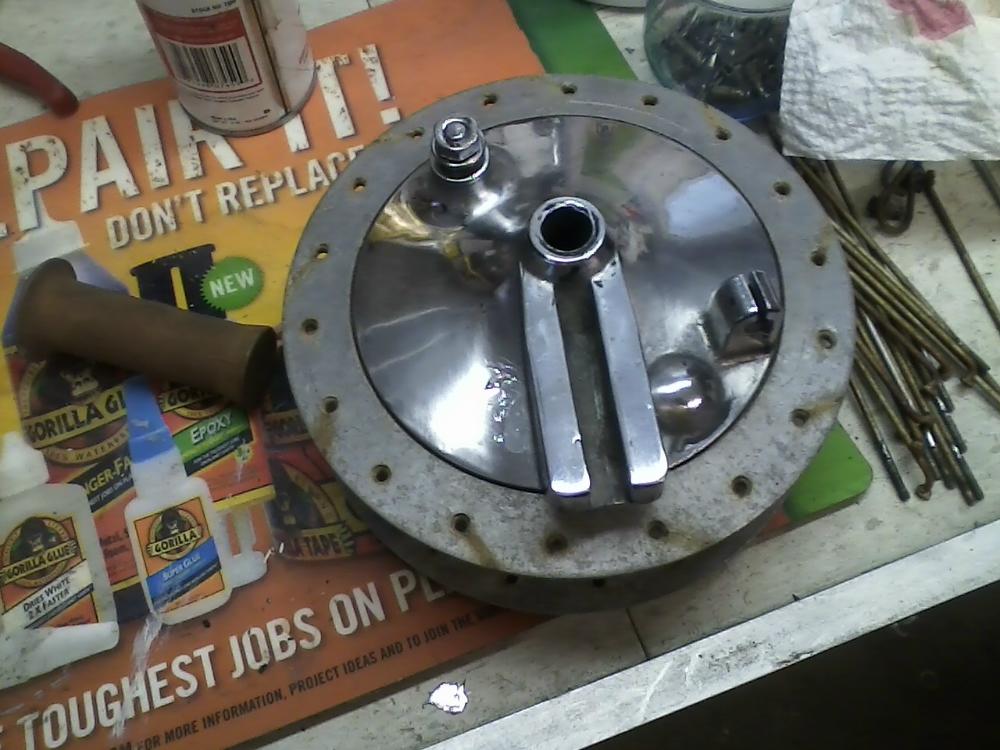
Front hub sanded vs rear hub untouched.
Polishing the hub ribs.
Front hub polished.
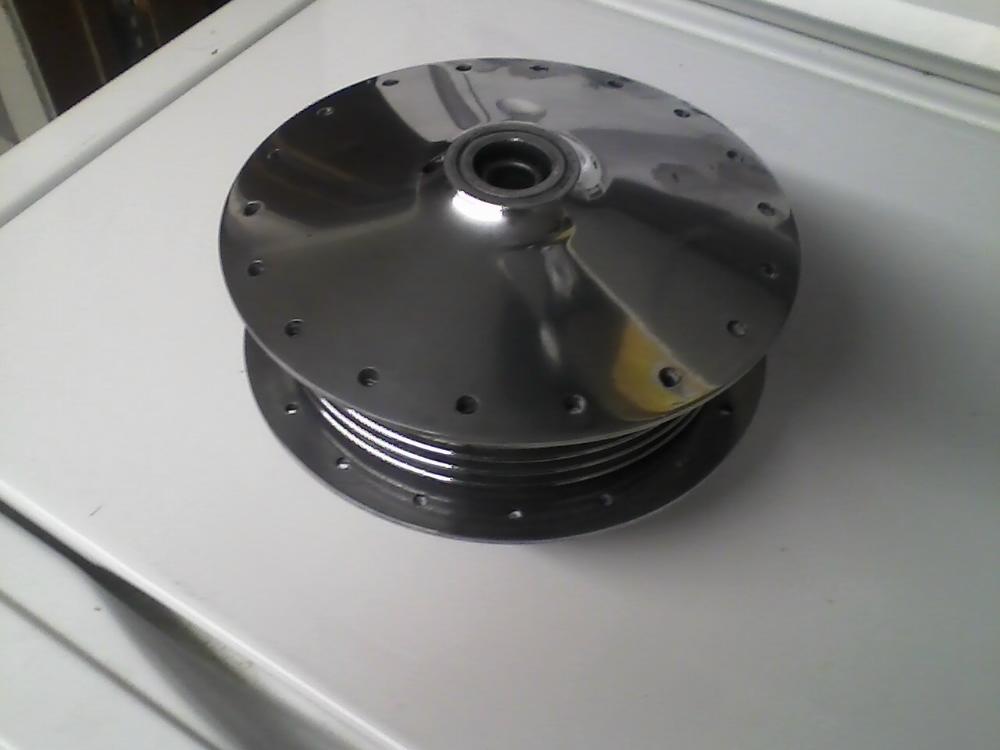

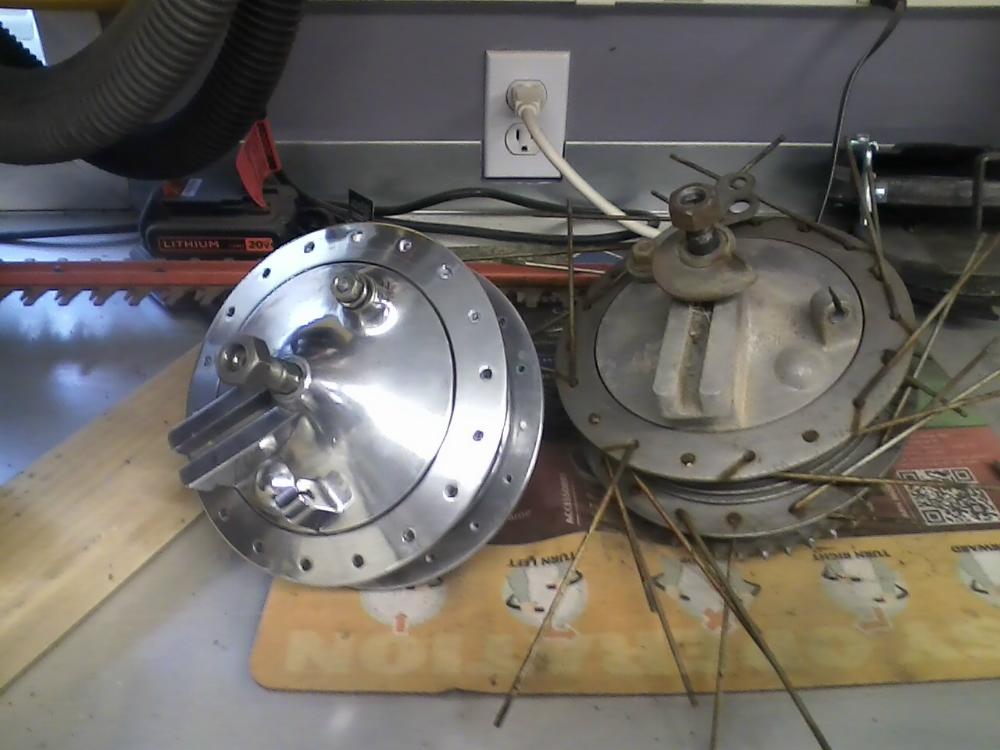
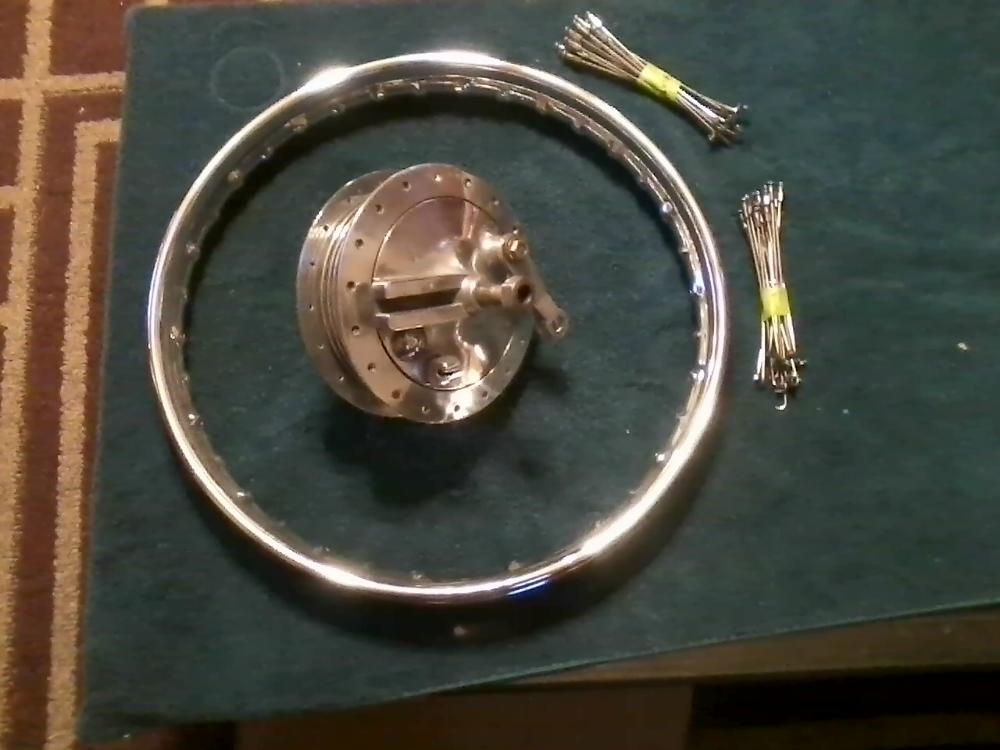
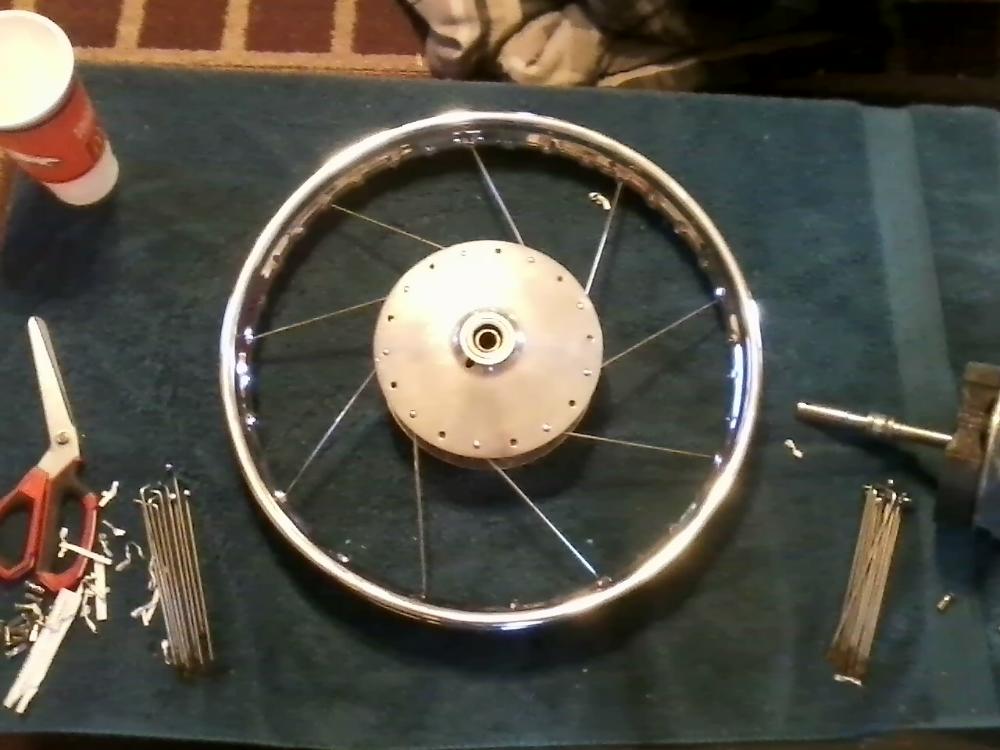
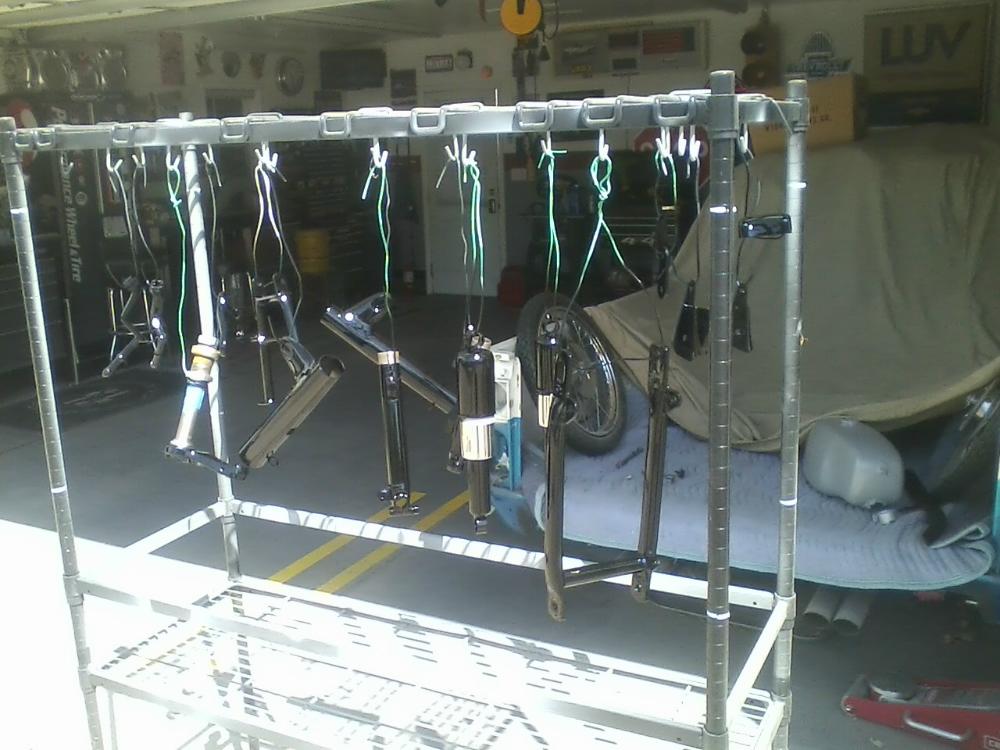
Everything back from Chrome and hub polished, time to lace the wheels.
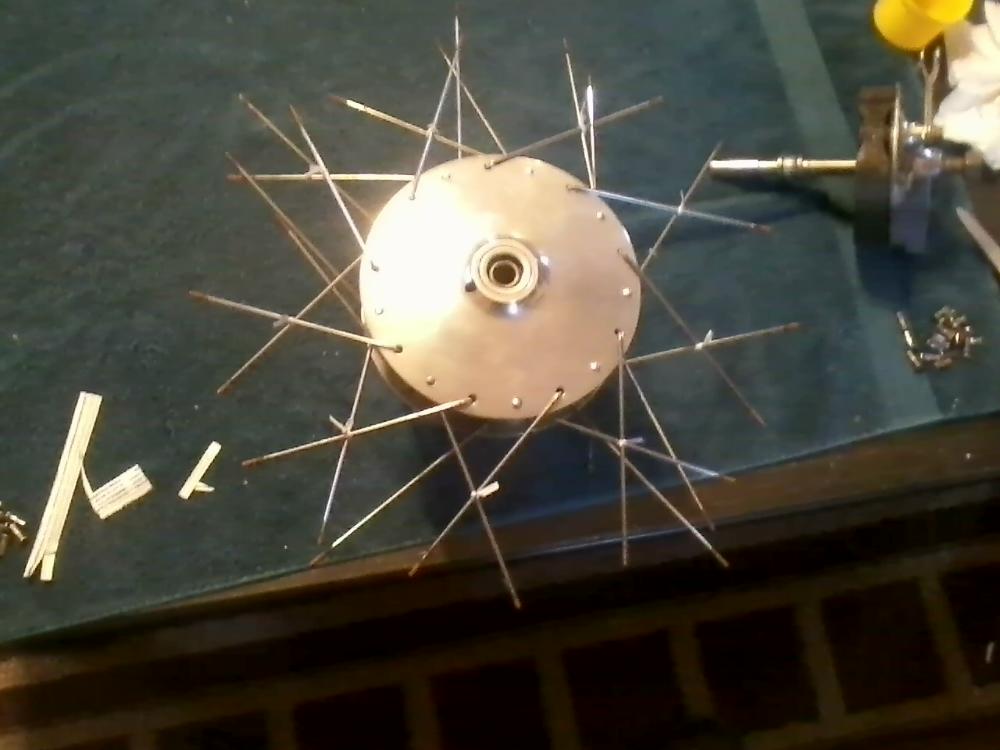
First try fail, the great thing about the internet, there are millions of vids on how to do things wrong!
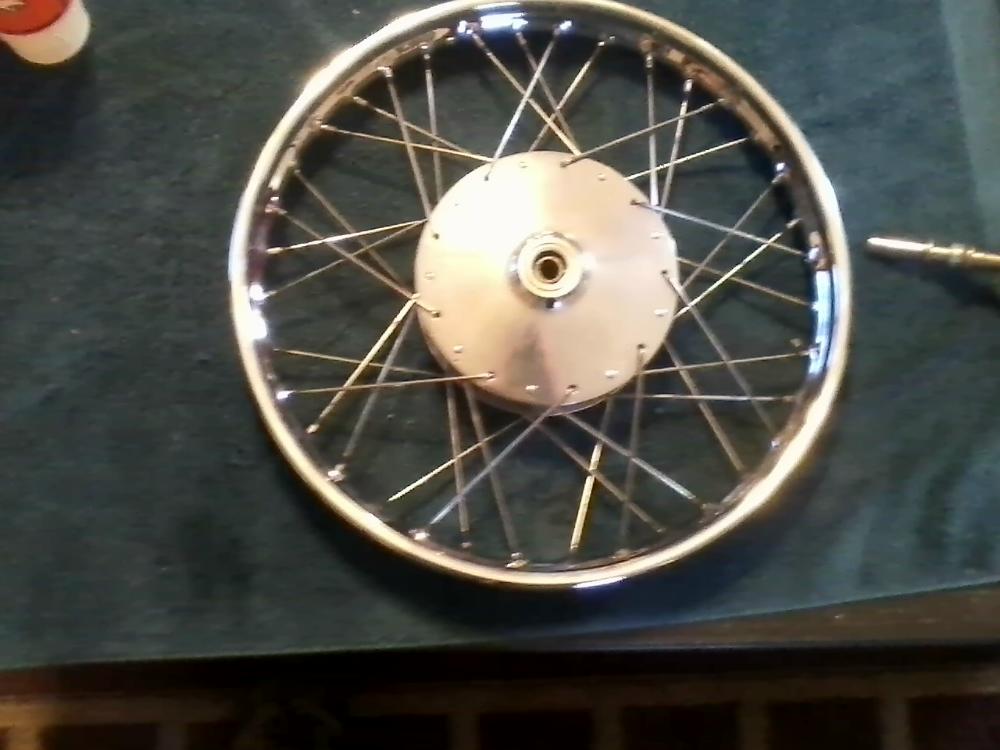
Found a better, easier way to lace them!
Success!
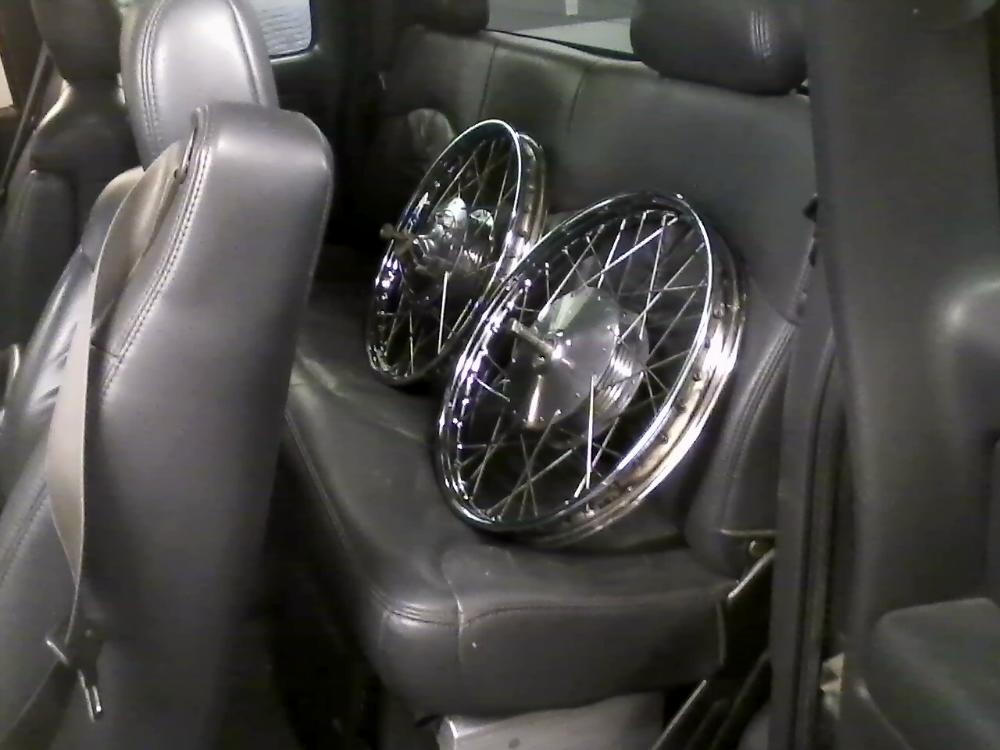
Back from the local motorcycle shop where they tightened and balanced them.
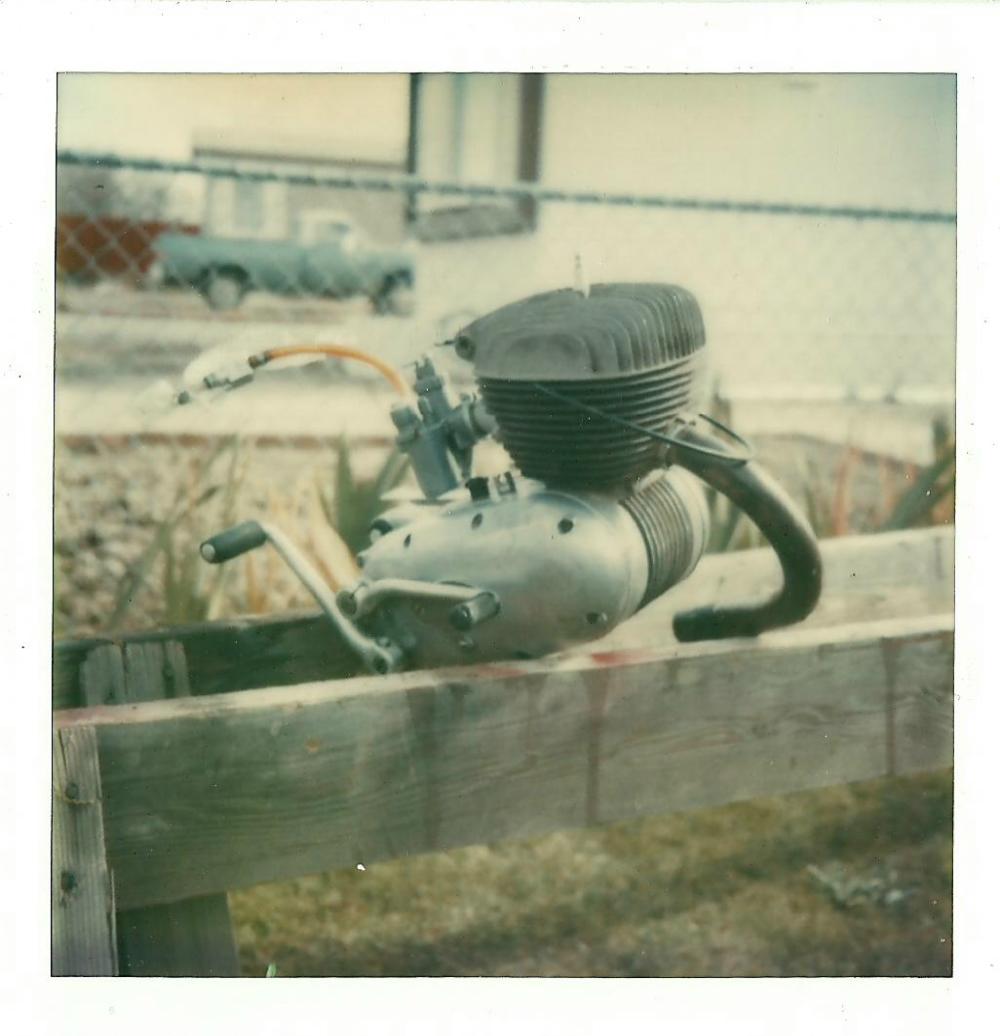
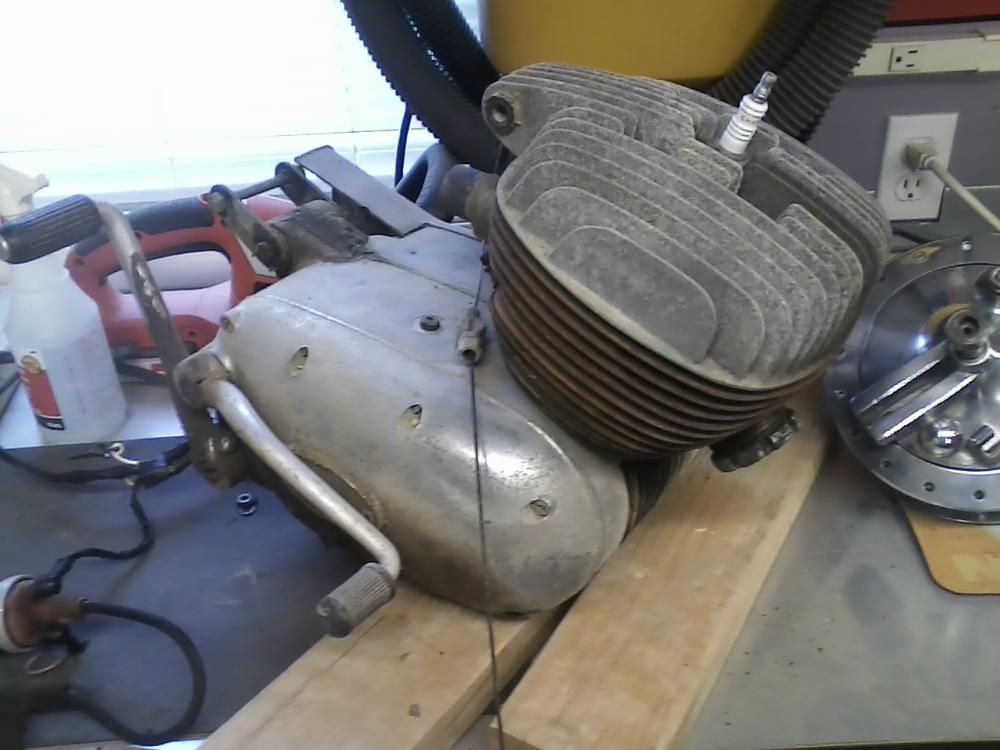
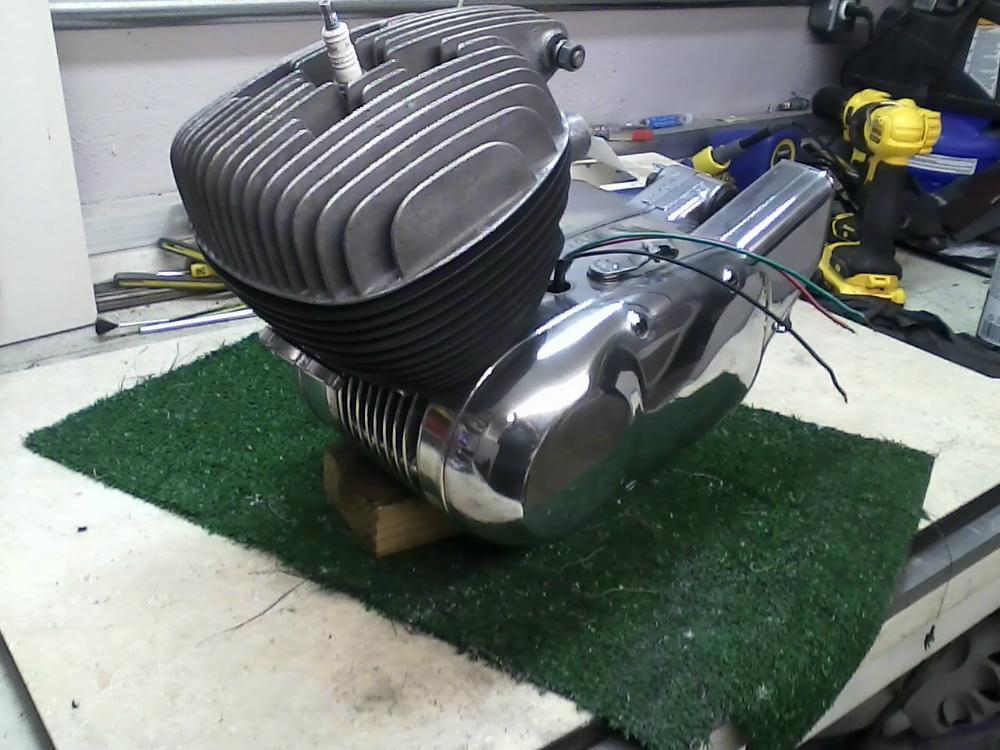
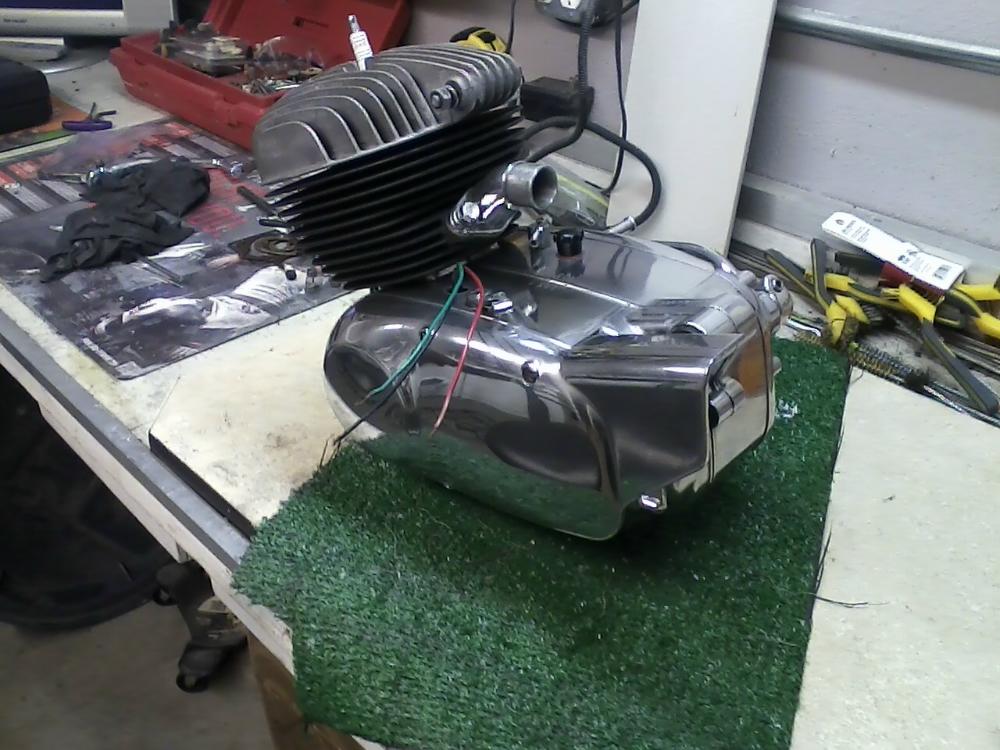
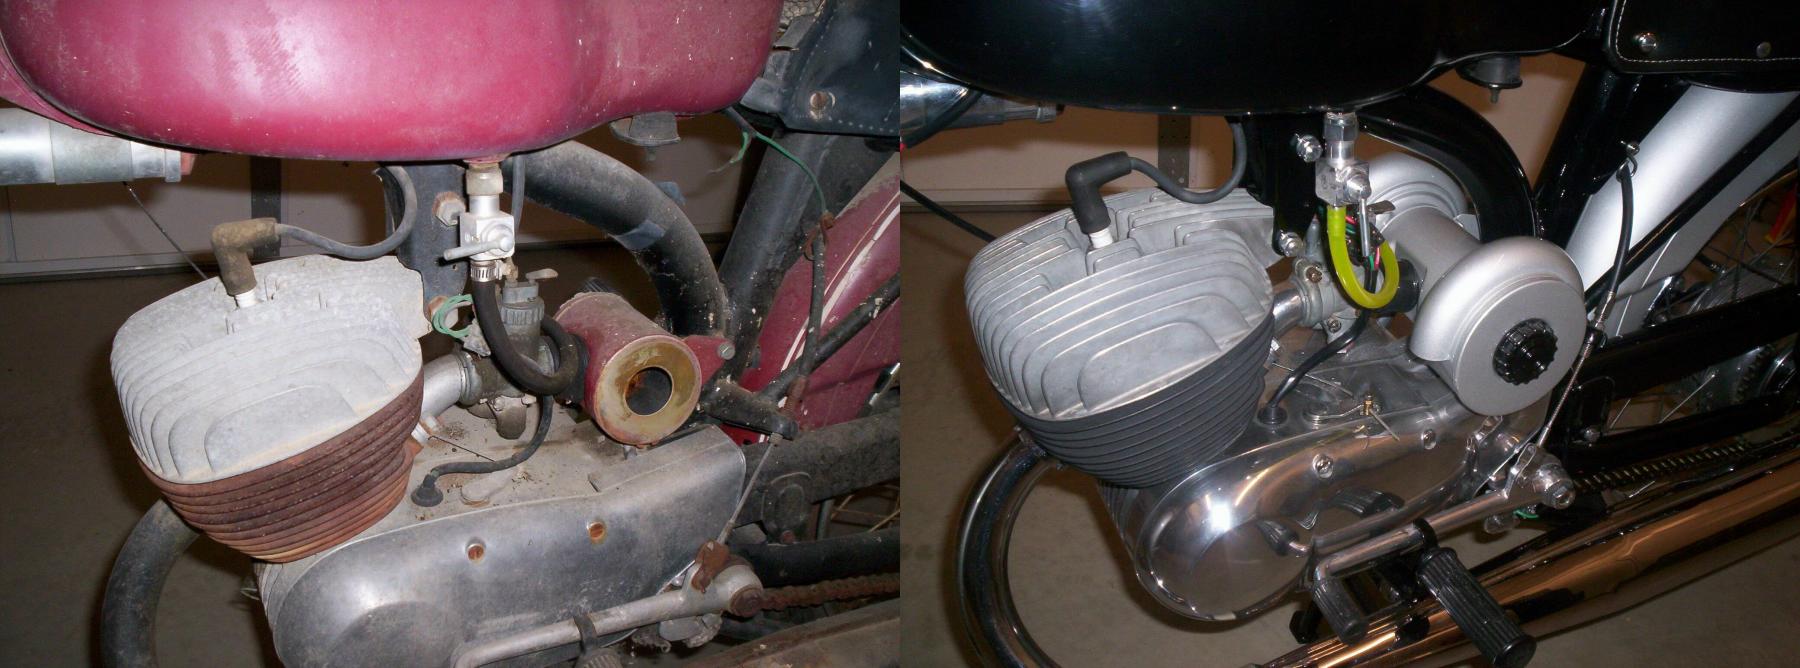
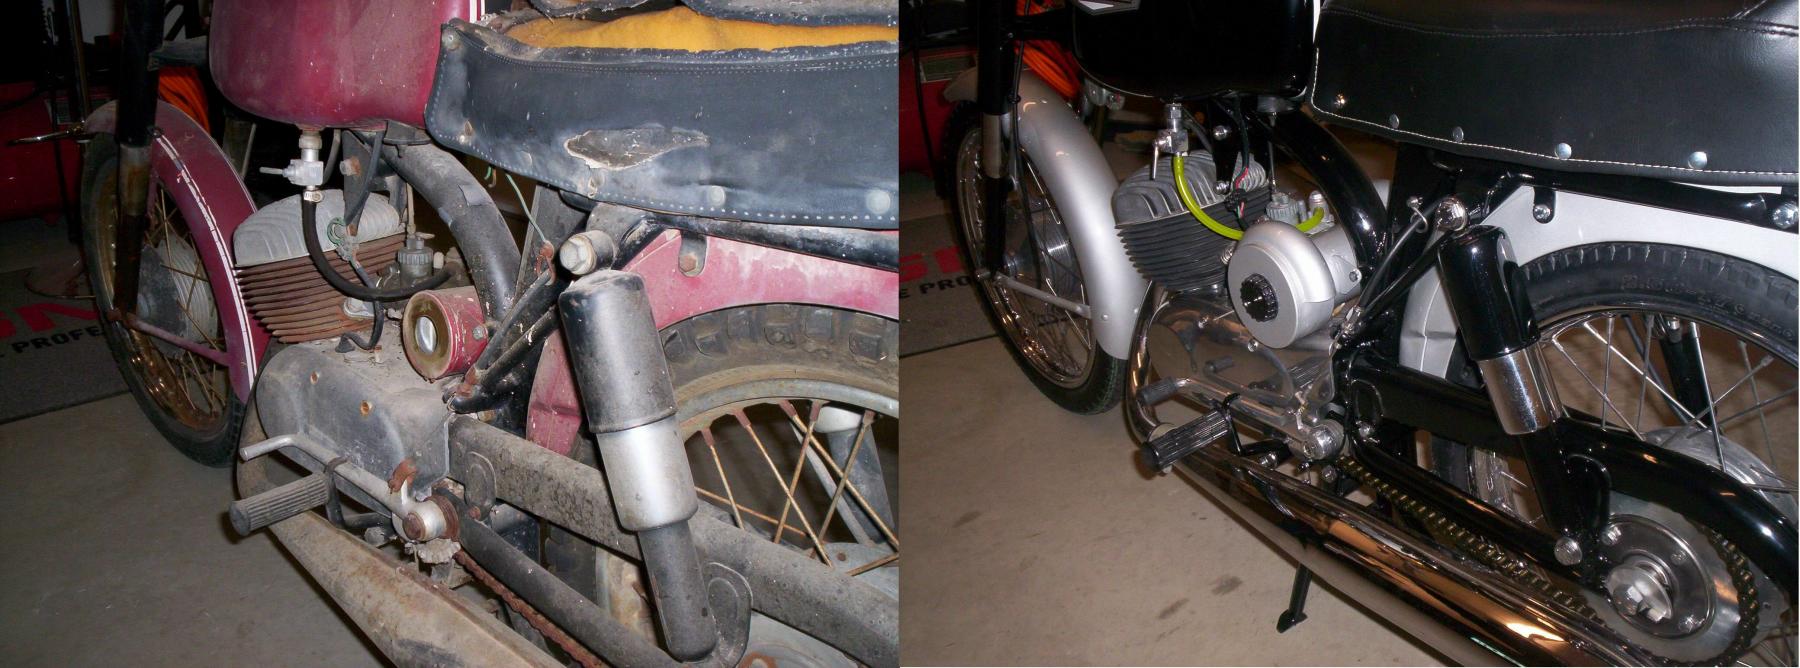
Time to focus on the motor.
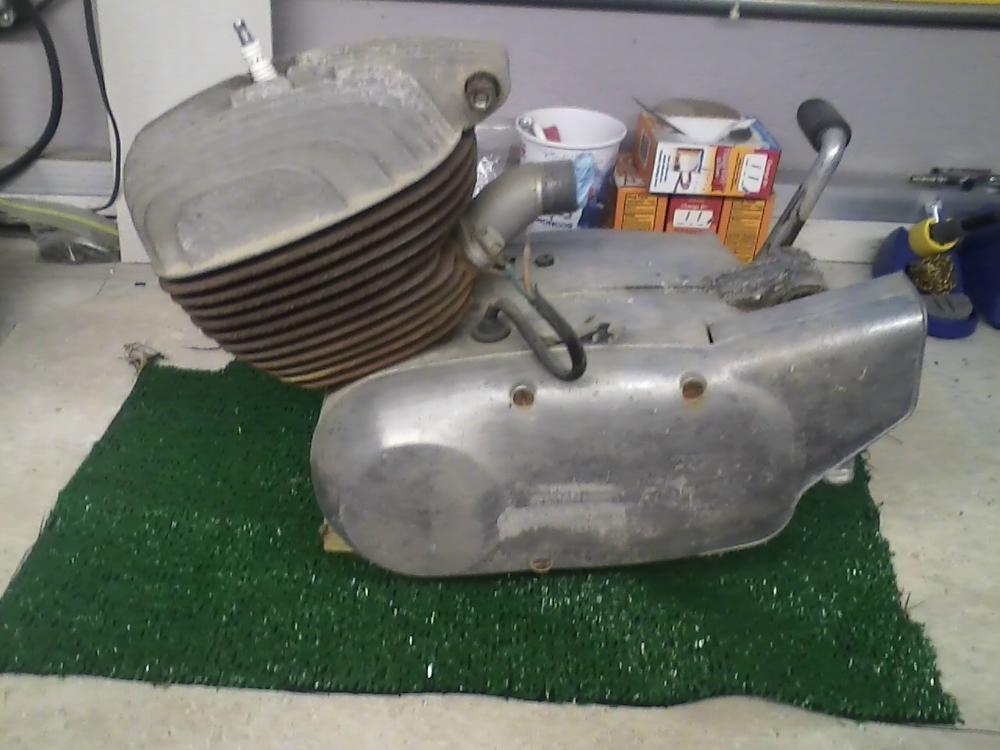
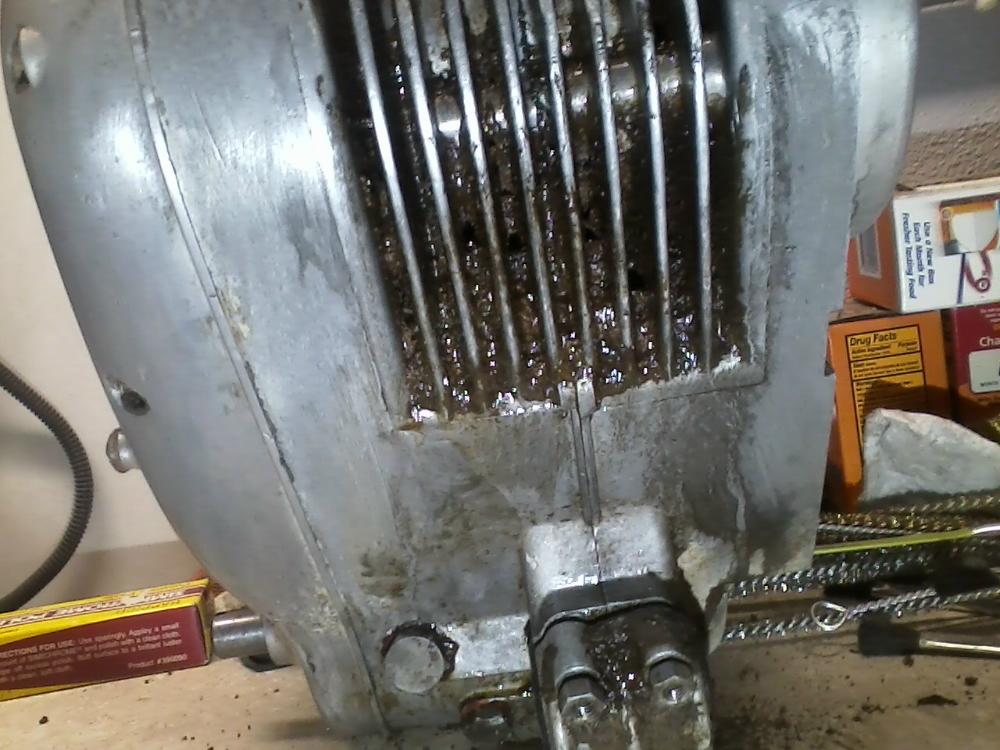
The bottom fins were completly packed with 50 years of dirt, this pic was after hours of soaking and digging.
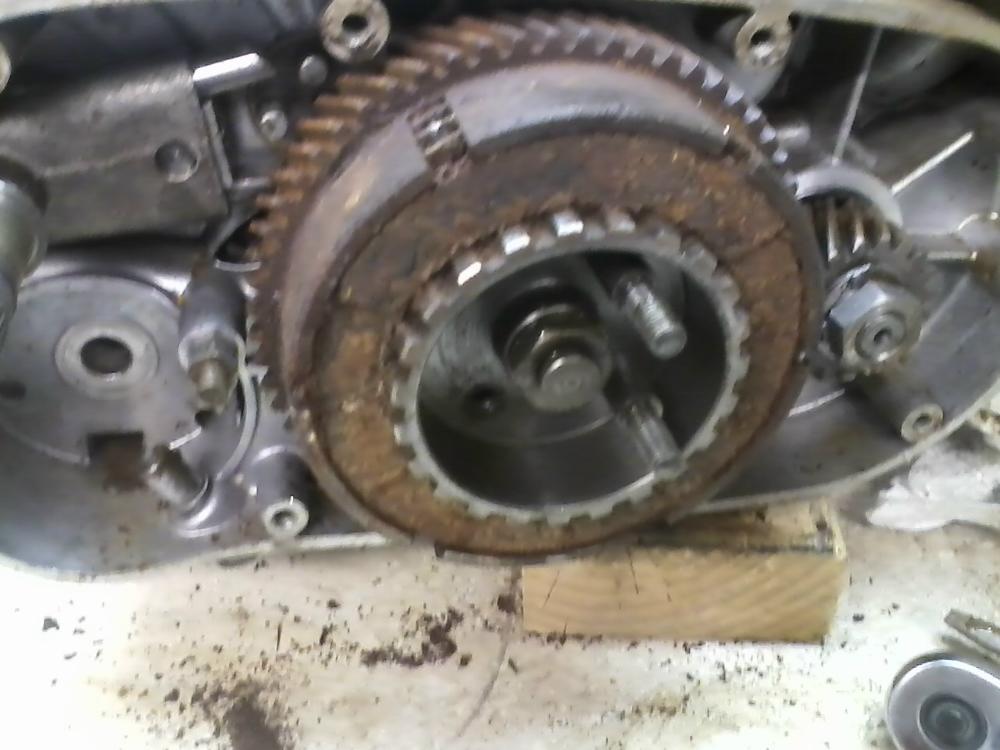
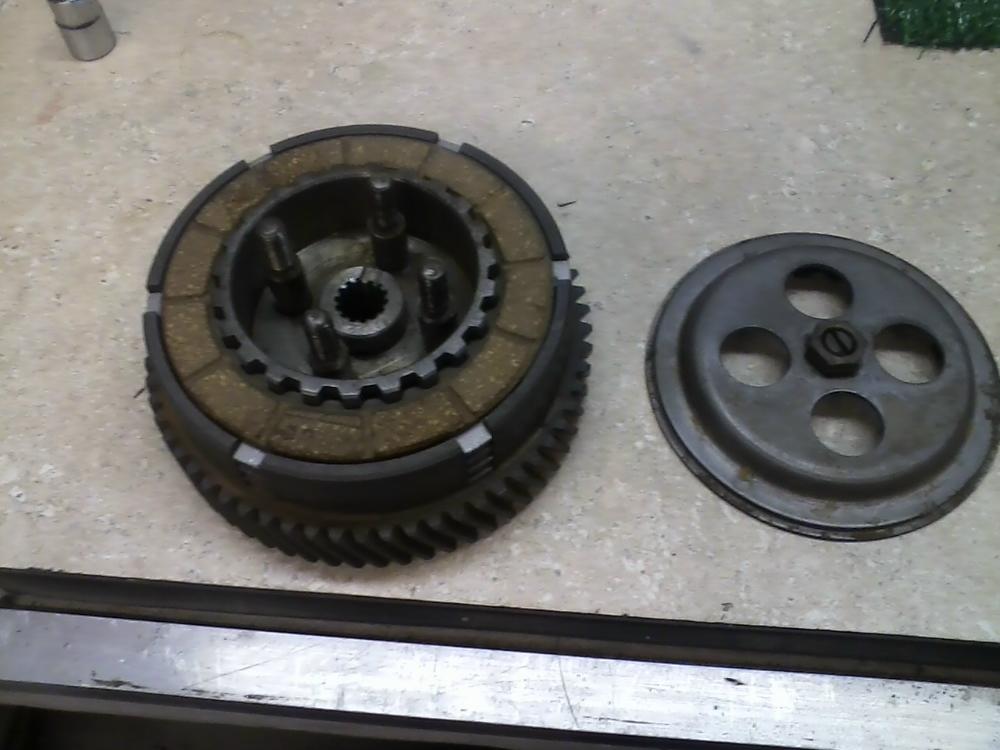
Clutch was in not to good of shape and 2 studs spun out trying to get cover off.
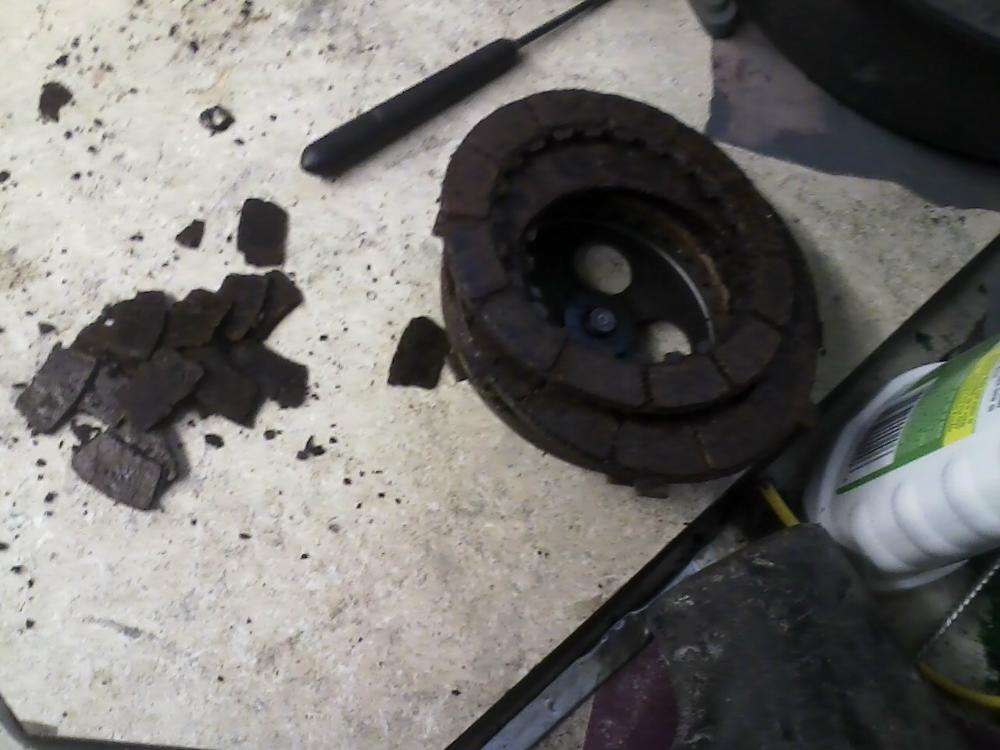
Came out in pieces.
New clutch, suprised at the availability of them still.
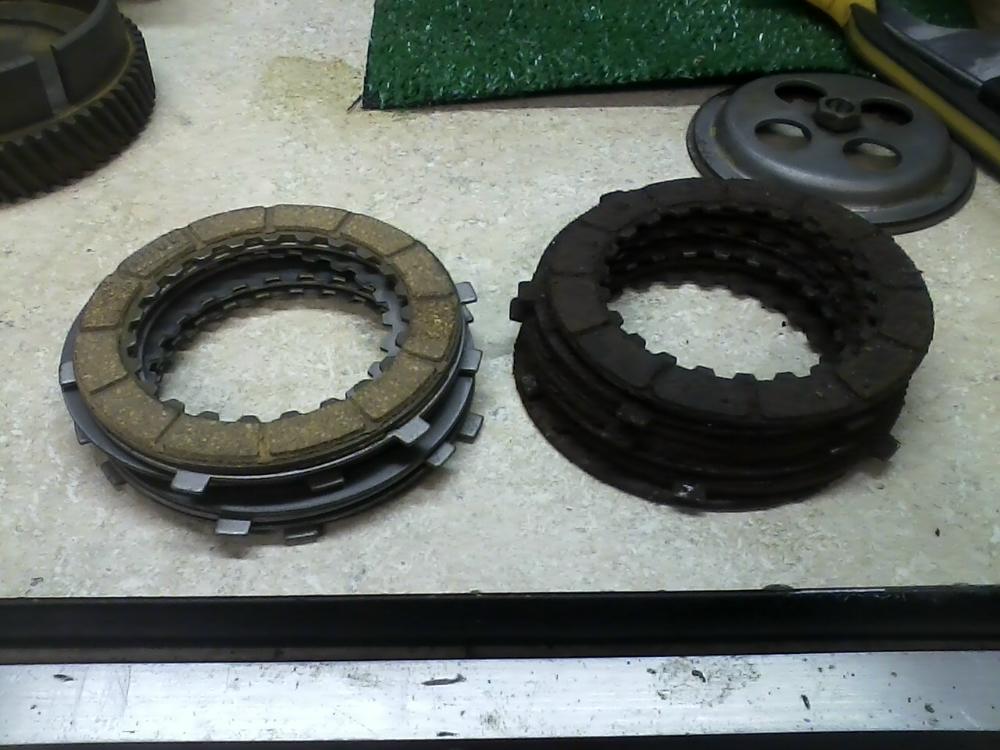
Test fit before soaking the plates.
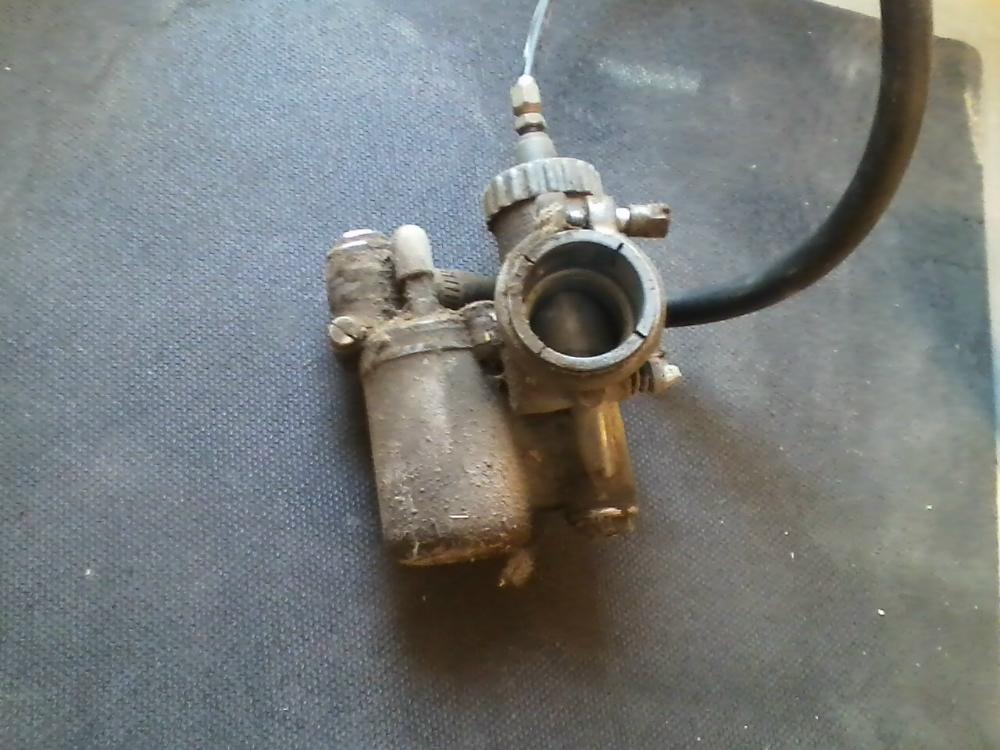
Dirty carb.
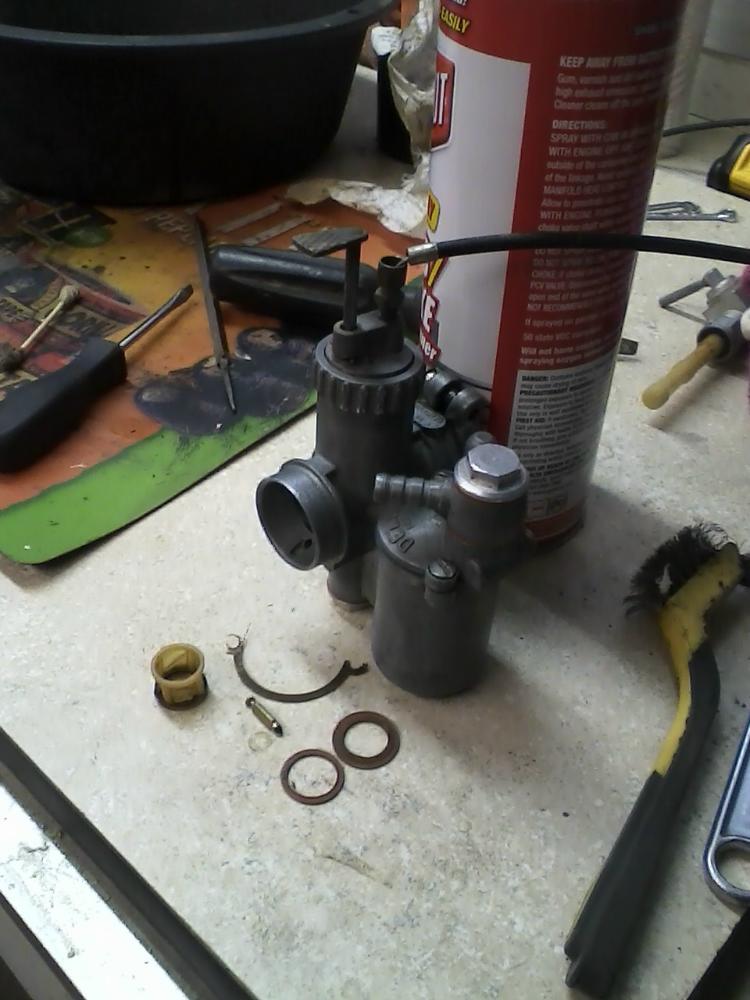
Cleaned and rebuilt carb, later polished out all the hardware on it.
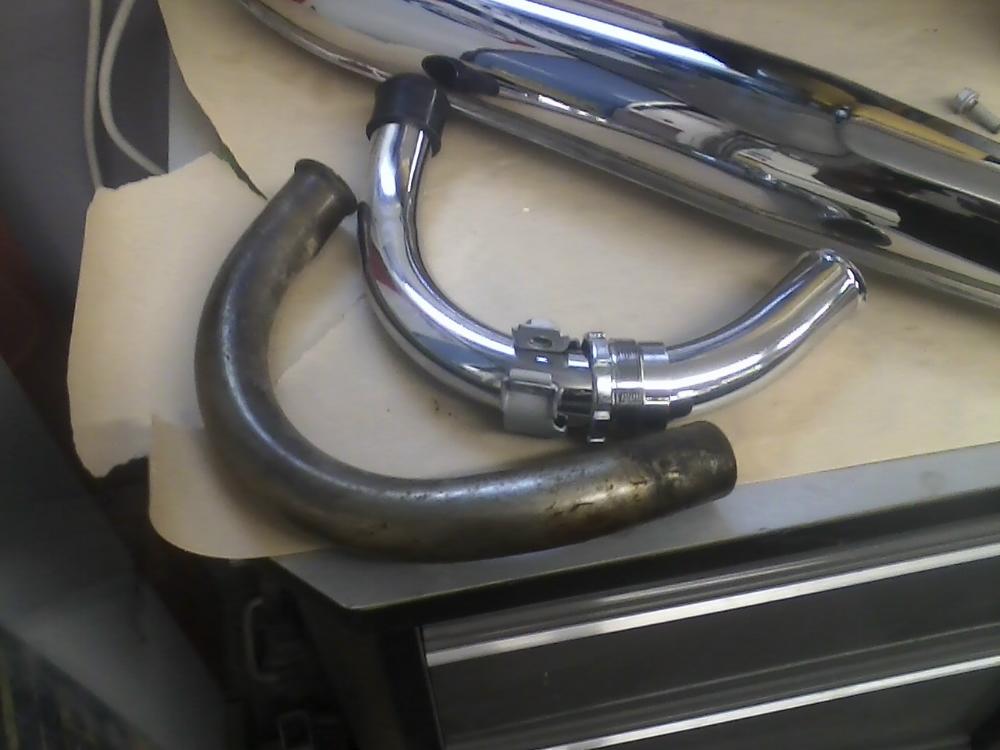
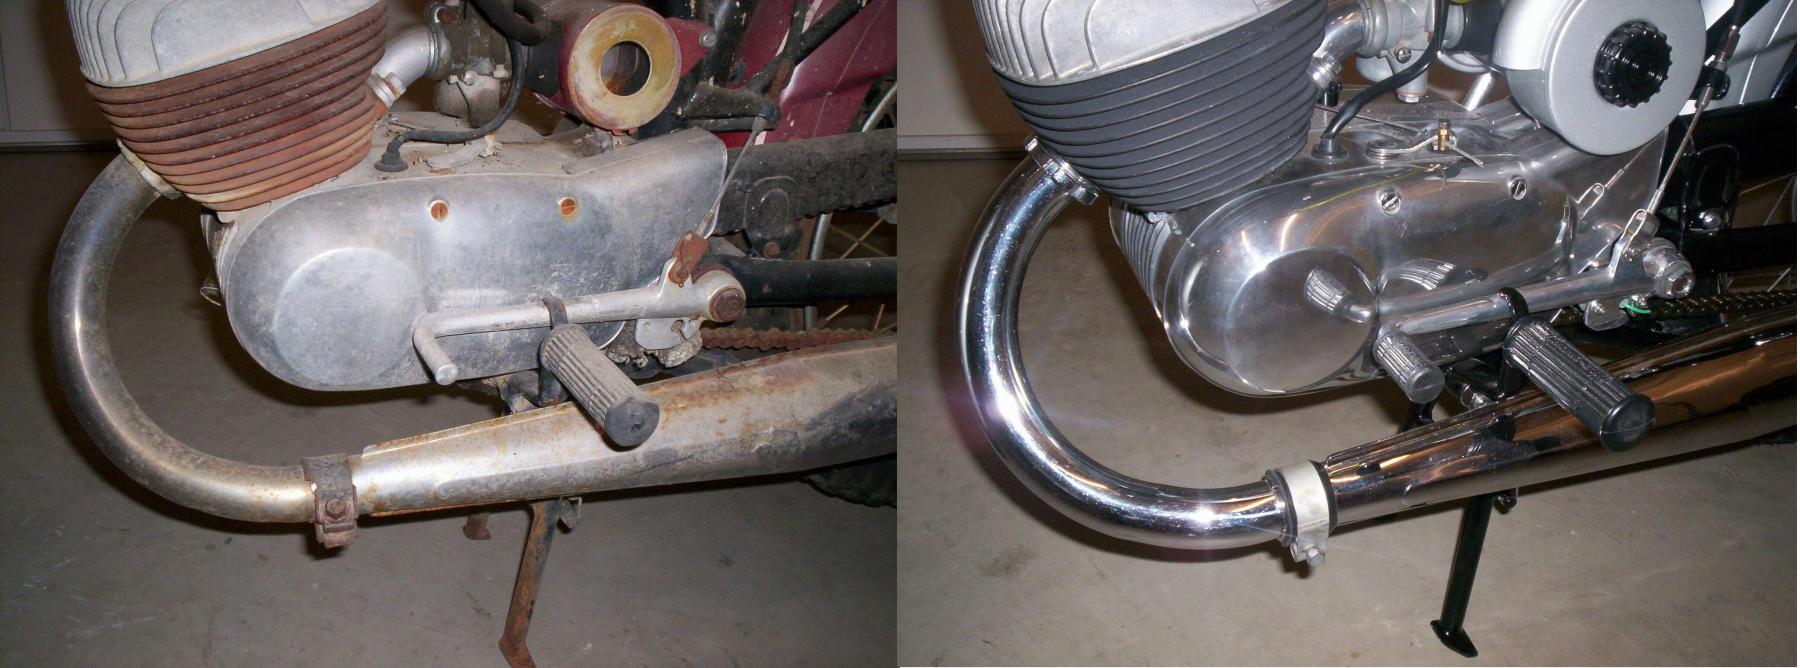
New exhaust pipe and exhaust nut and rubber gasket, old ones were pretty hammered. (plus found out later I have the wrong muffler clamp in this pic)
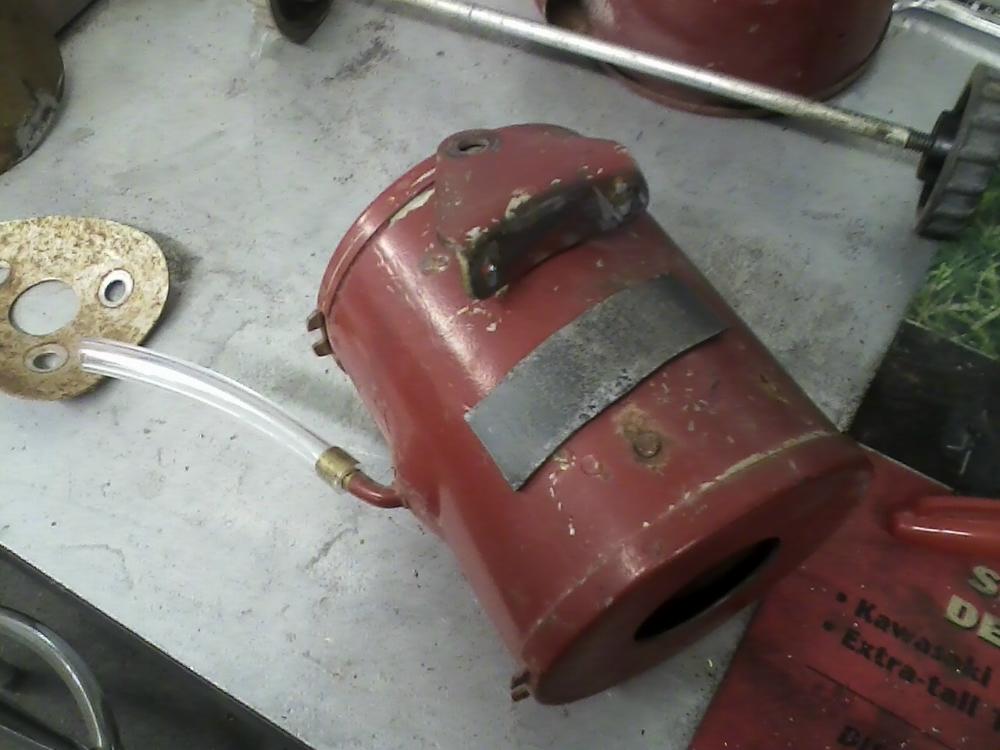
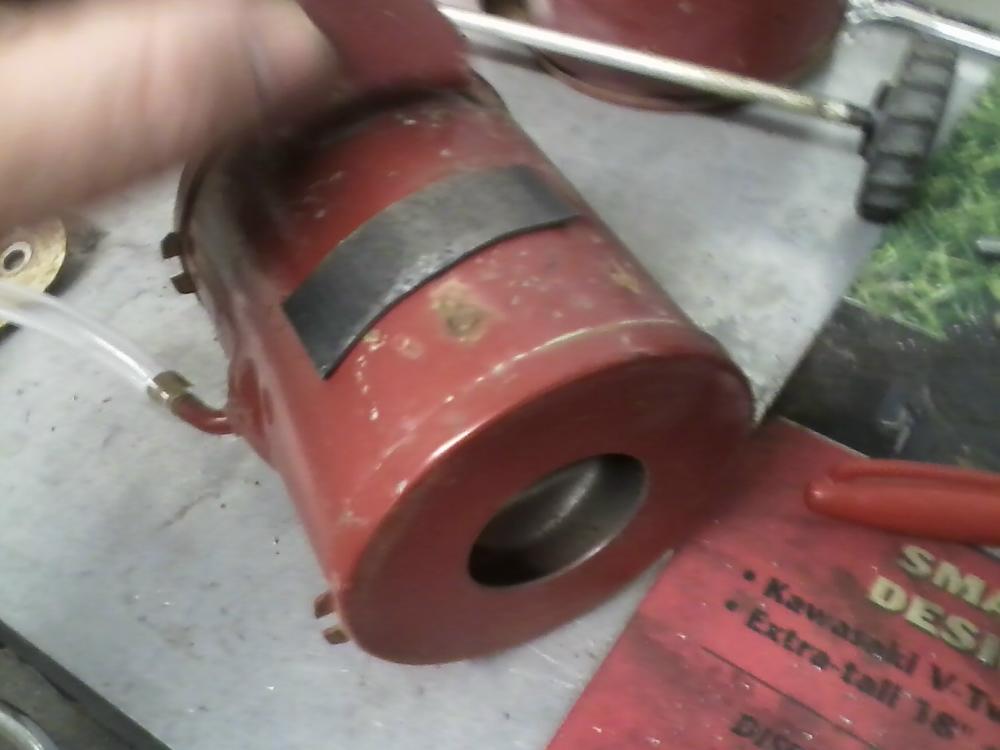
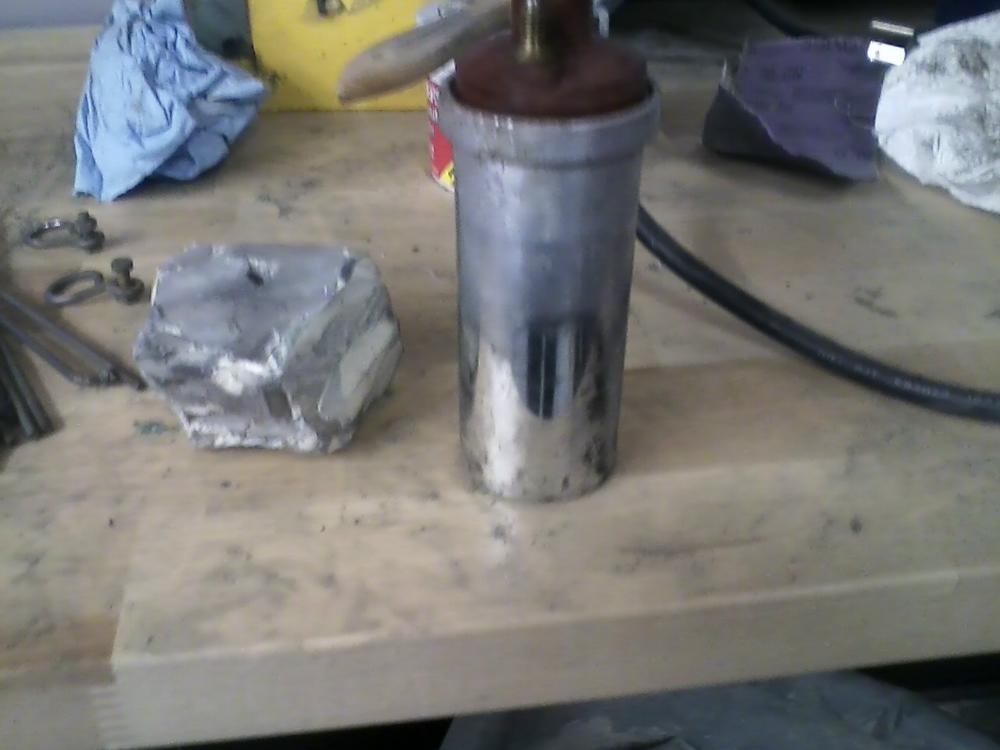
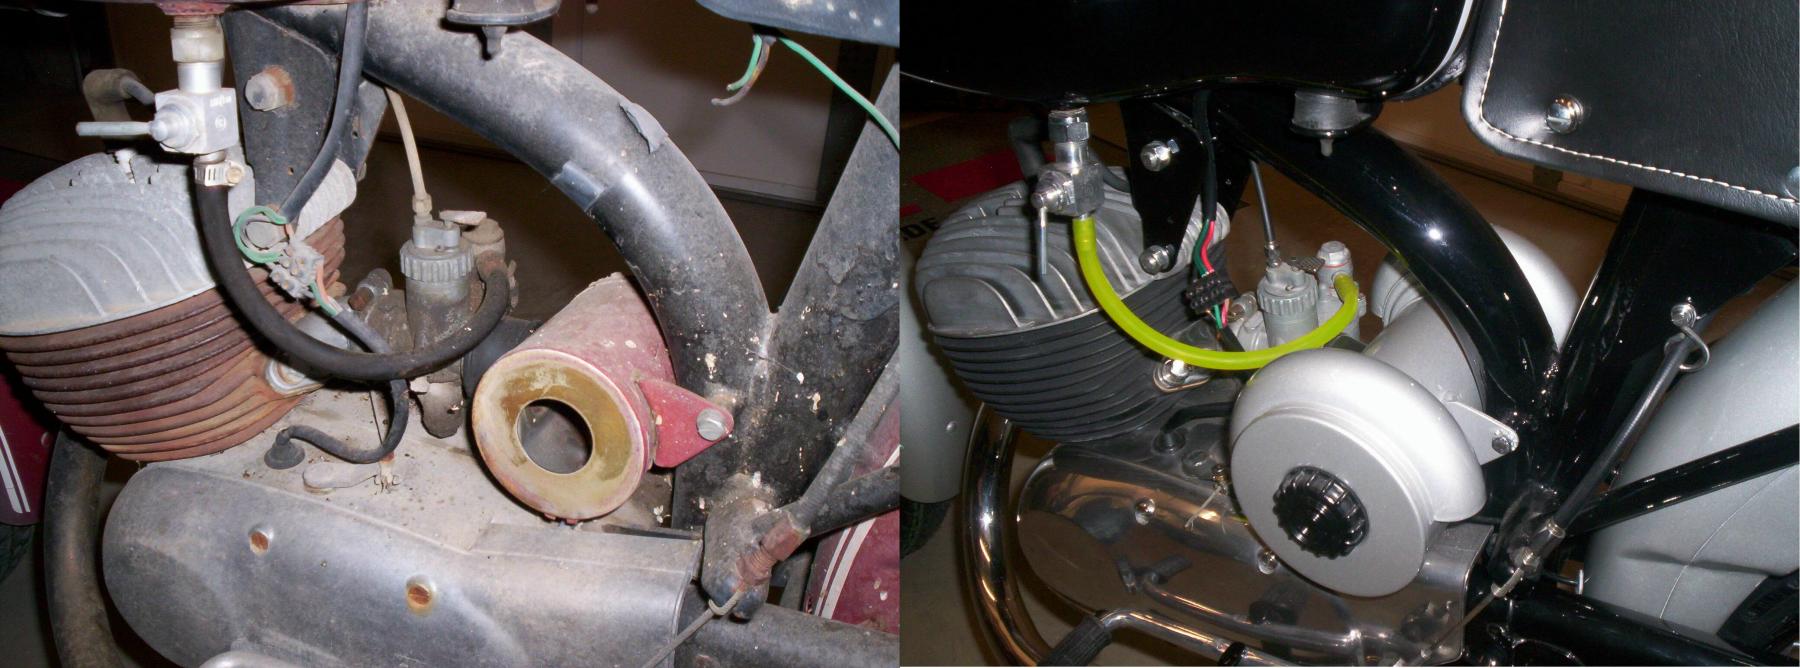
Can't find a new coil but the original started to polish out pretty good, still looking for a replacement.
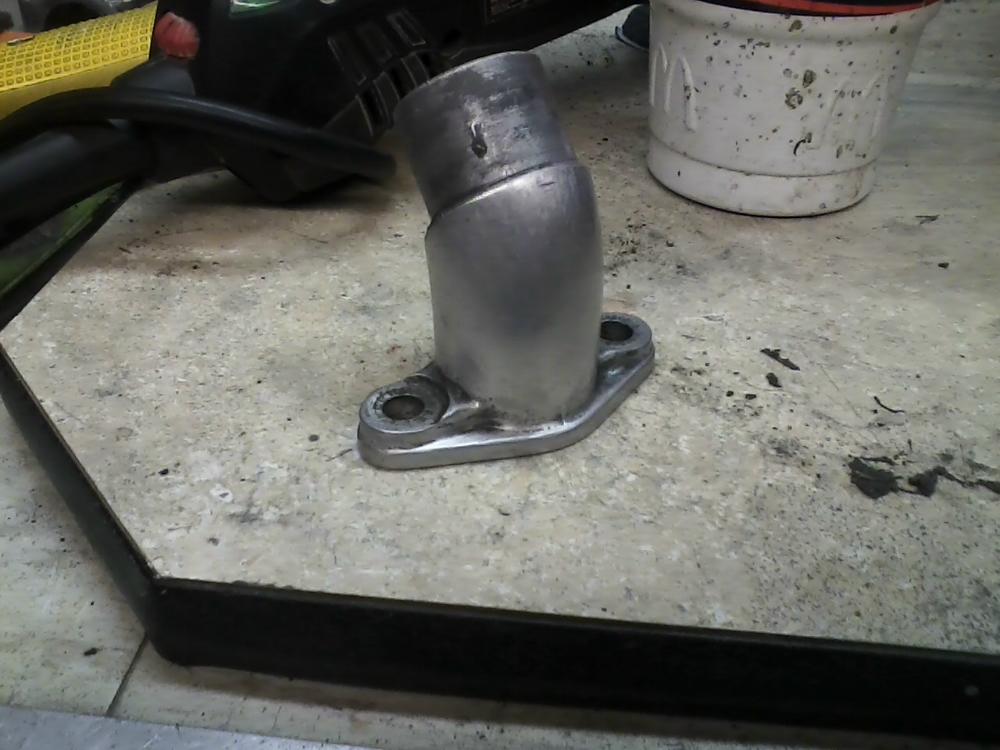
Intake was rough cast, I sanded it smooth.
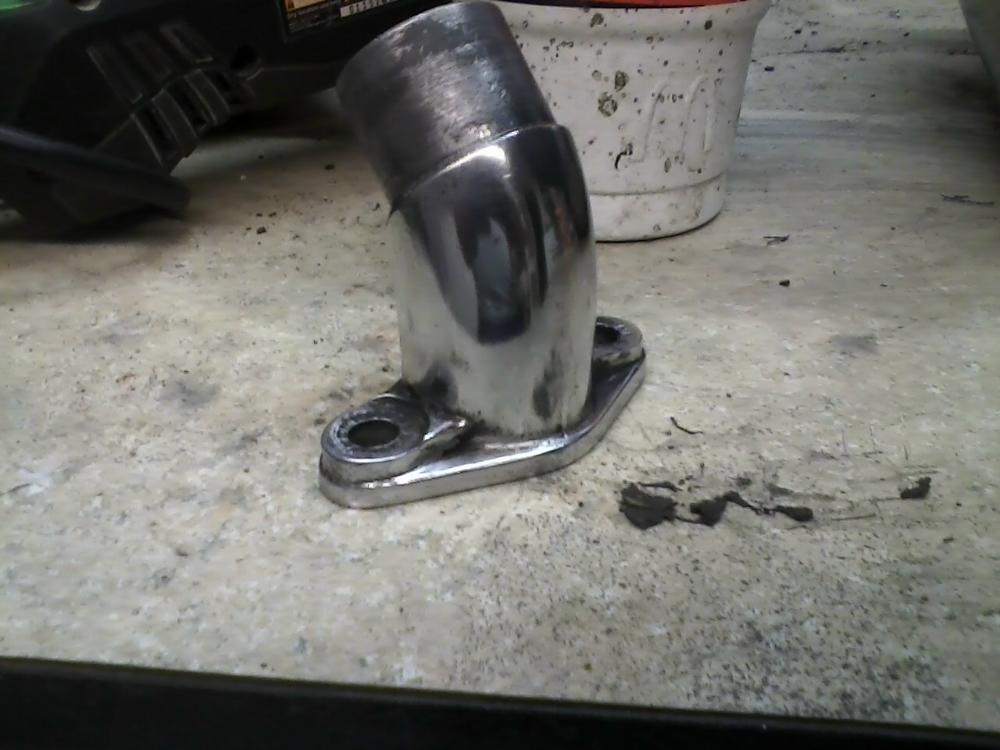
And had to polish it of course.
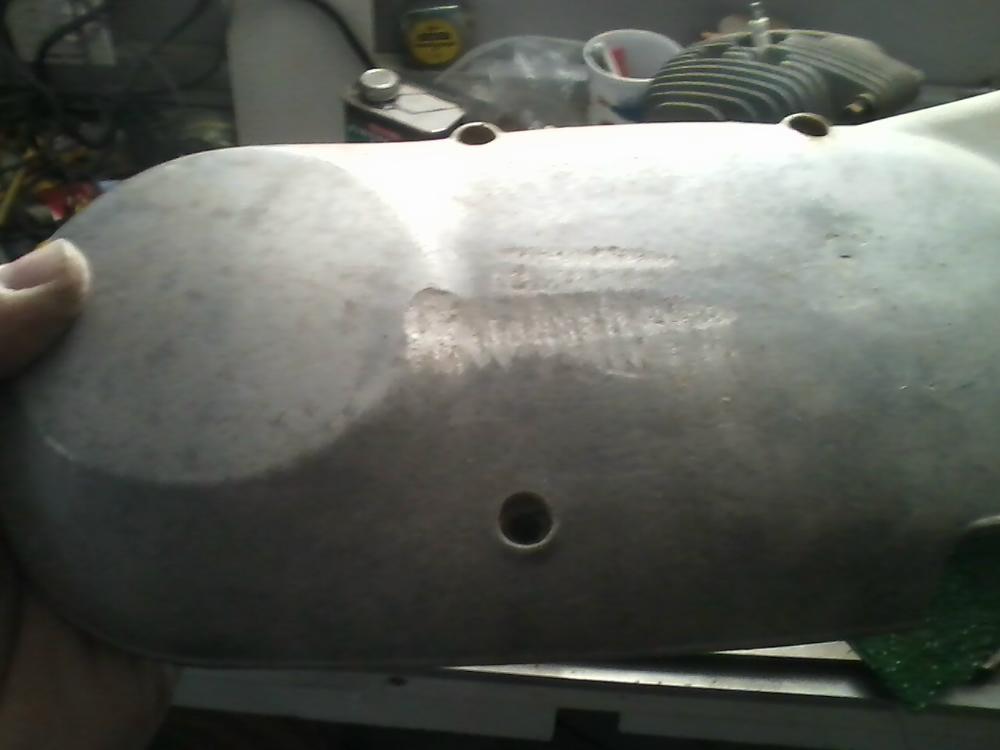
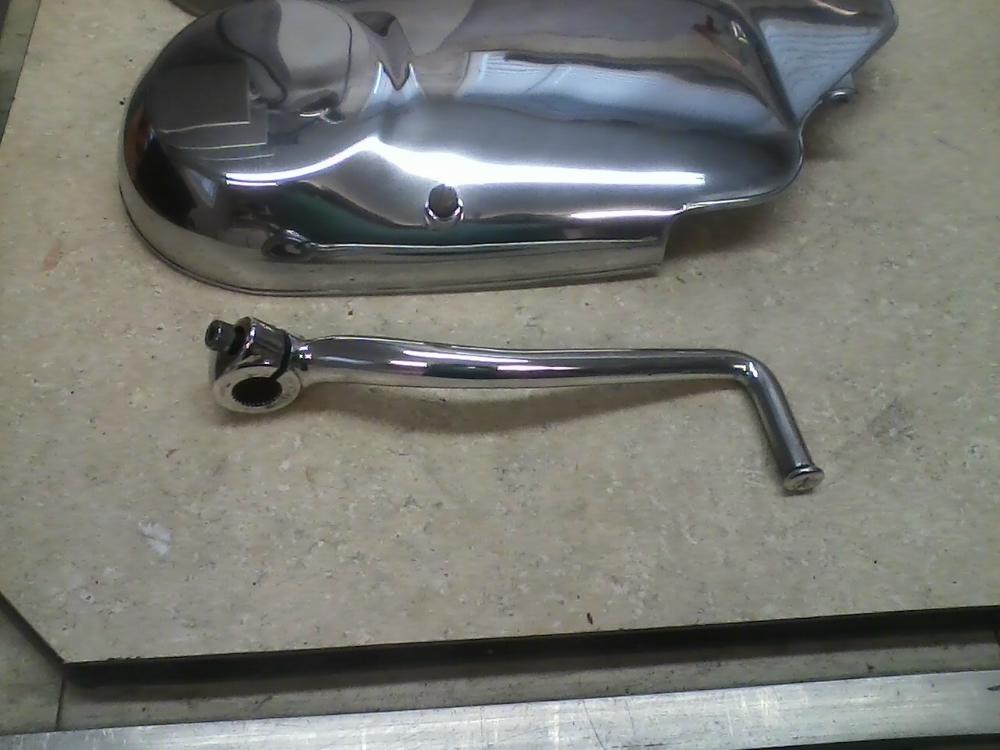
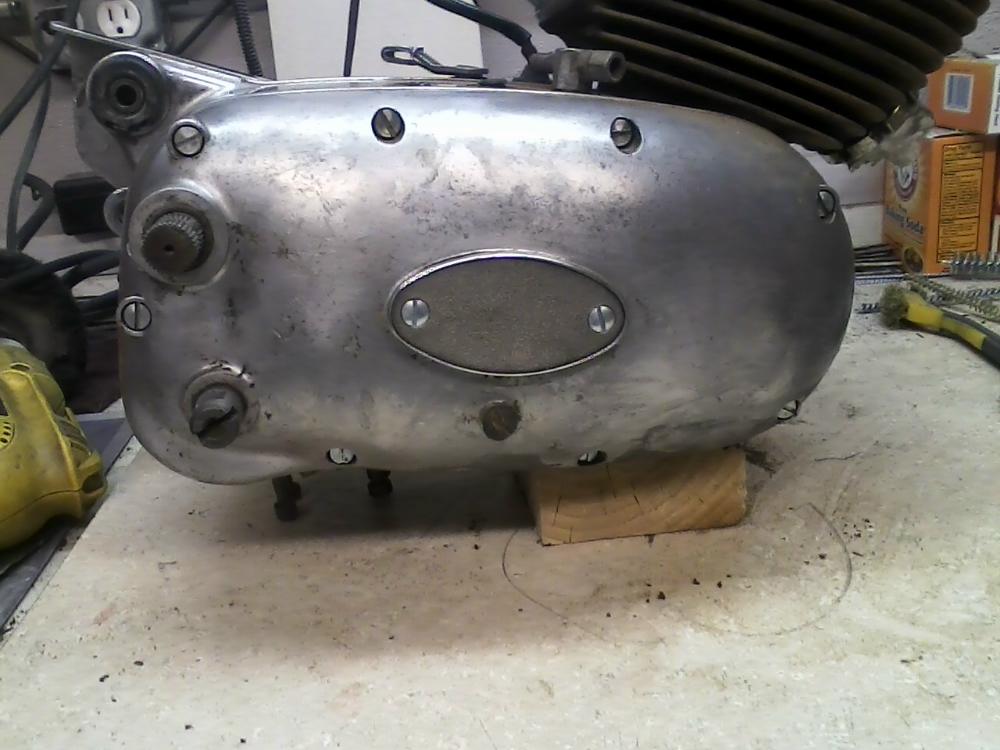
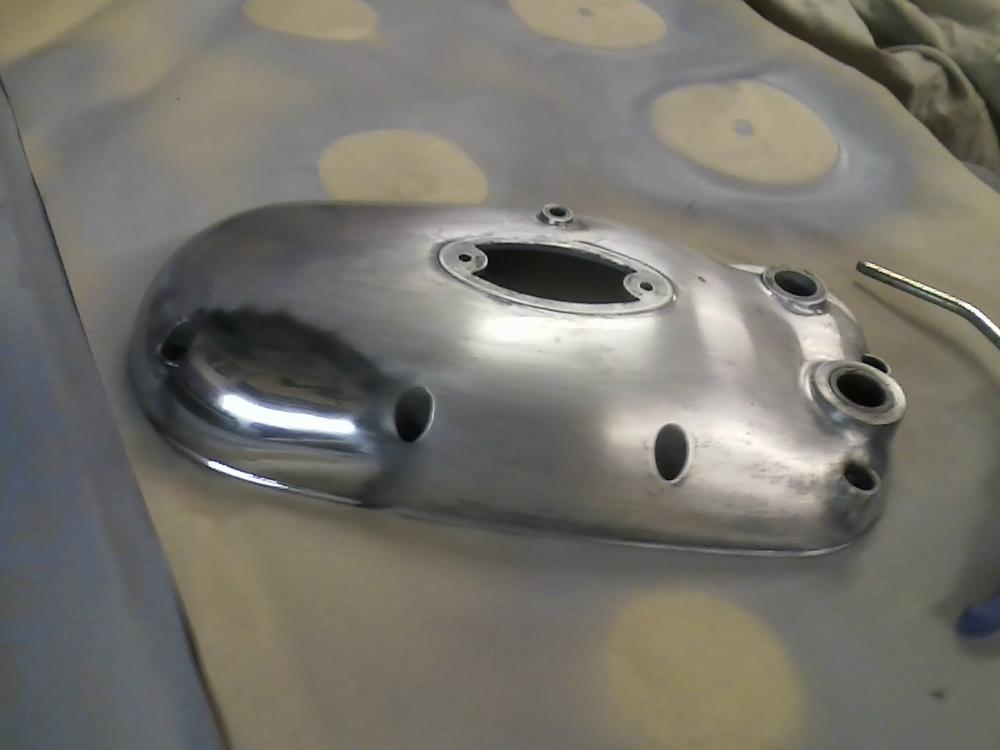
Crankcase cover had a lot of deep scrapes from brake pedal.
Tried to sand out the damage but it was too deep and distorted the cover, got another one off good ole Ebay, and sanded it smooth.
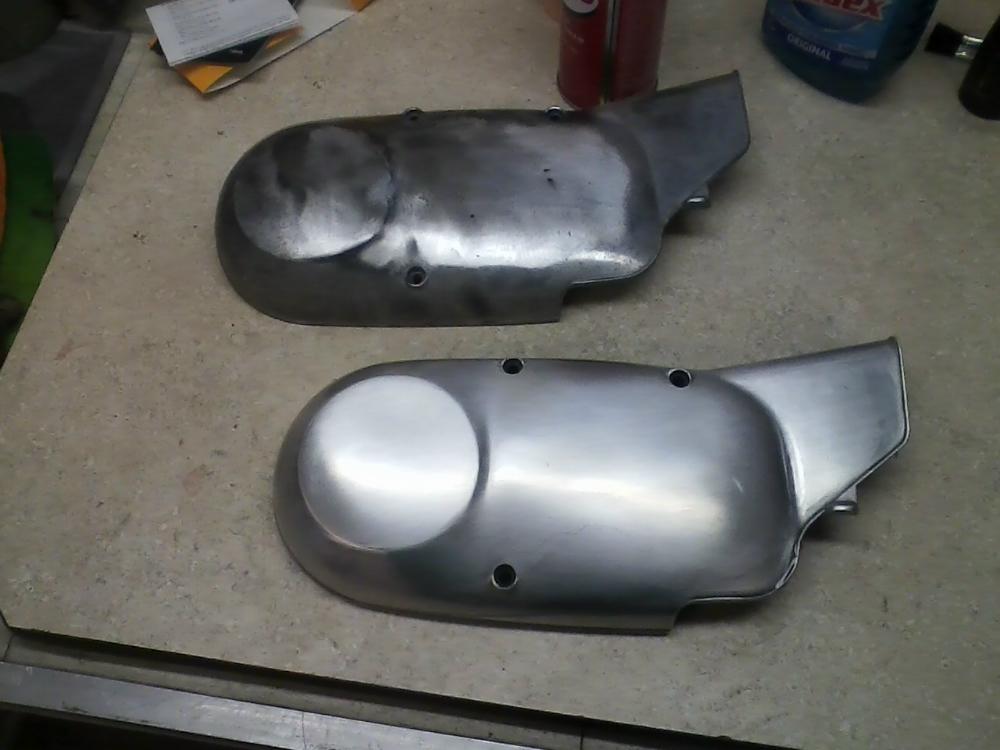
Half polished.
Still some scratches I need to sand out.
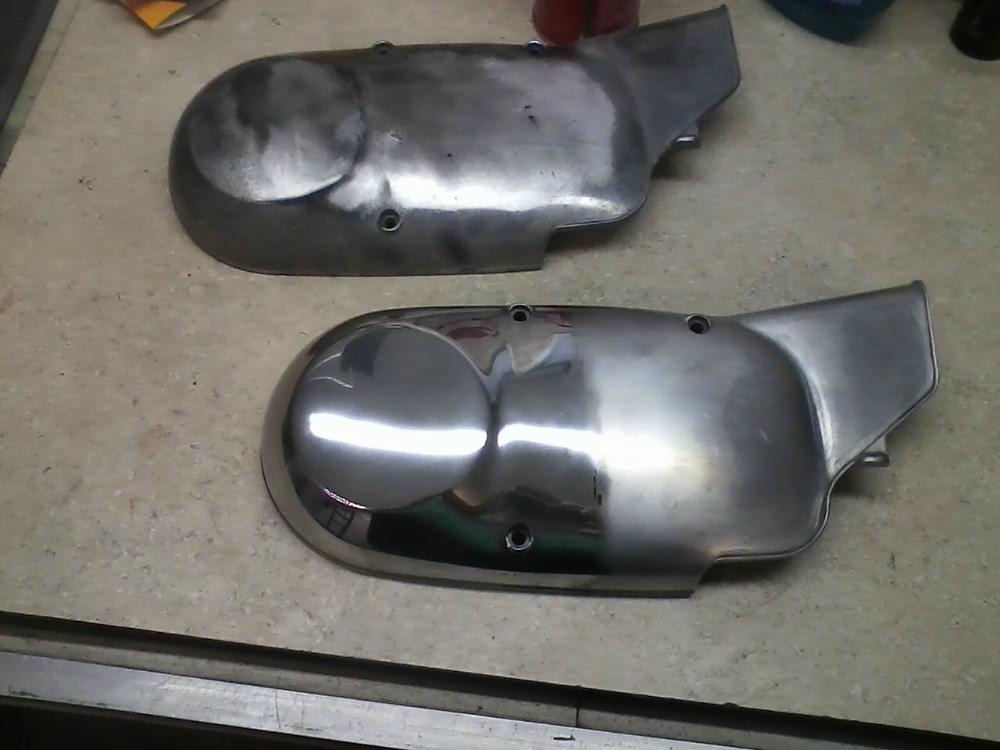
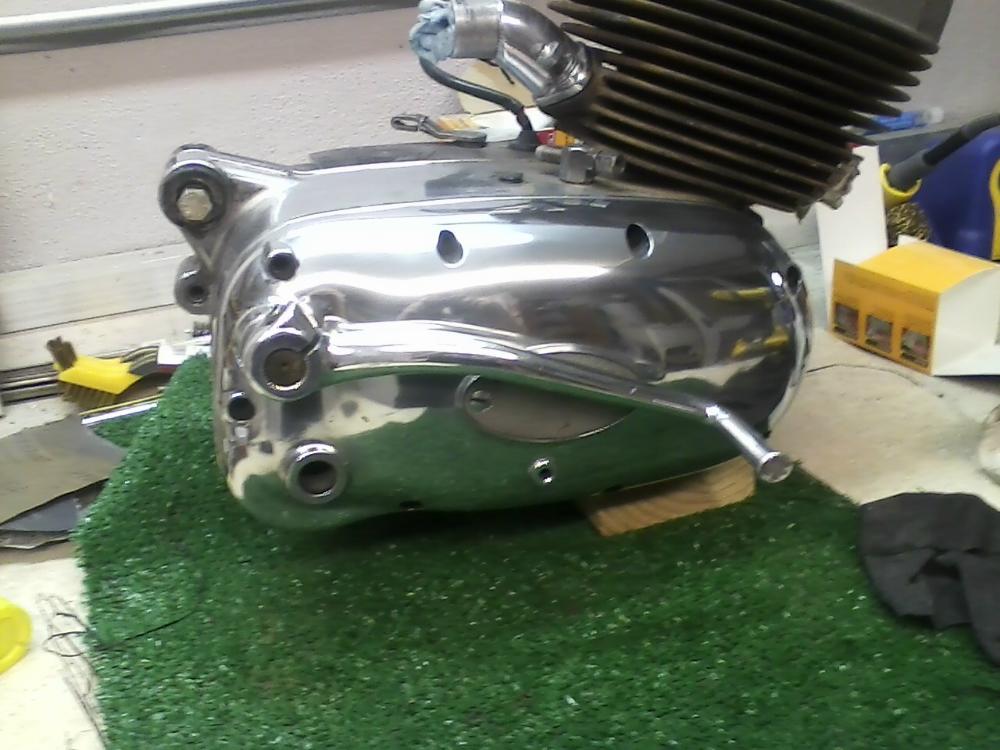
Fully poilshed.
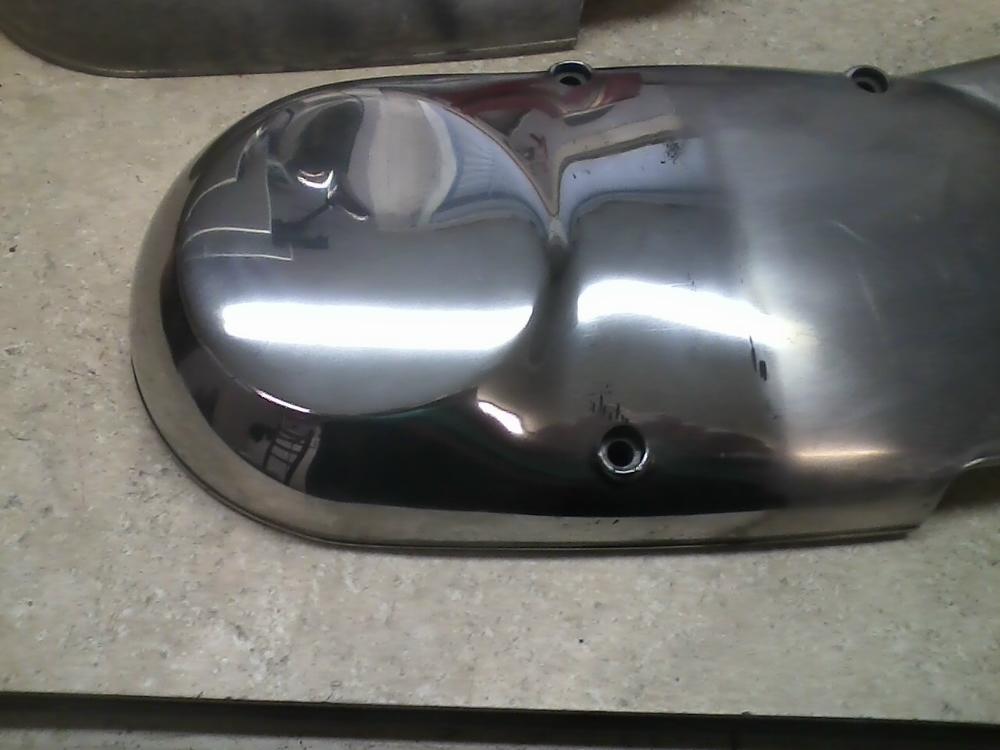
One piece closer to finished.
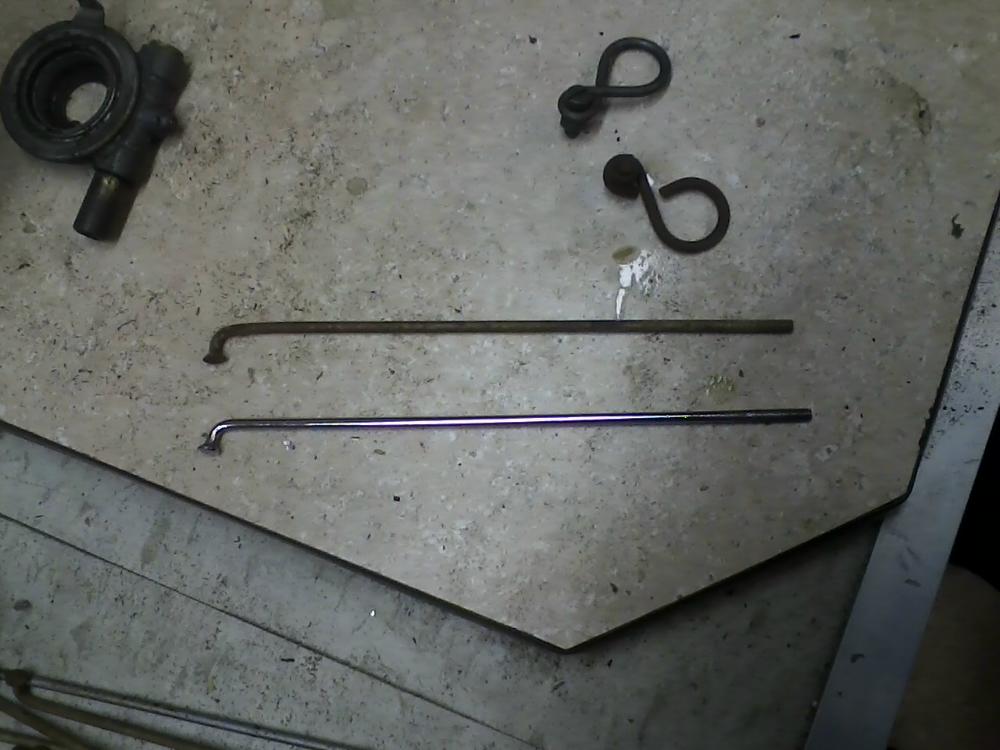
Brake lever was bent and very gouged, back to ebay for a better version. It polished out very nice.
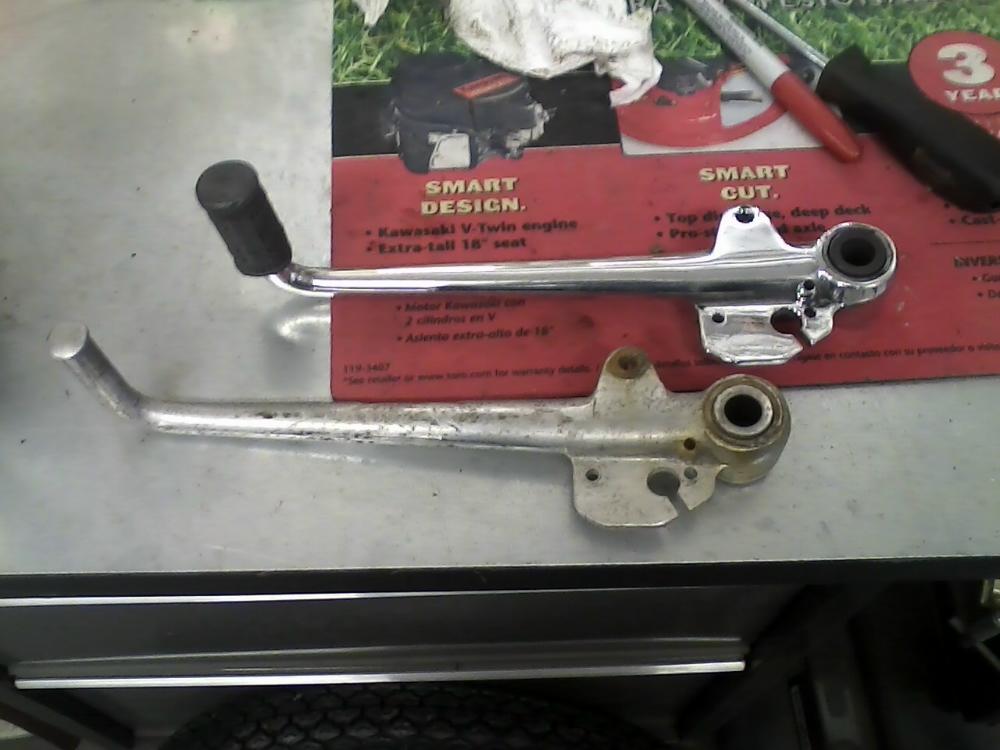
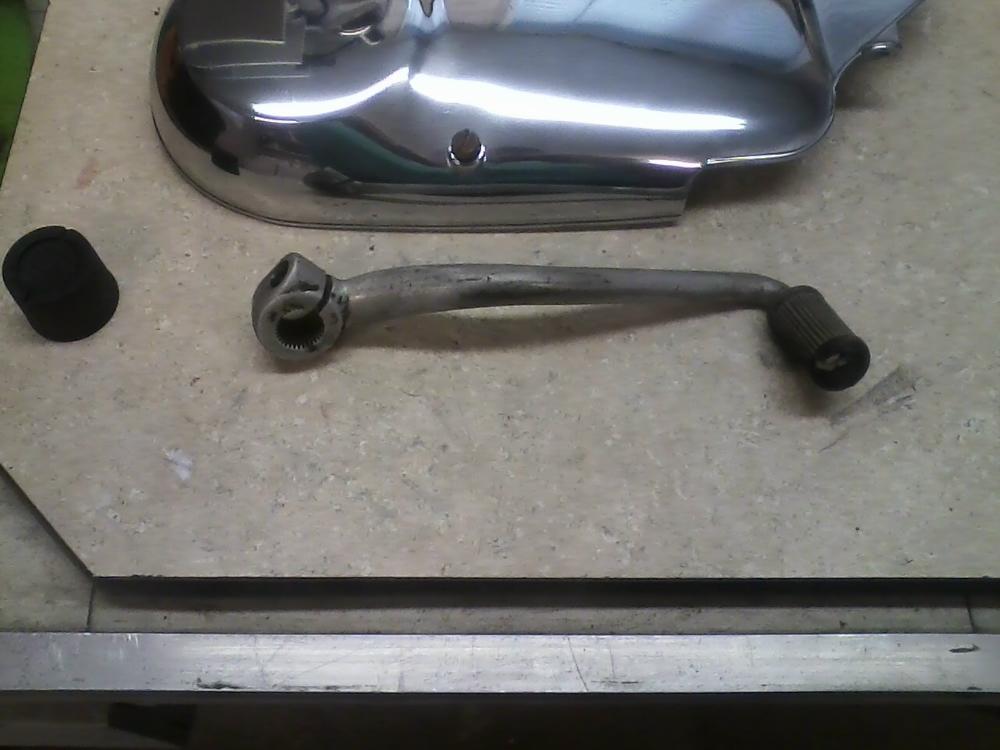
Original shifter wasn't in to bad of shape.
Another piece polished out.
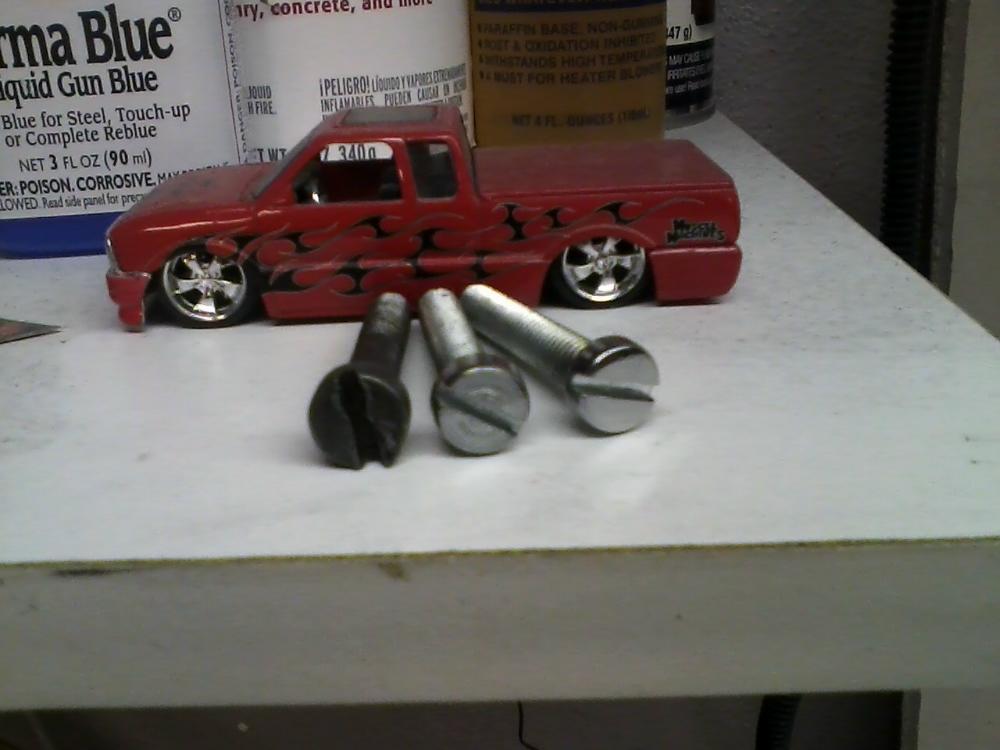
New bolts for the motor, first is an original, second is a new one, third is a sanded and polished new one.
One step closer to done.
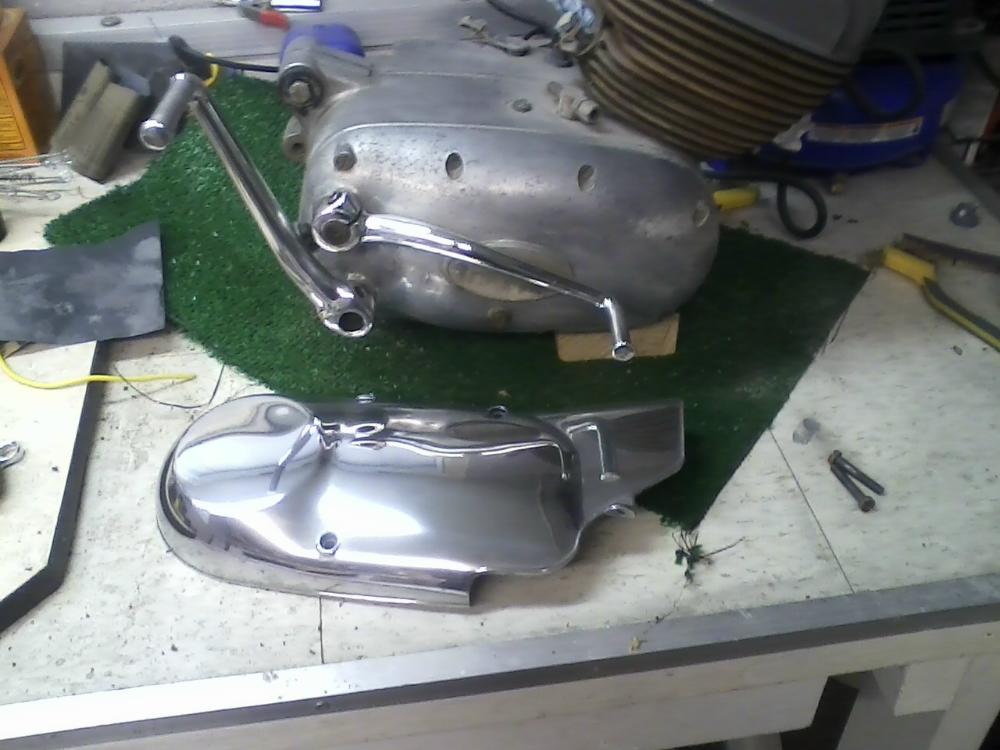
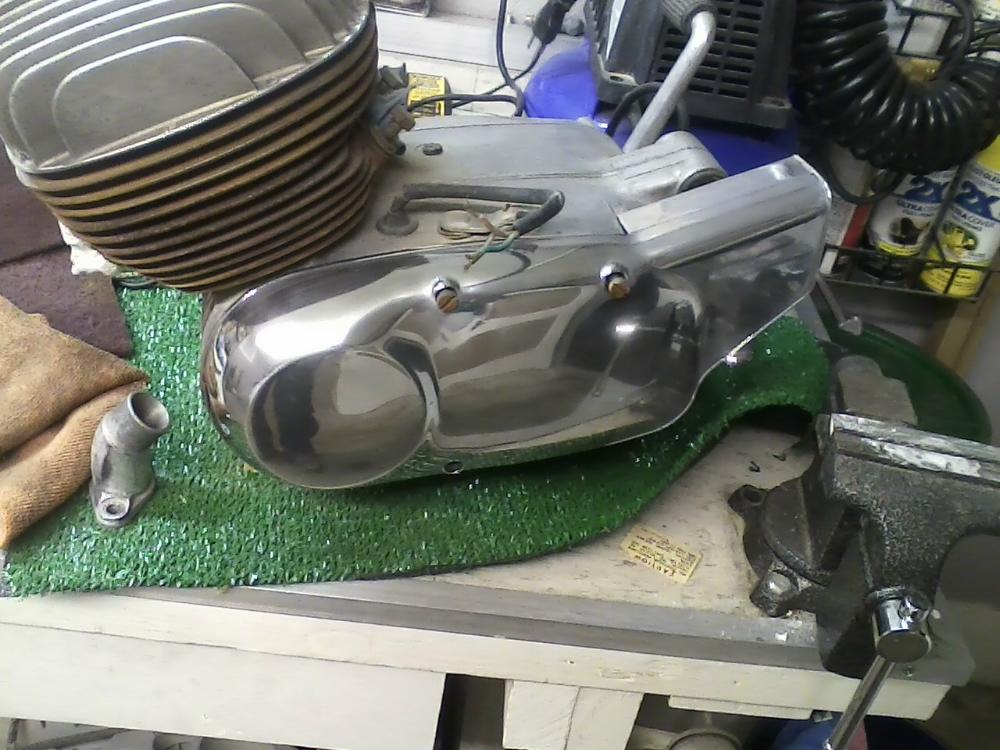
Now to the clutch cover.
Fully sanded and test polish to see if sanded smooth enough.
Fully polished and partial block polish.
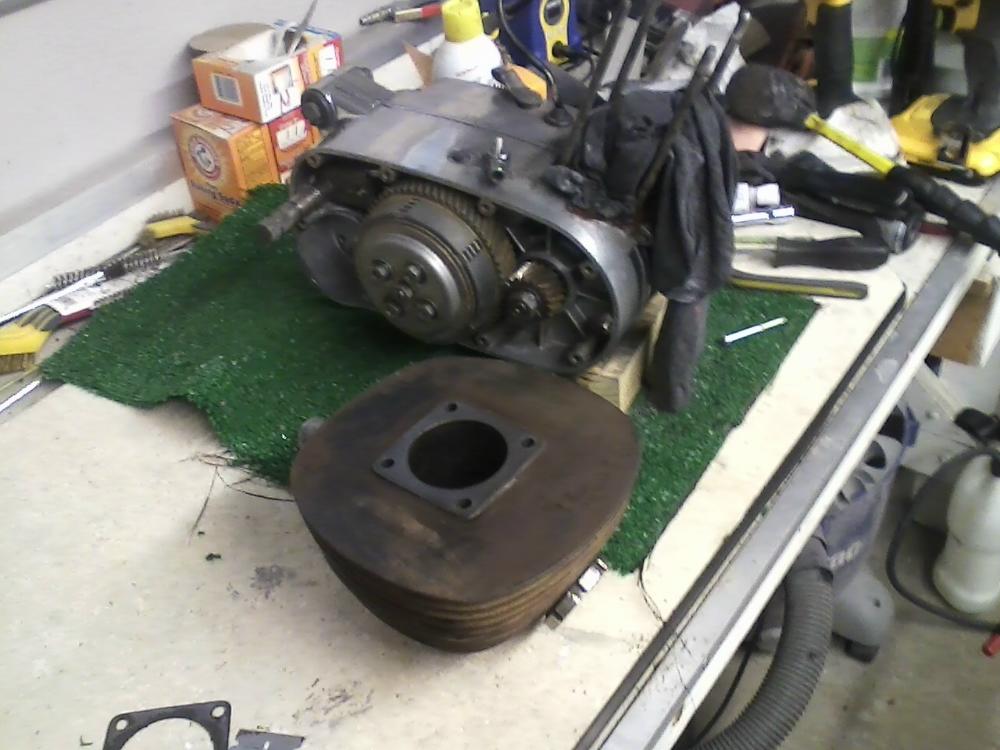
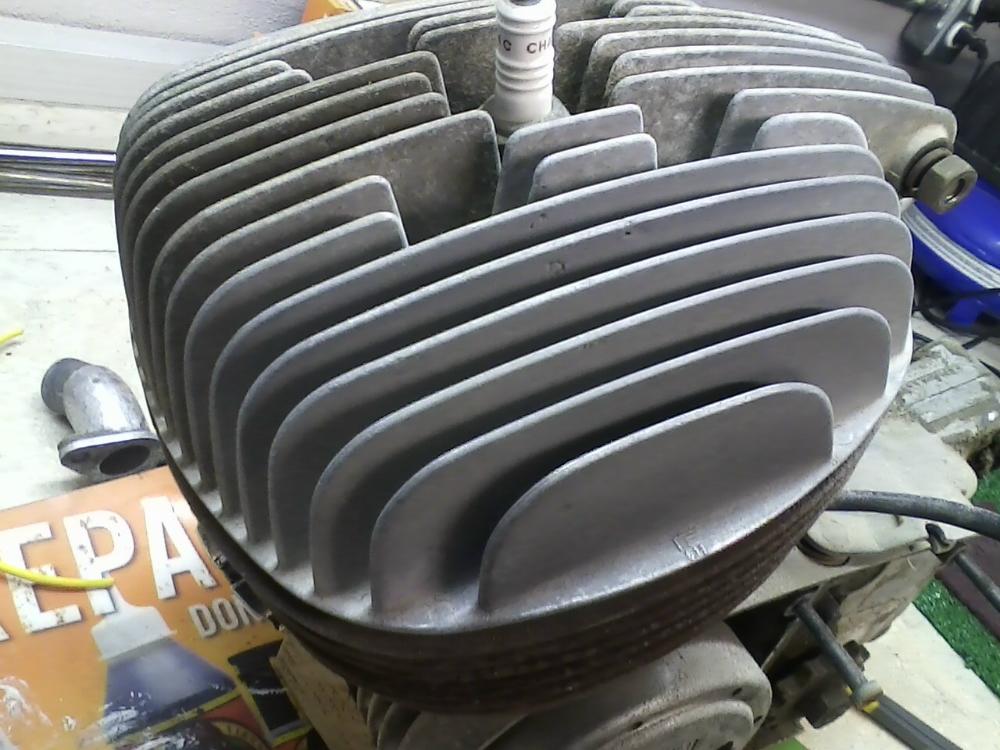
Time to clean the cylinder block and polish the rest of the block.
Carbon on top of piston.
Scotchbriting the head.
Little more progress, this took forever!
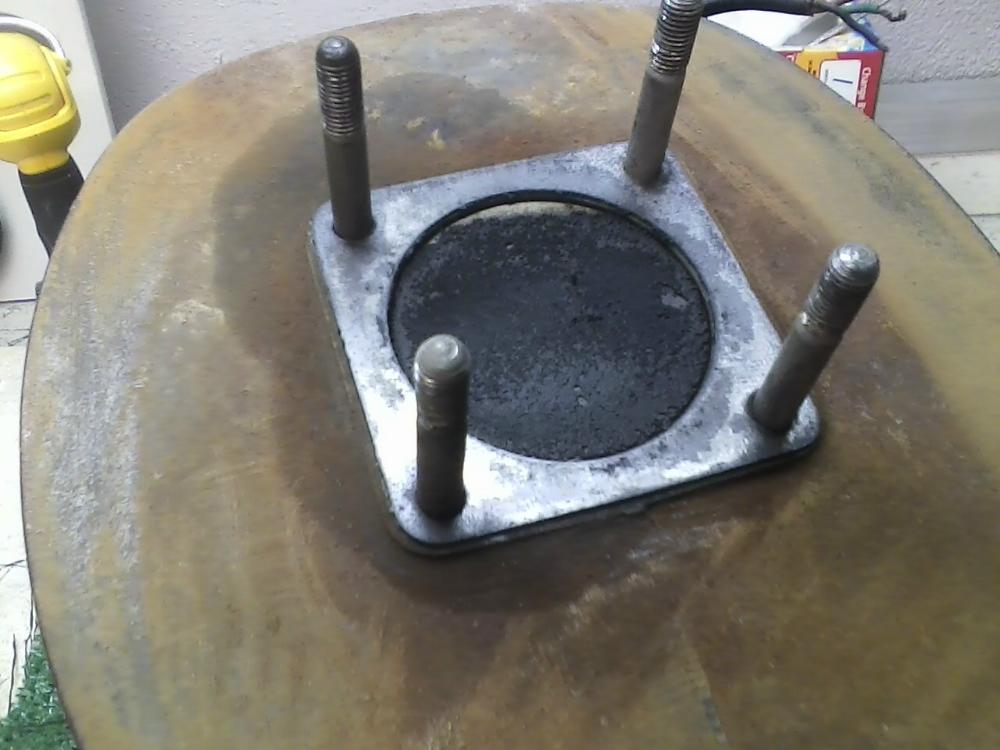
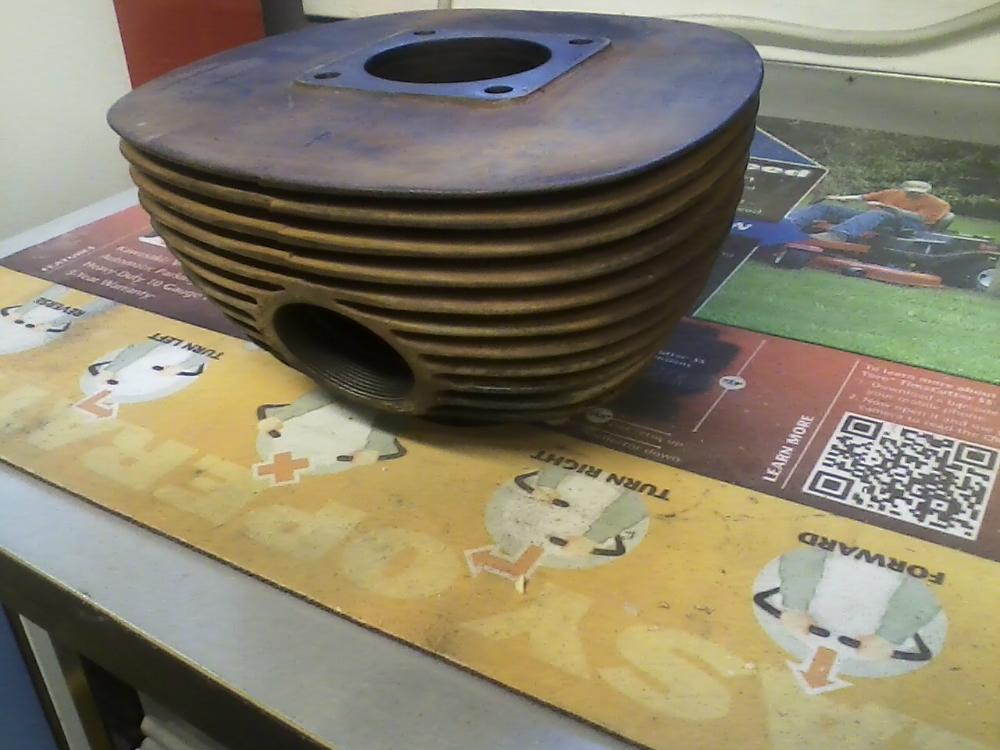
Rusty cylinder.
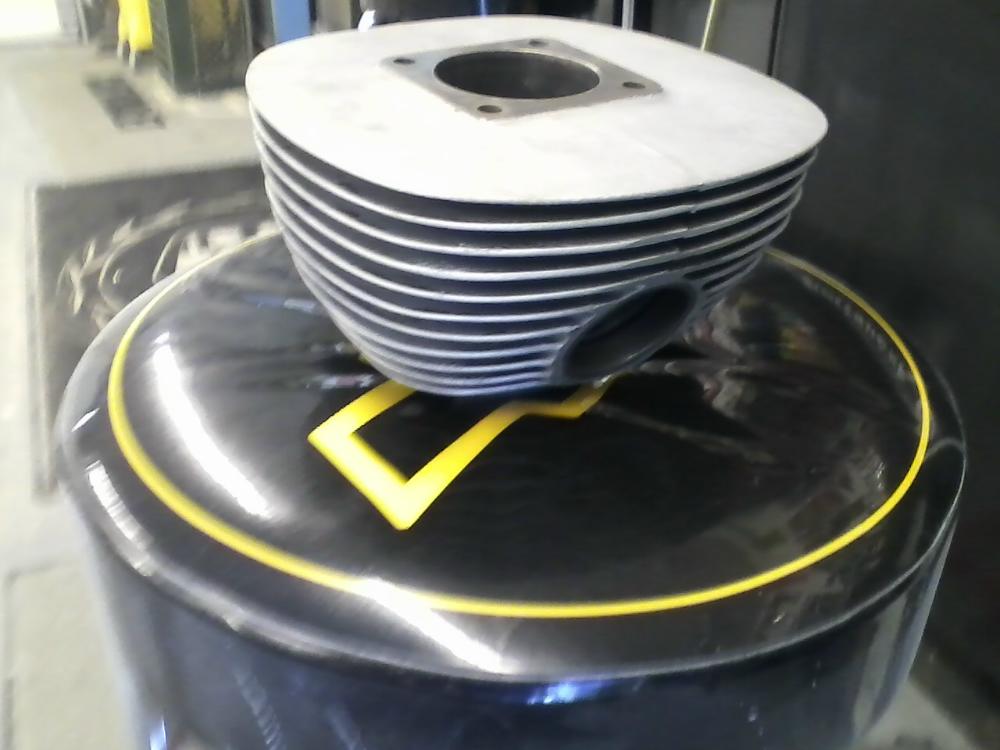
Glass beaded cylinder. (Nice having a blaster at work)
Painted cylinder.
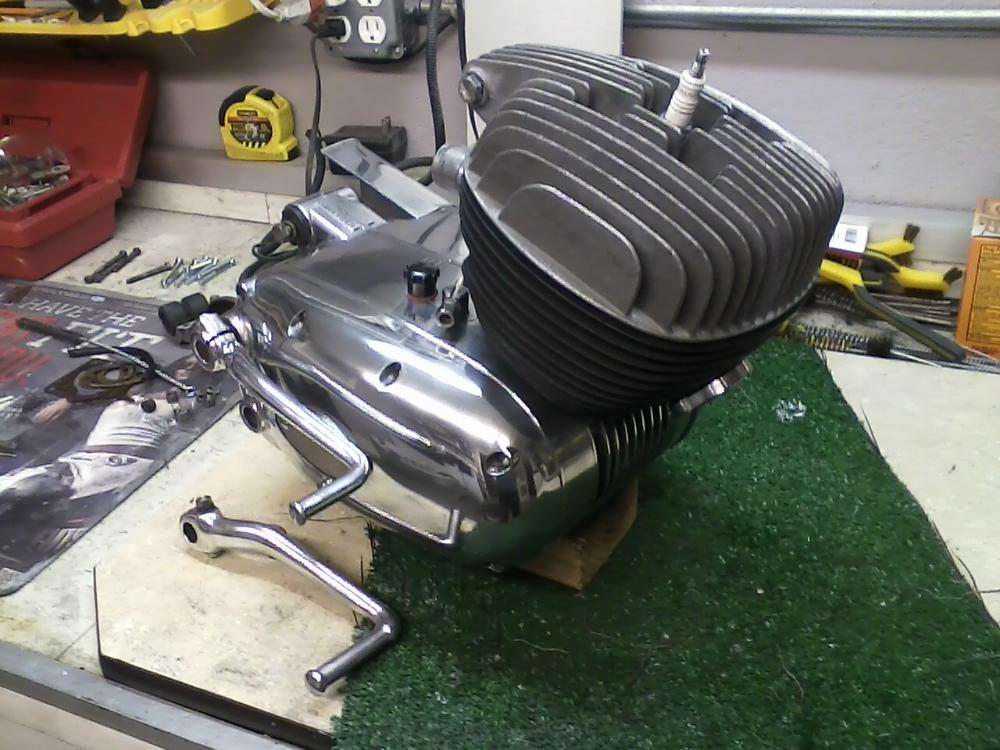
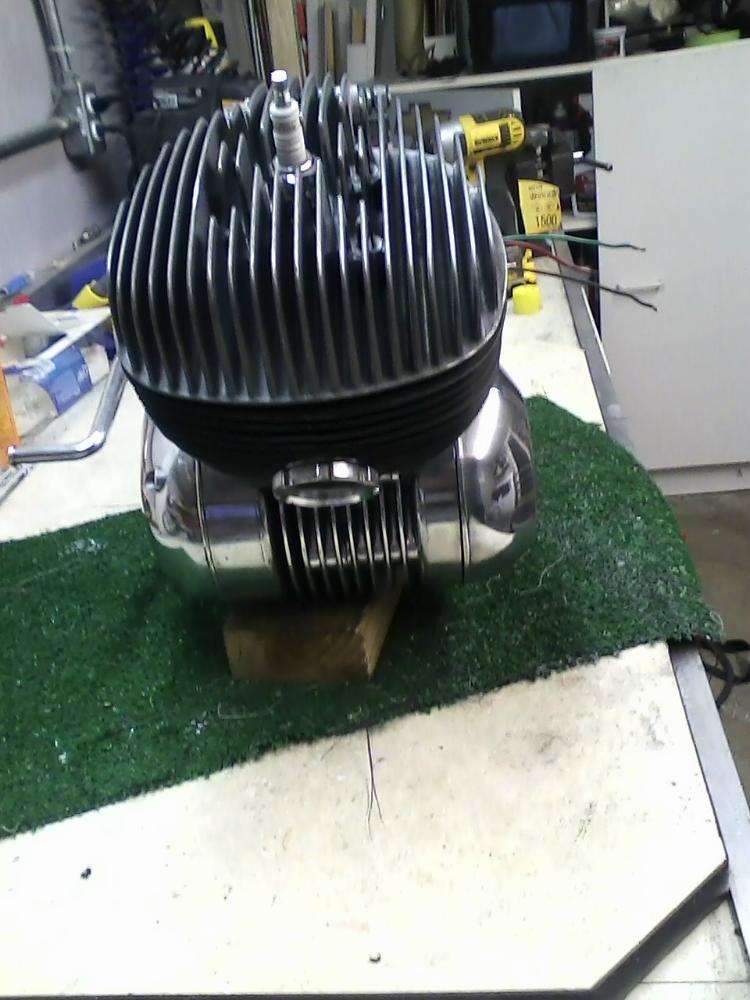
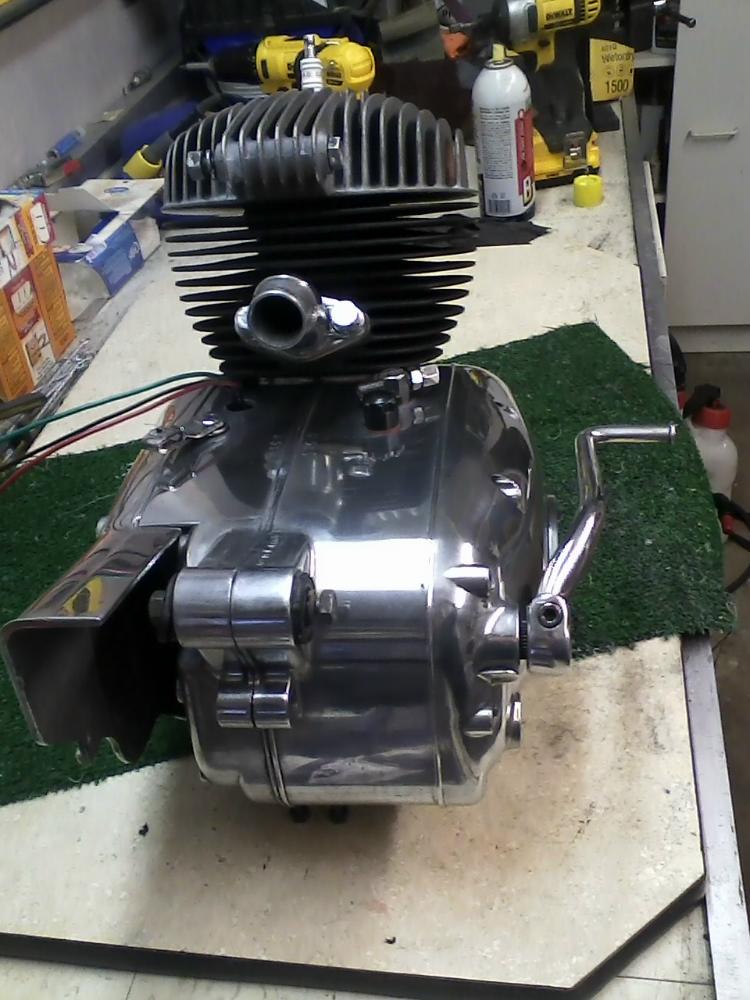
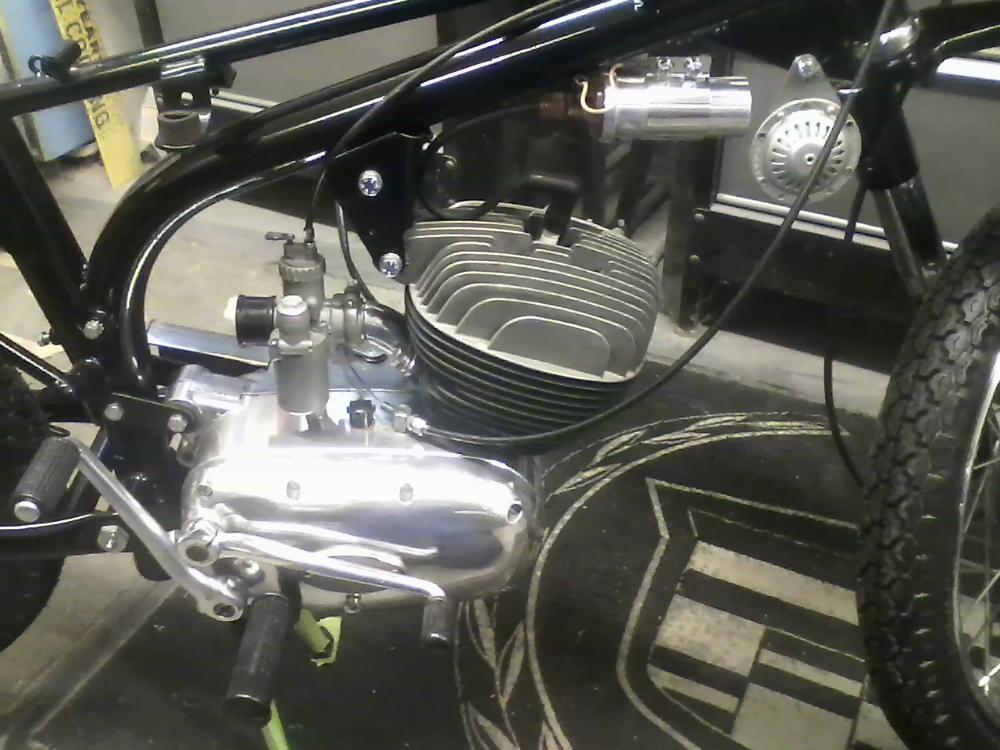
Finished cylinder and head.
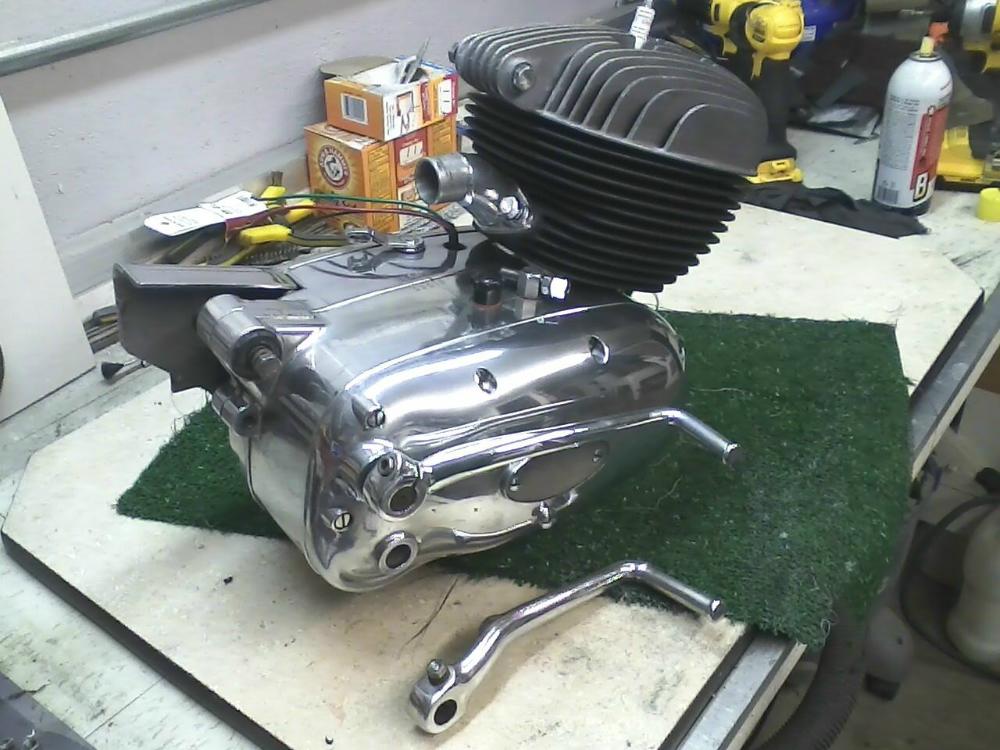
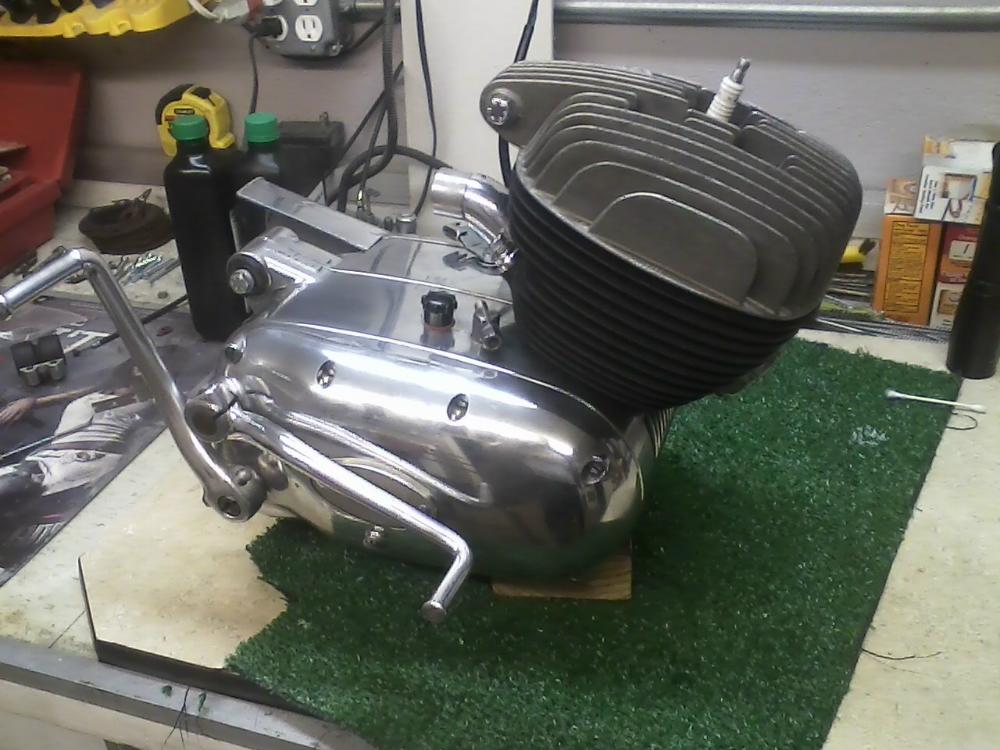
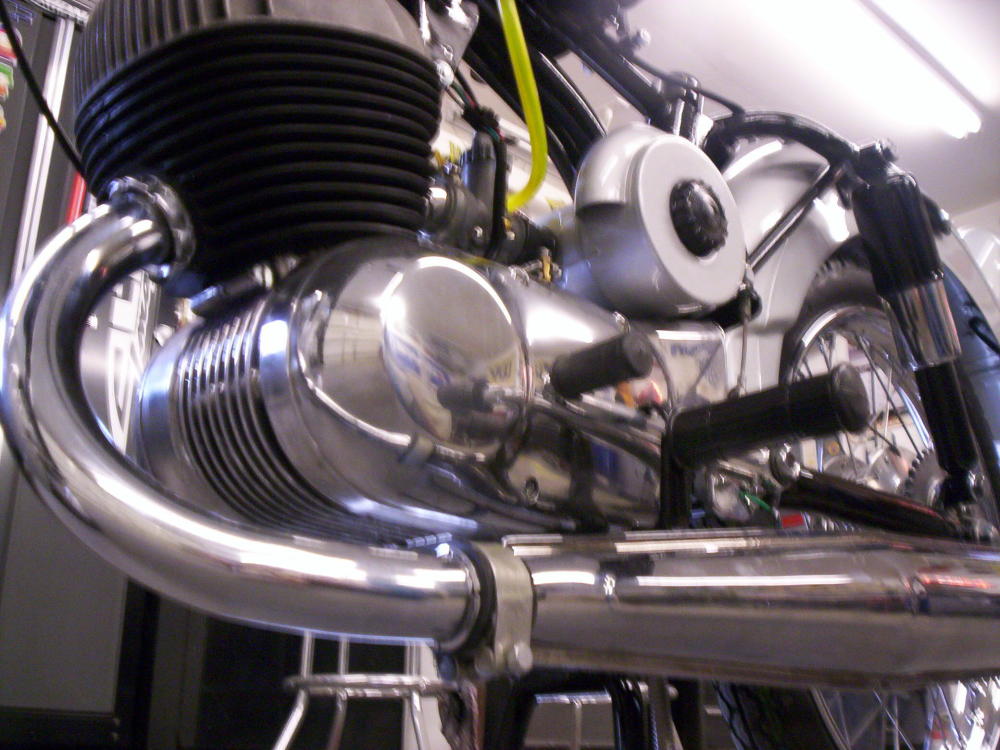
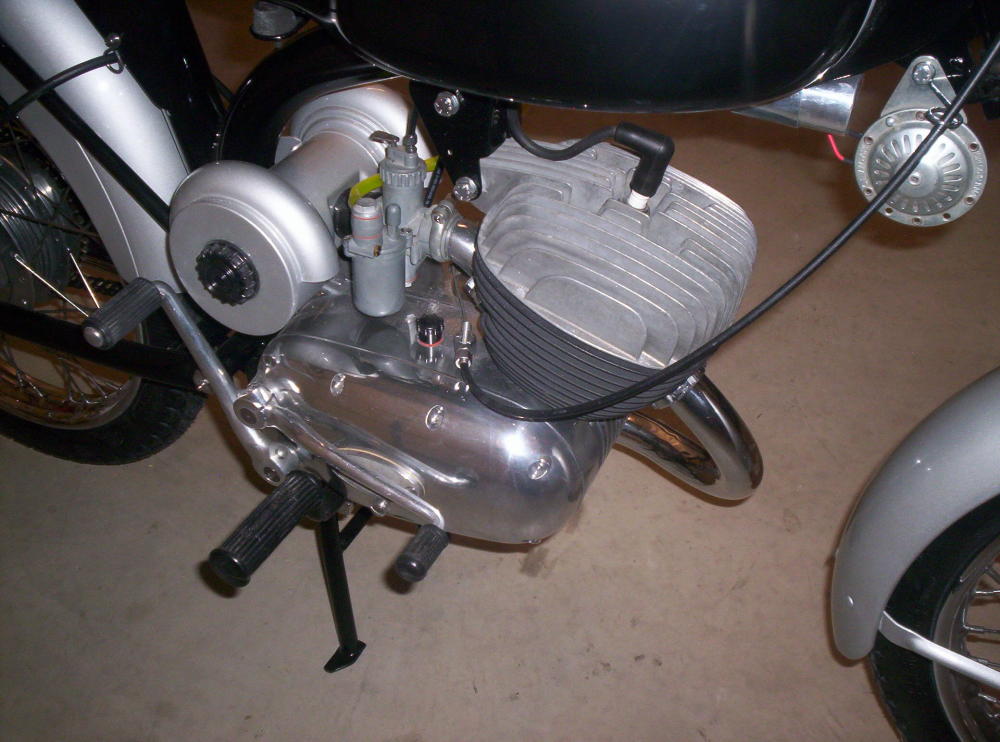
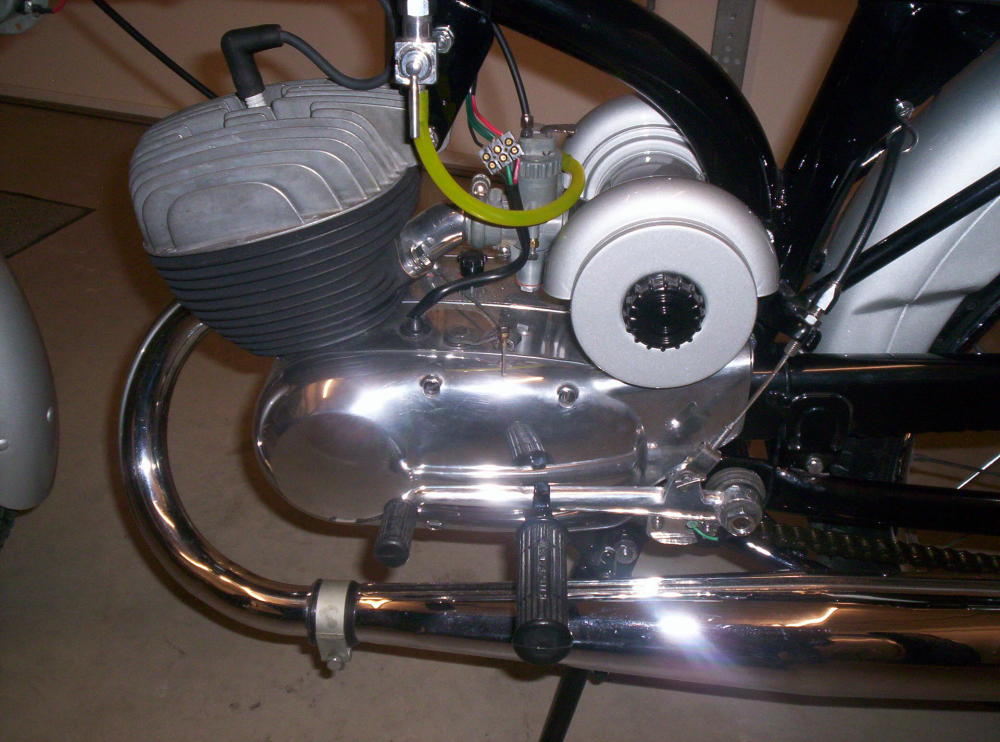
Motor almost finished.

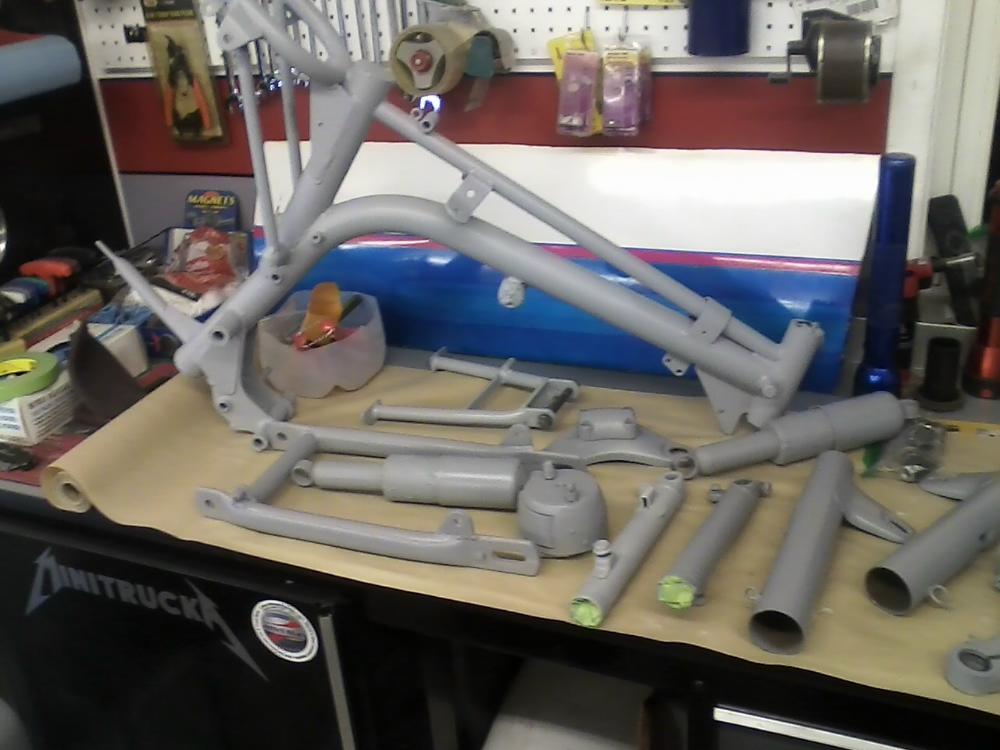
On to paint, parts sanded and etched.
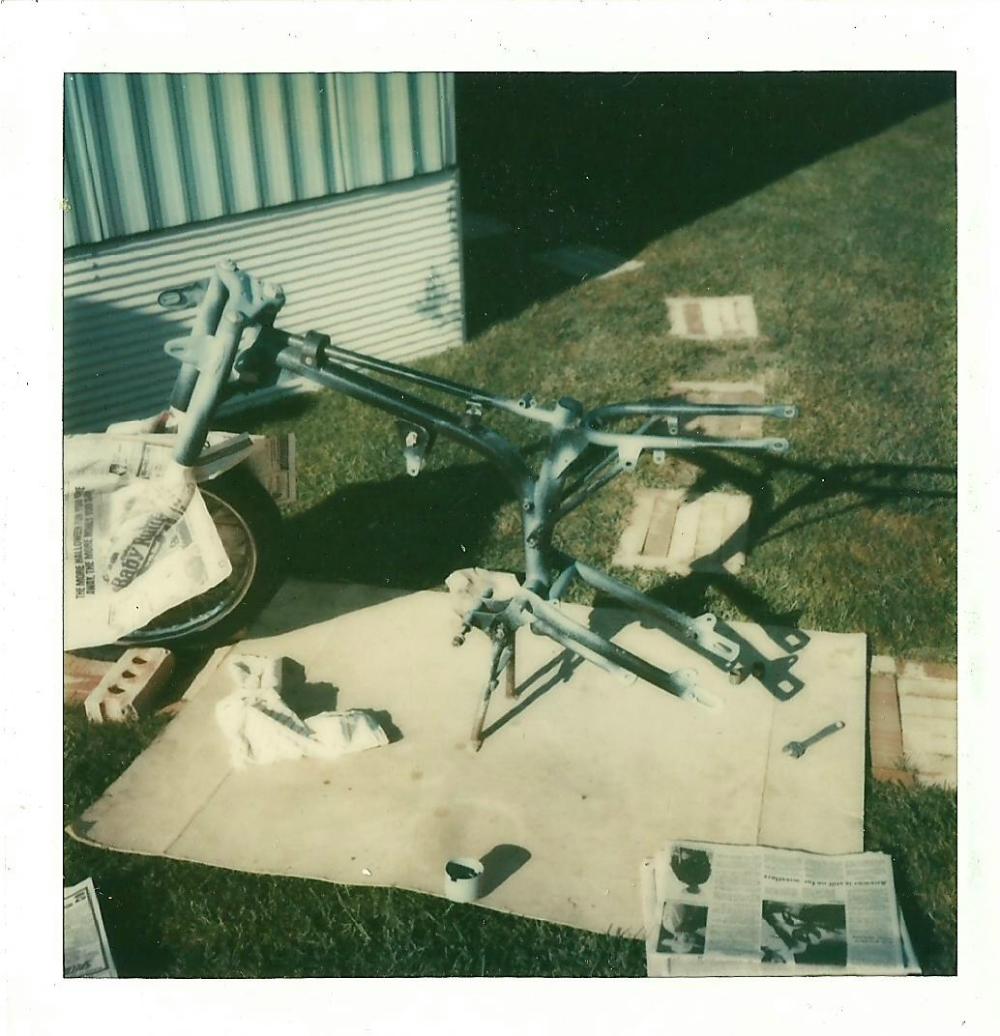
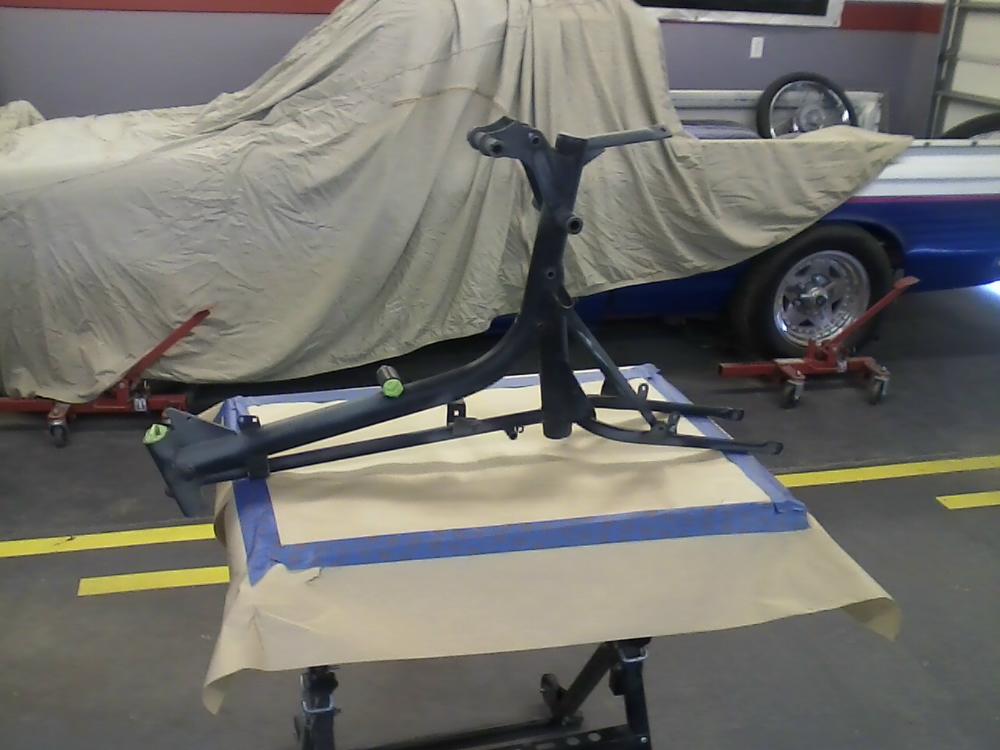
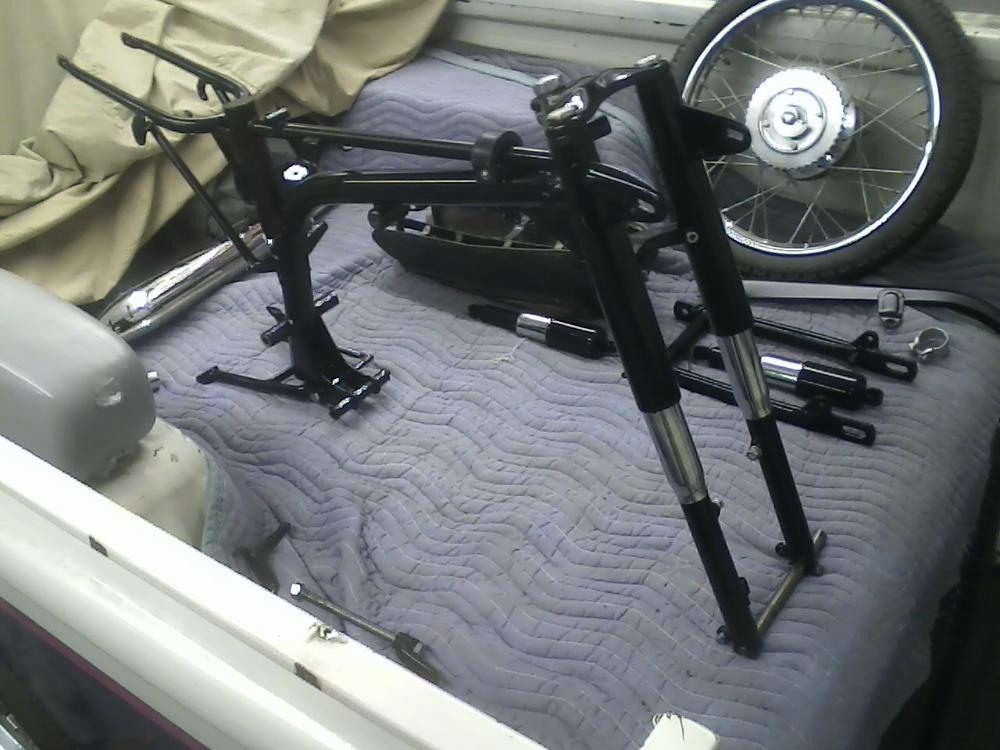
Frame ready for primer.
Primered.
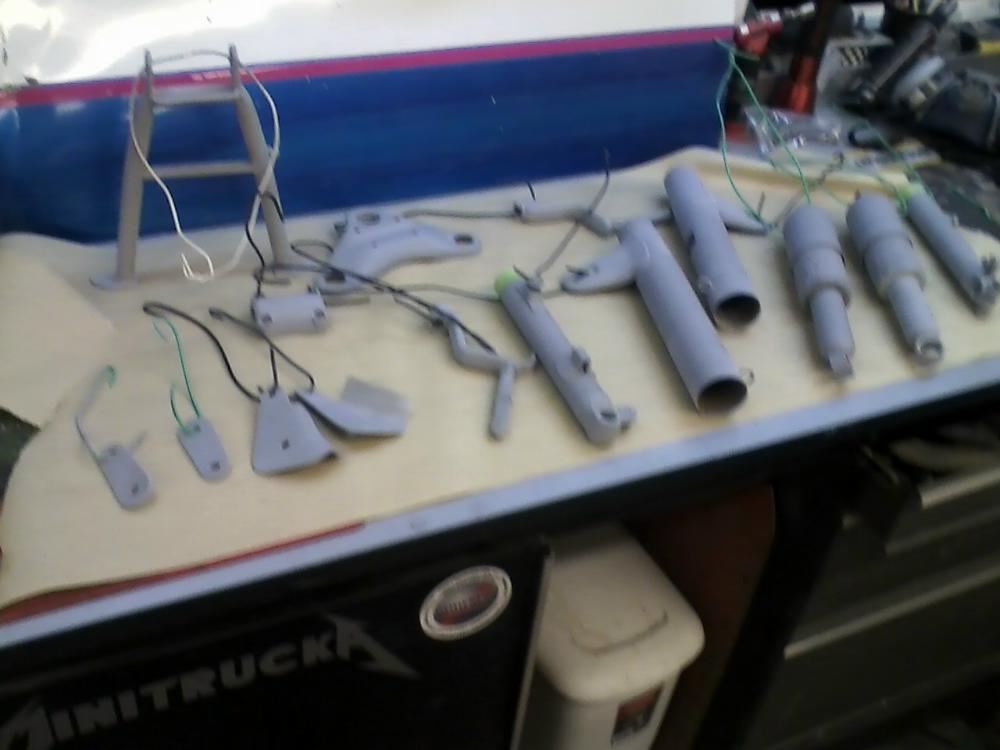
All black pieces primered.
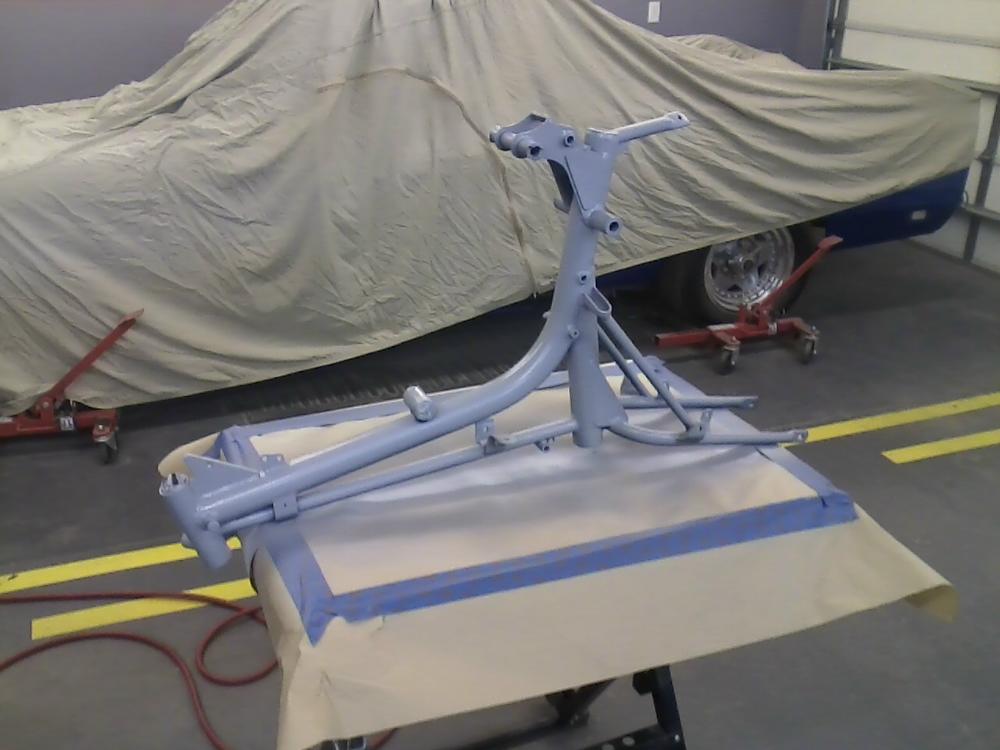
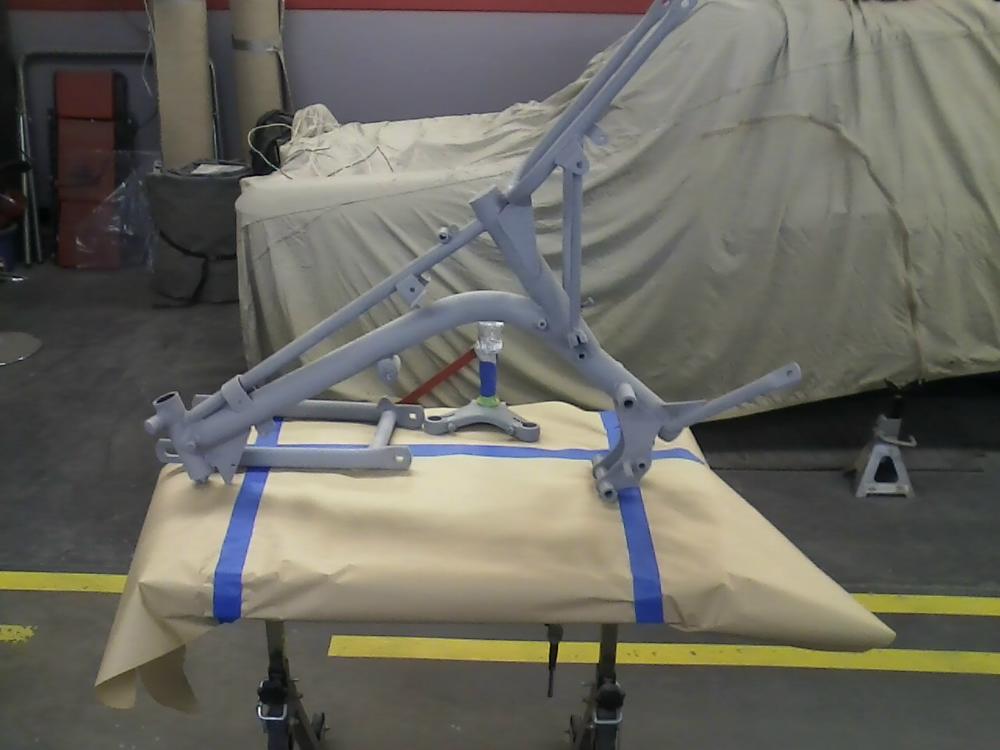
Frame ready for color.

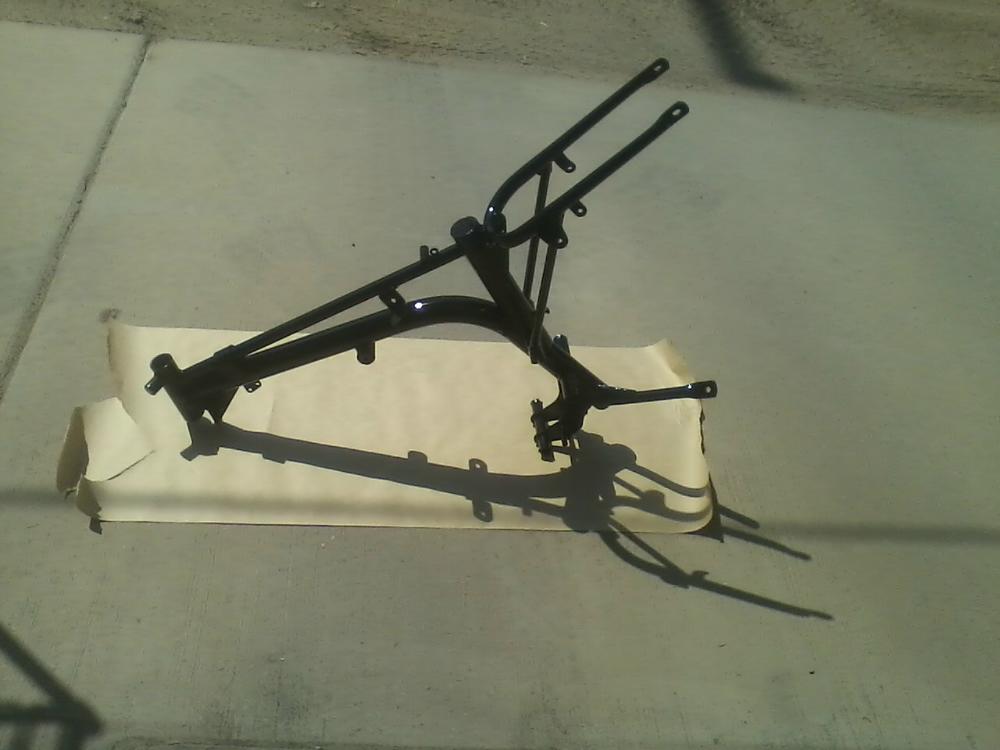
Frame painted and baking in the sun.
Found out painting a motorcyle frame is a lot more dfficult than painting a car.
Rest of black pieces painted (except tank) and had to repaint the chain guard, I ran it pretty bad.
Sun drying.
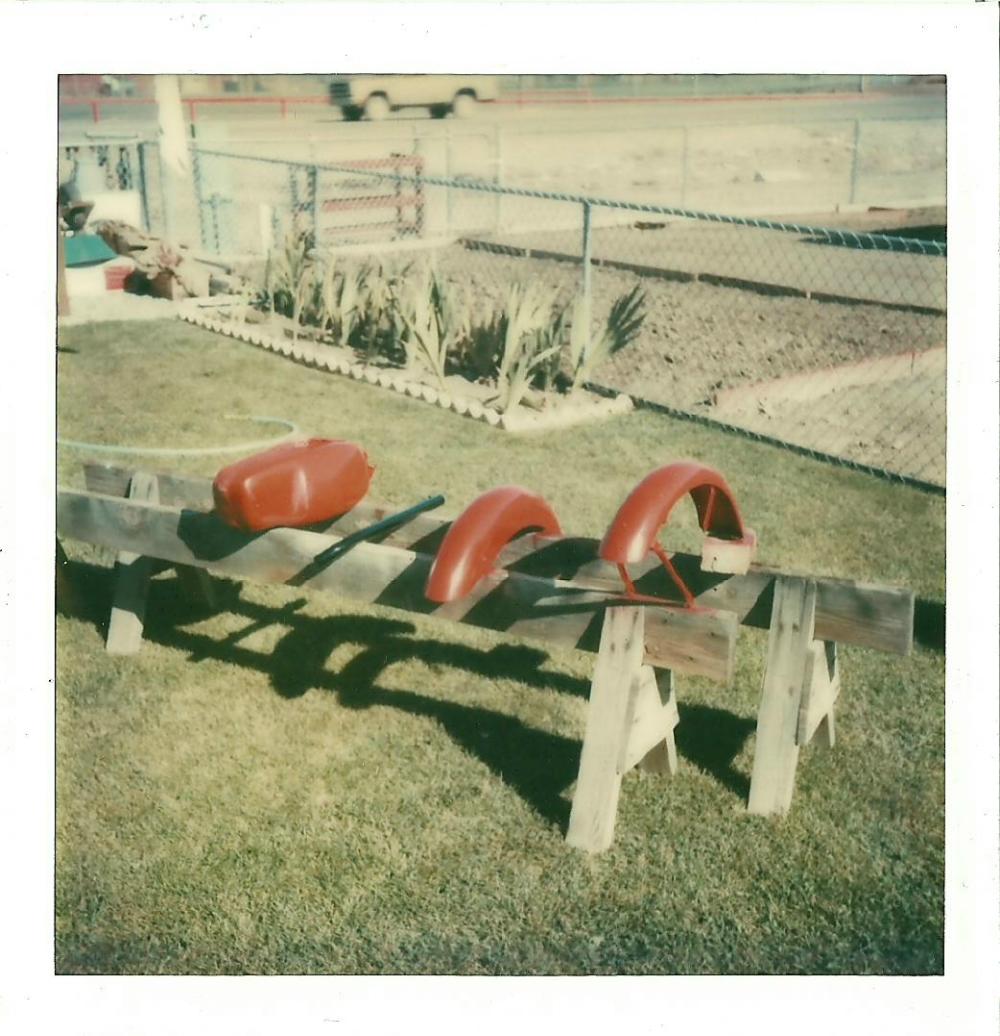
Time to paint the silver.
Fenders painted and cleared.
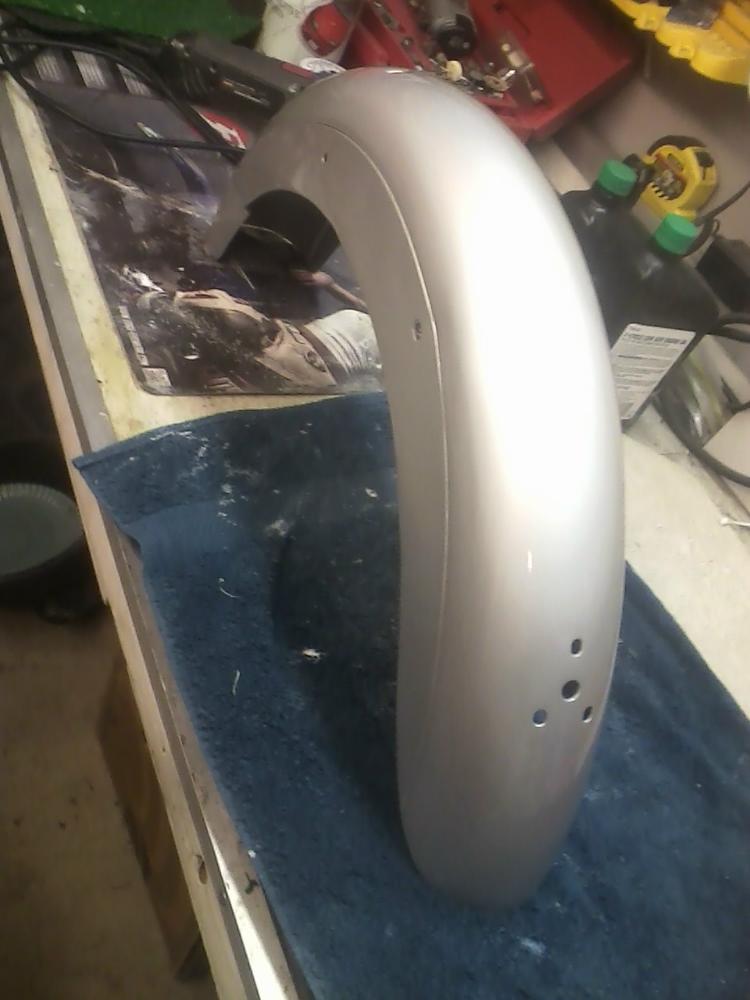
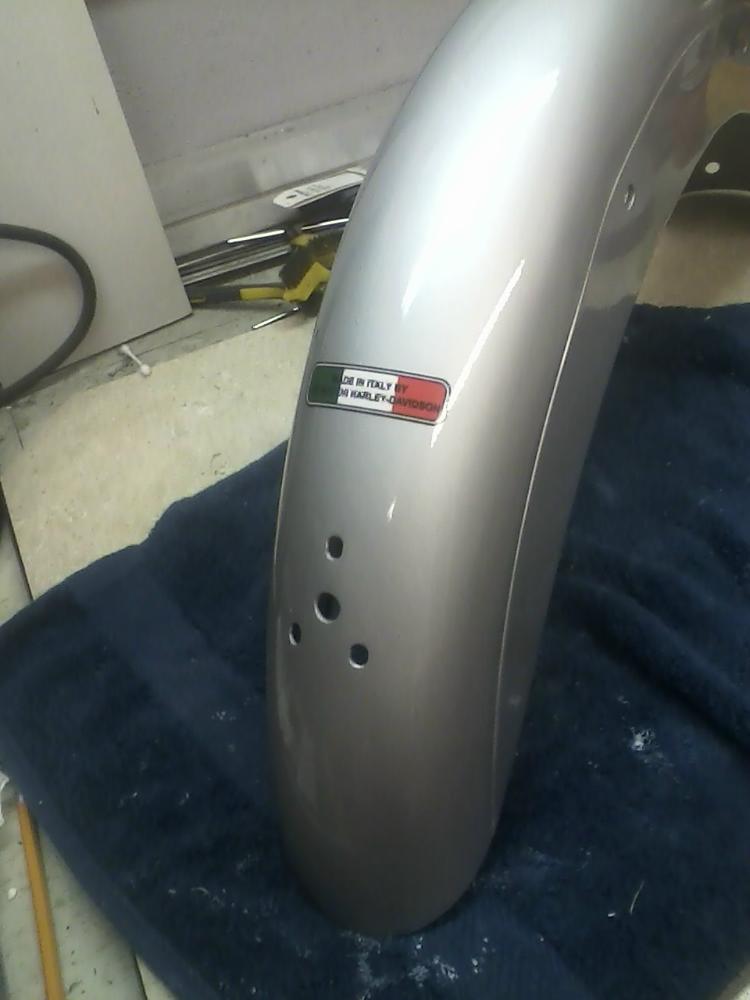
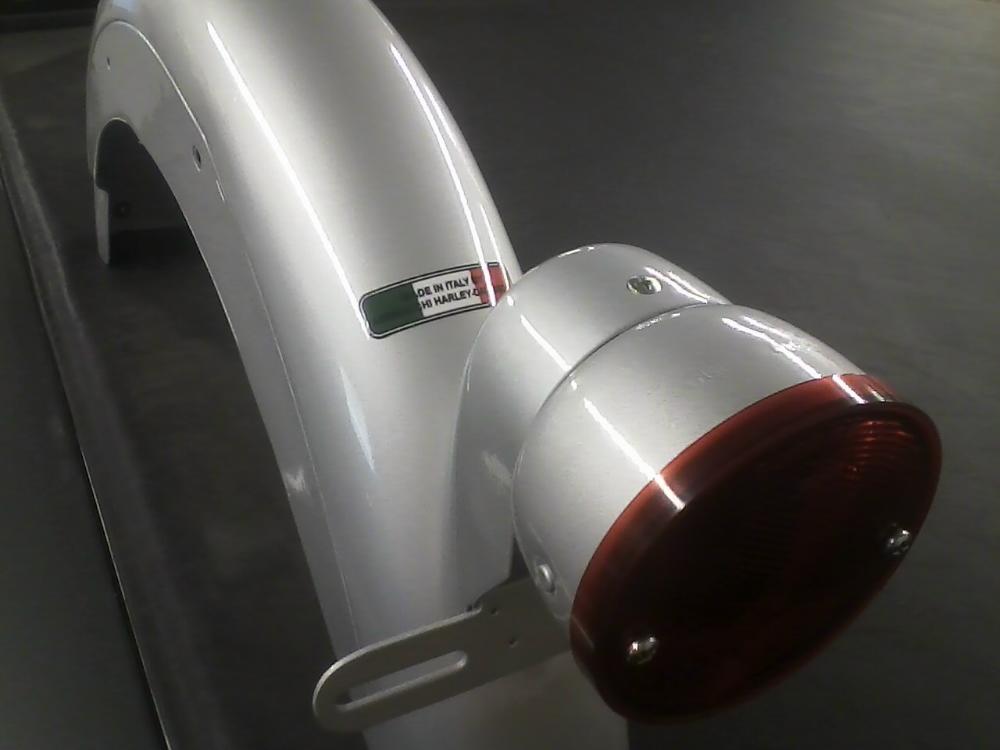
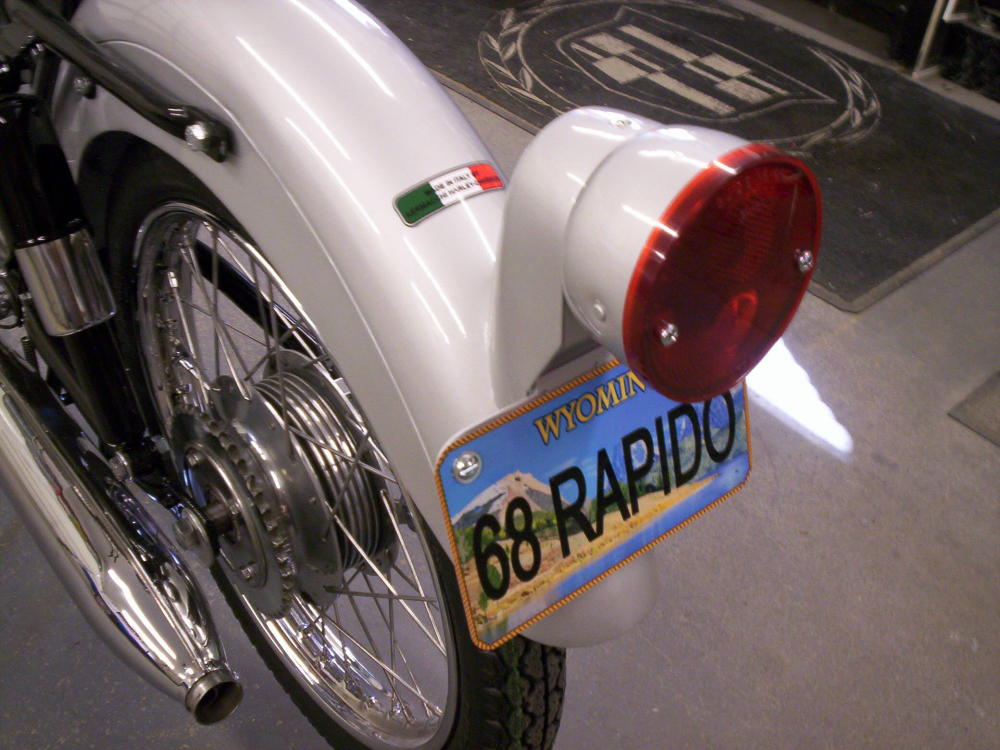
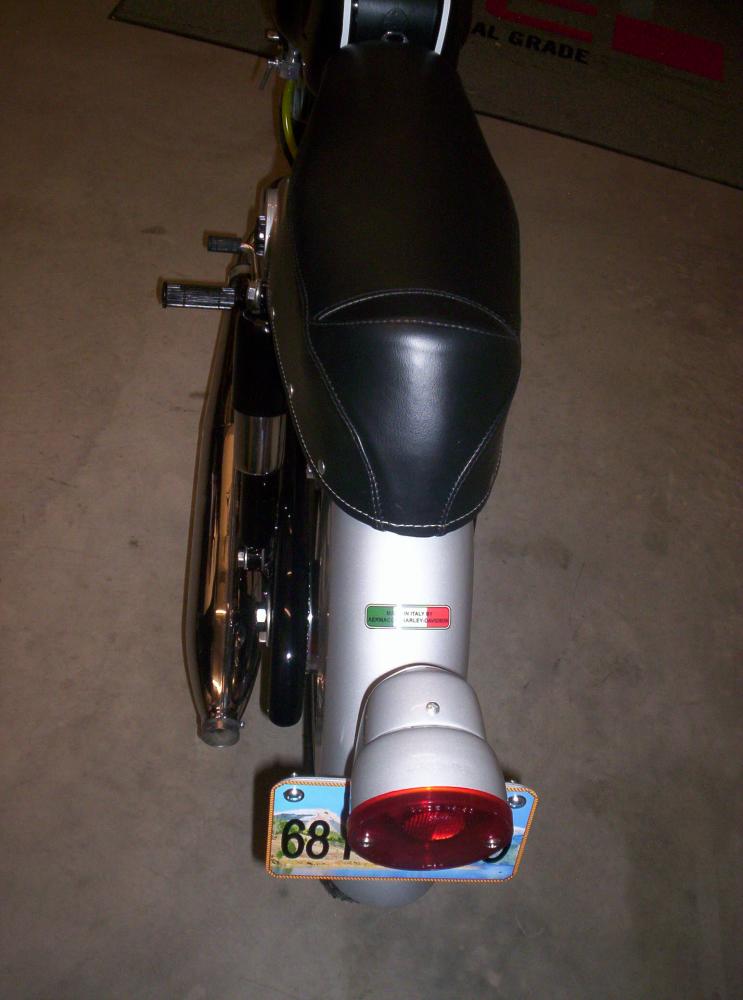
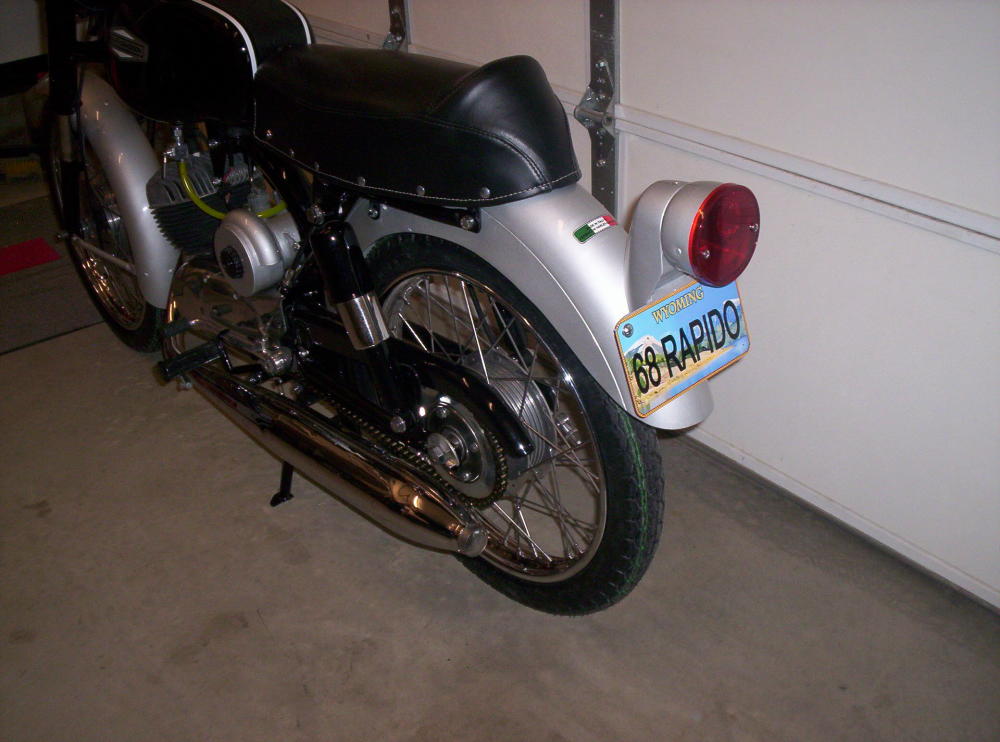
Made in Italy sticker installed.
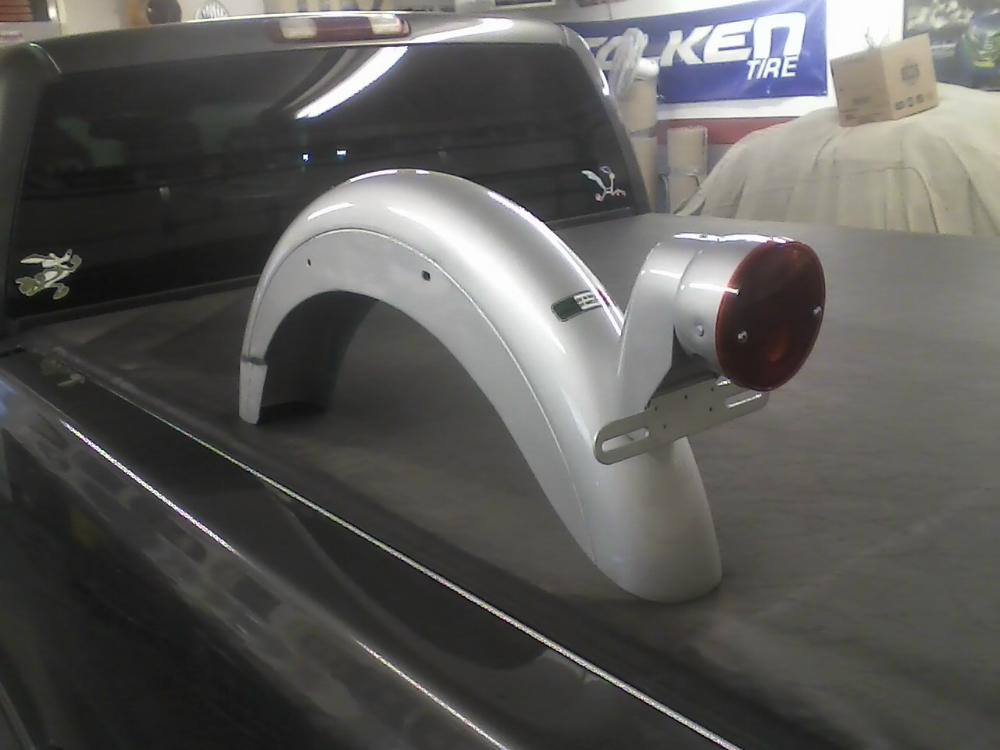
Tail light and housing installed.
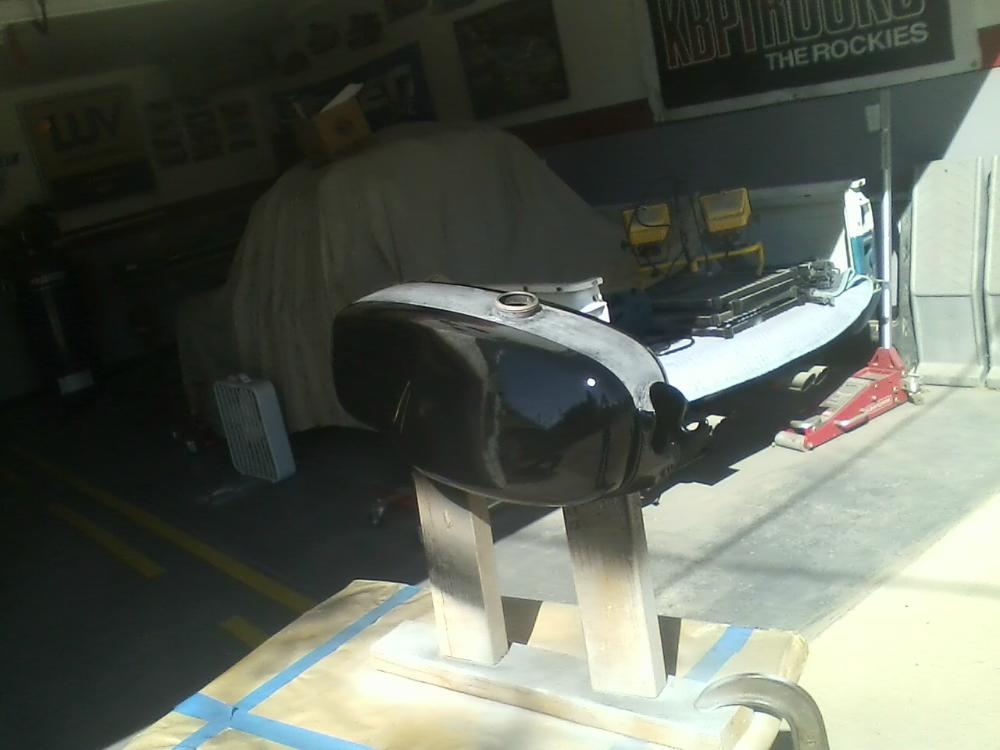
Tank mounts were bent over.
Closer to right position, but not finished.
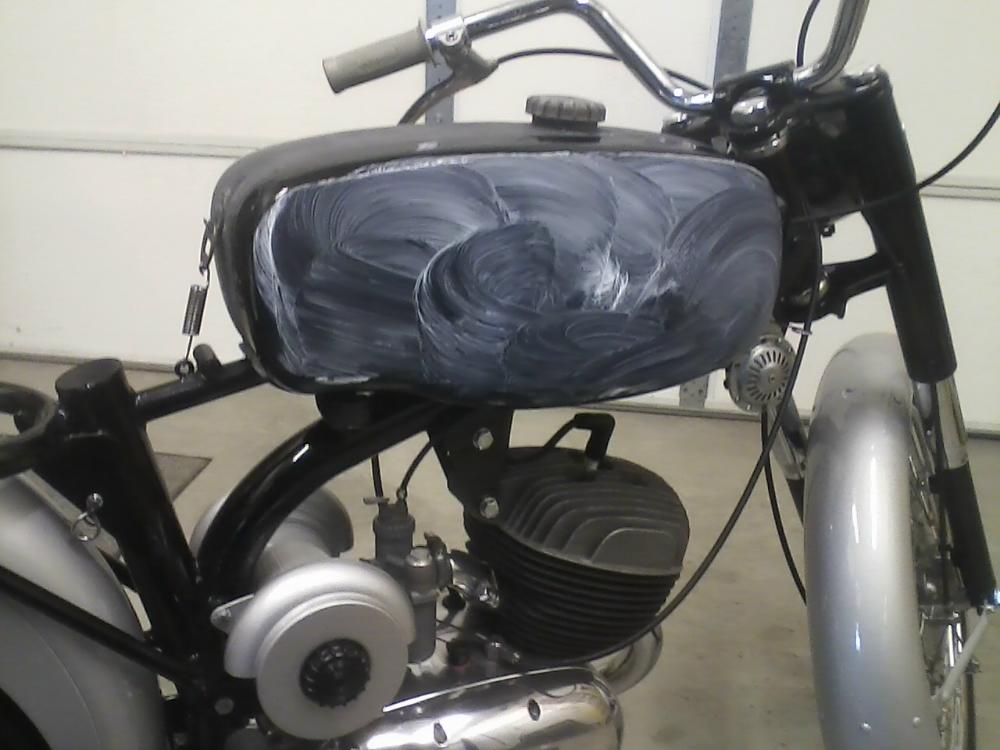
Fixing a small dent.
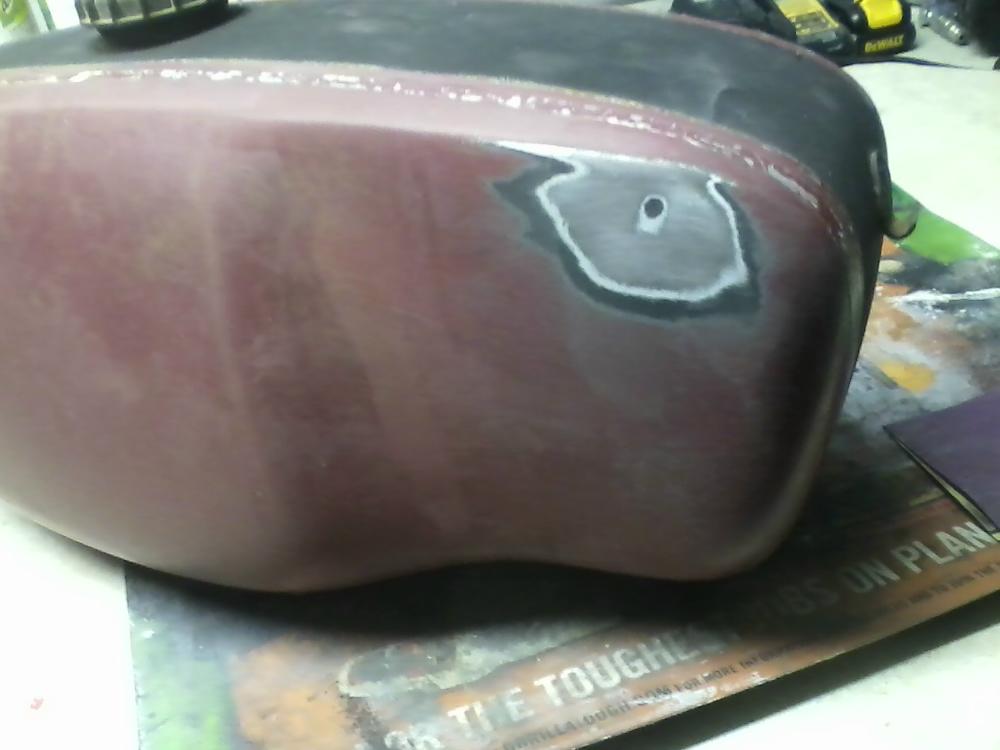
Smoothed out.

Painted.

Wet sanded.
Buffing out.
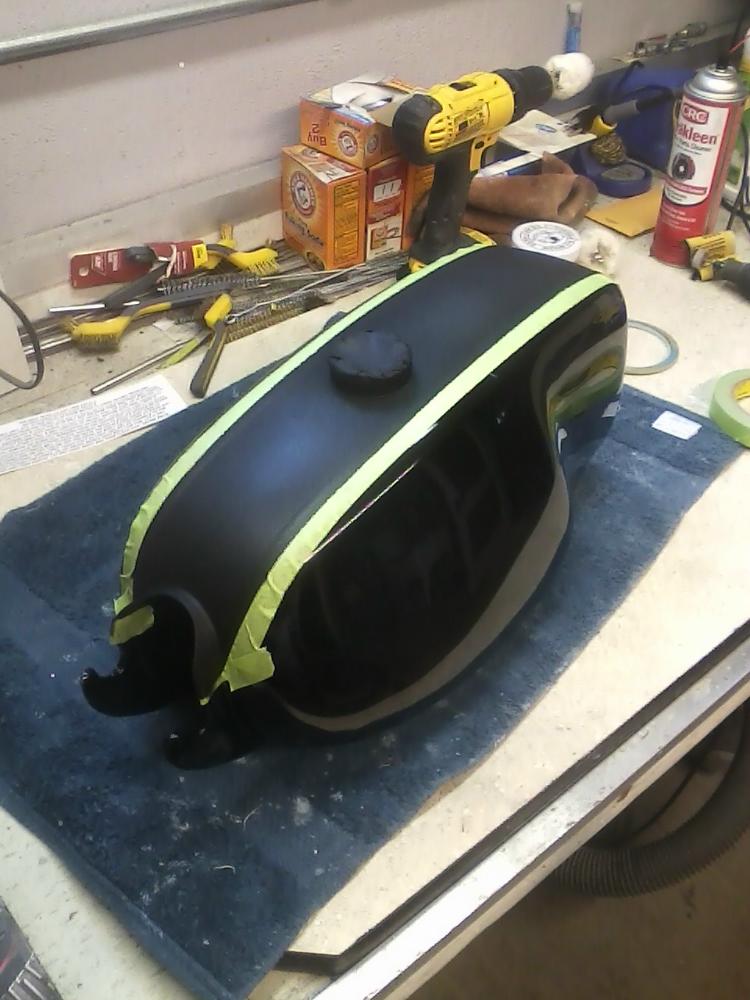
Buffed out and getting ready to paint stripe.
Painted textured stripe.
Pinstriped.
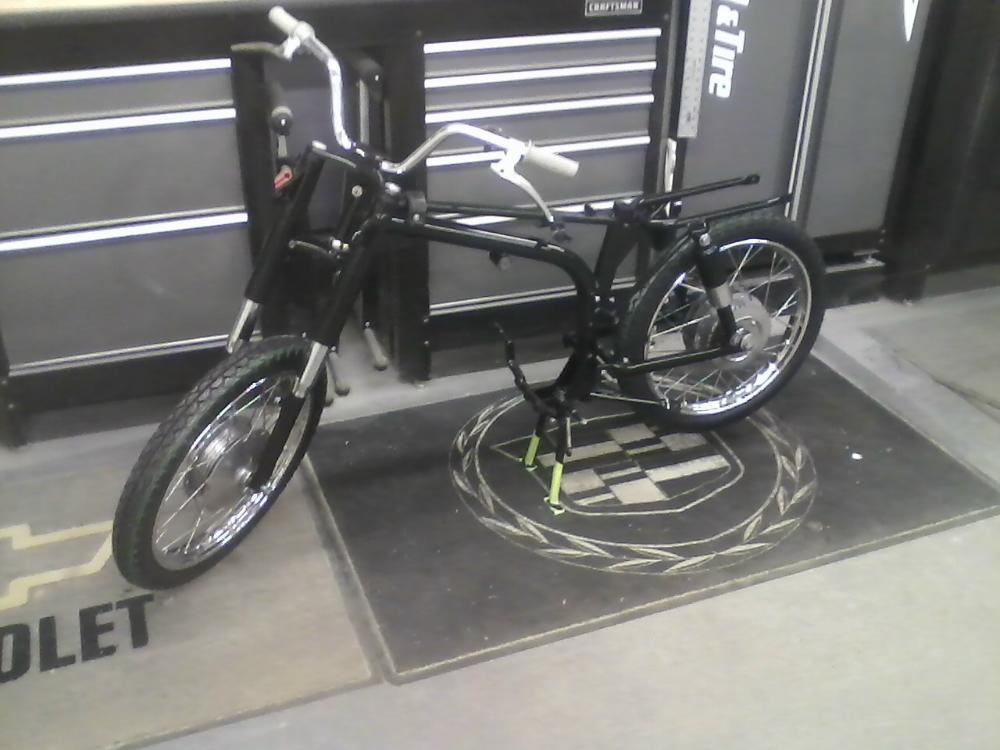
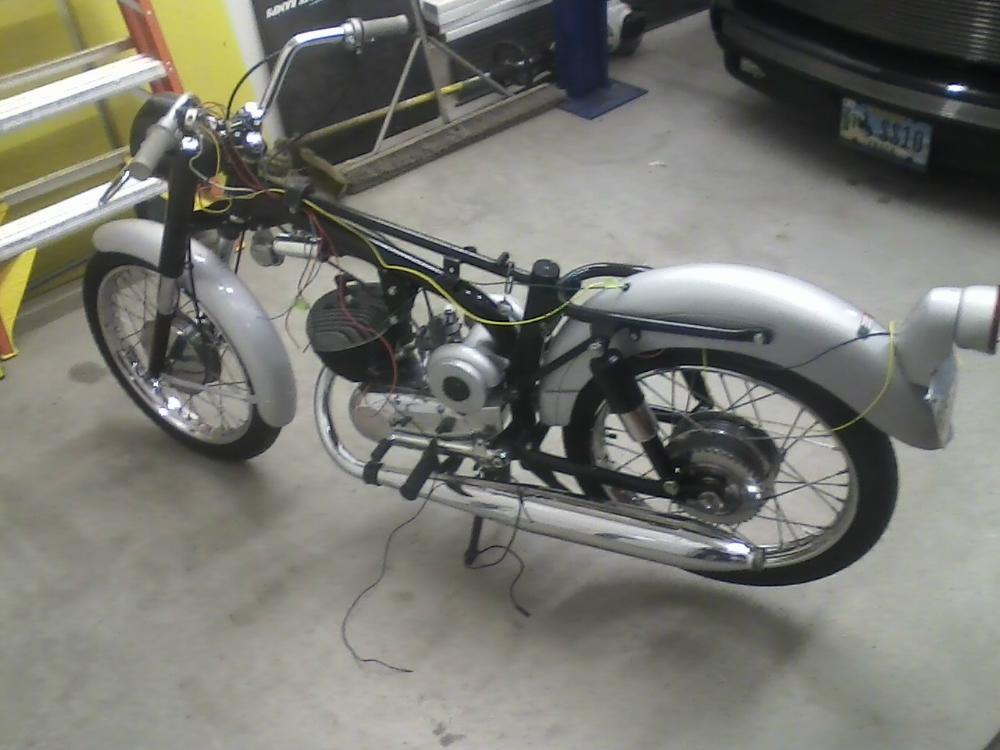
Starting re-assembly.
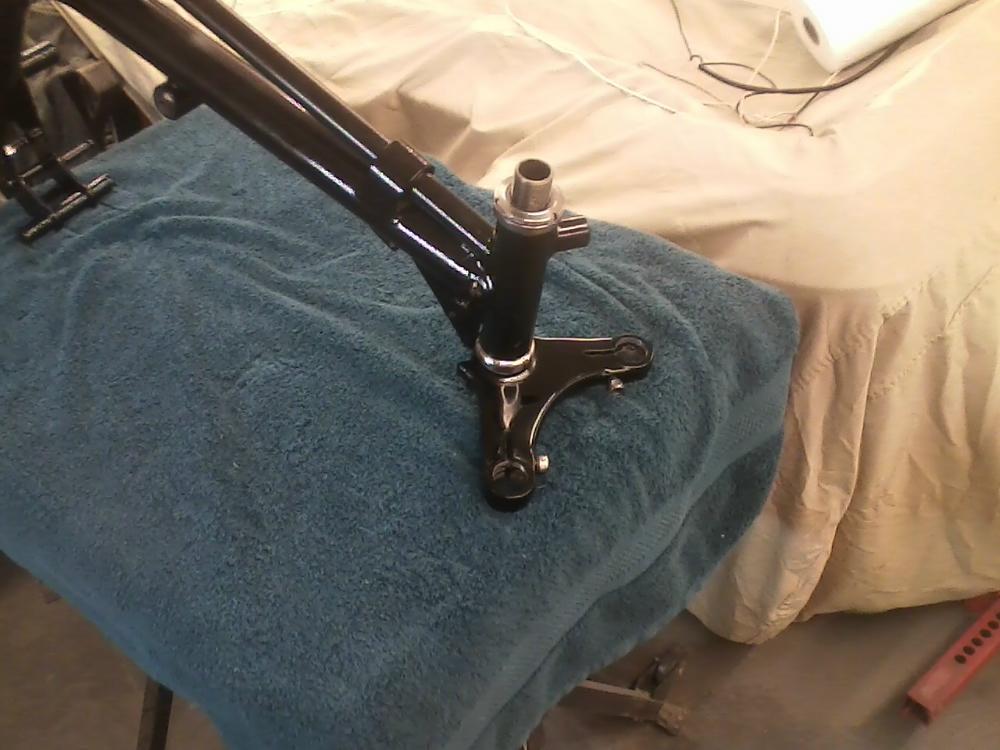
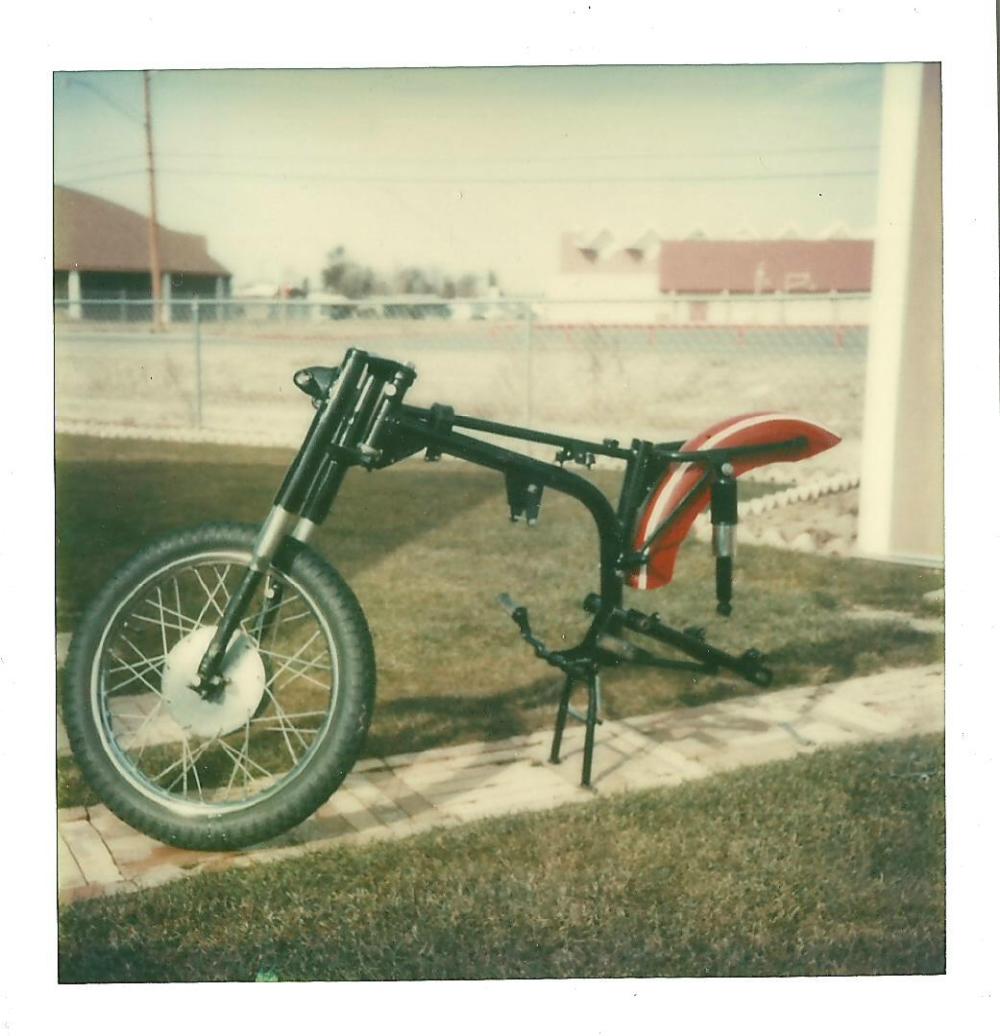
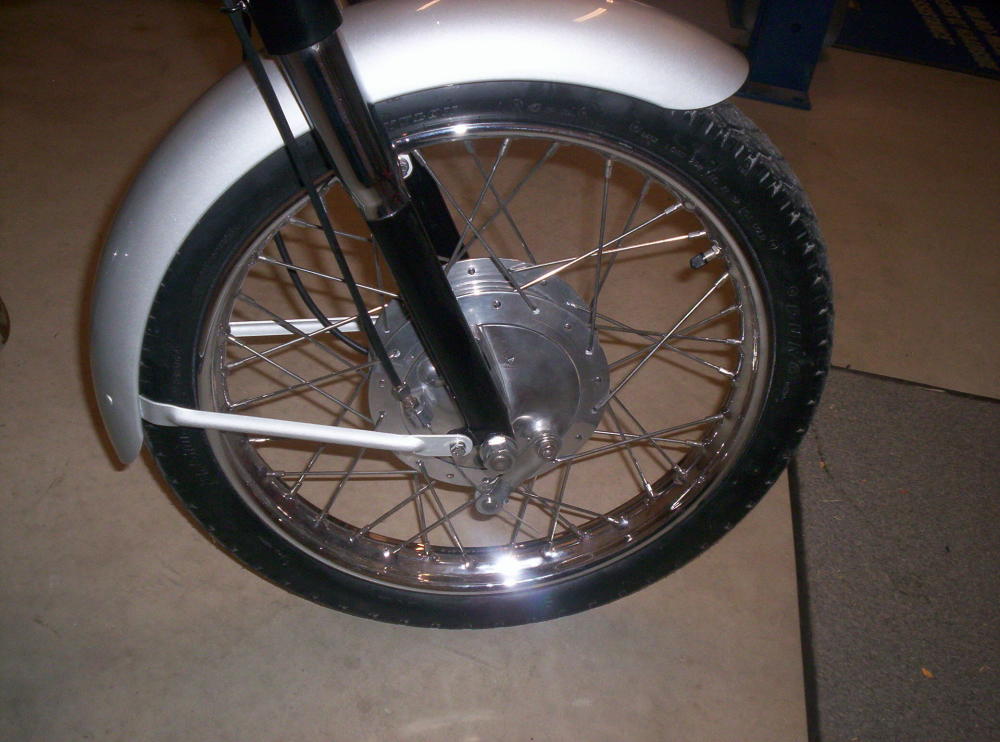
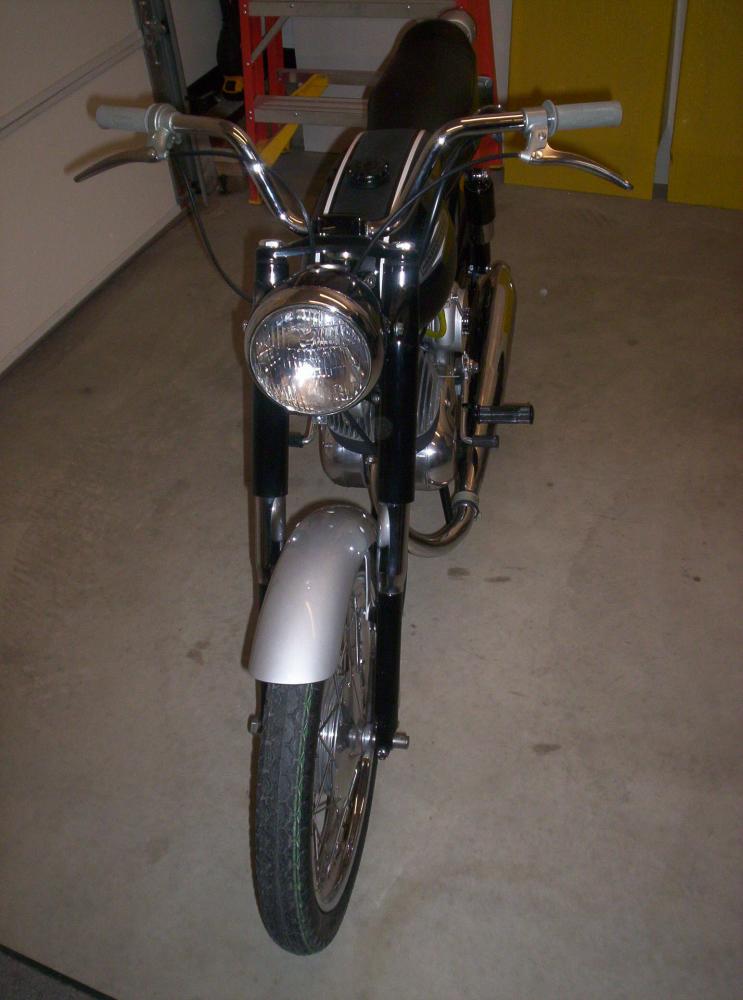
Front forks and kick stand on.
Front wheel on.
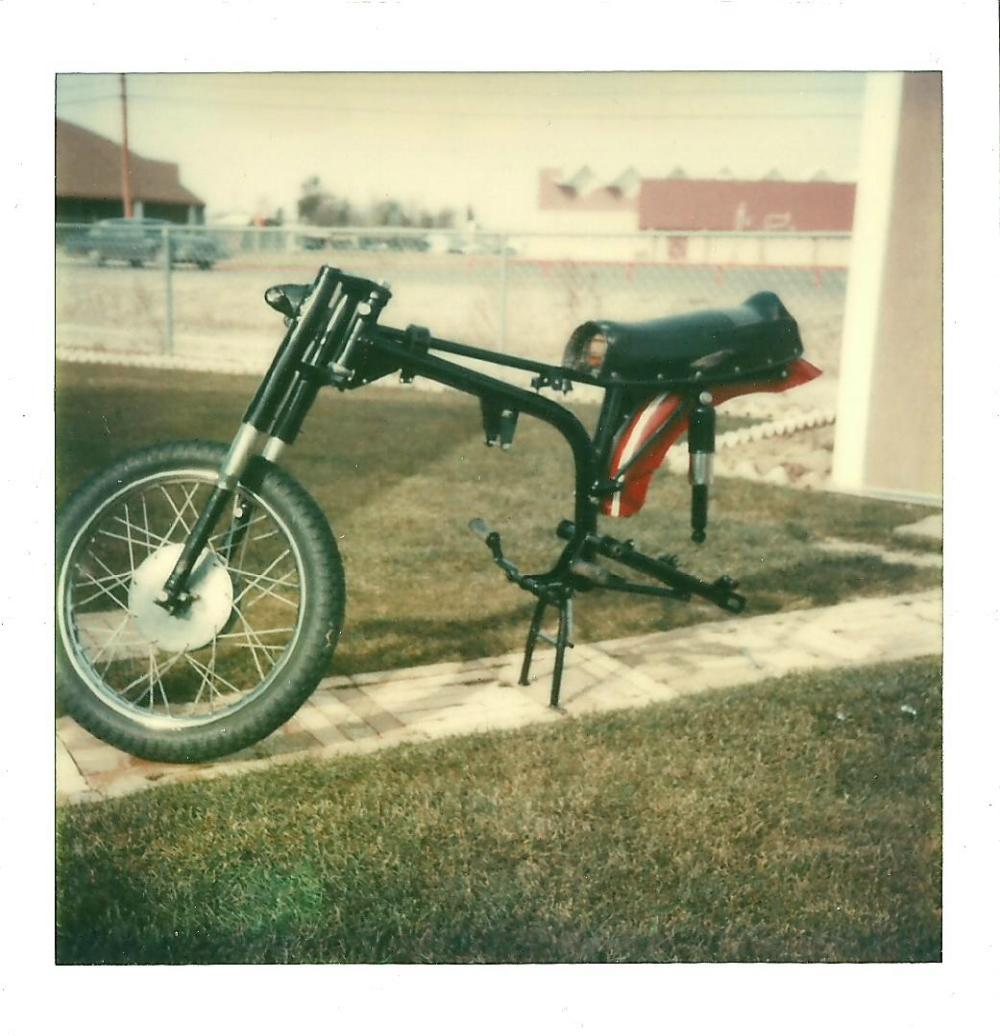
Handlebars, rear forks, foot pegs and shocks on.
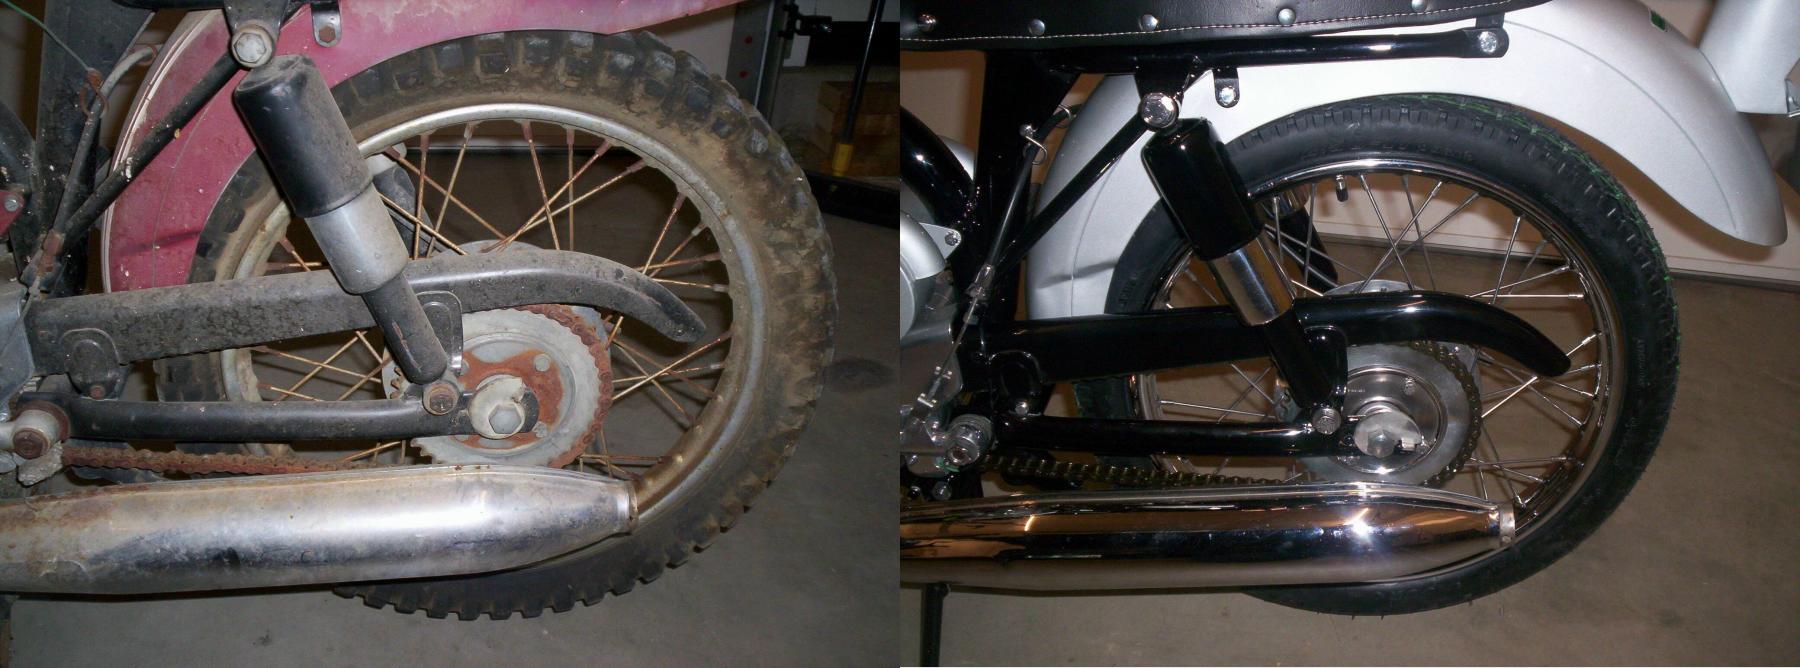
Rear wheel on.
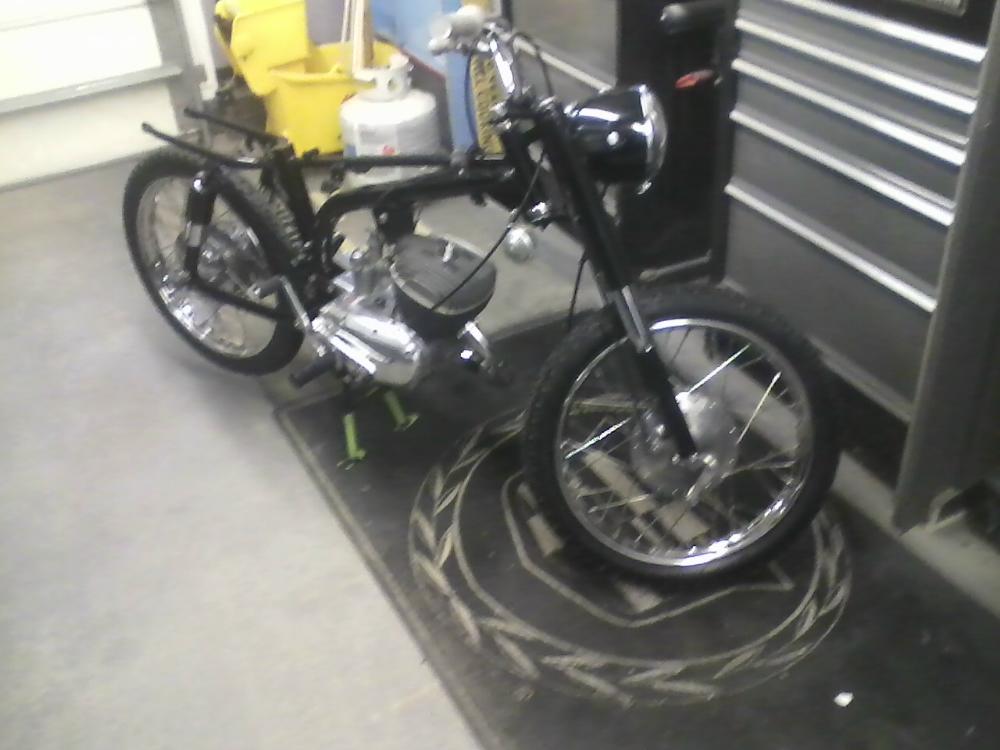
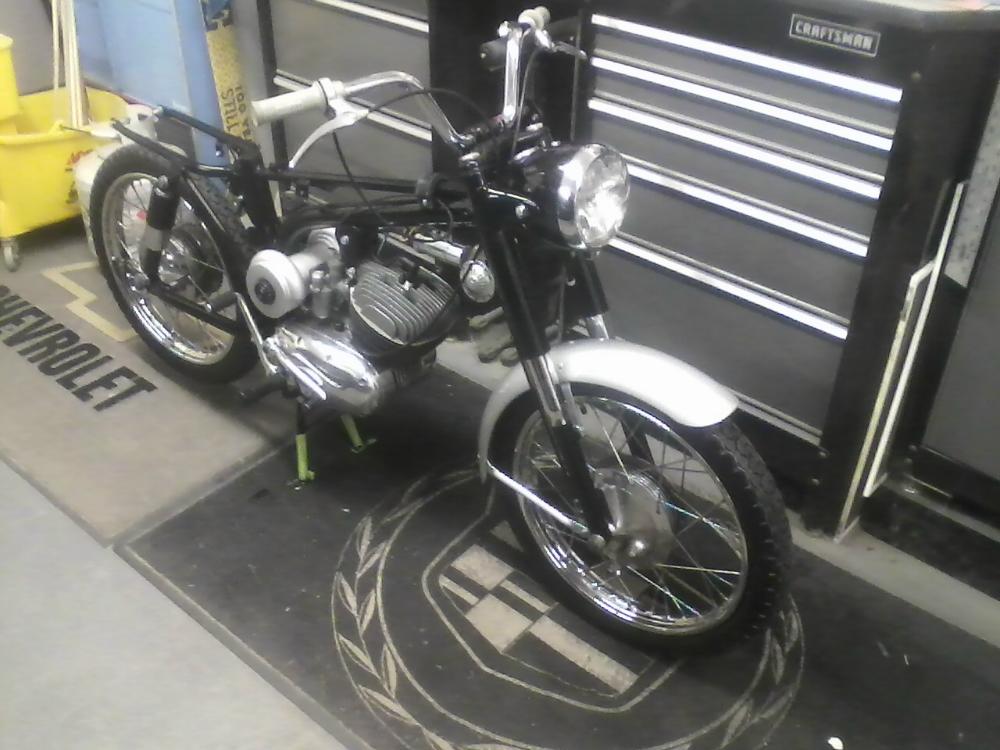
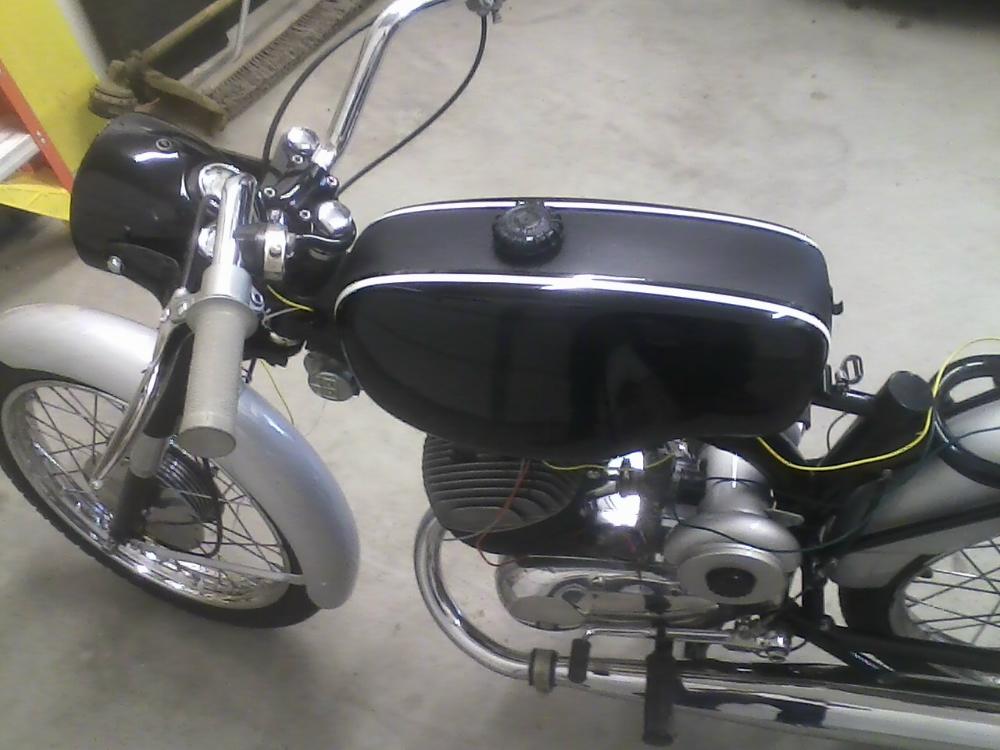
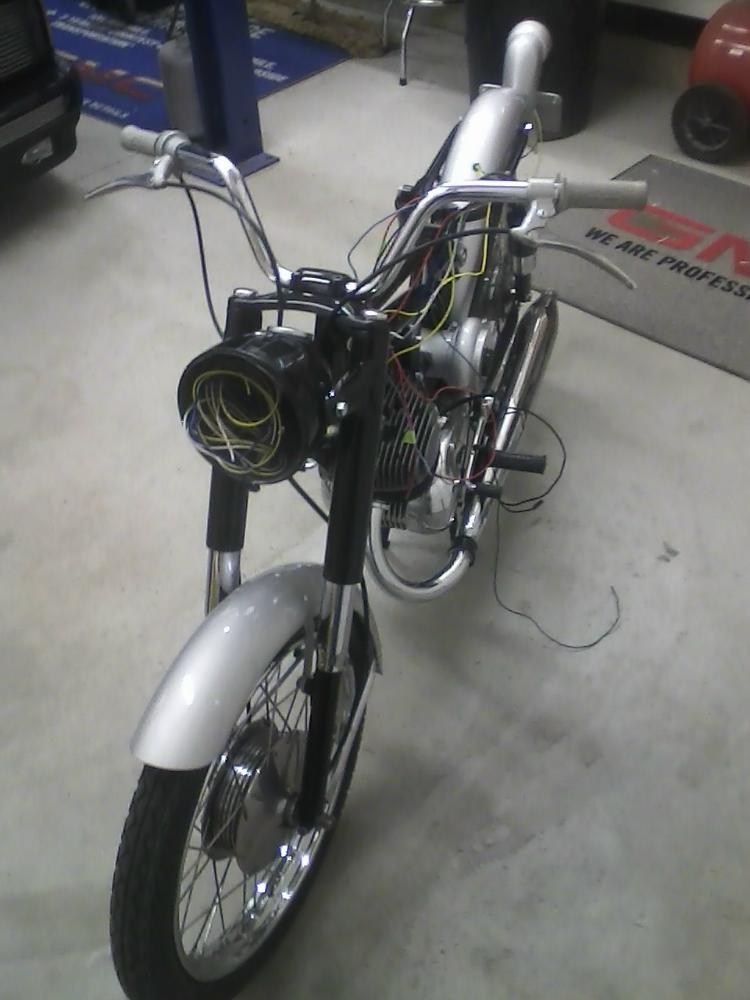
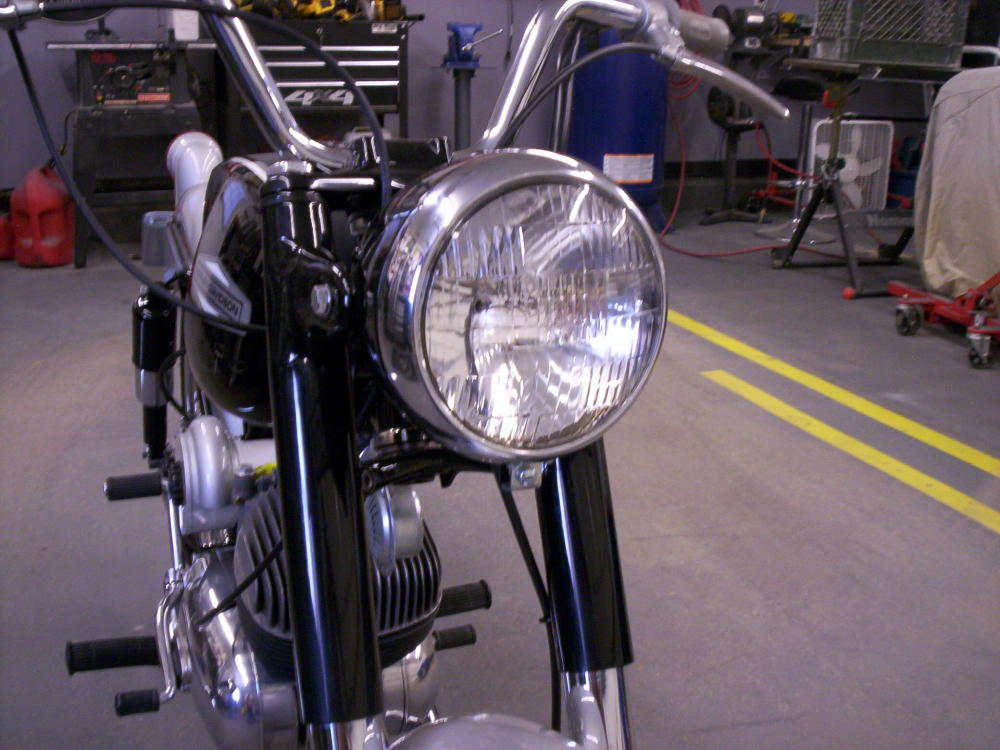
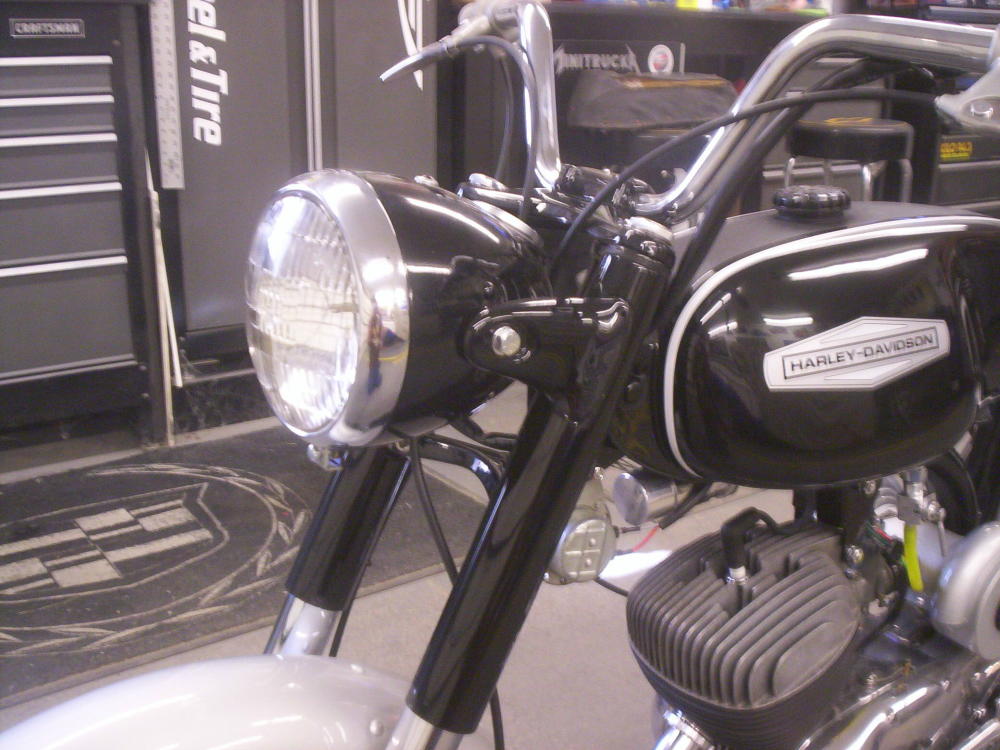
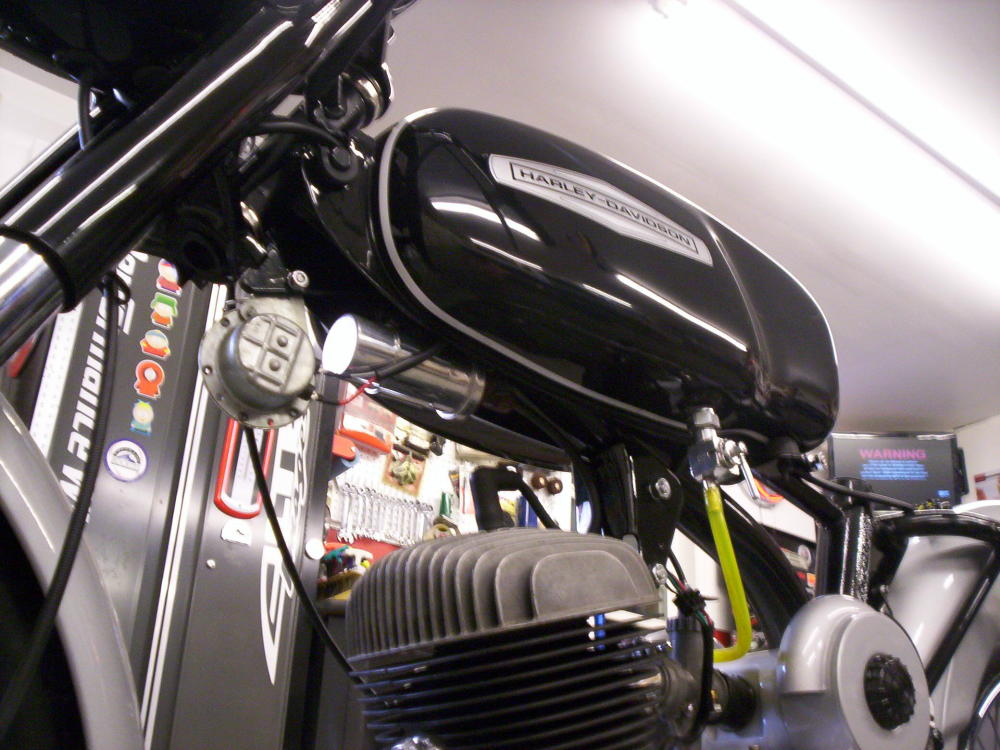
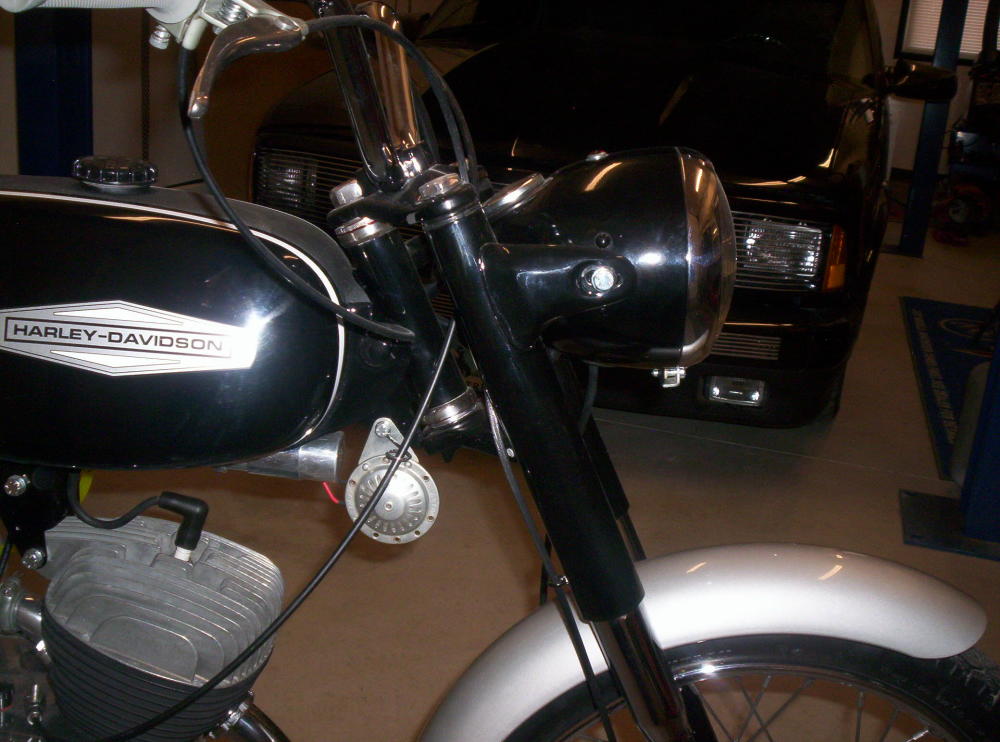
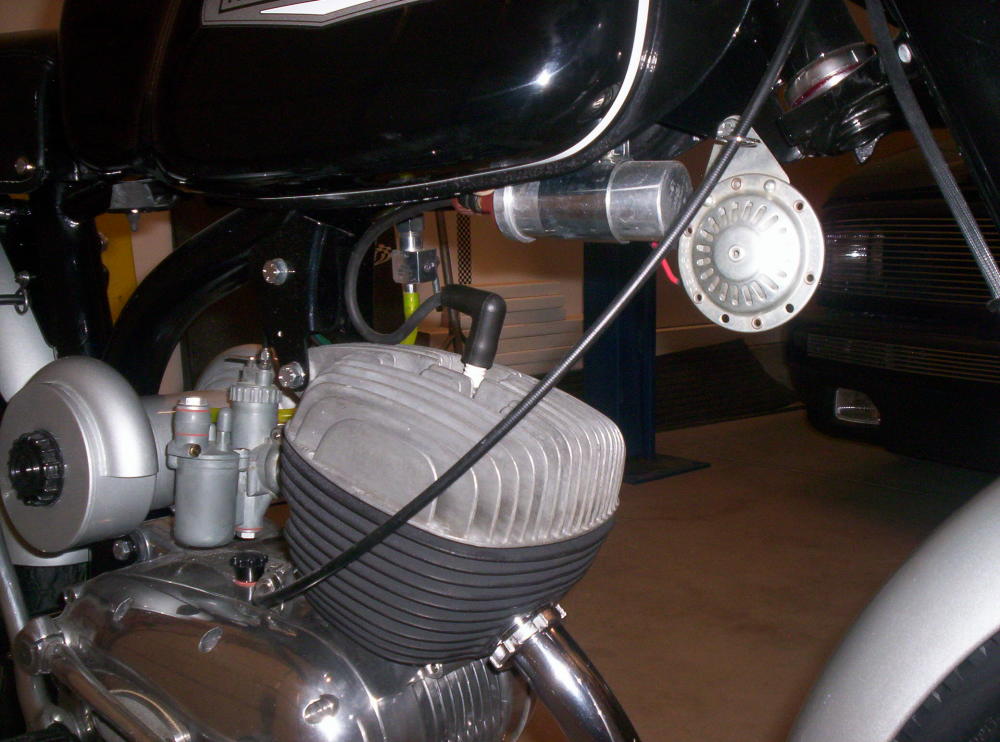
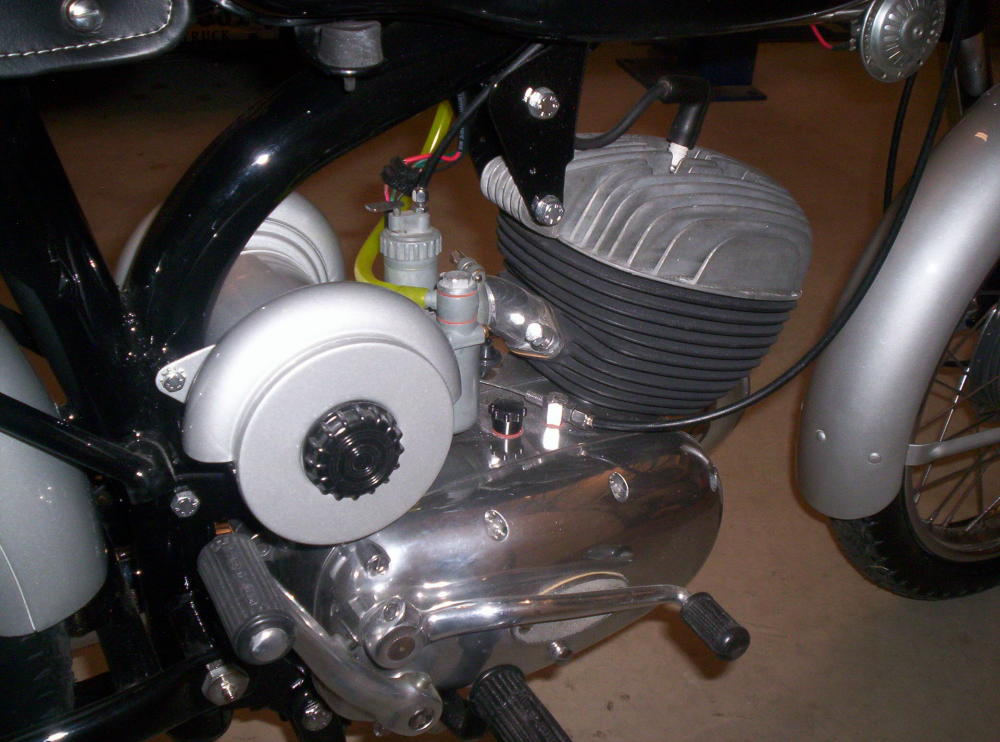
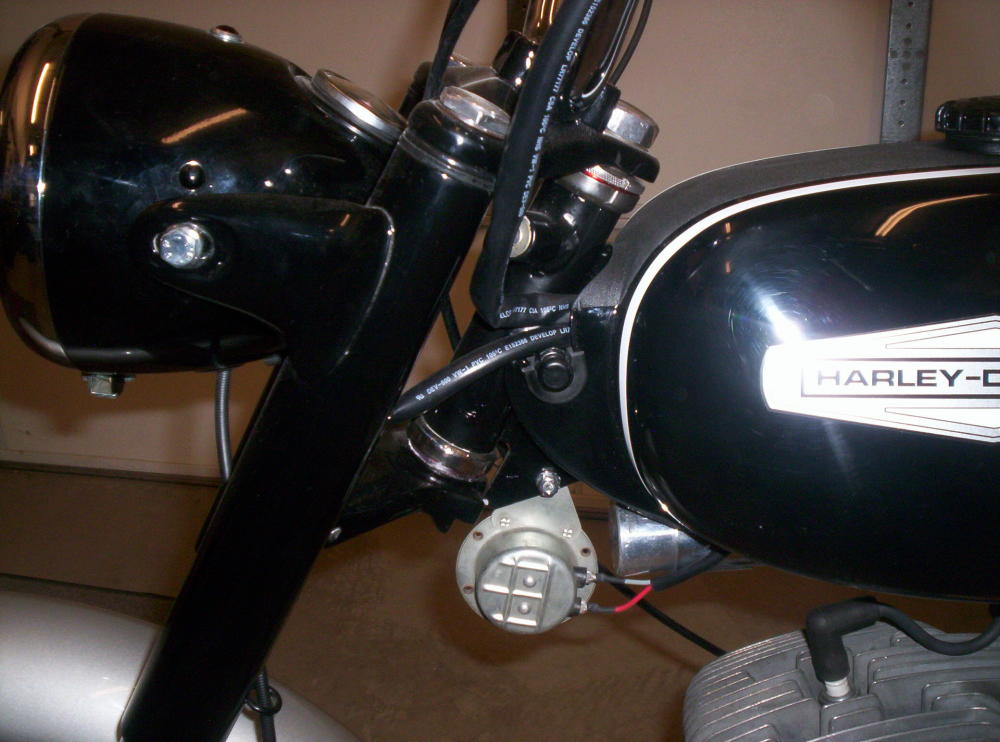
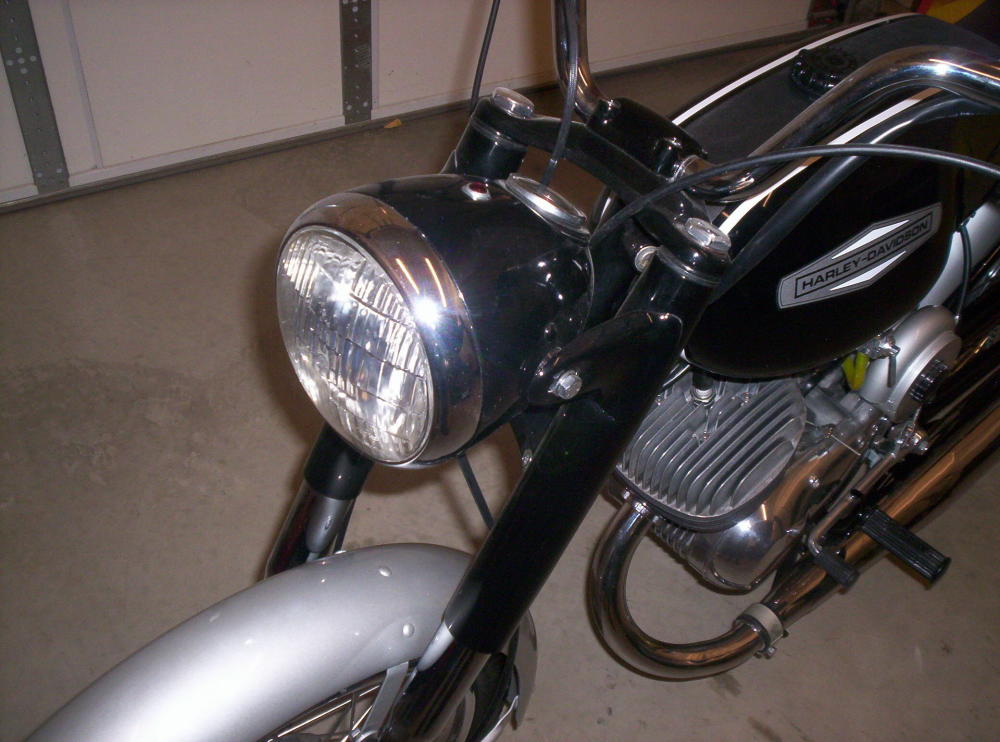
NOS original paint headlight, horn and motor installed.

Coil and new peg rubbers installed.
 .
.
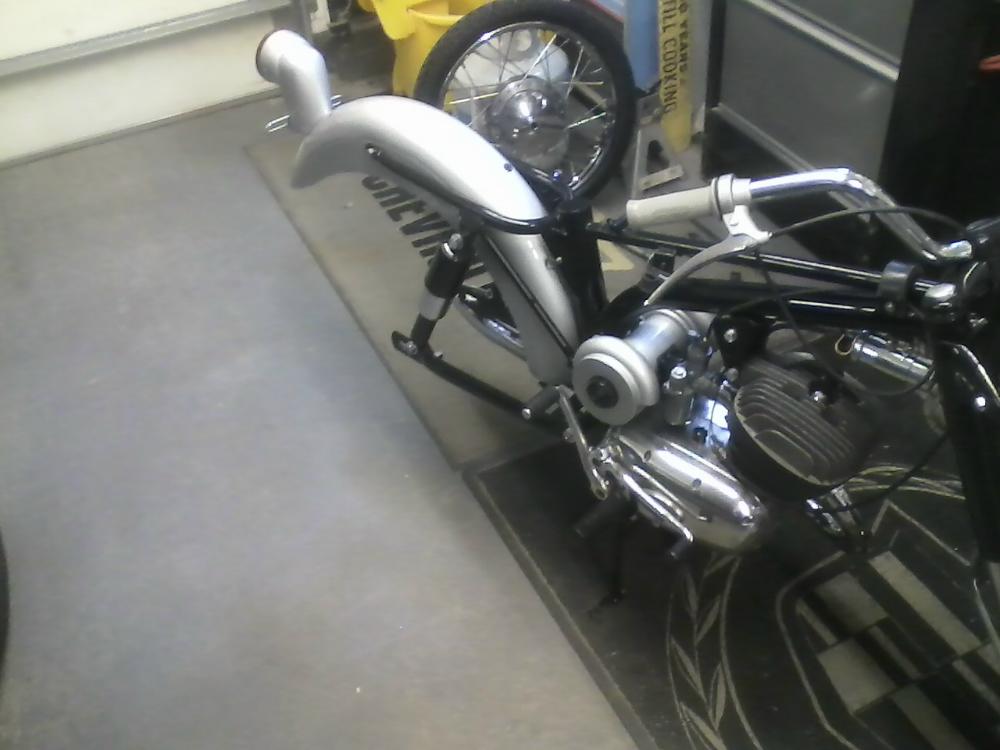
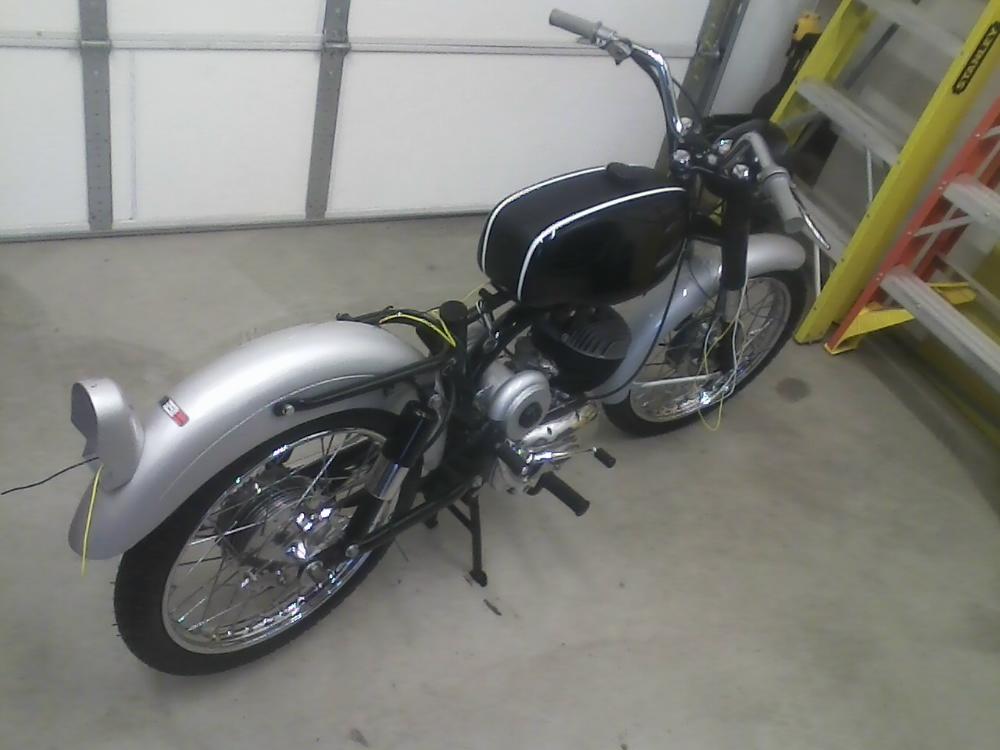
Front fender and air cleaner installed.
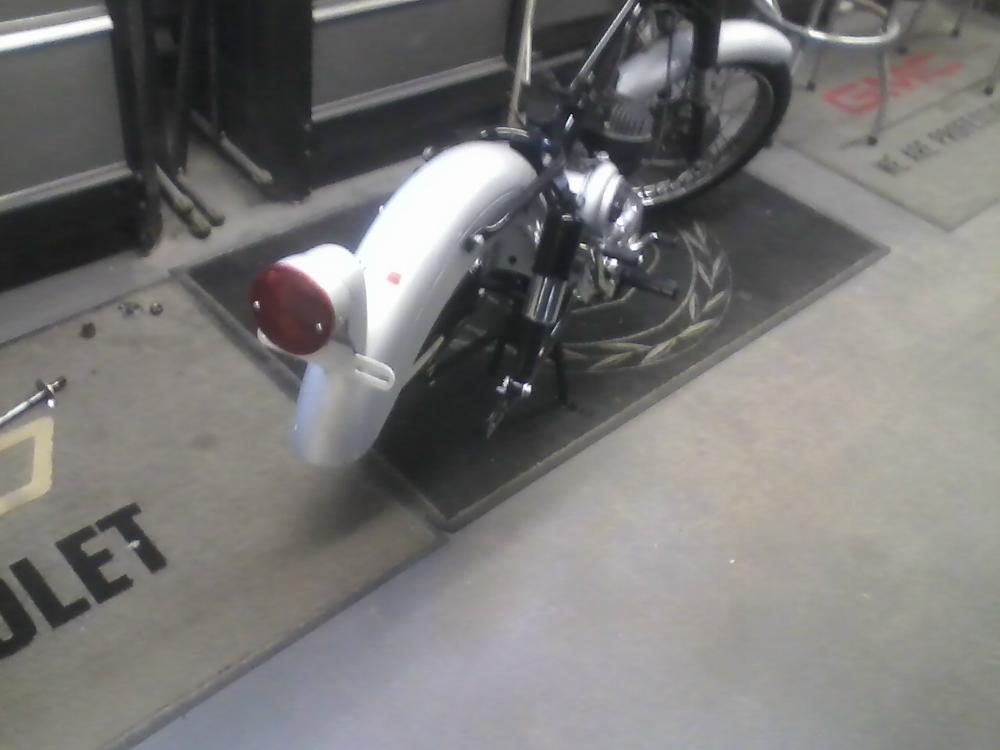
Rear fender installed.
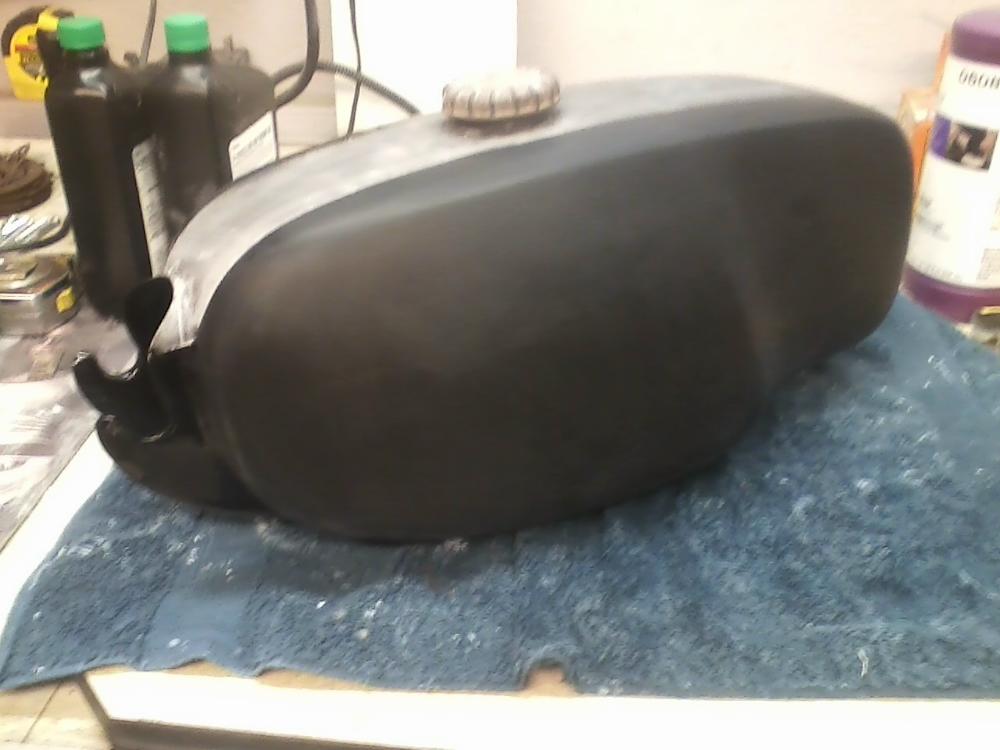
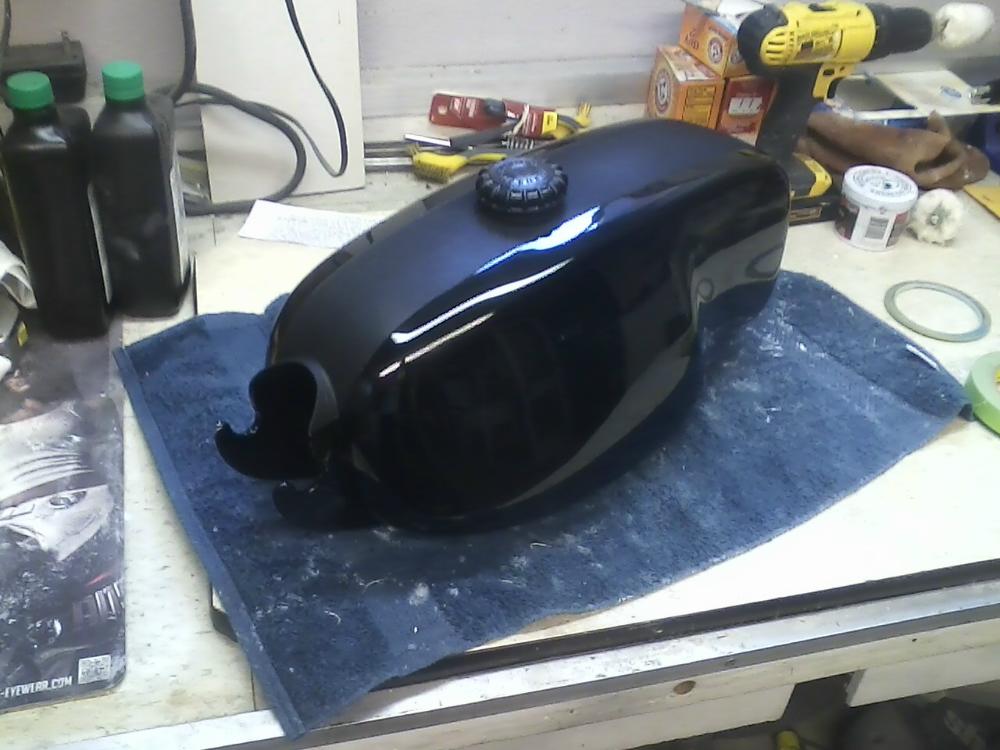
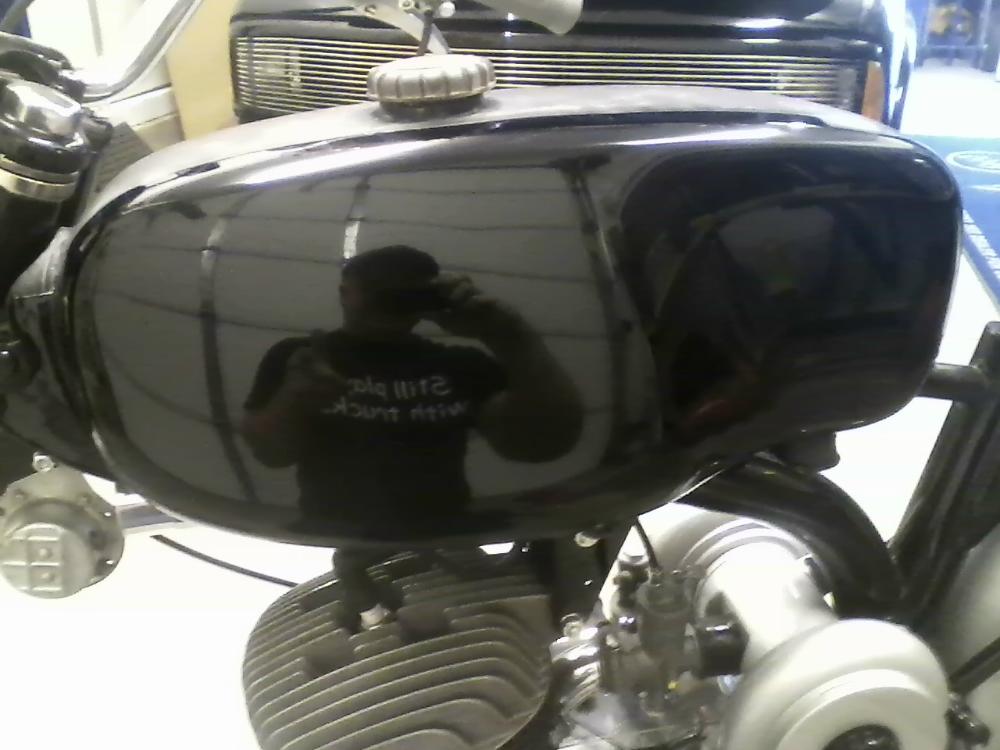
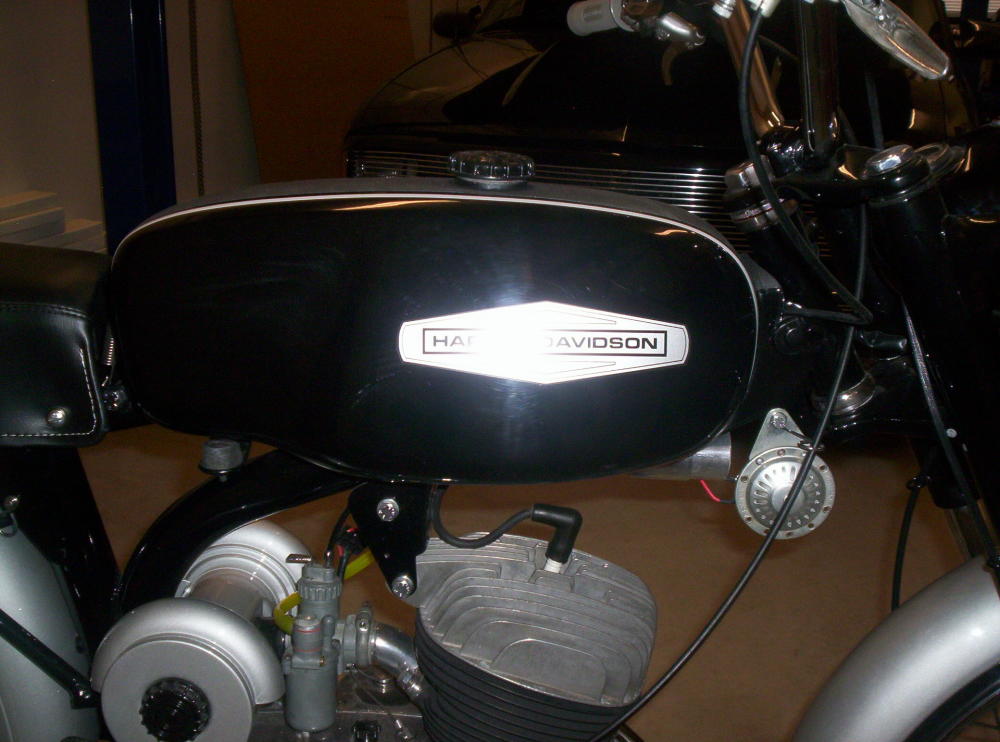
Primered tank test fit.

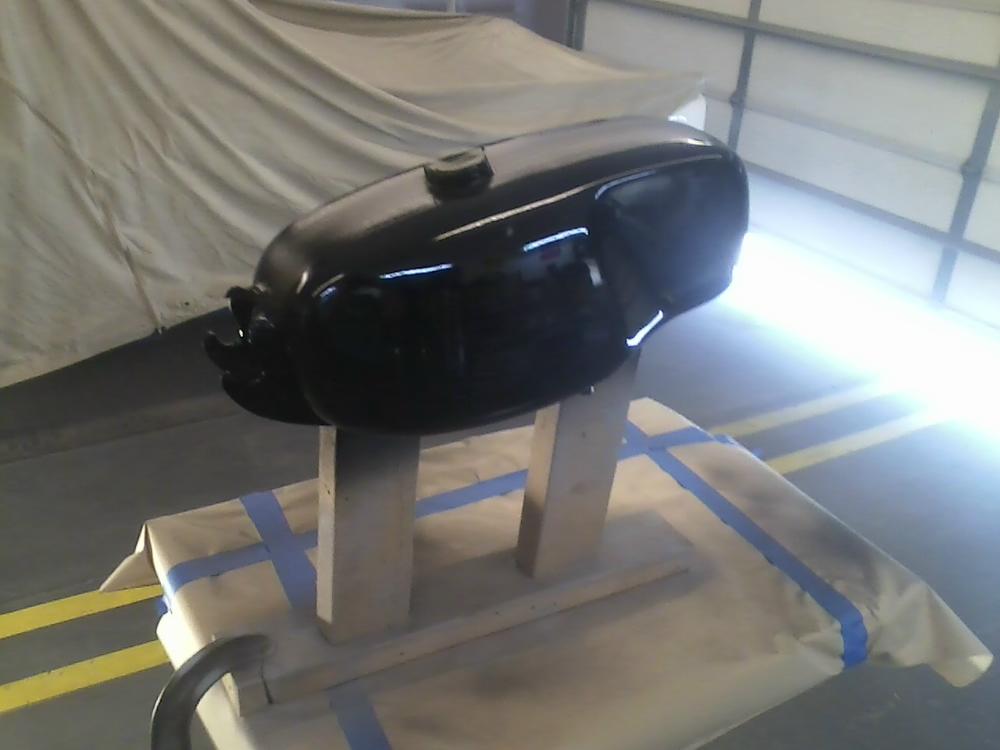
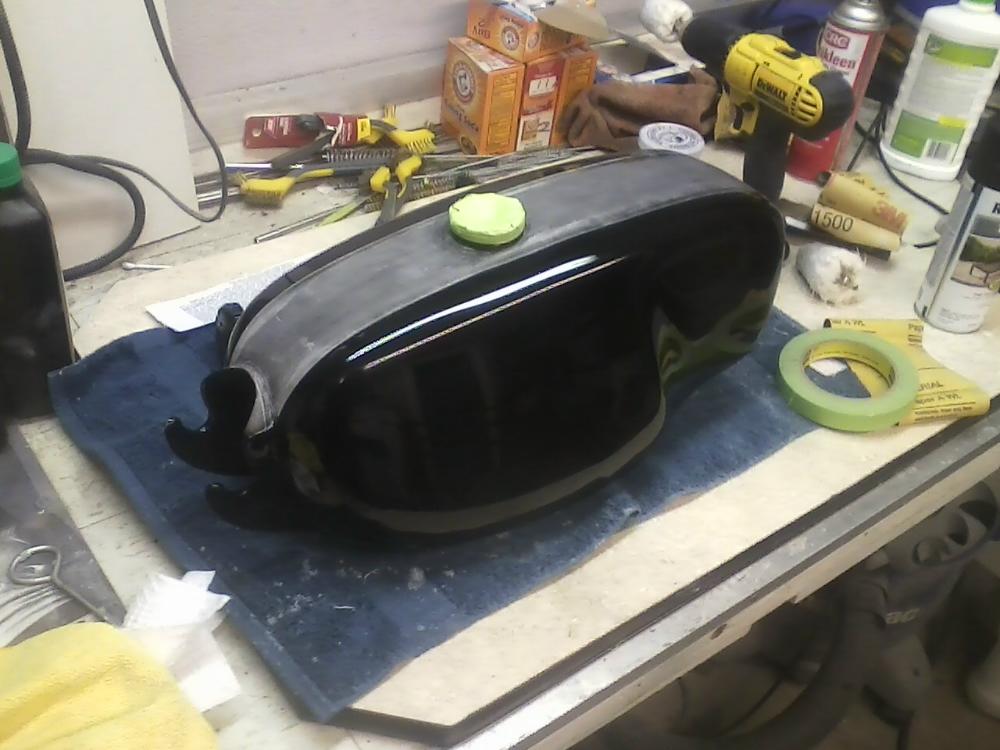
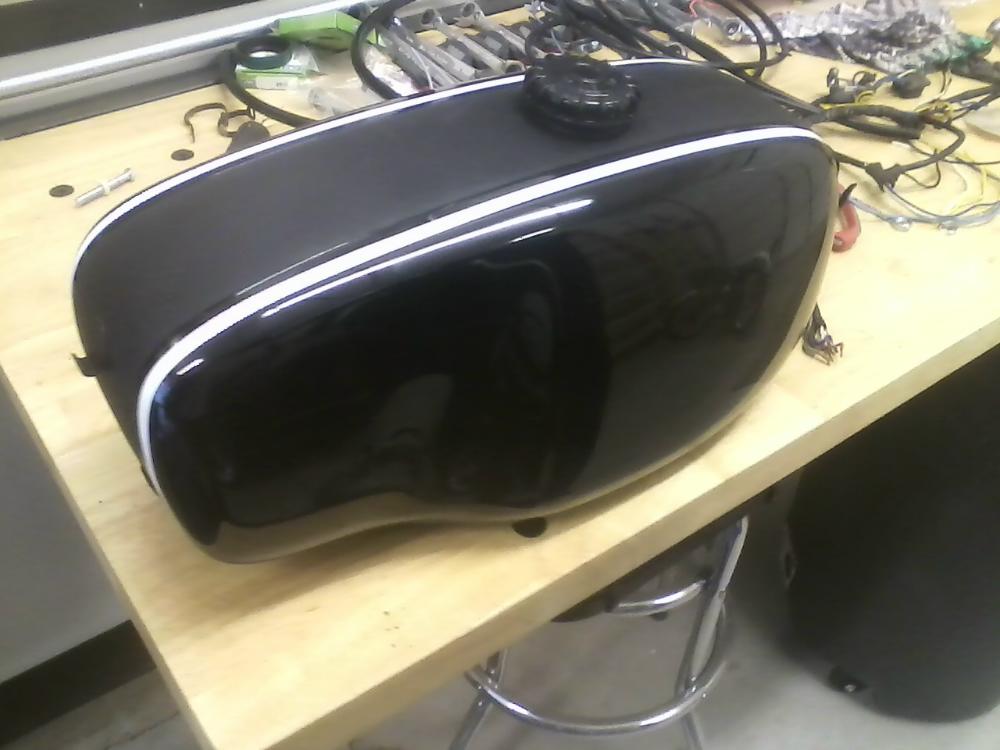
Painted tank.
Starting to rewire the whole bike.
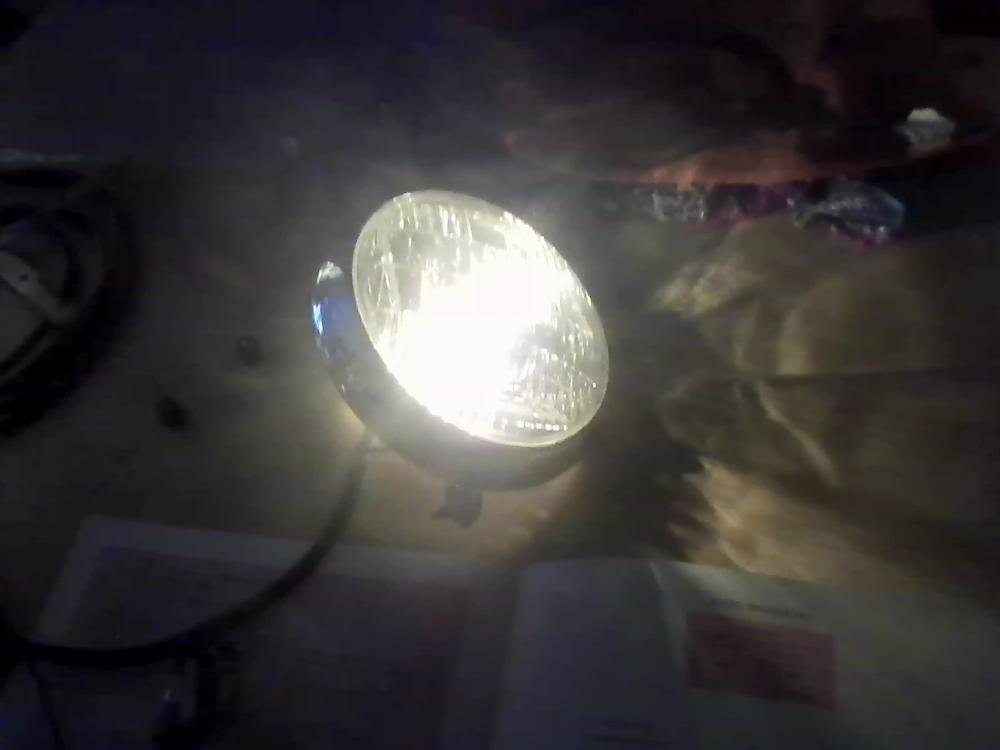
Headlight test.
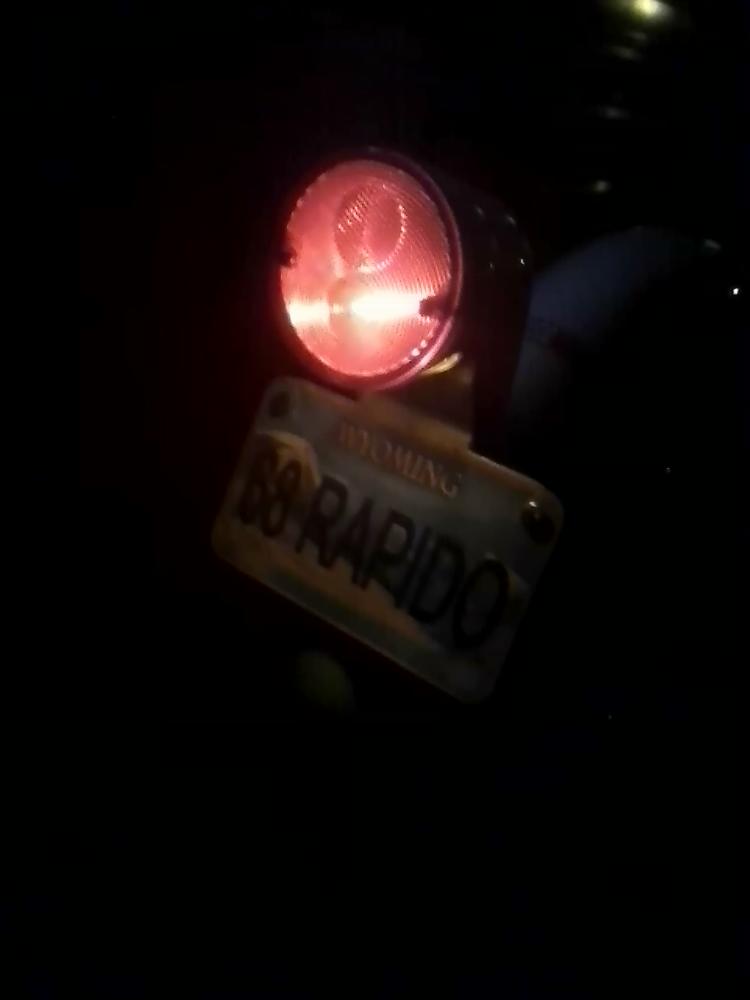
Tail light test.
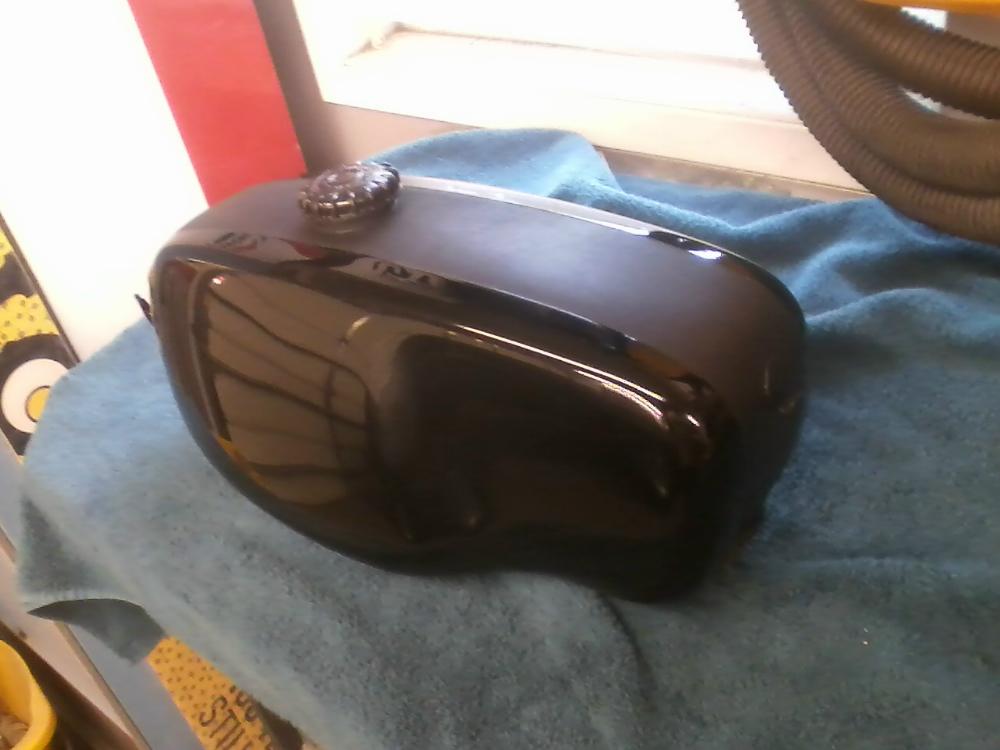
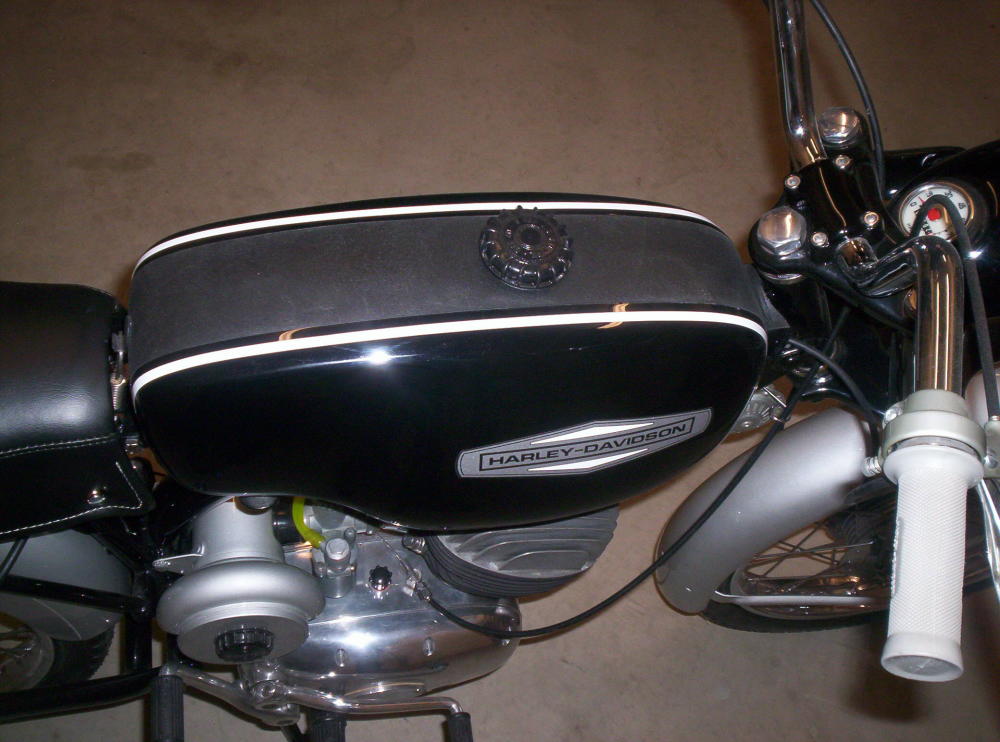
Tank stickers installed.

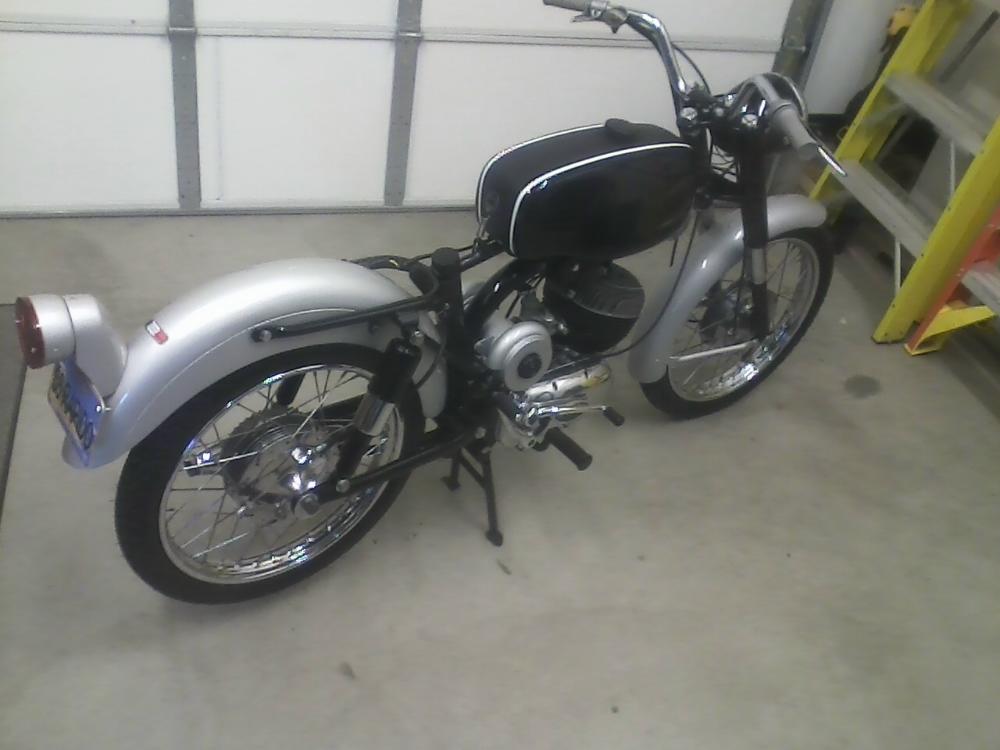
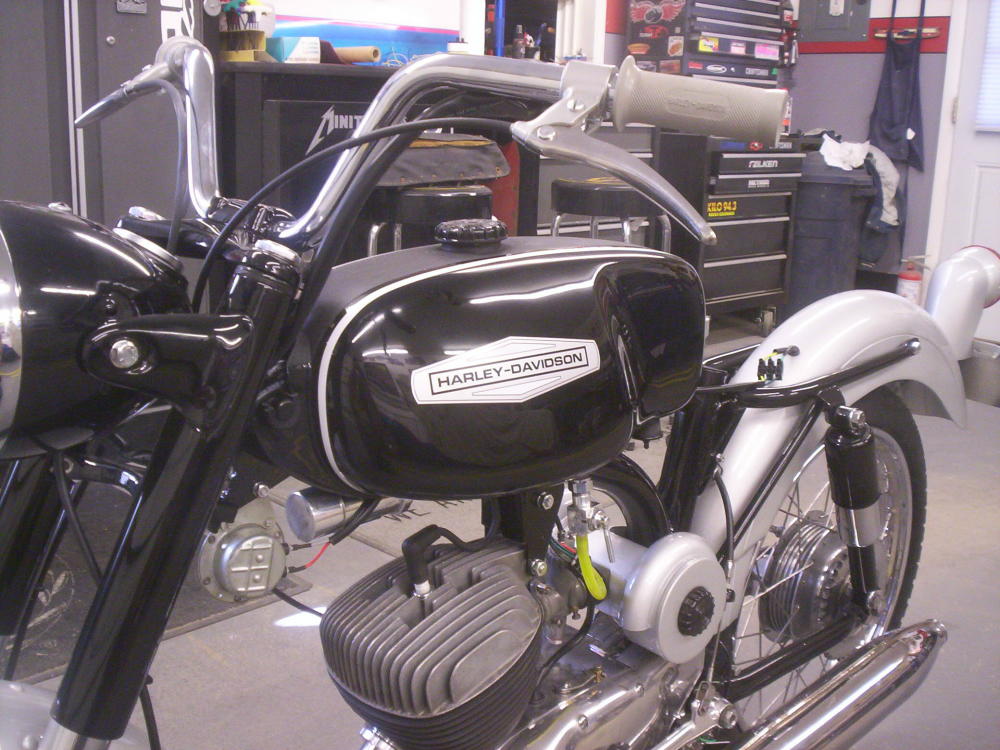
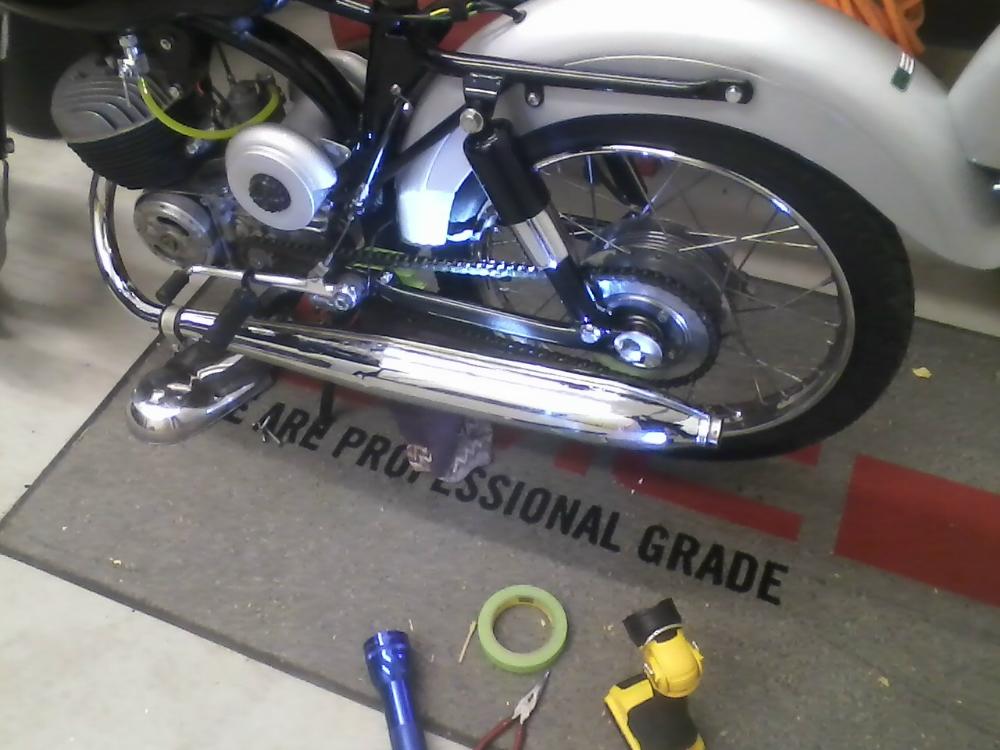
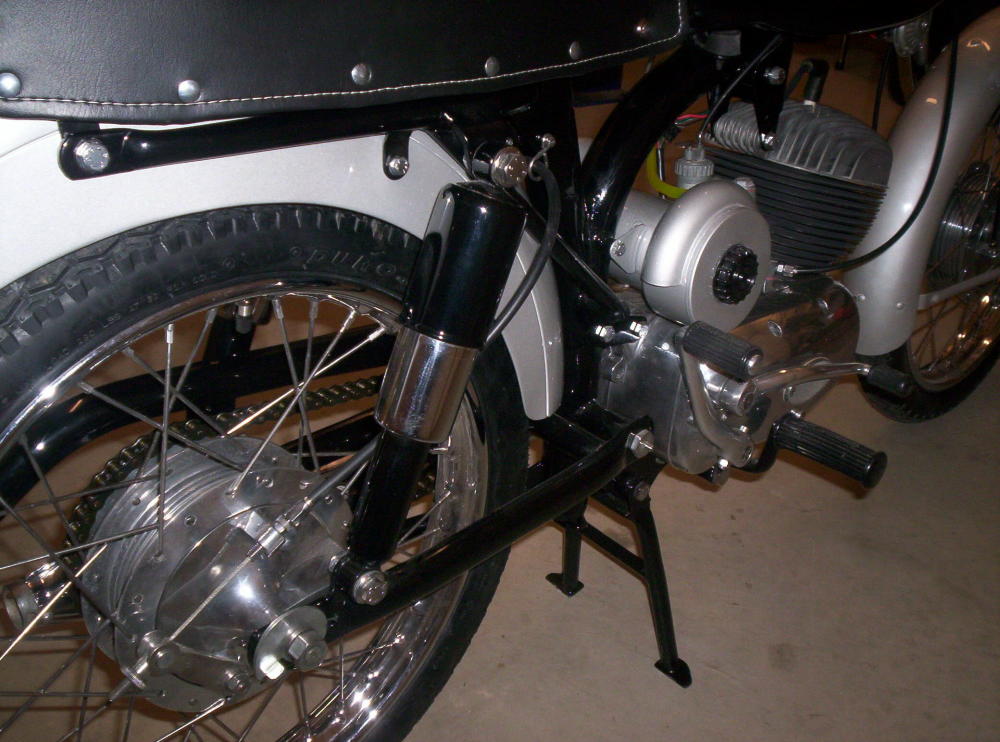
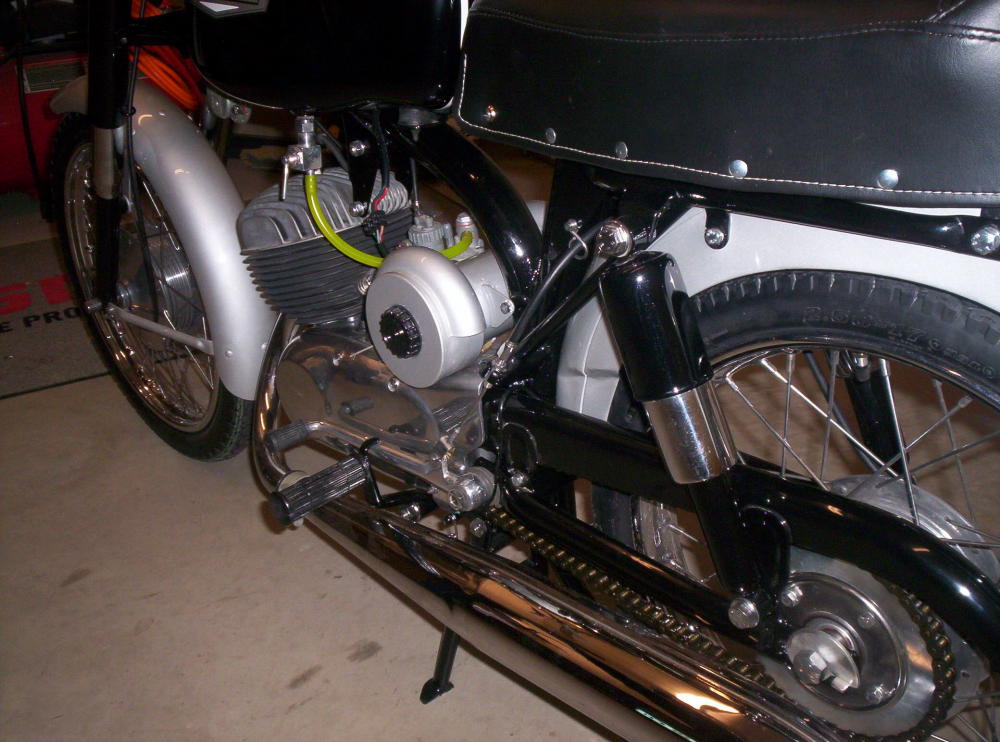
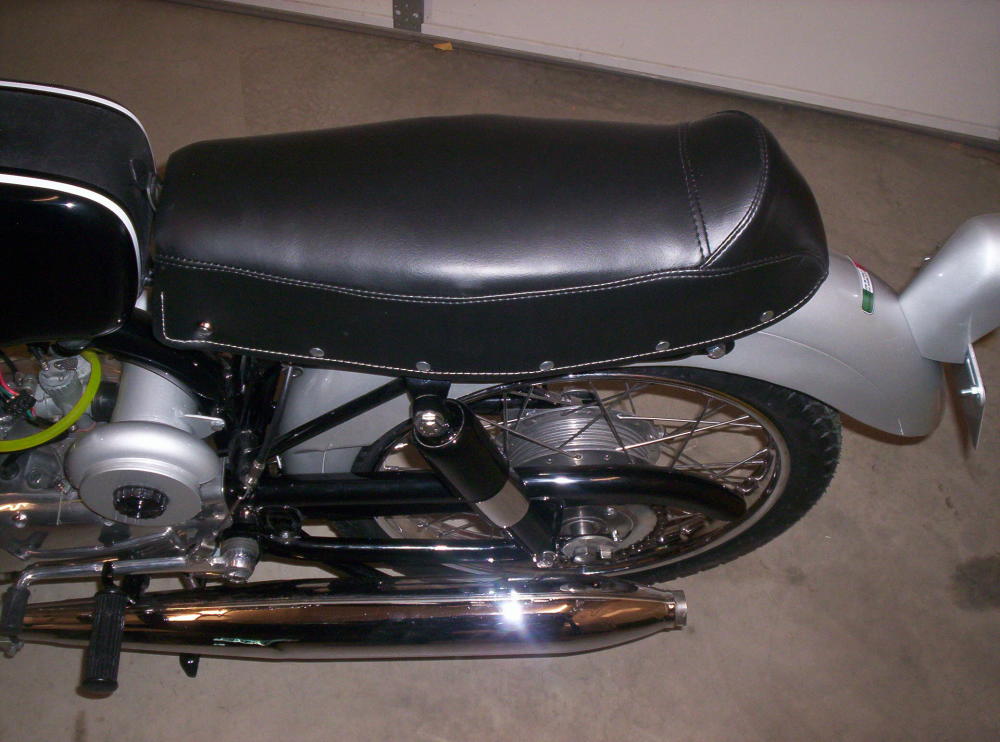
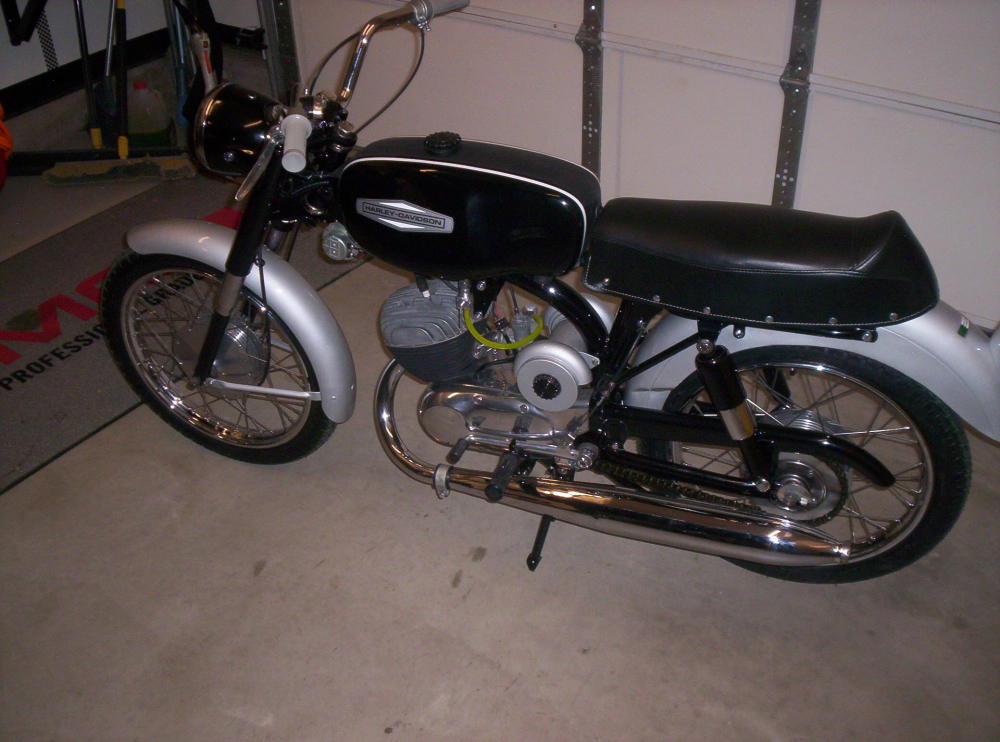
All finished but the seat, chain and chain guard.

Time to install the chain.
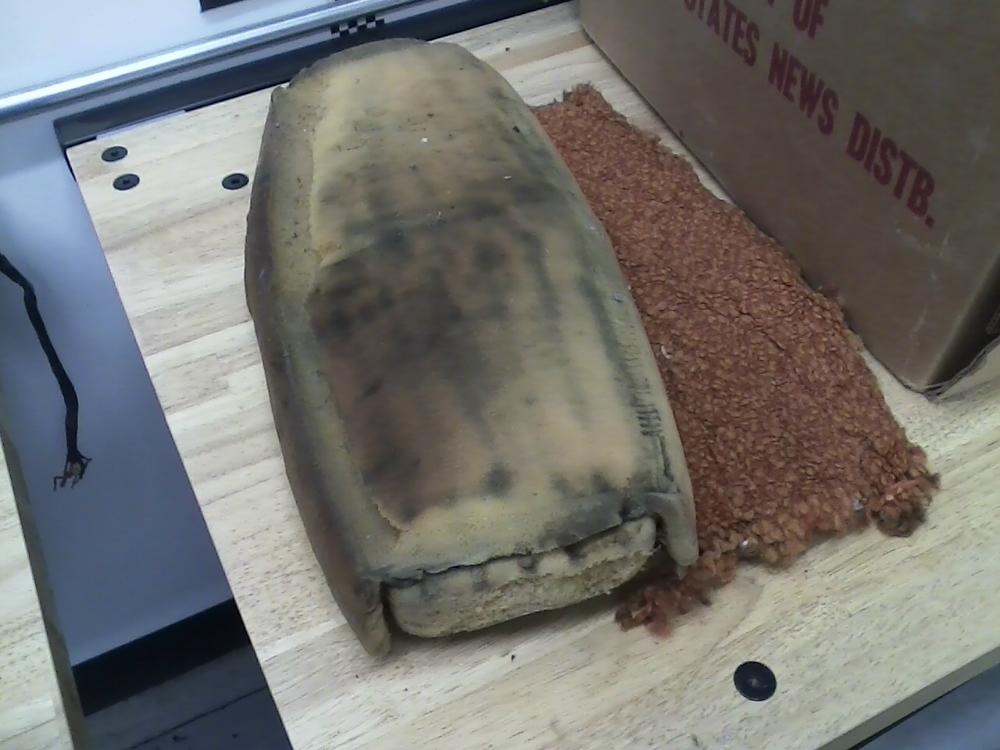
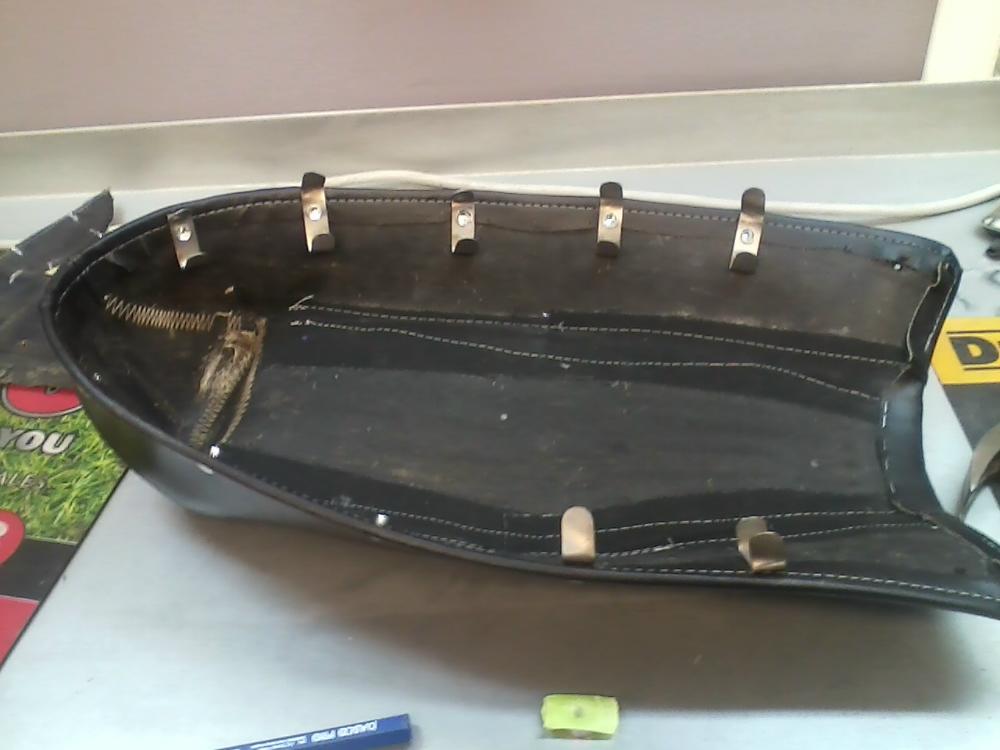
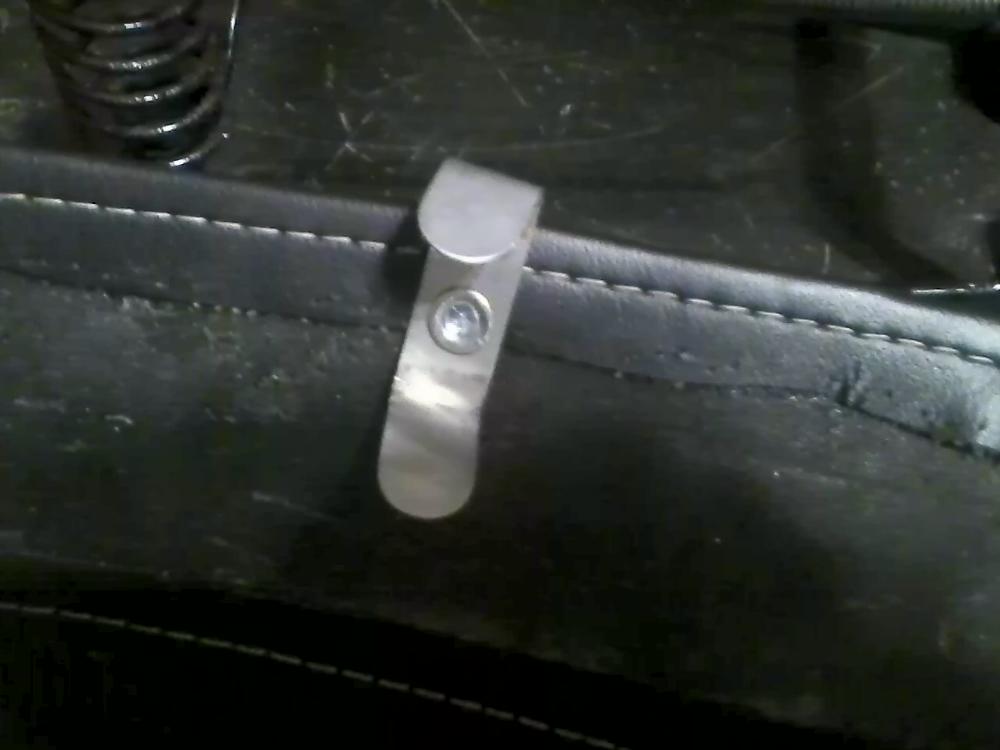
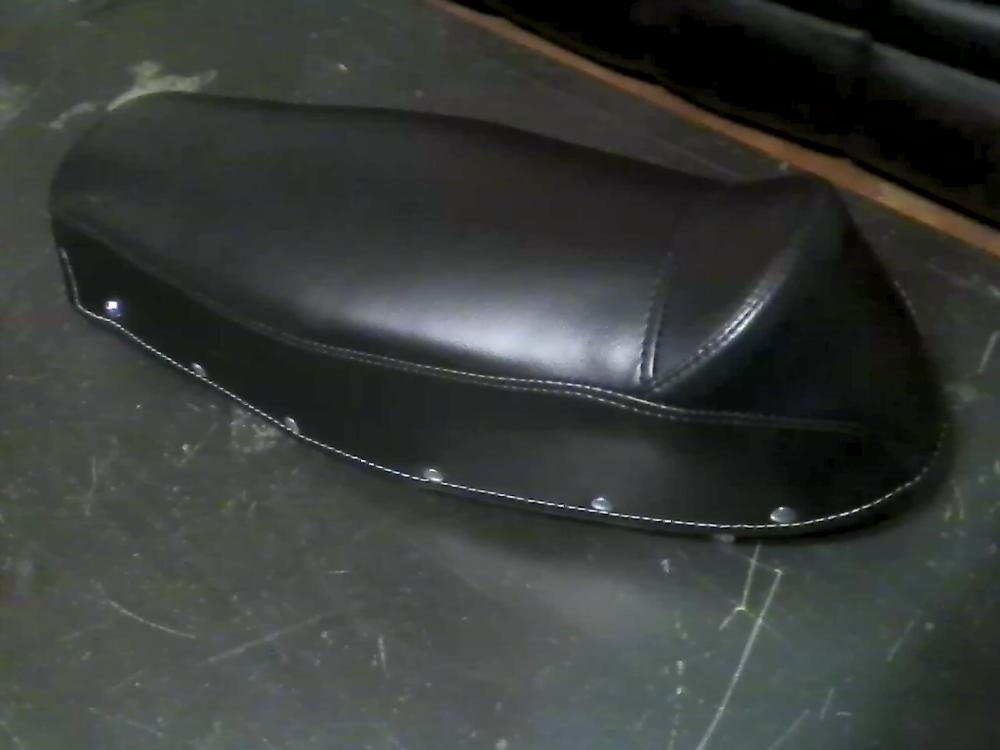
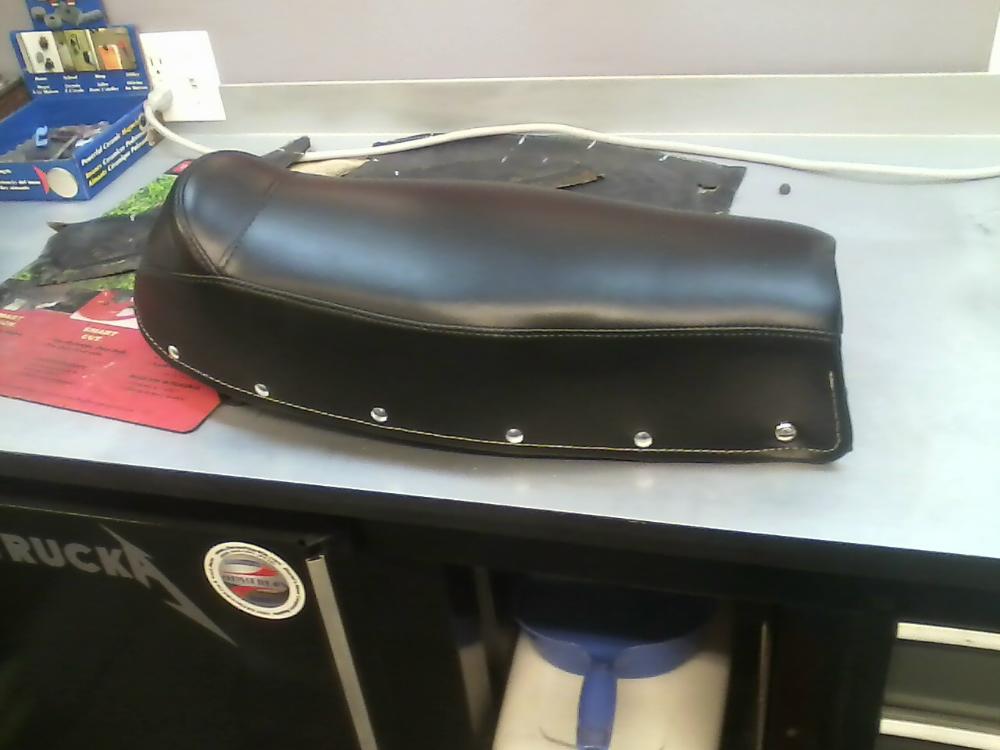
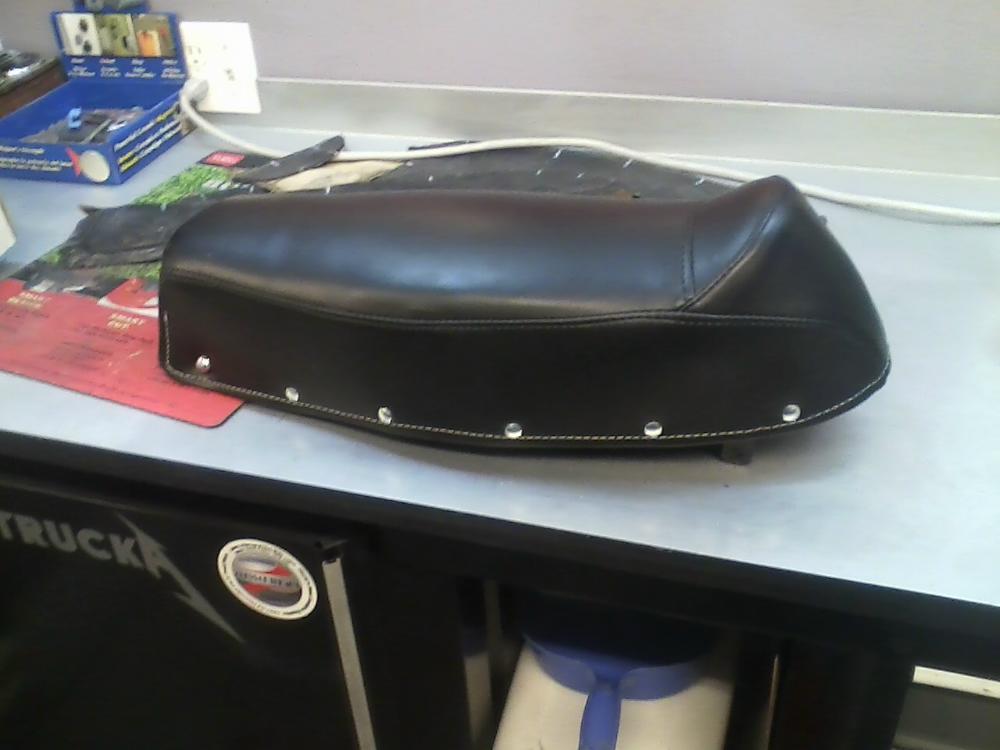
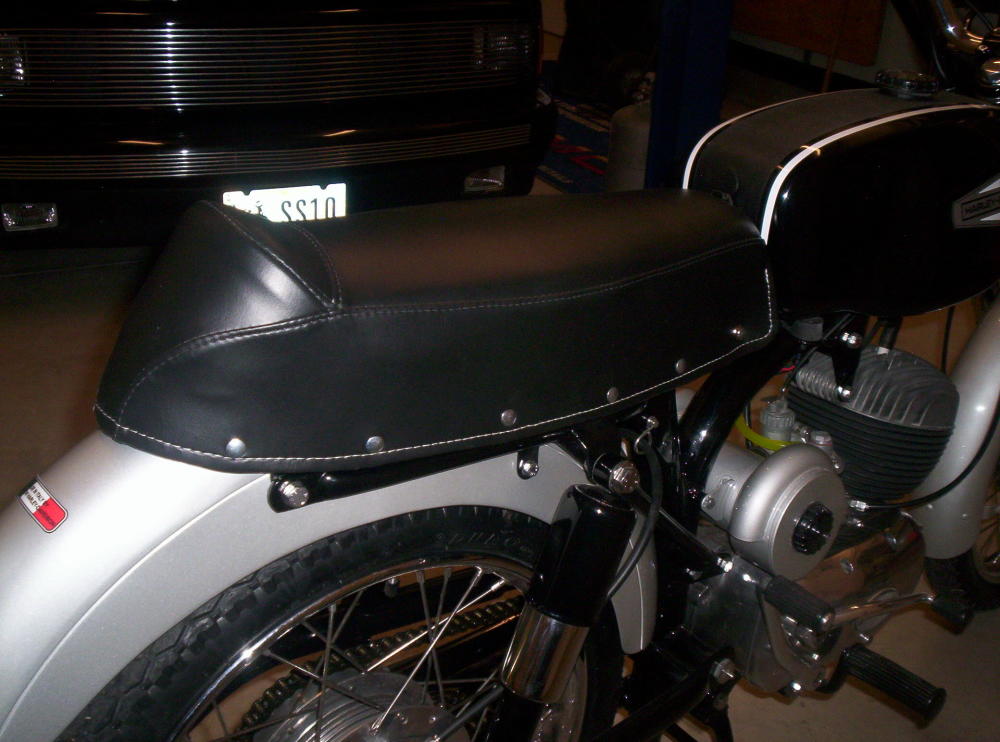
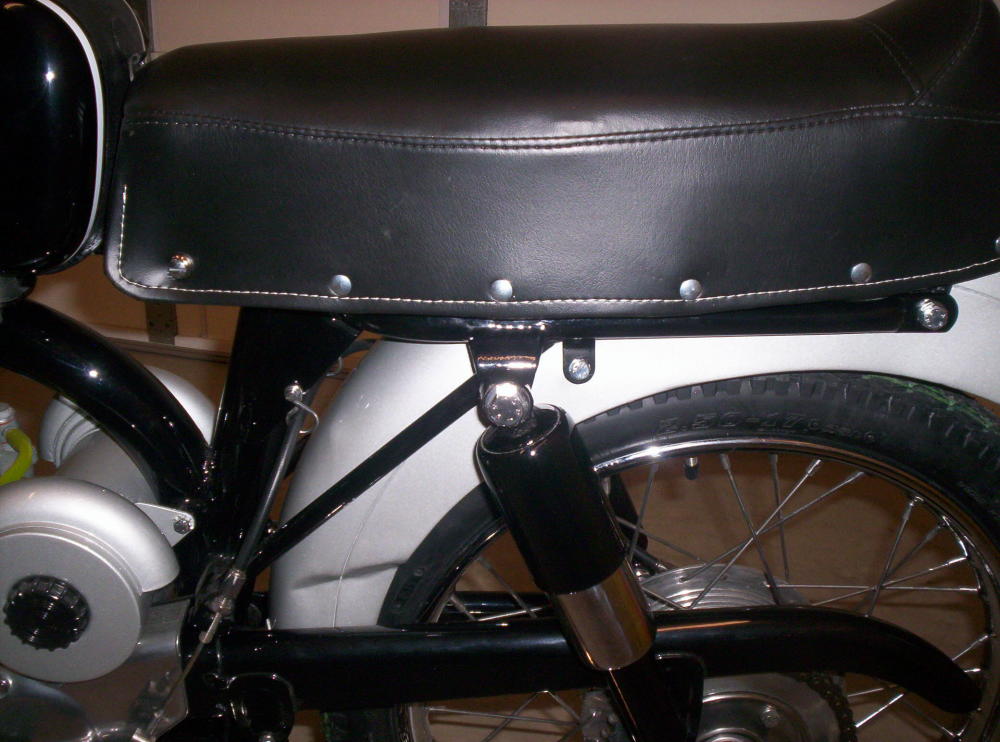
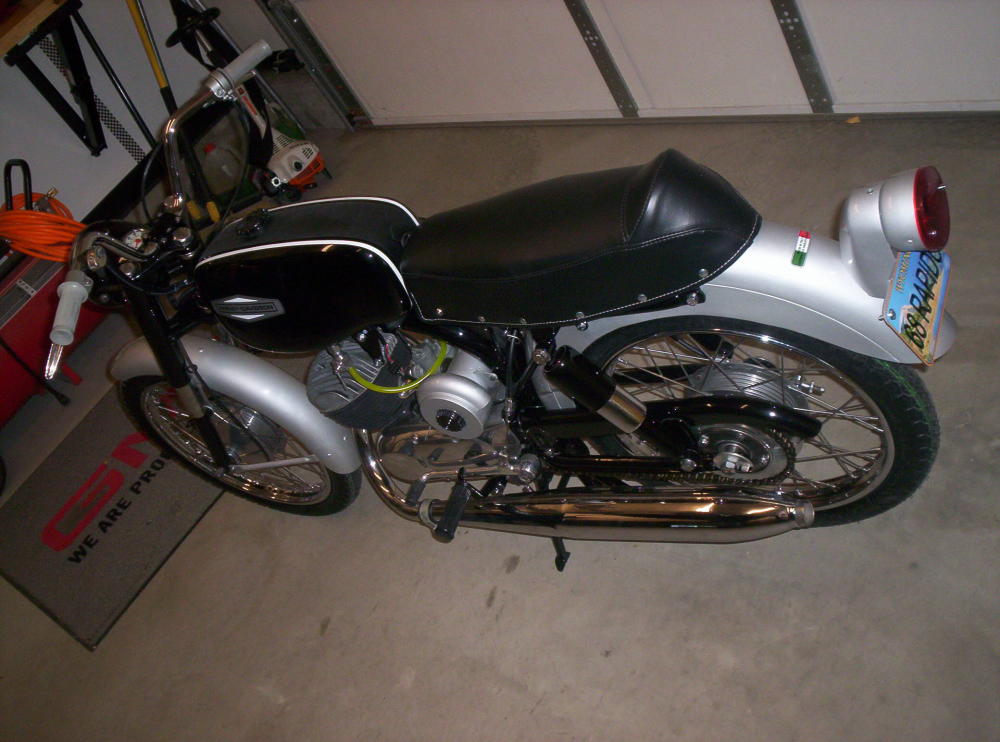
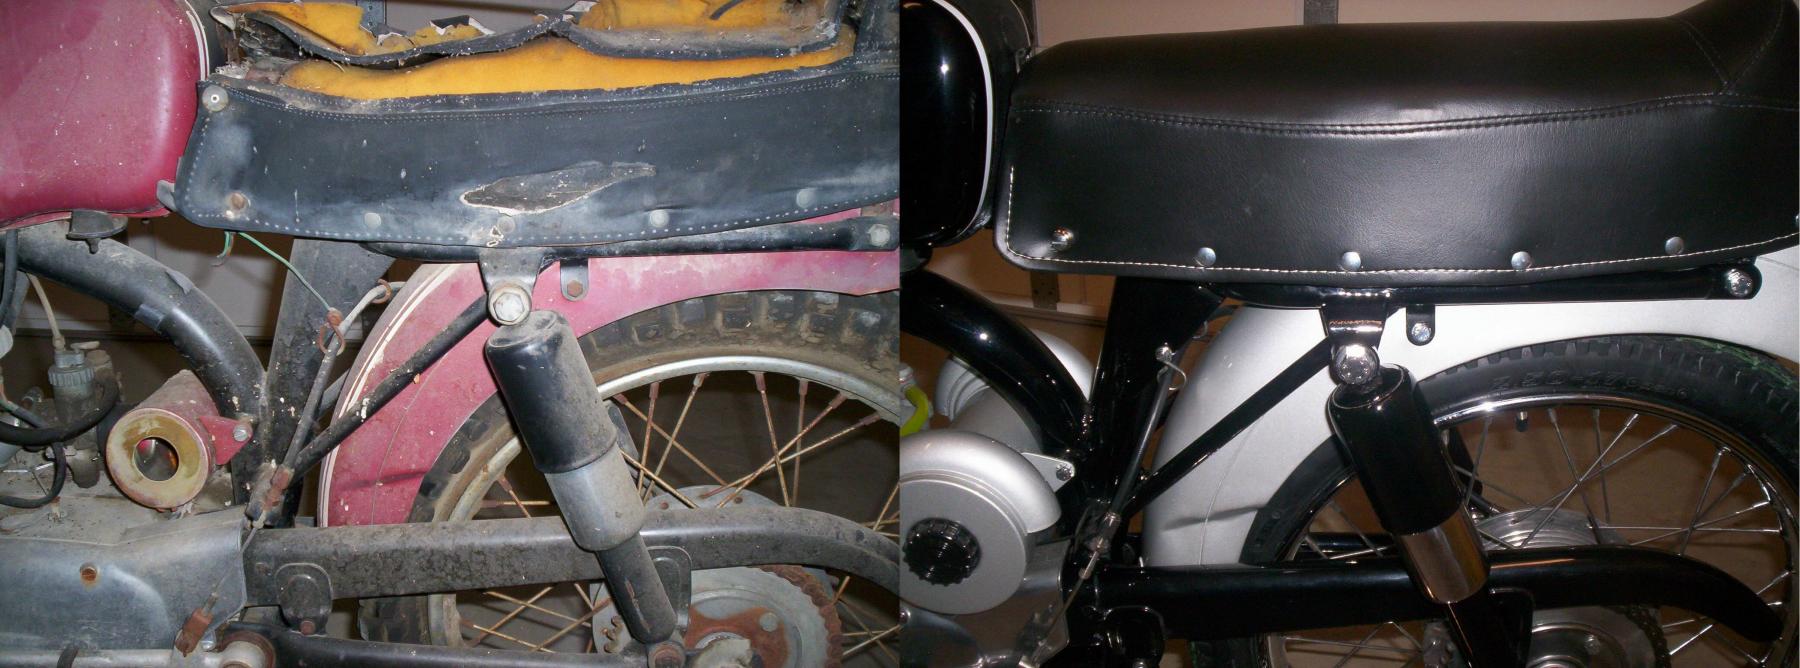
Seat back from the upholsterer.
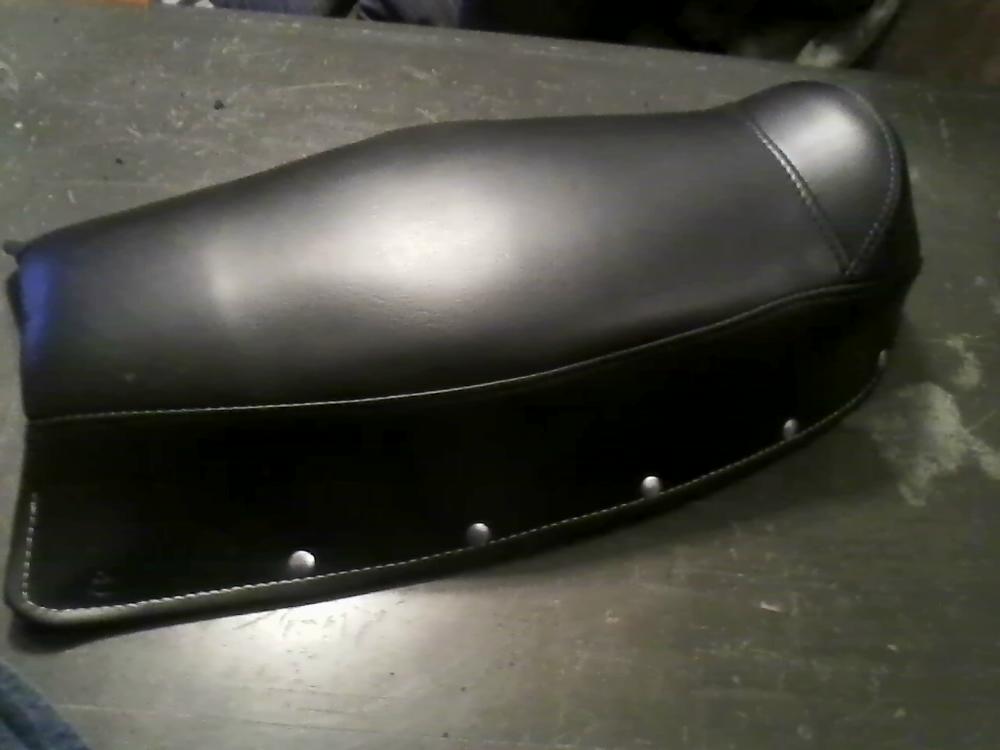
Brackets re-riveted onto the new cover.
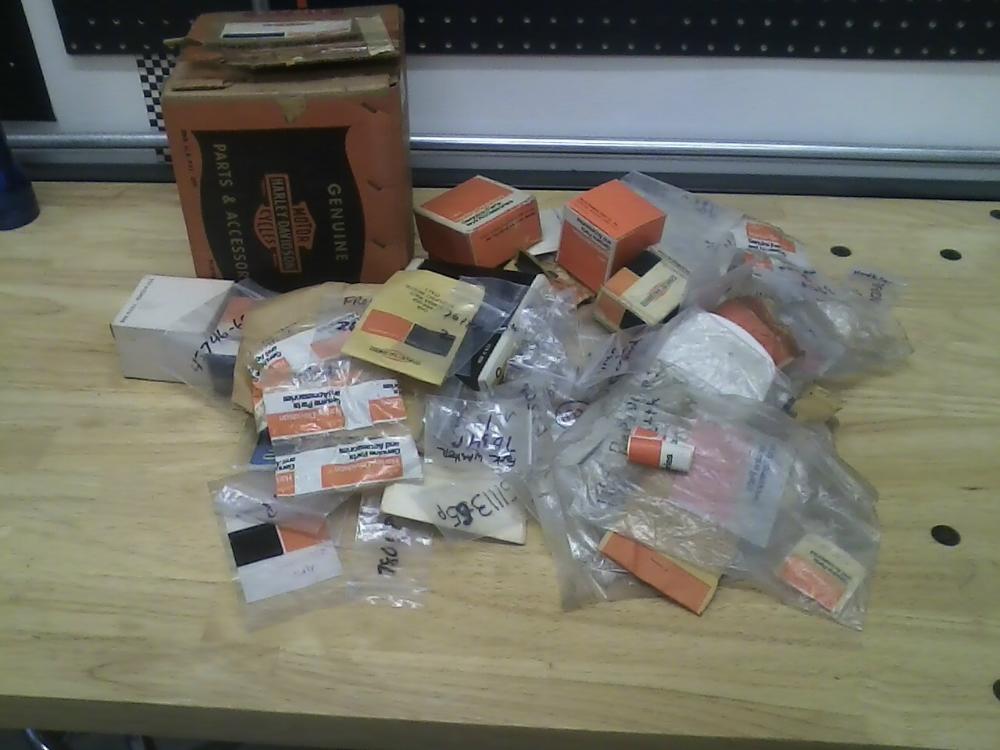
Lots of NOS parts used to get my bike back to its former glory.
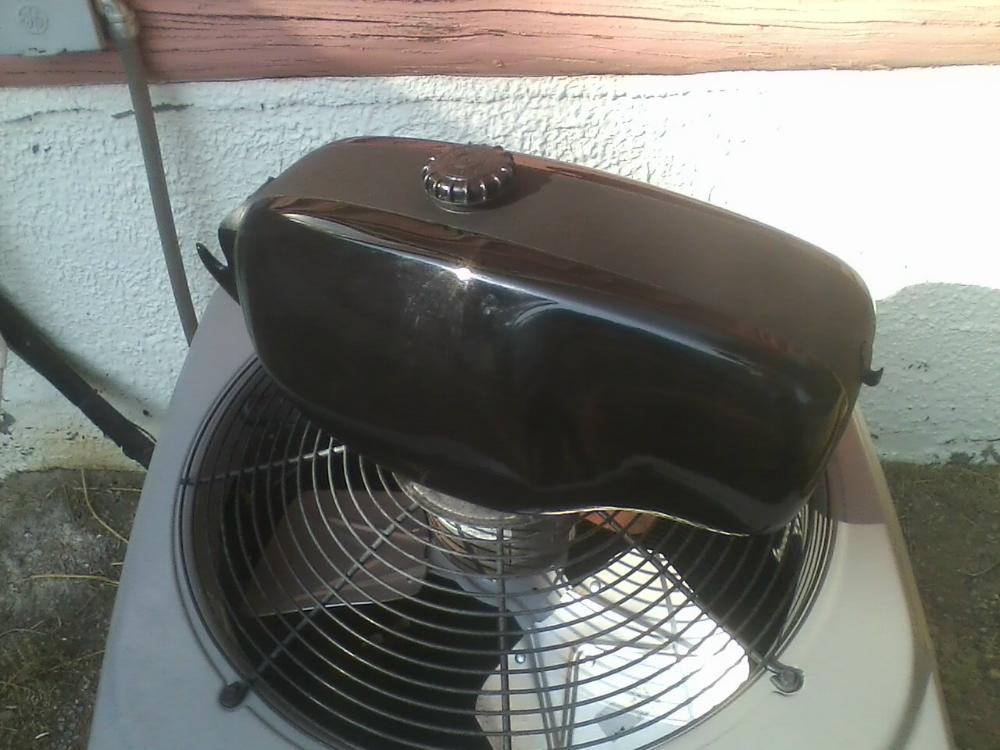
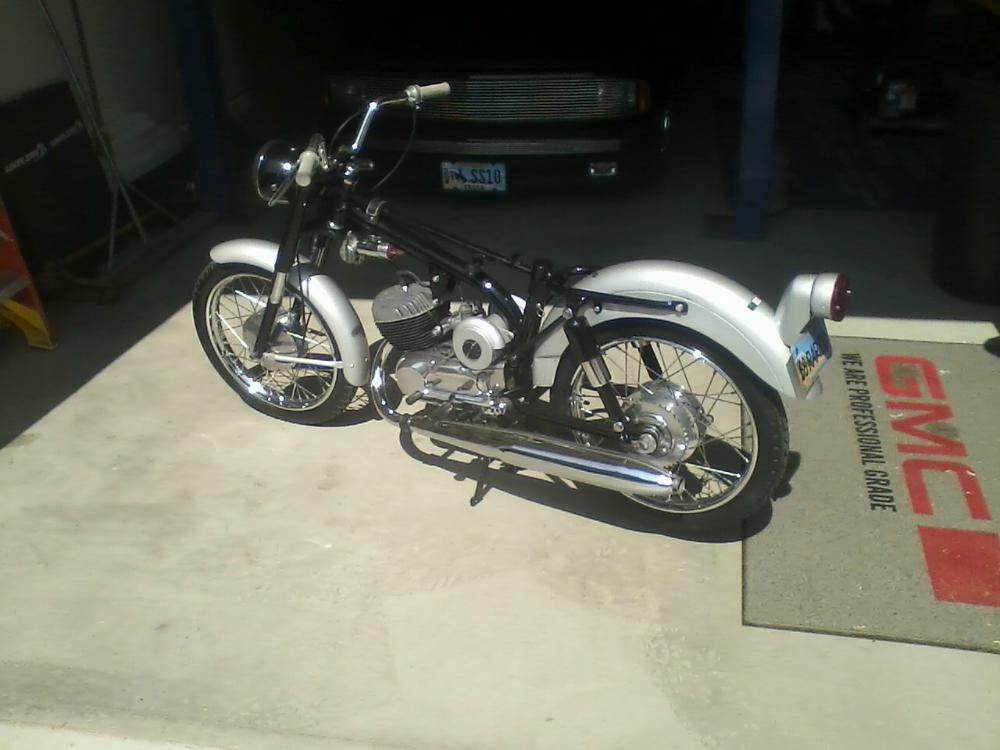
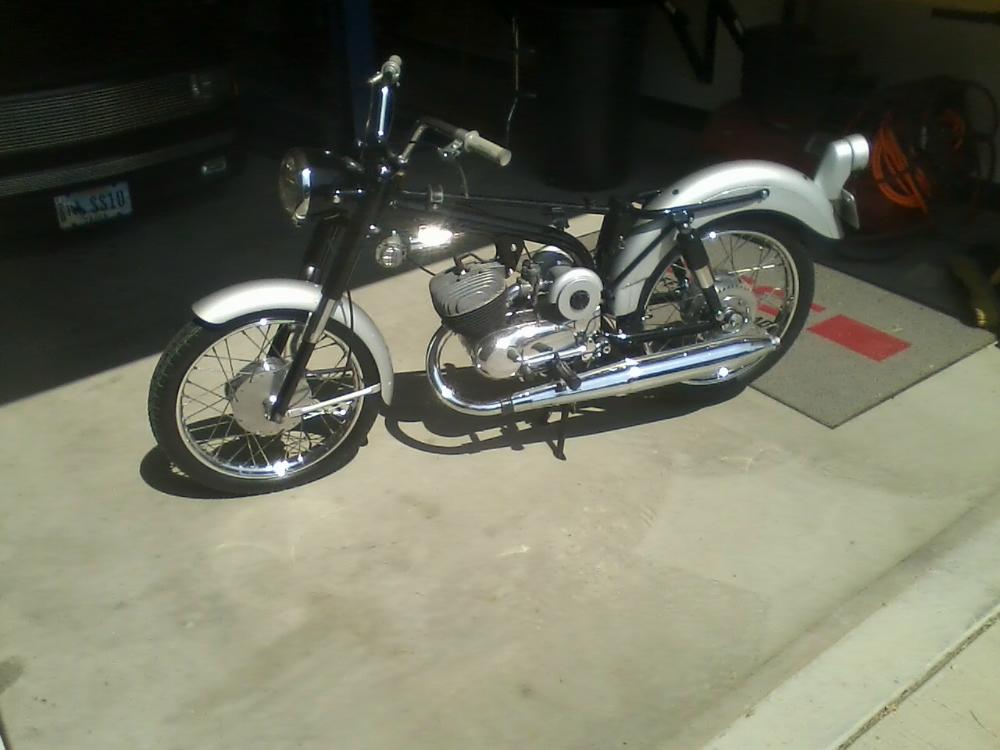
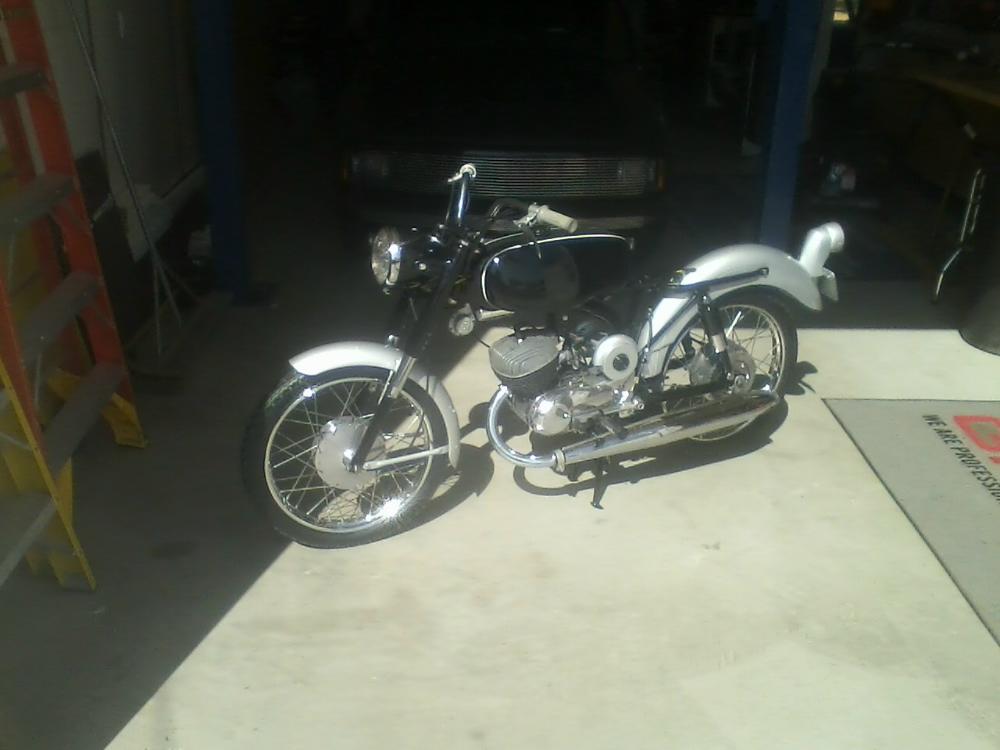
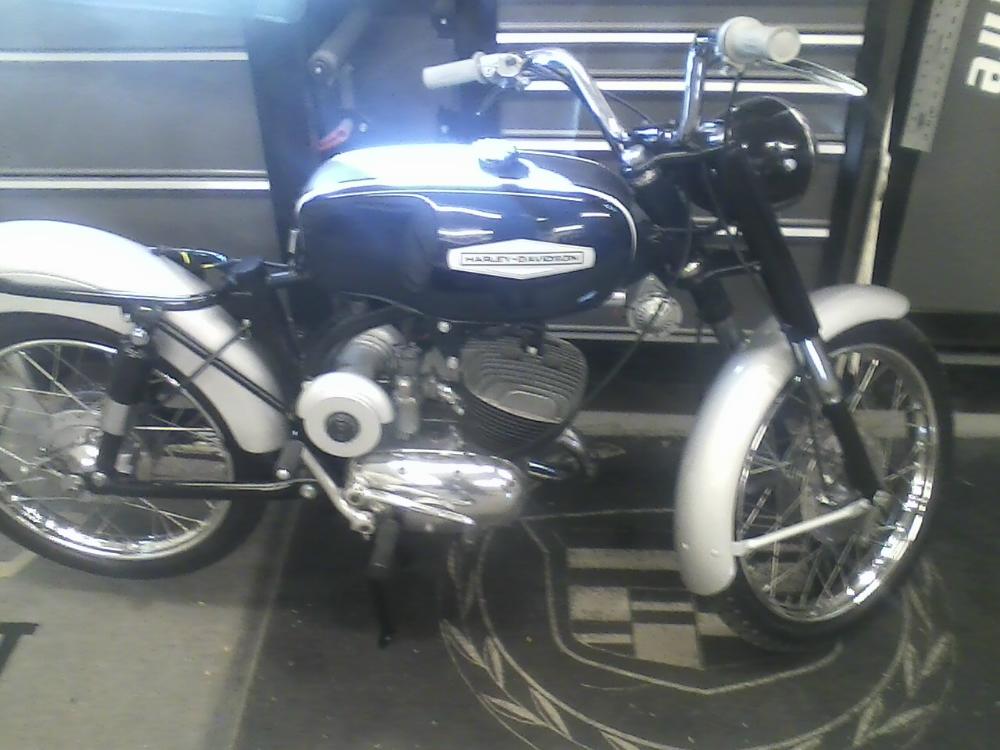
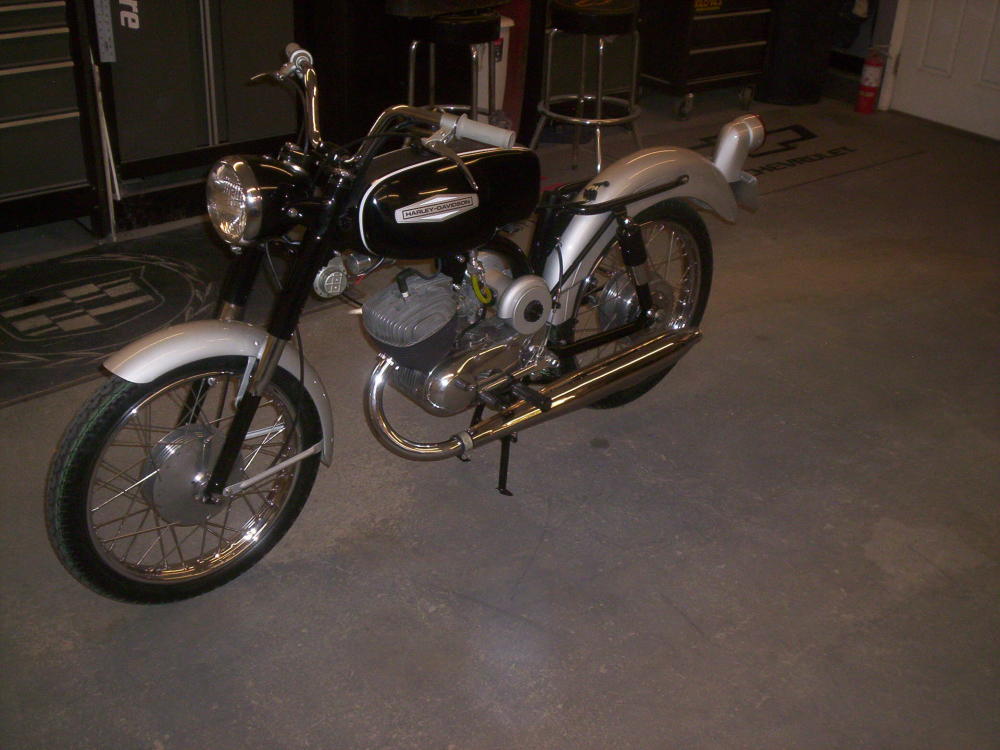
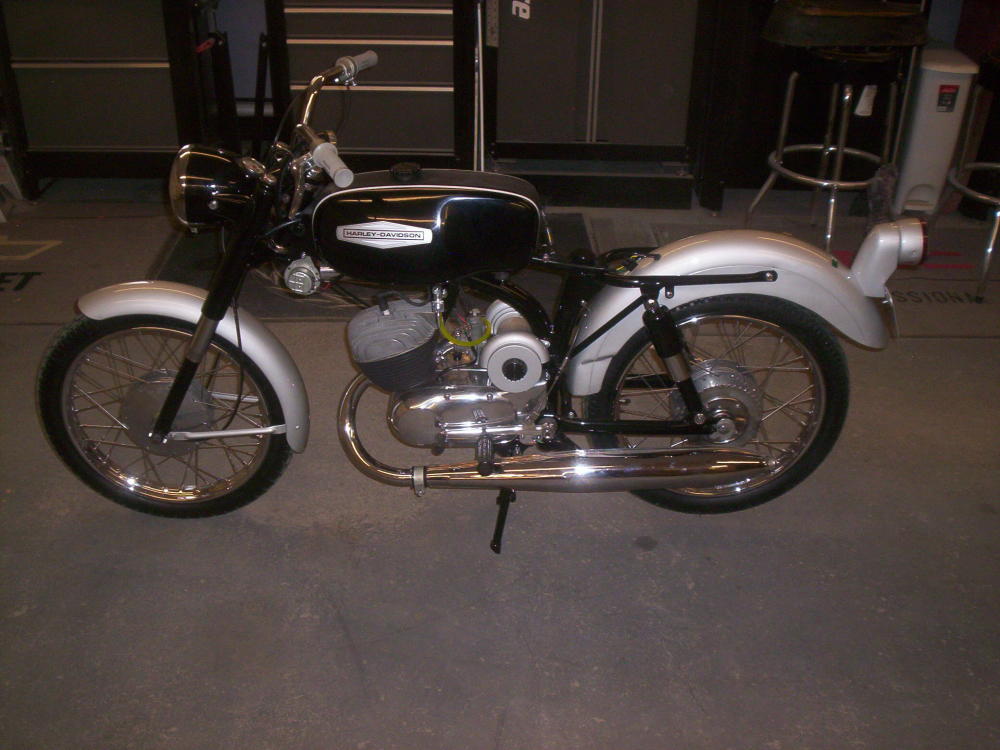
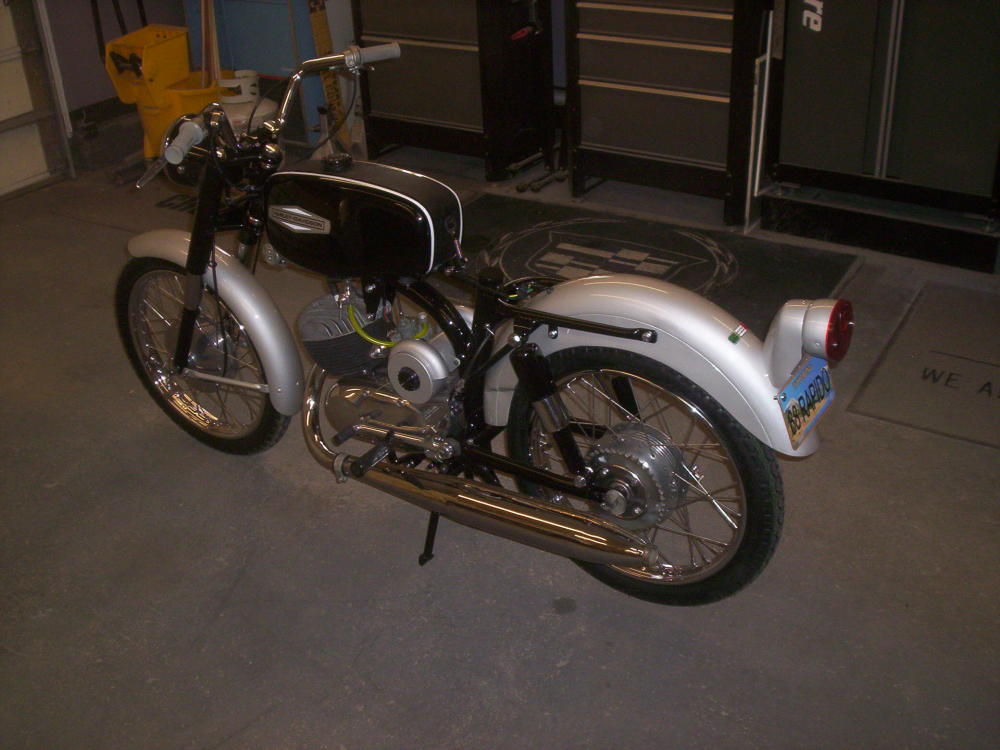
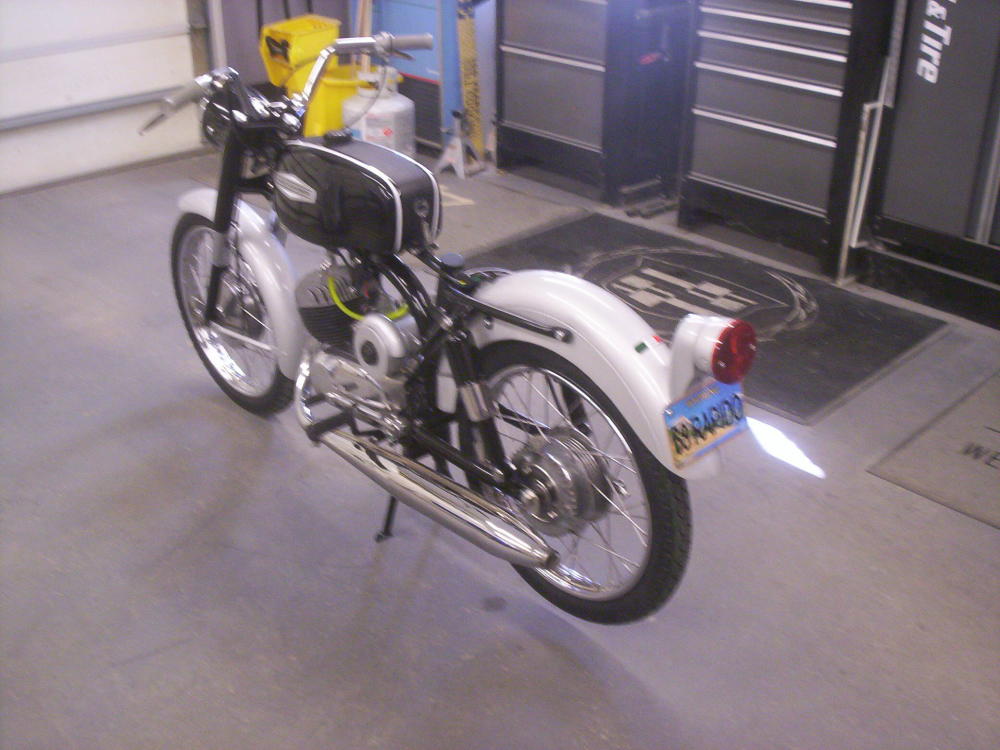
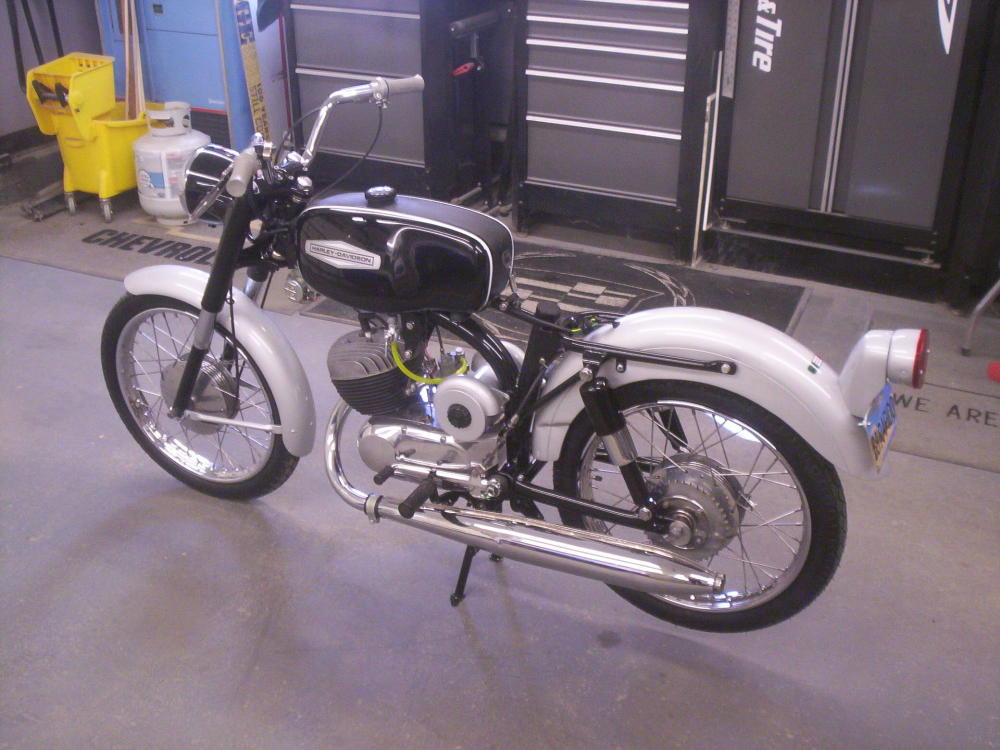
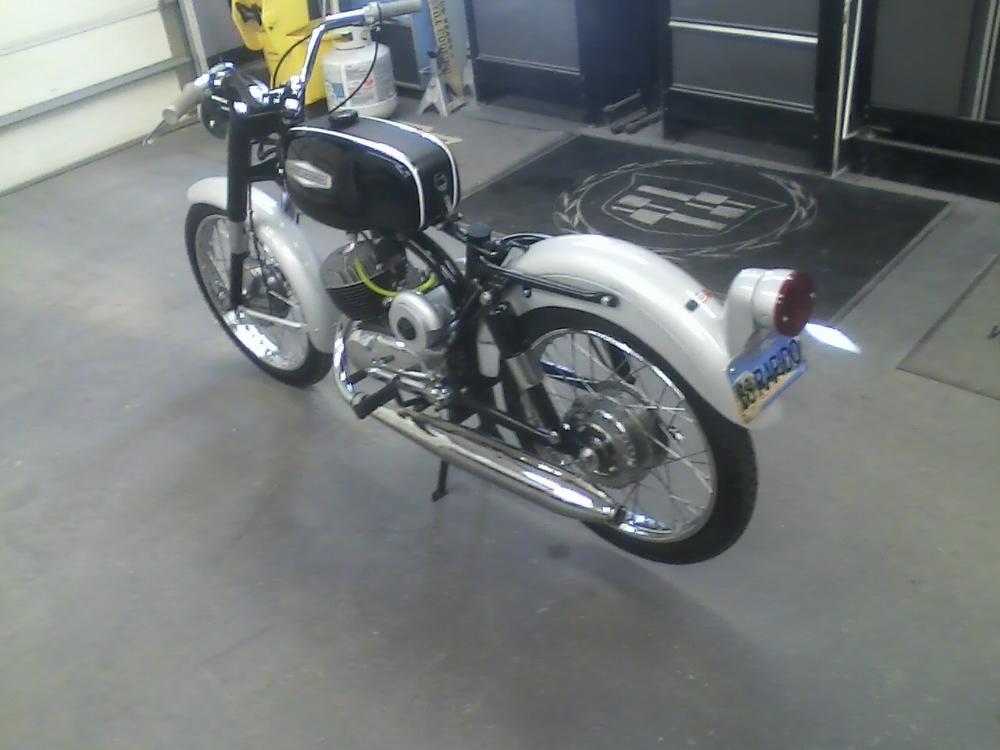
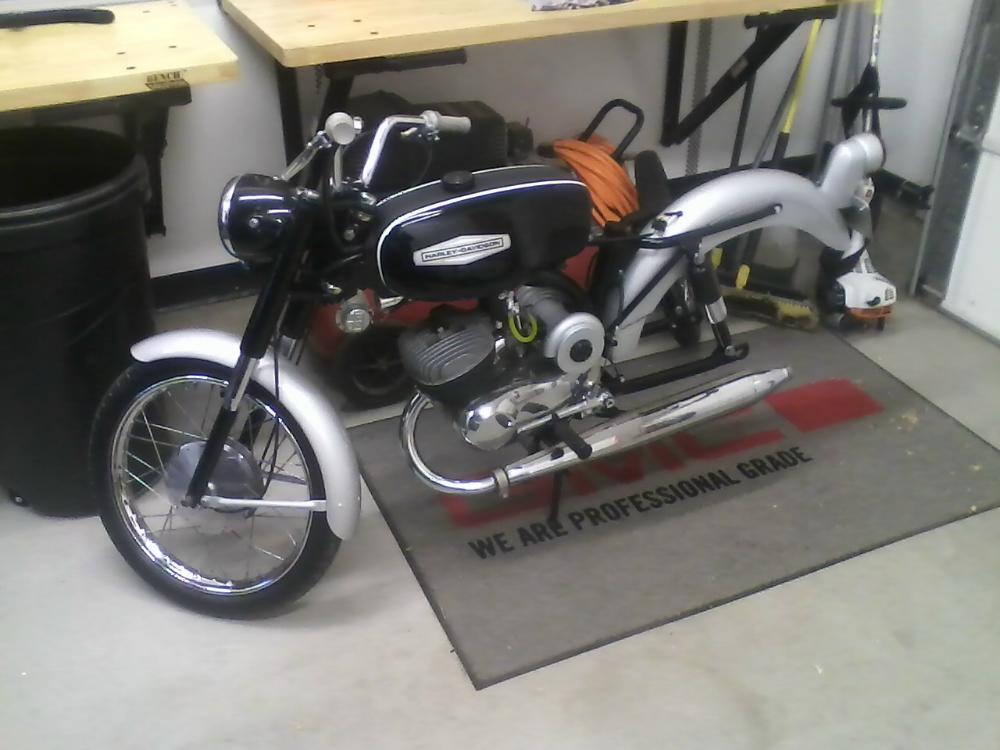
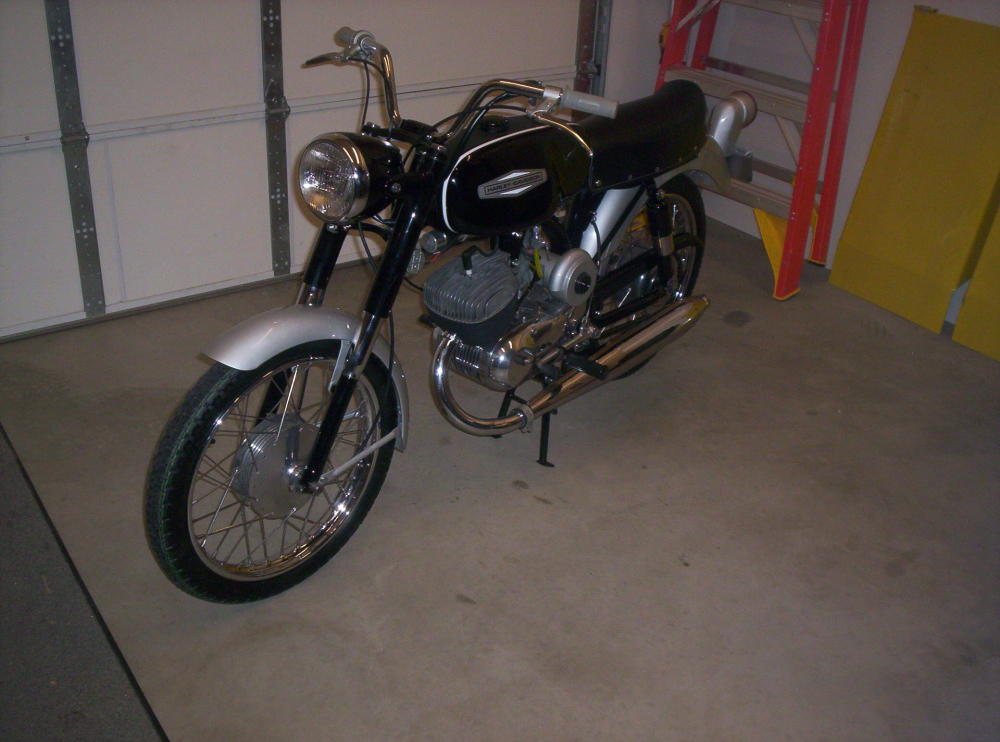
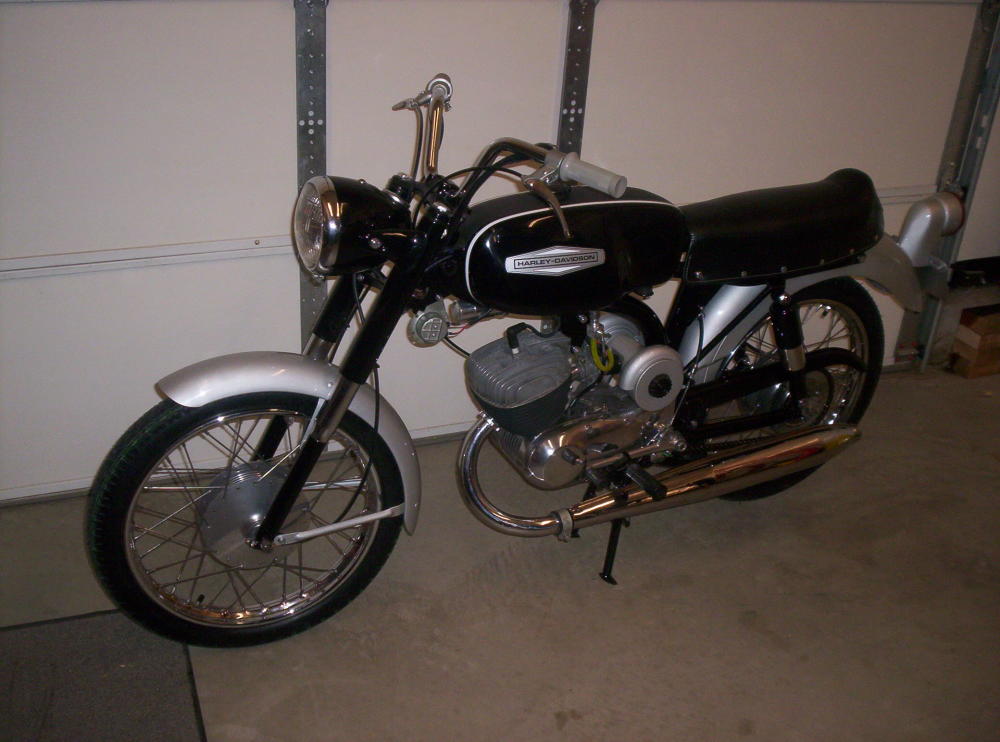
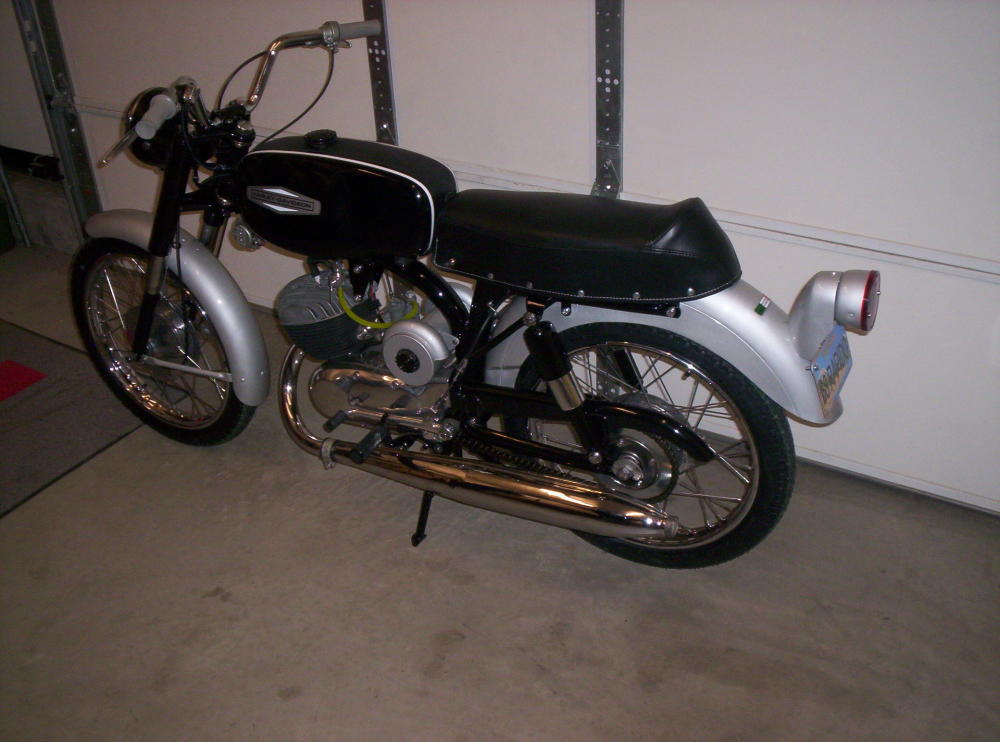
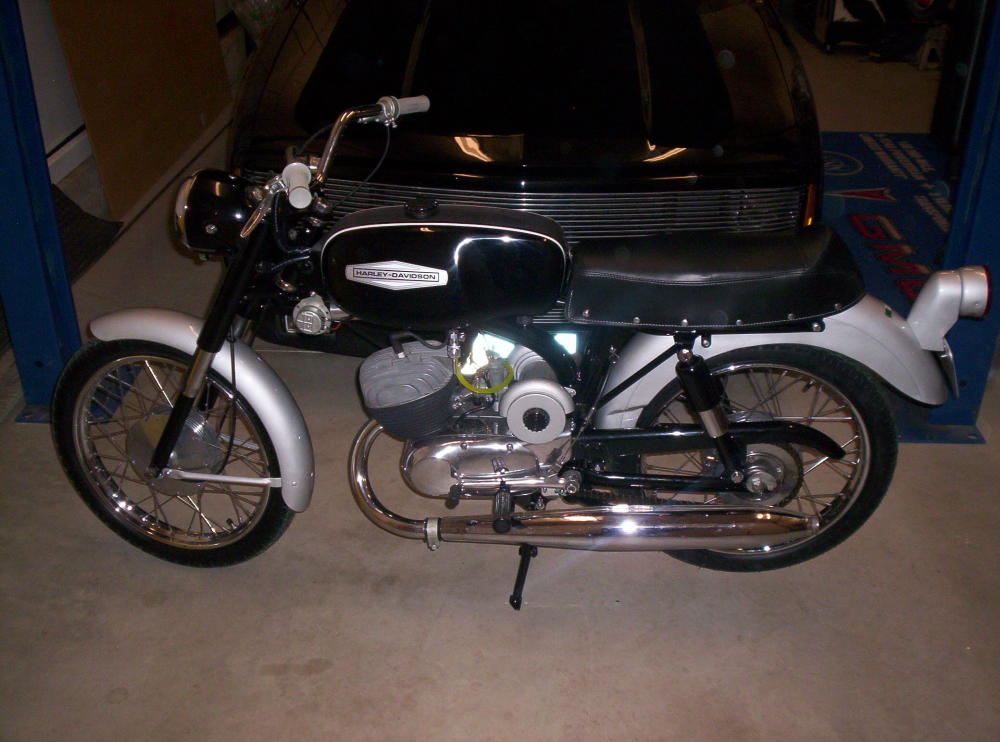
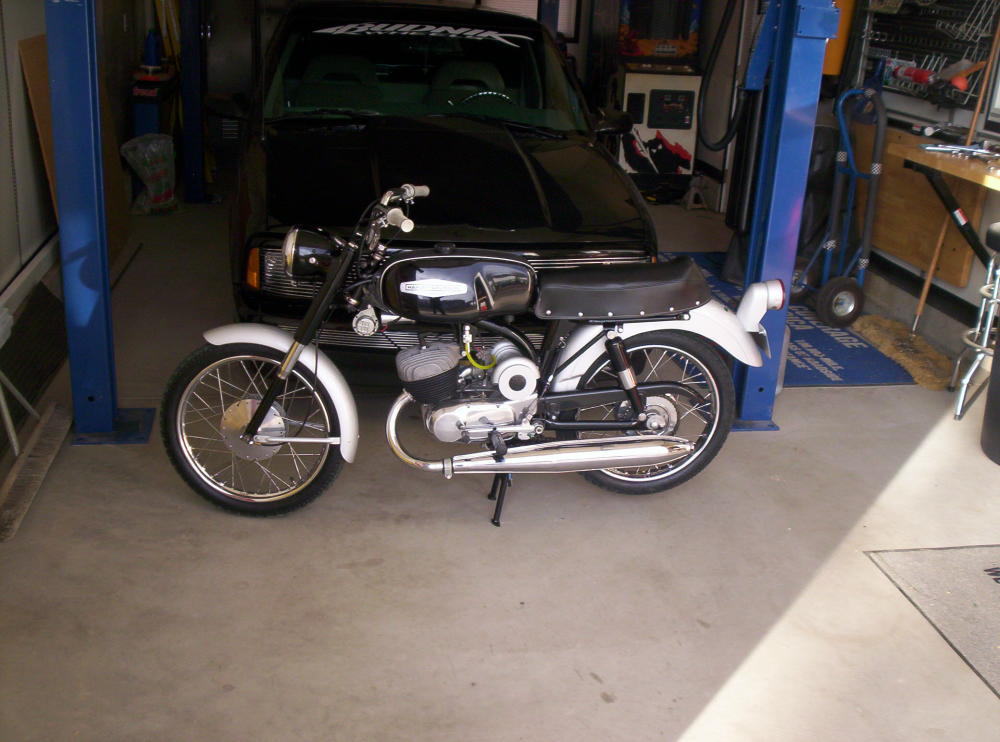
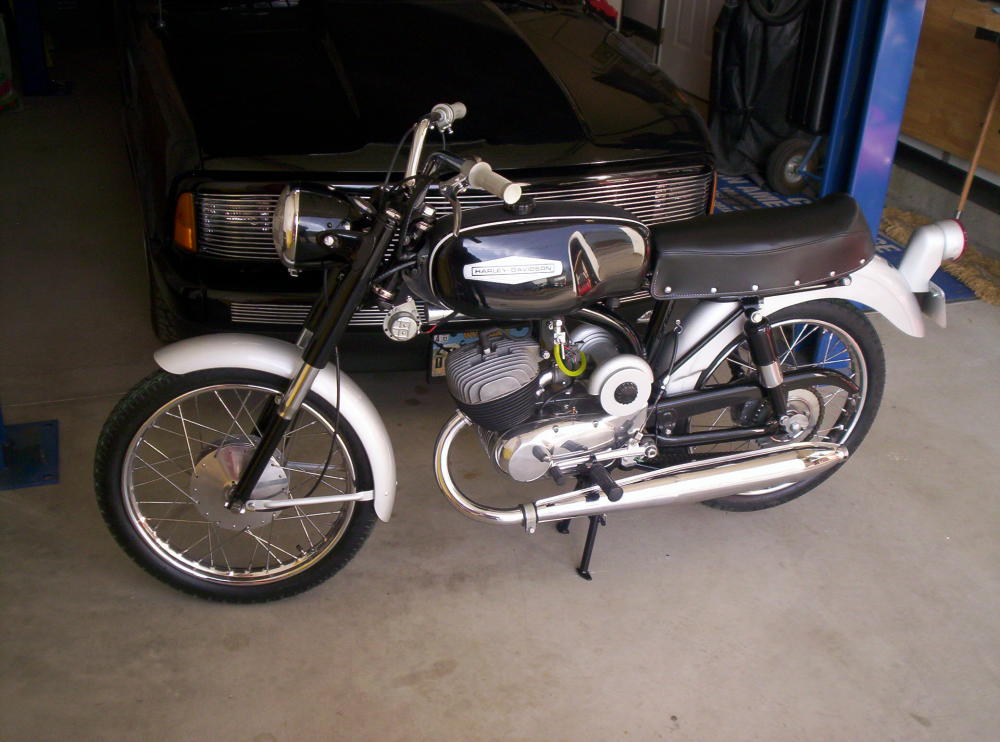
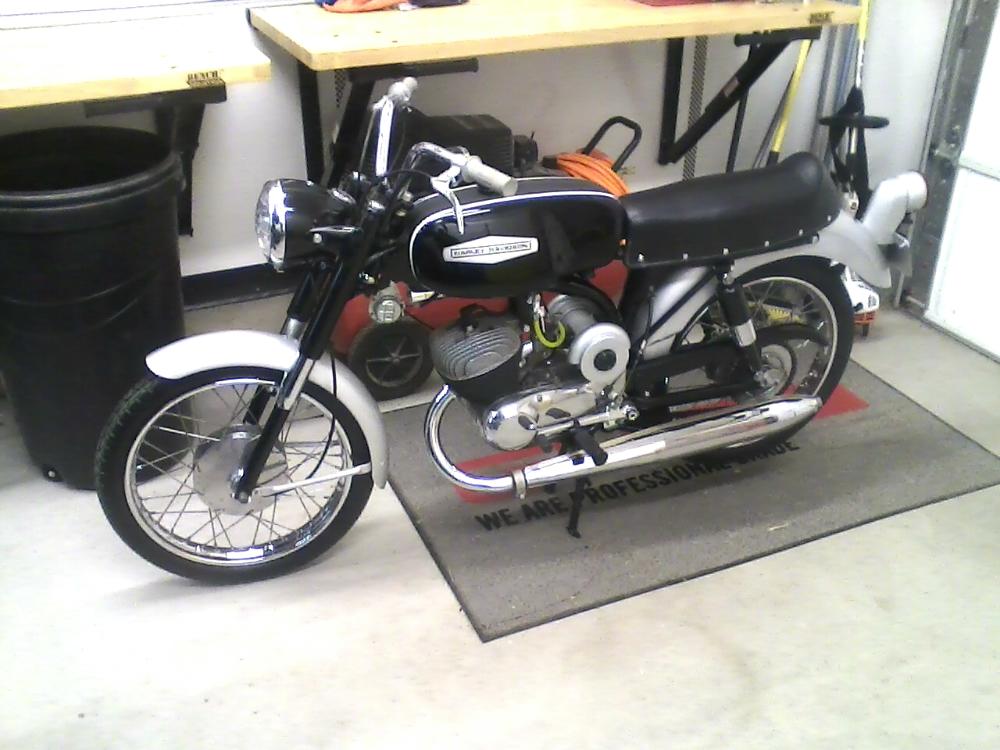
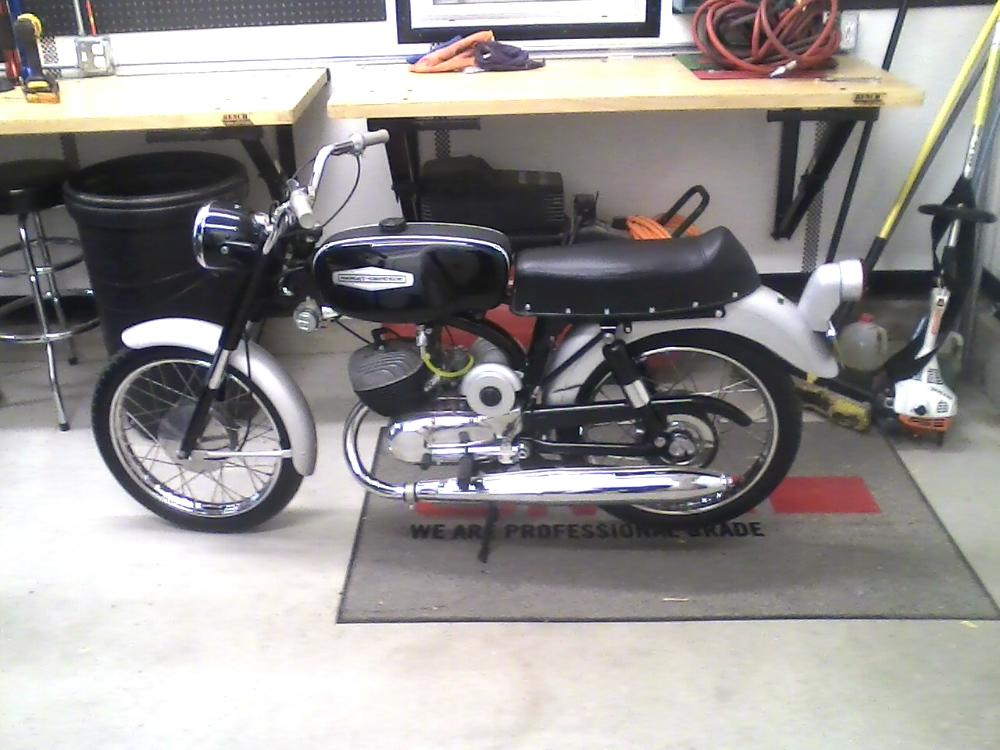
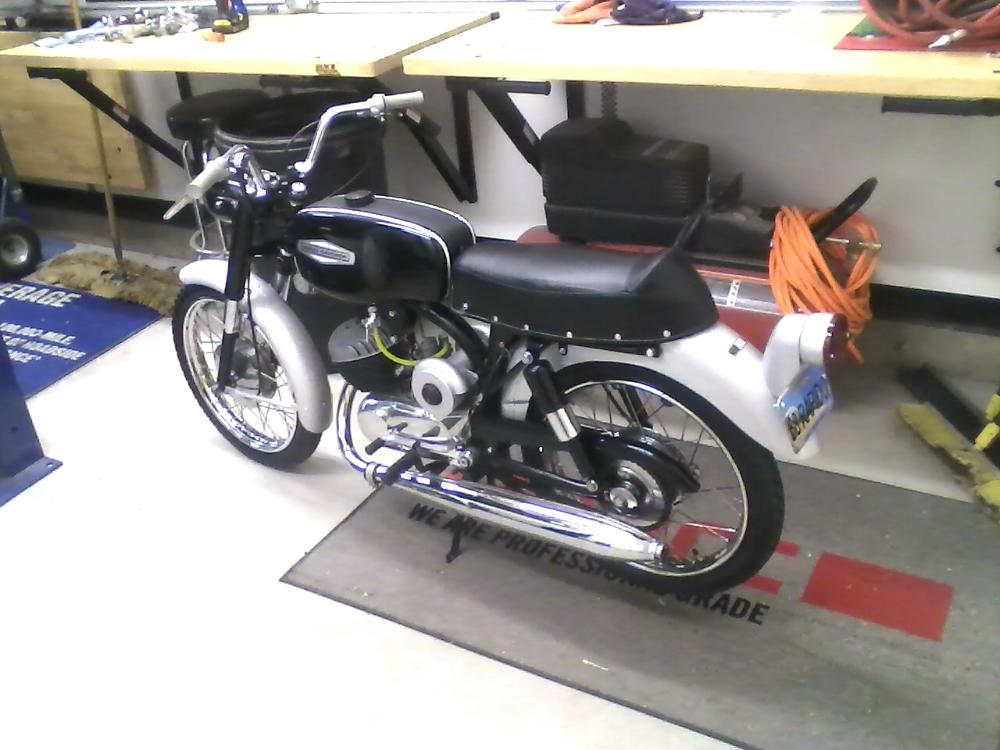
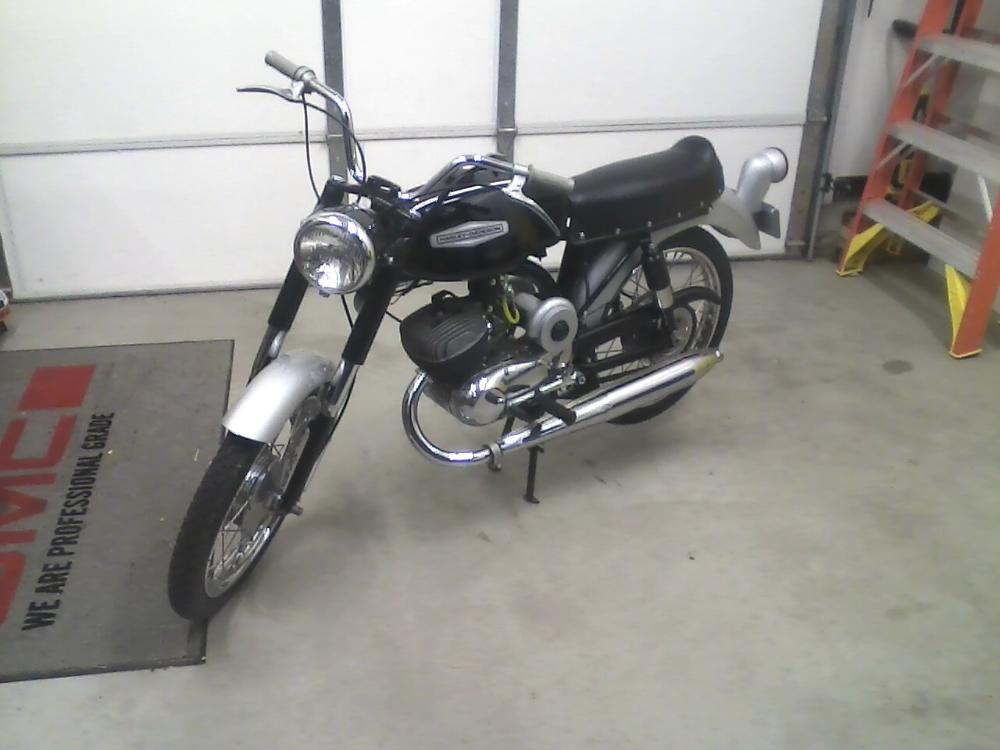
Finished pictures. Started Feb 2019 - Finished Nov 2020
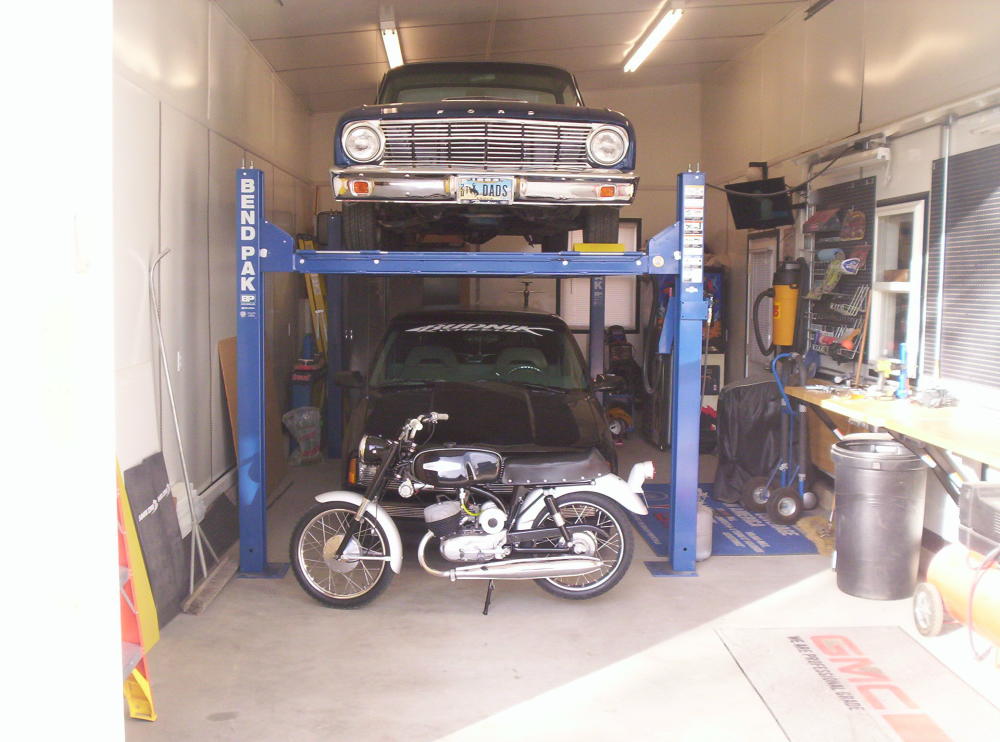
Half of my fleet.

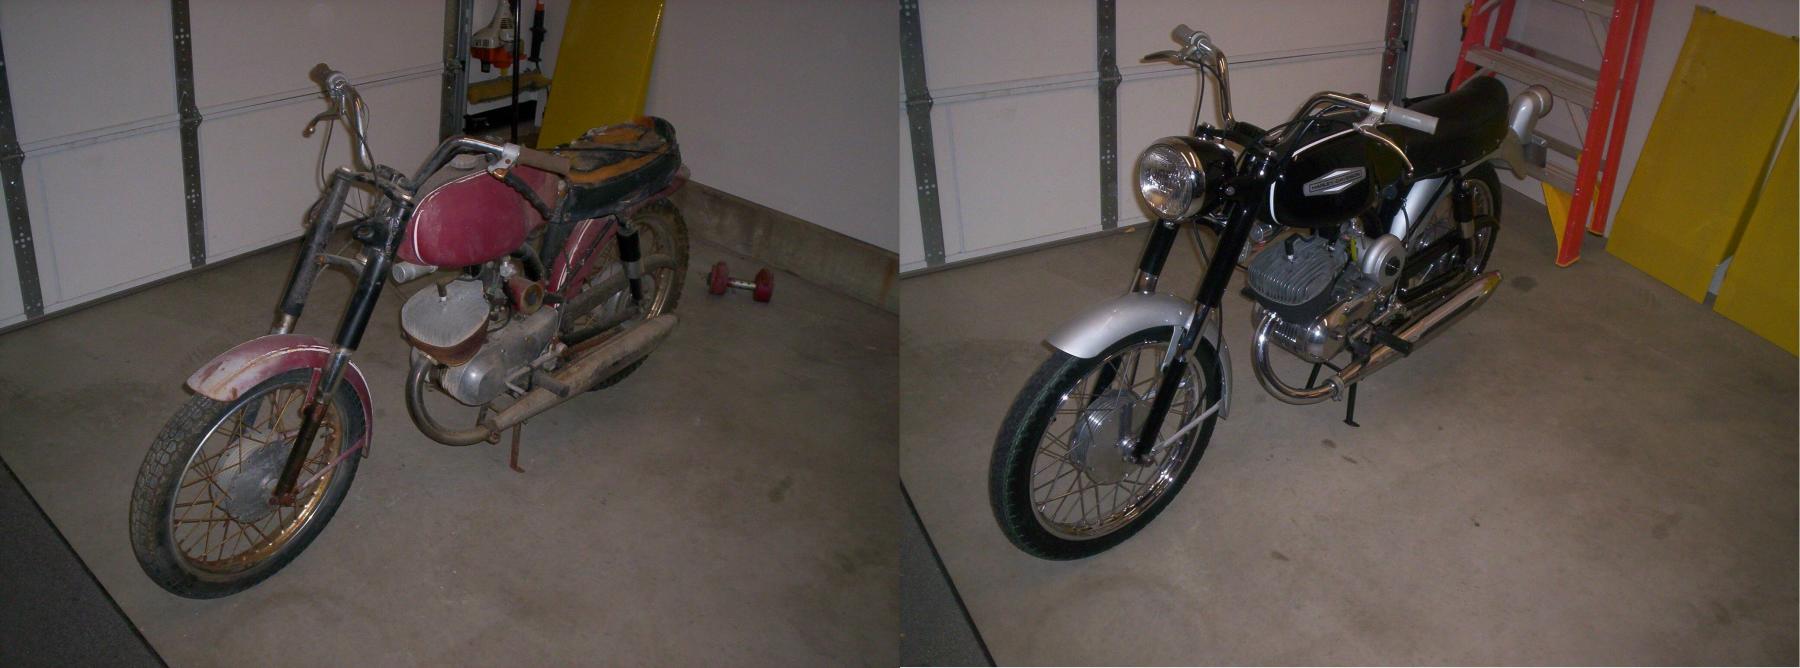
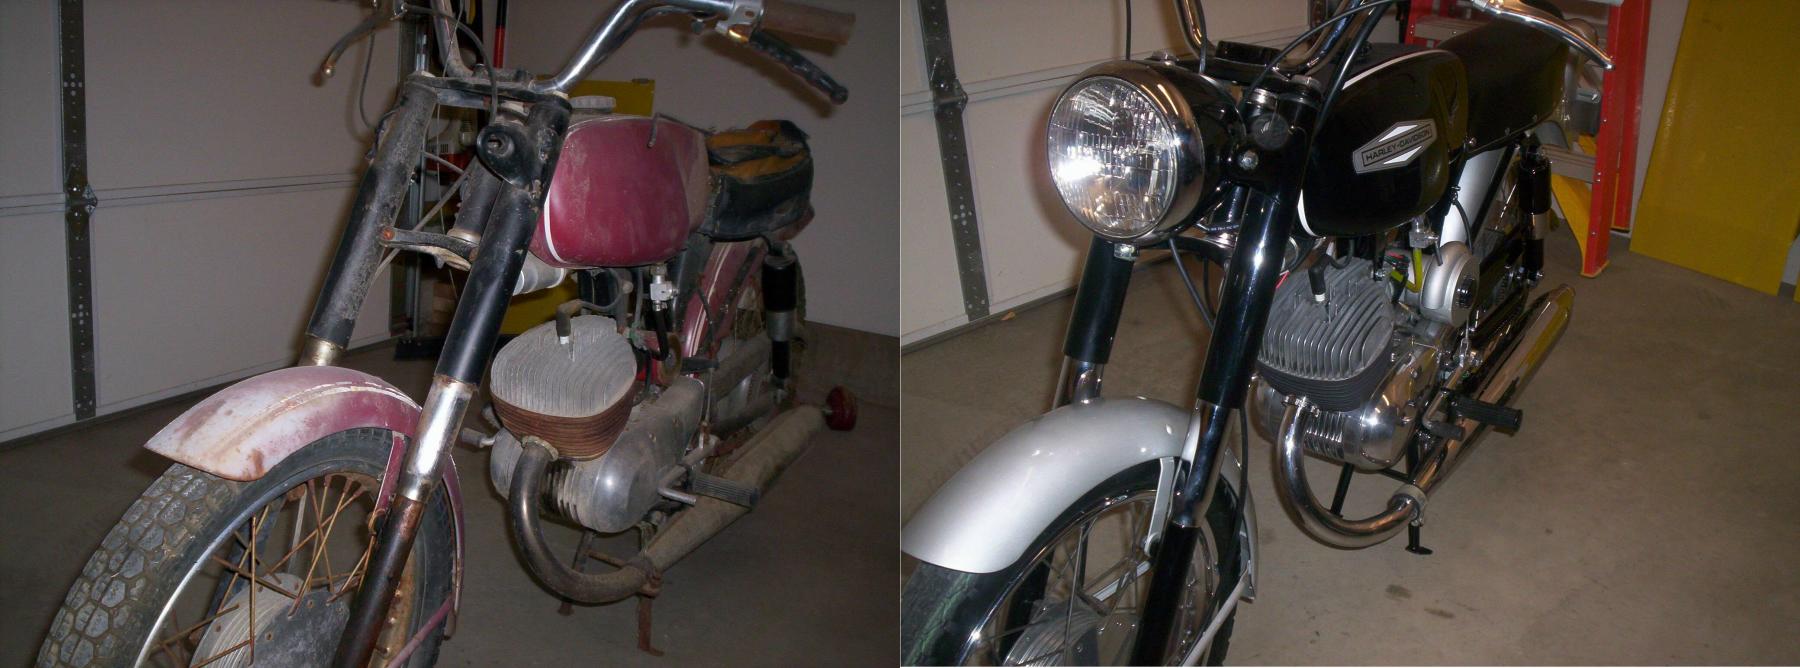
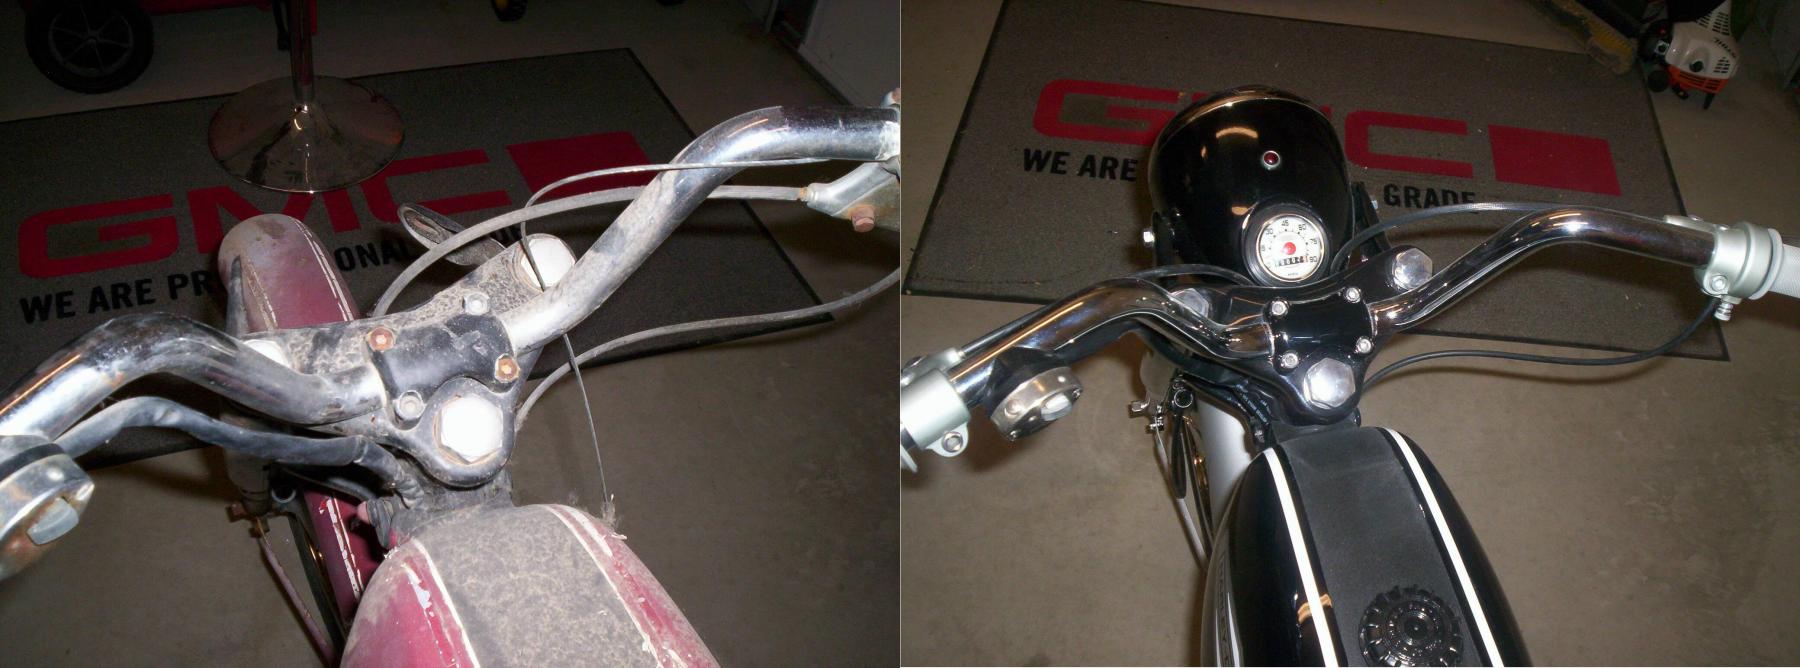
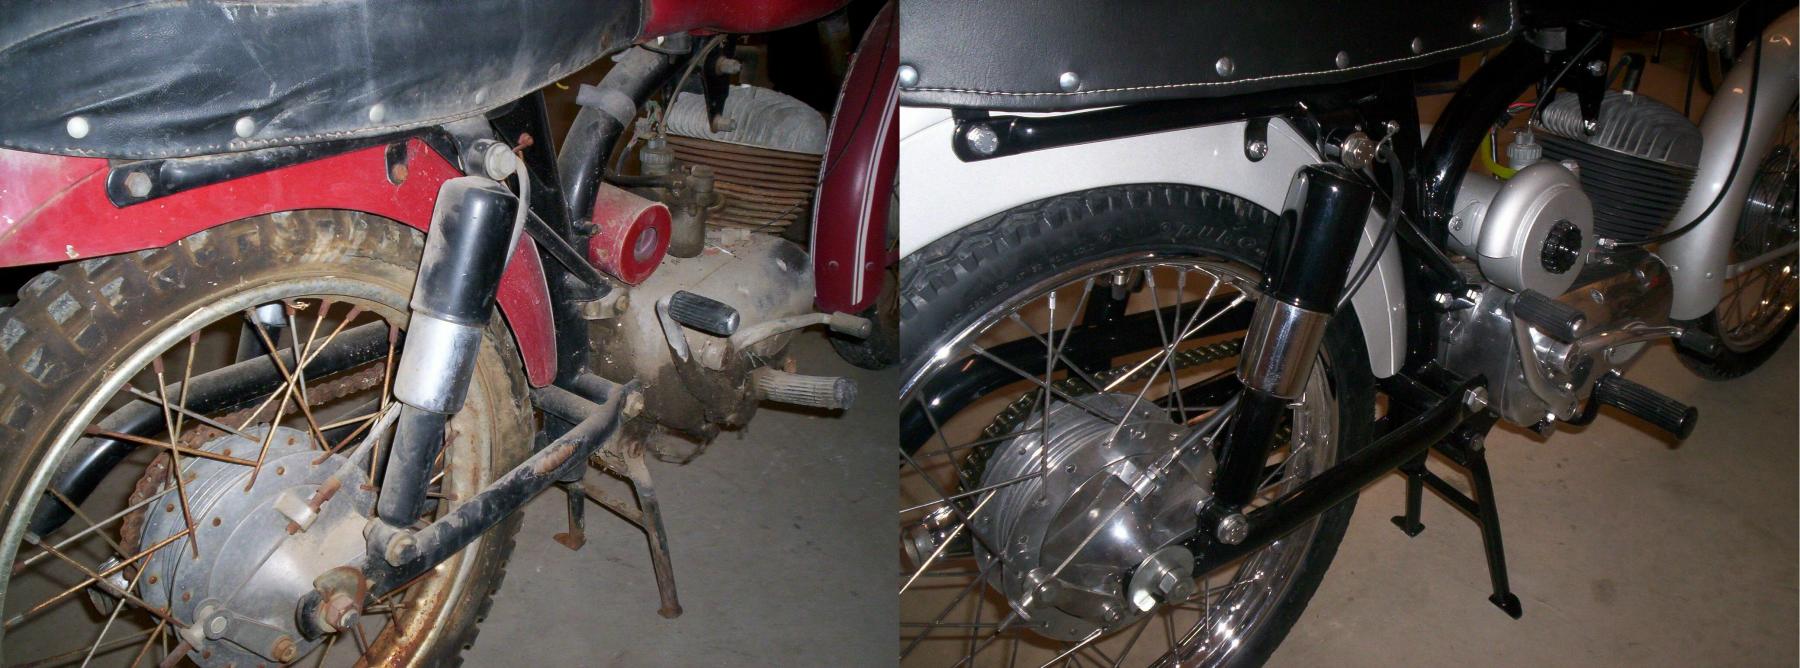
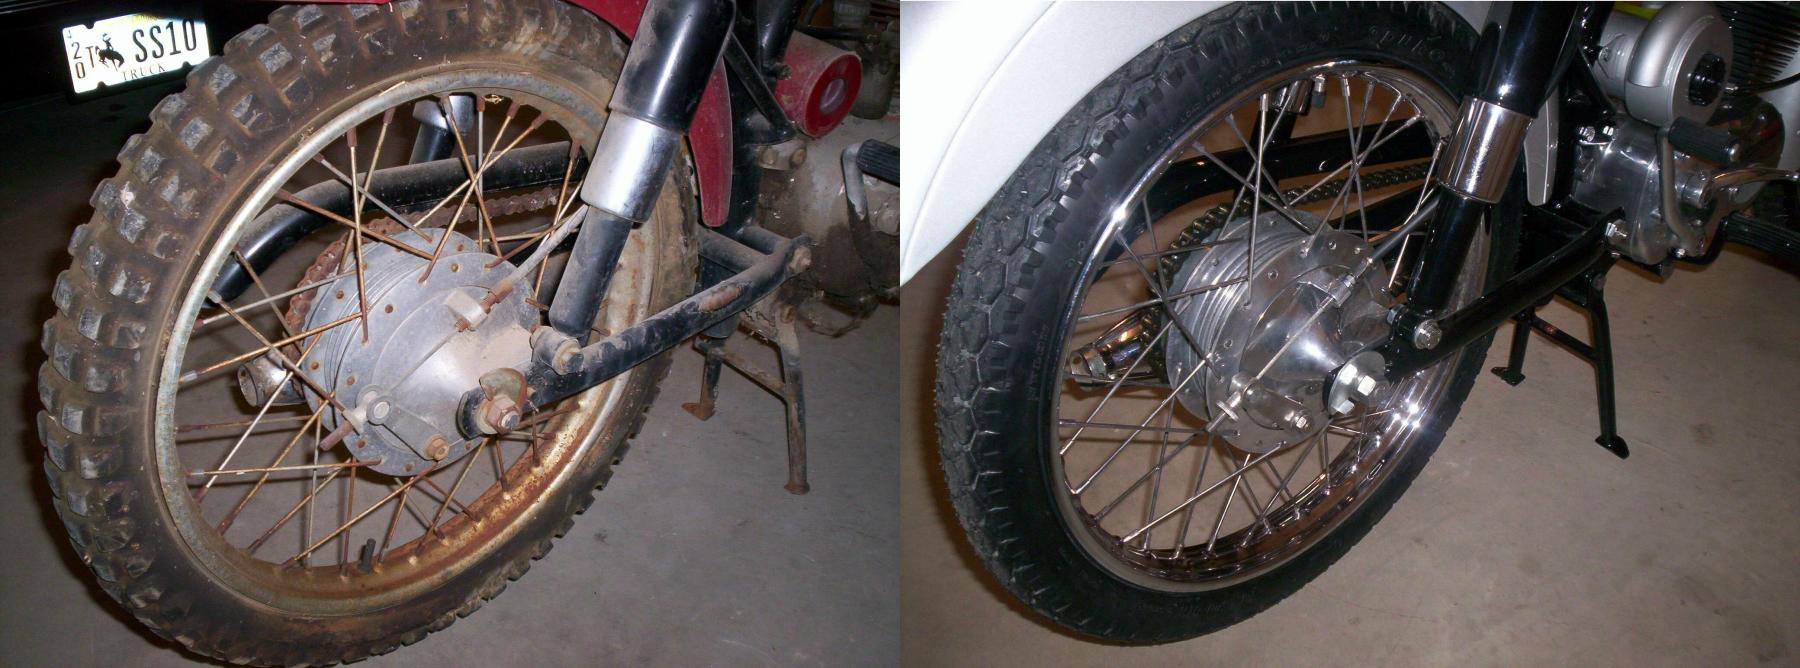
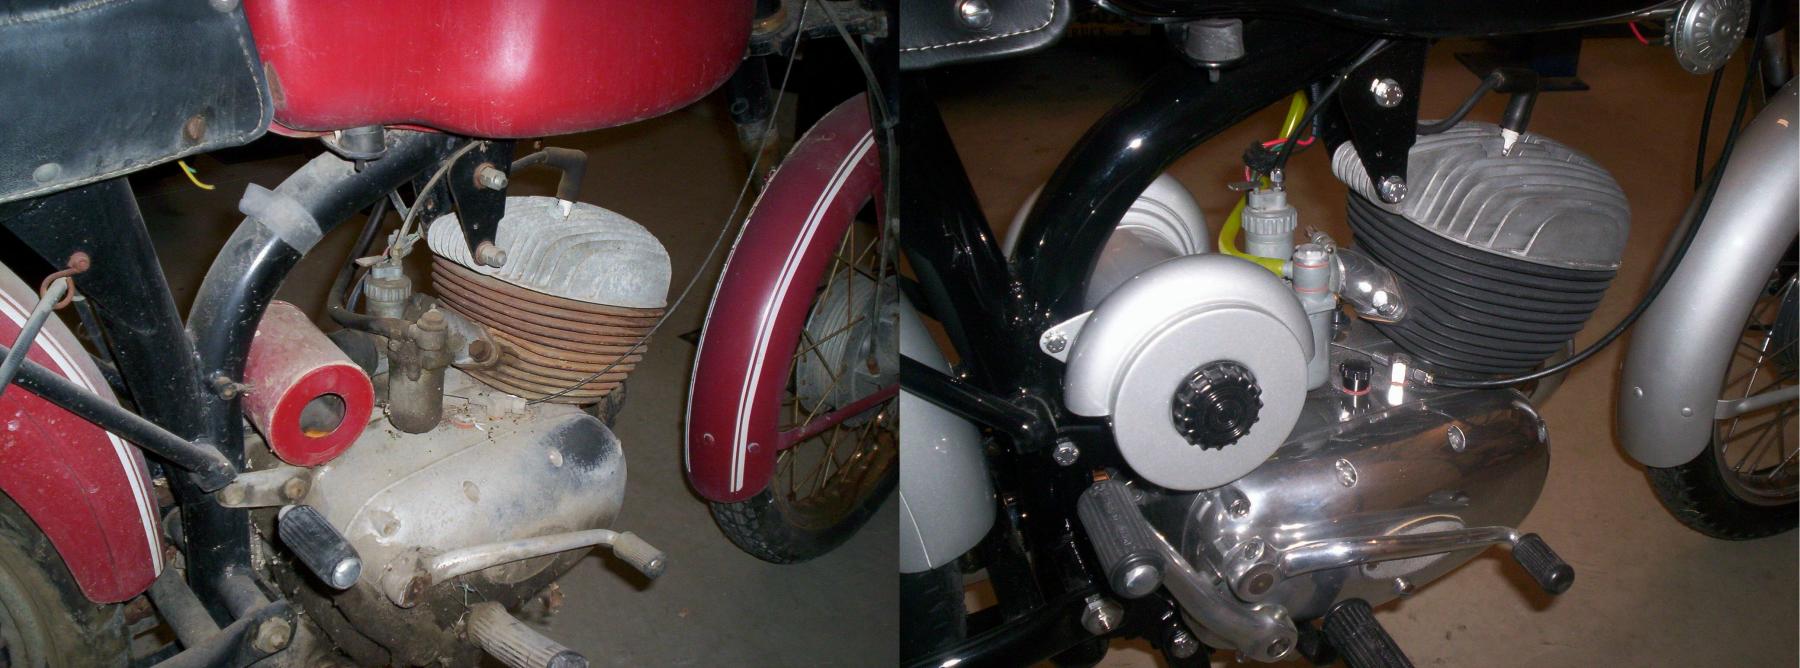
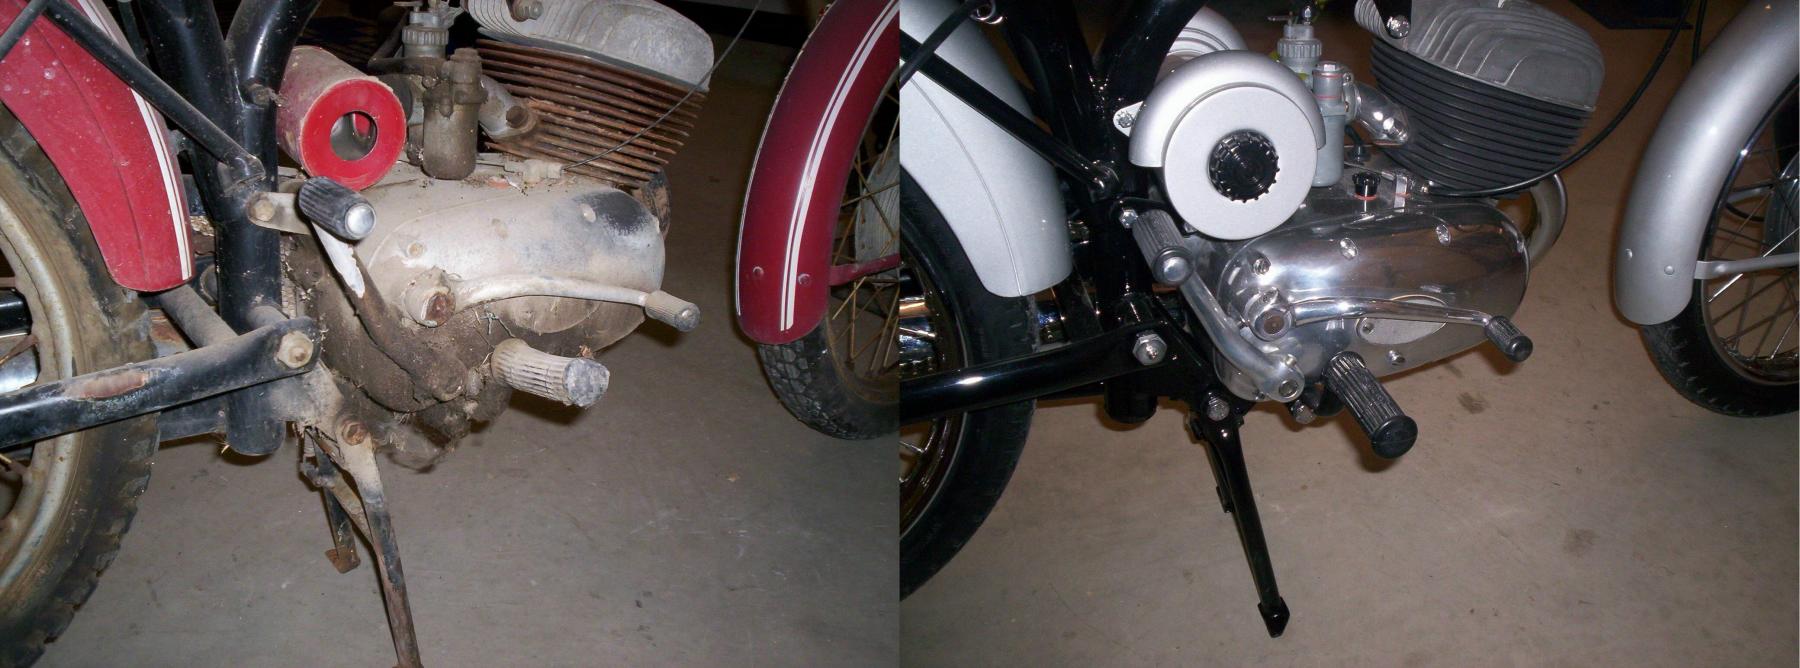
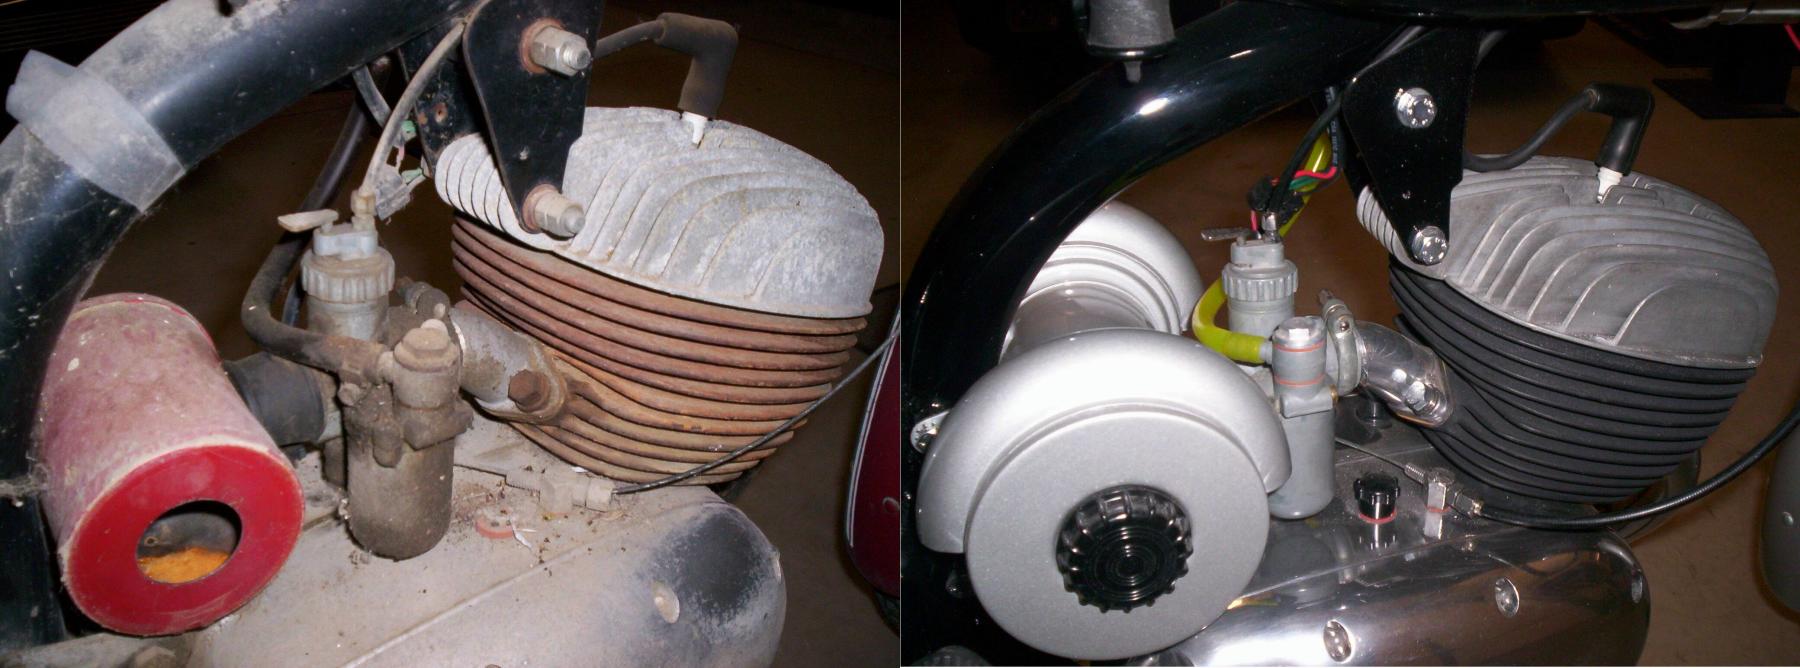
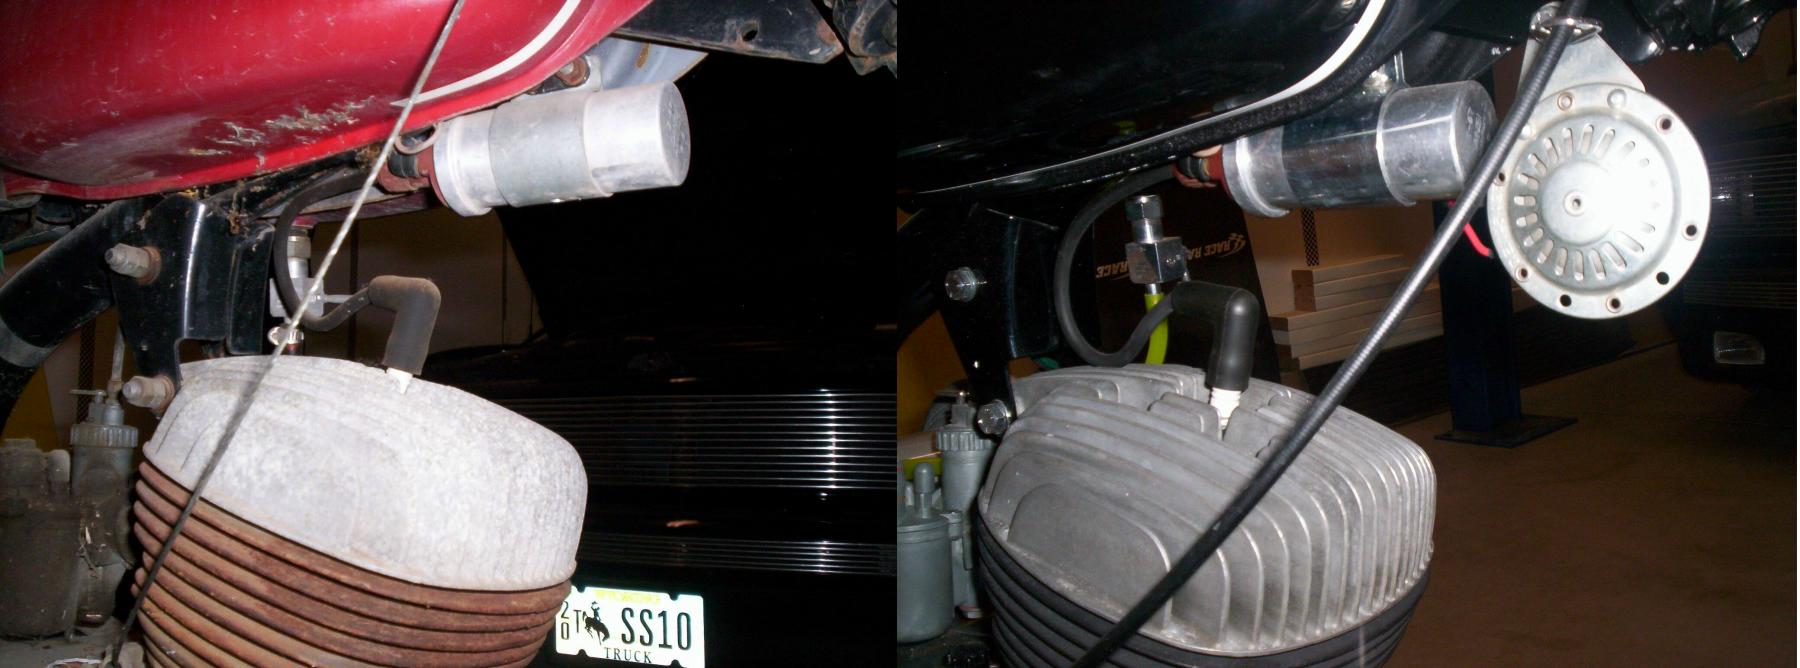
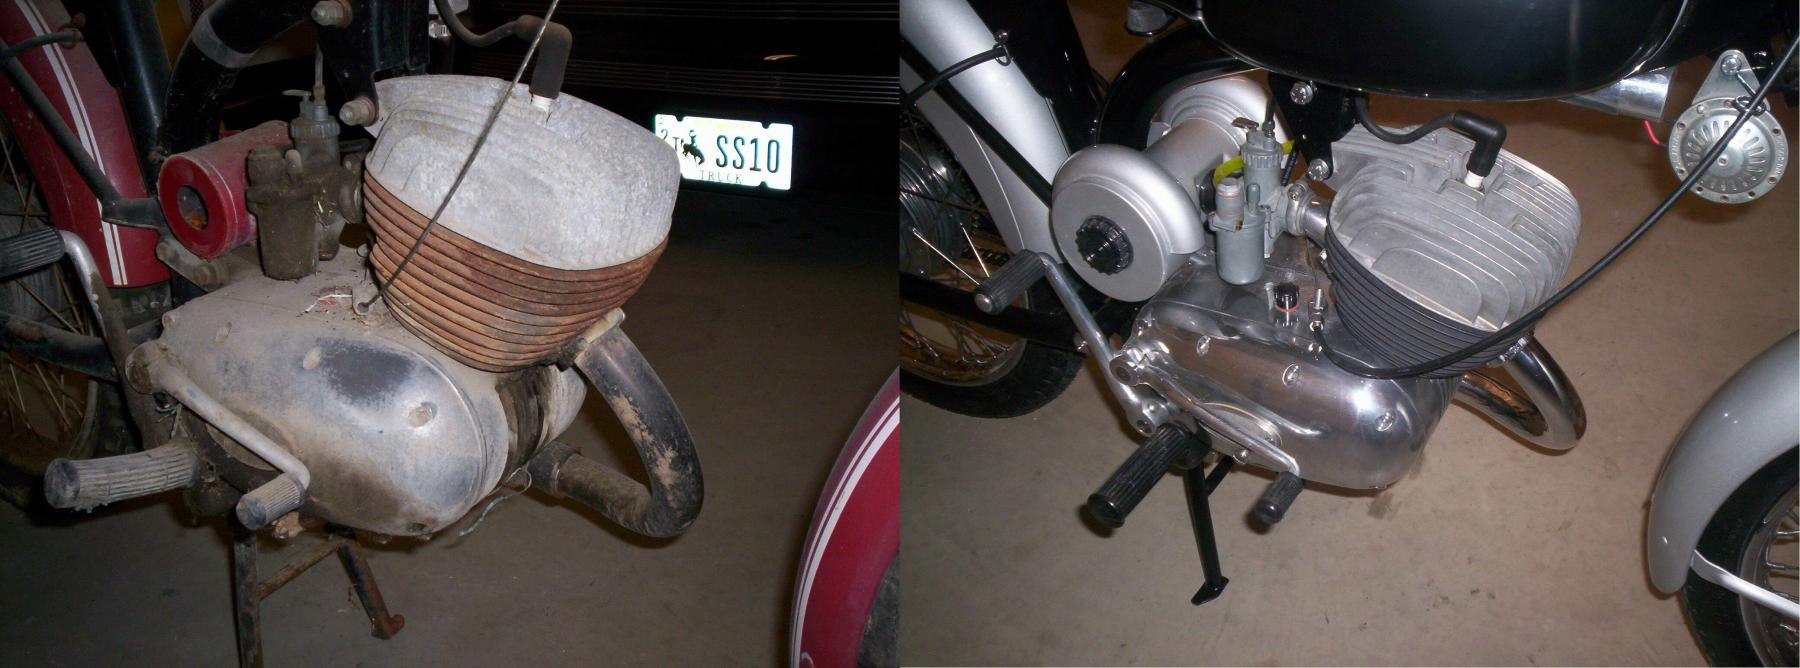
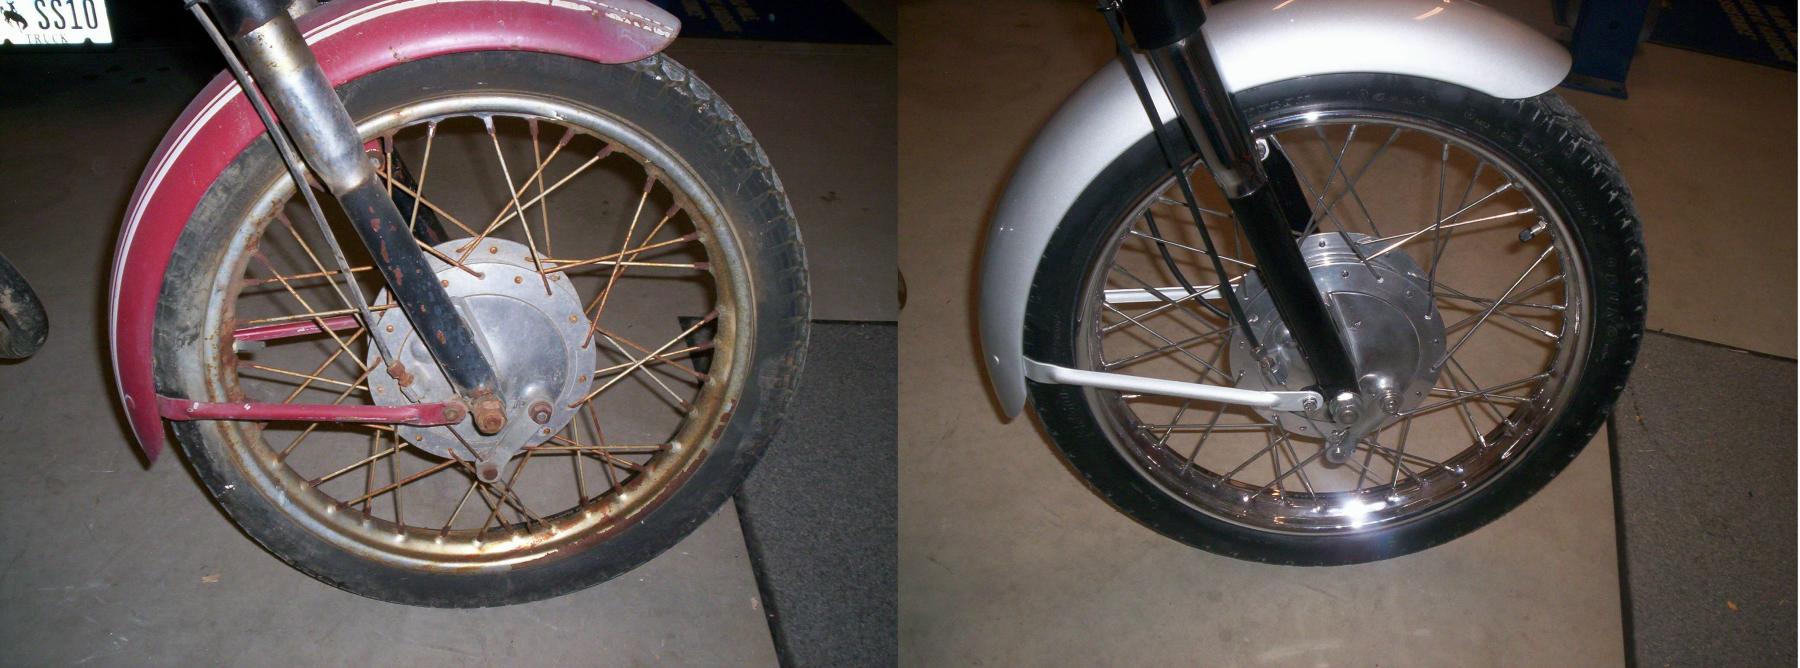
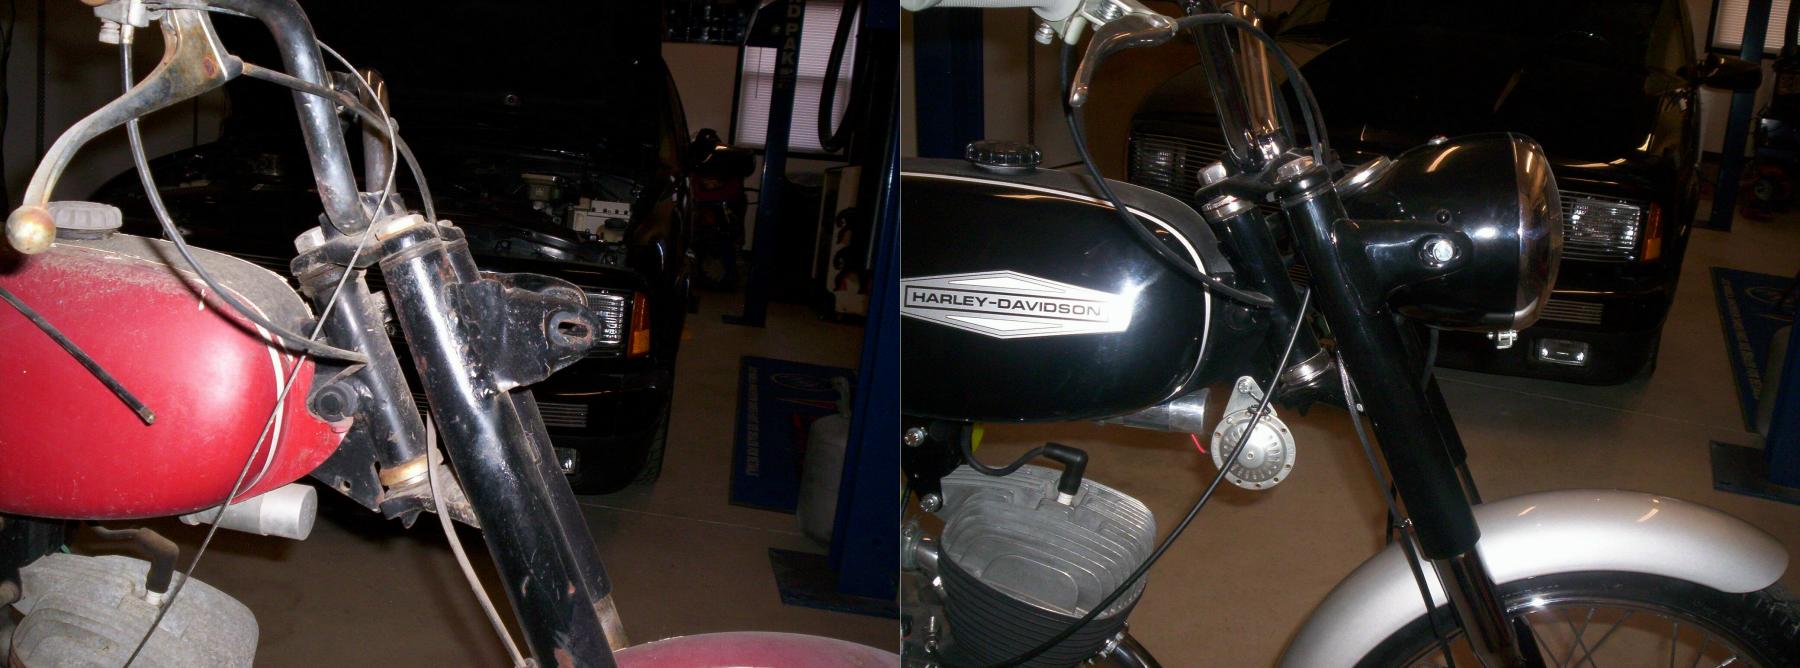
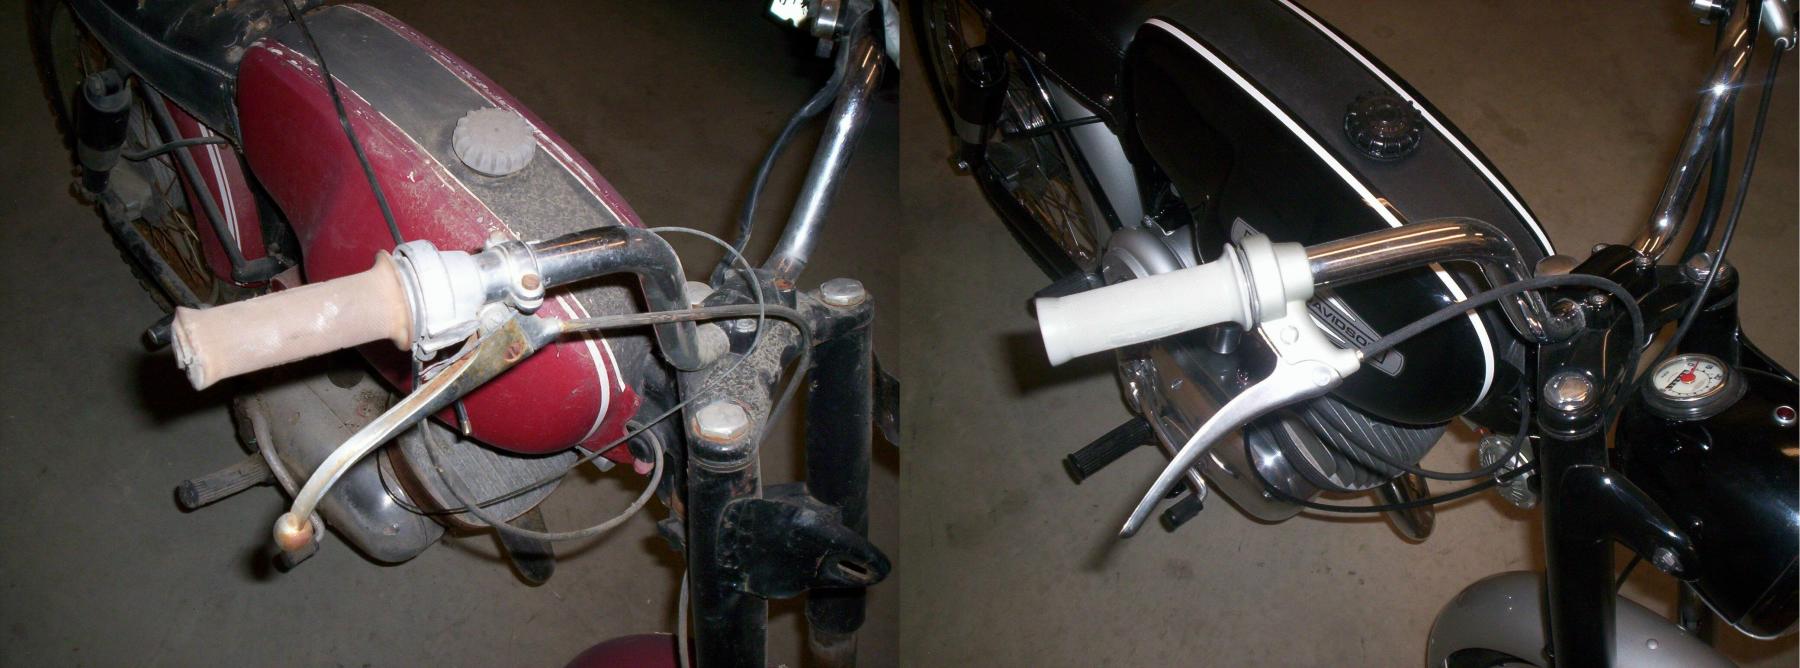
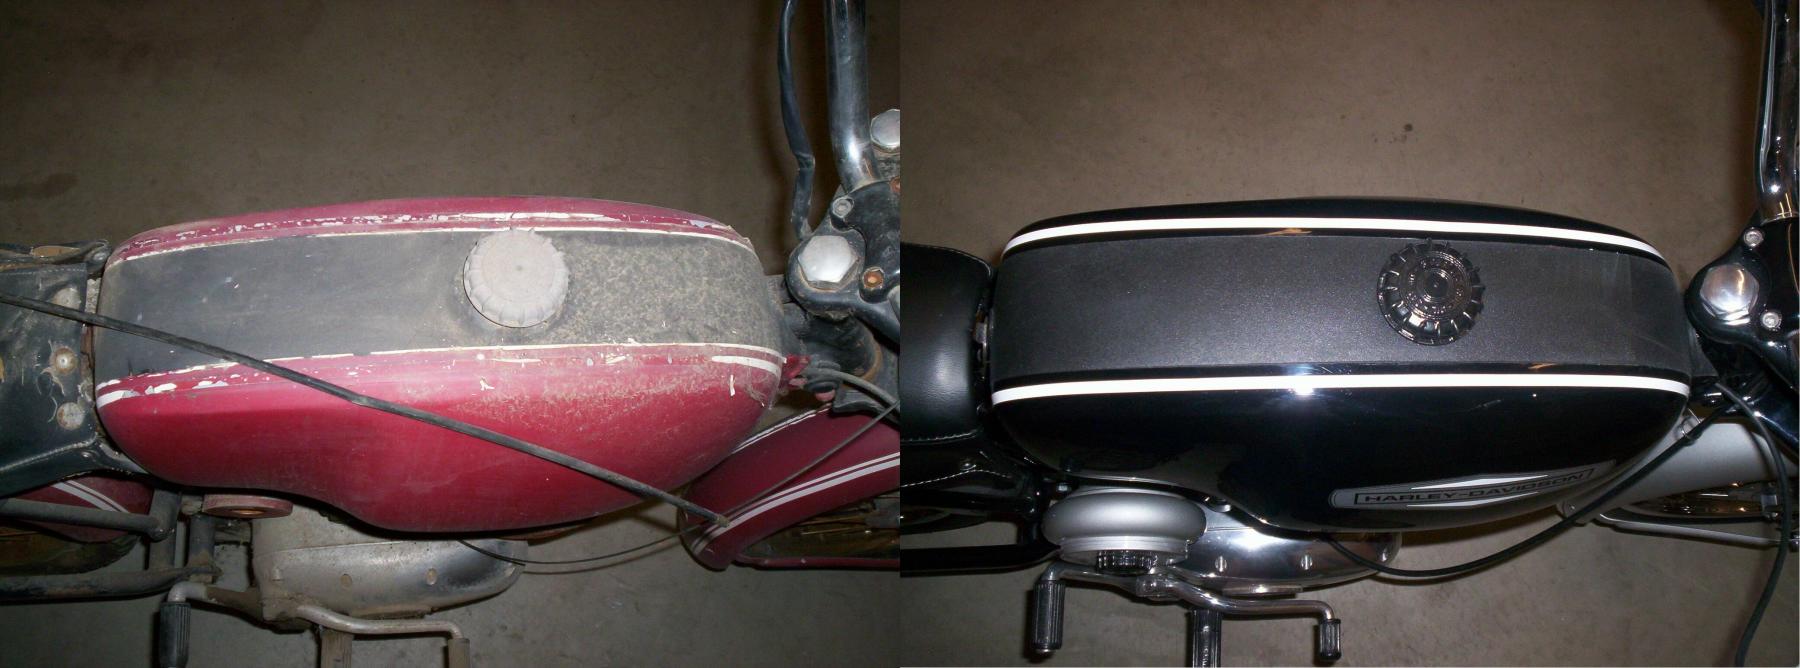
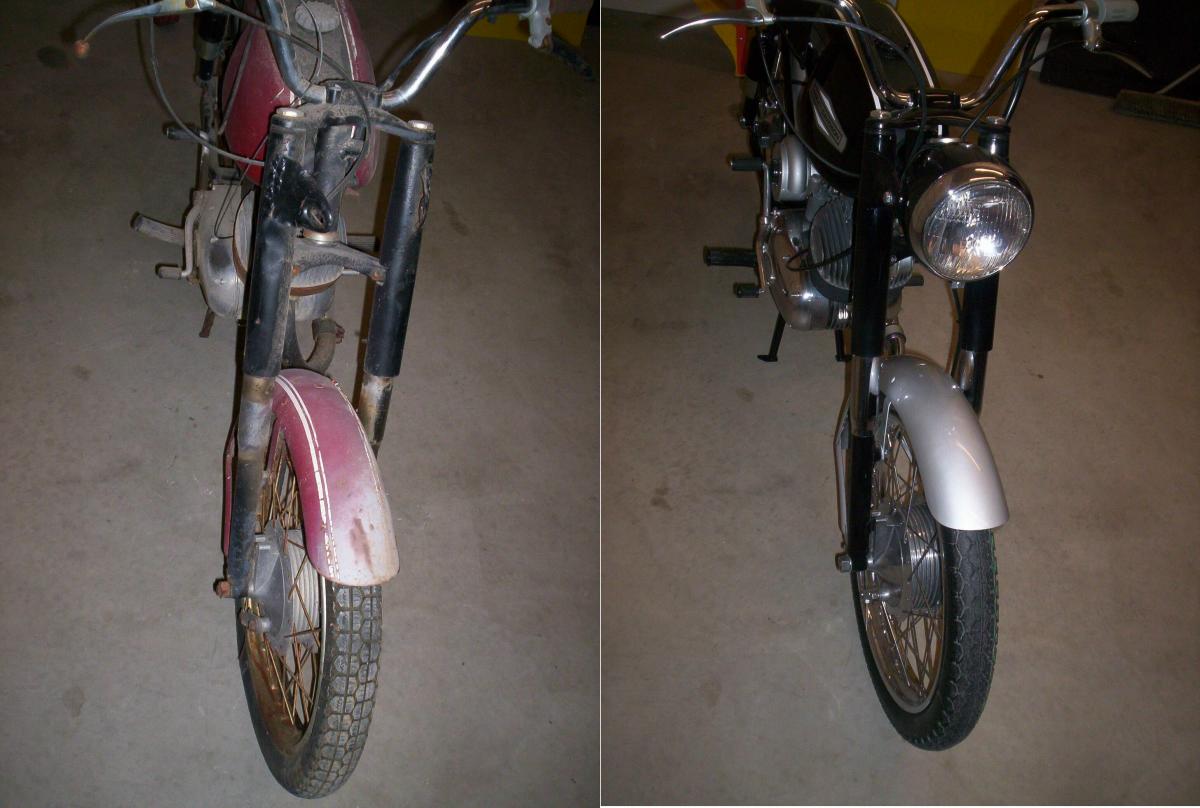
Before and After side by side pics.

Everything on this build done by me except, Chrome, Upholstery and Wheel truing.
Special thanks to:
Napa Auto Parts of Worland - Paint
Signs of Sutherland of Worland - Tank Stickers
Cat's West Upholstry of Worland - Seat reupholstery
R & R Cycle of Worland - Wheel truing
Decorative Industrial Plating of Helena, MT - Chrome replating
Ebay sellers for NOS and used parts I bought from.